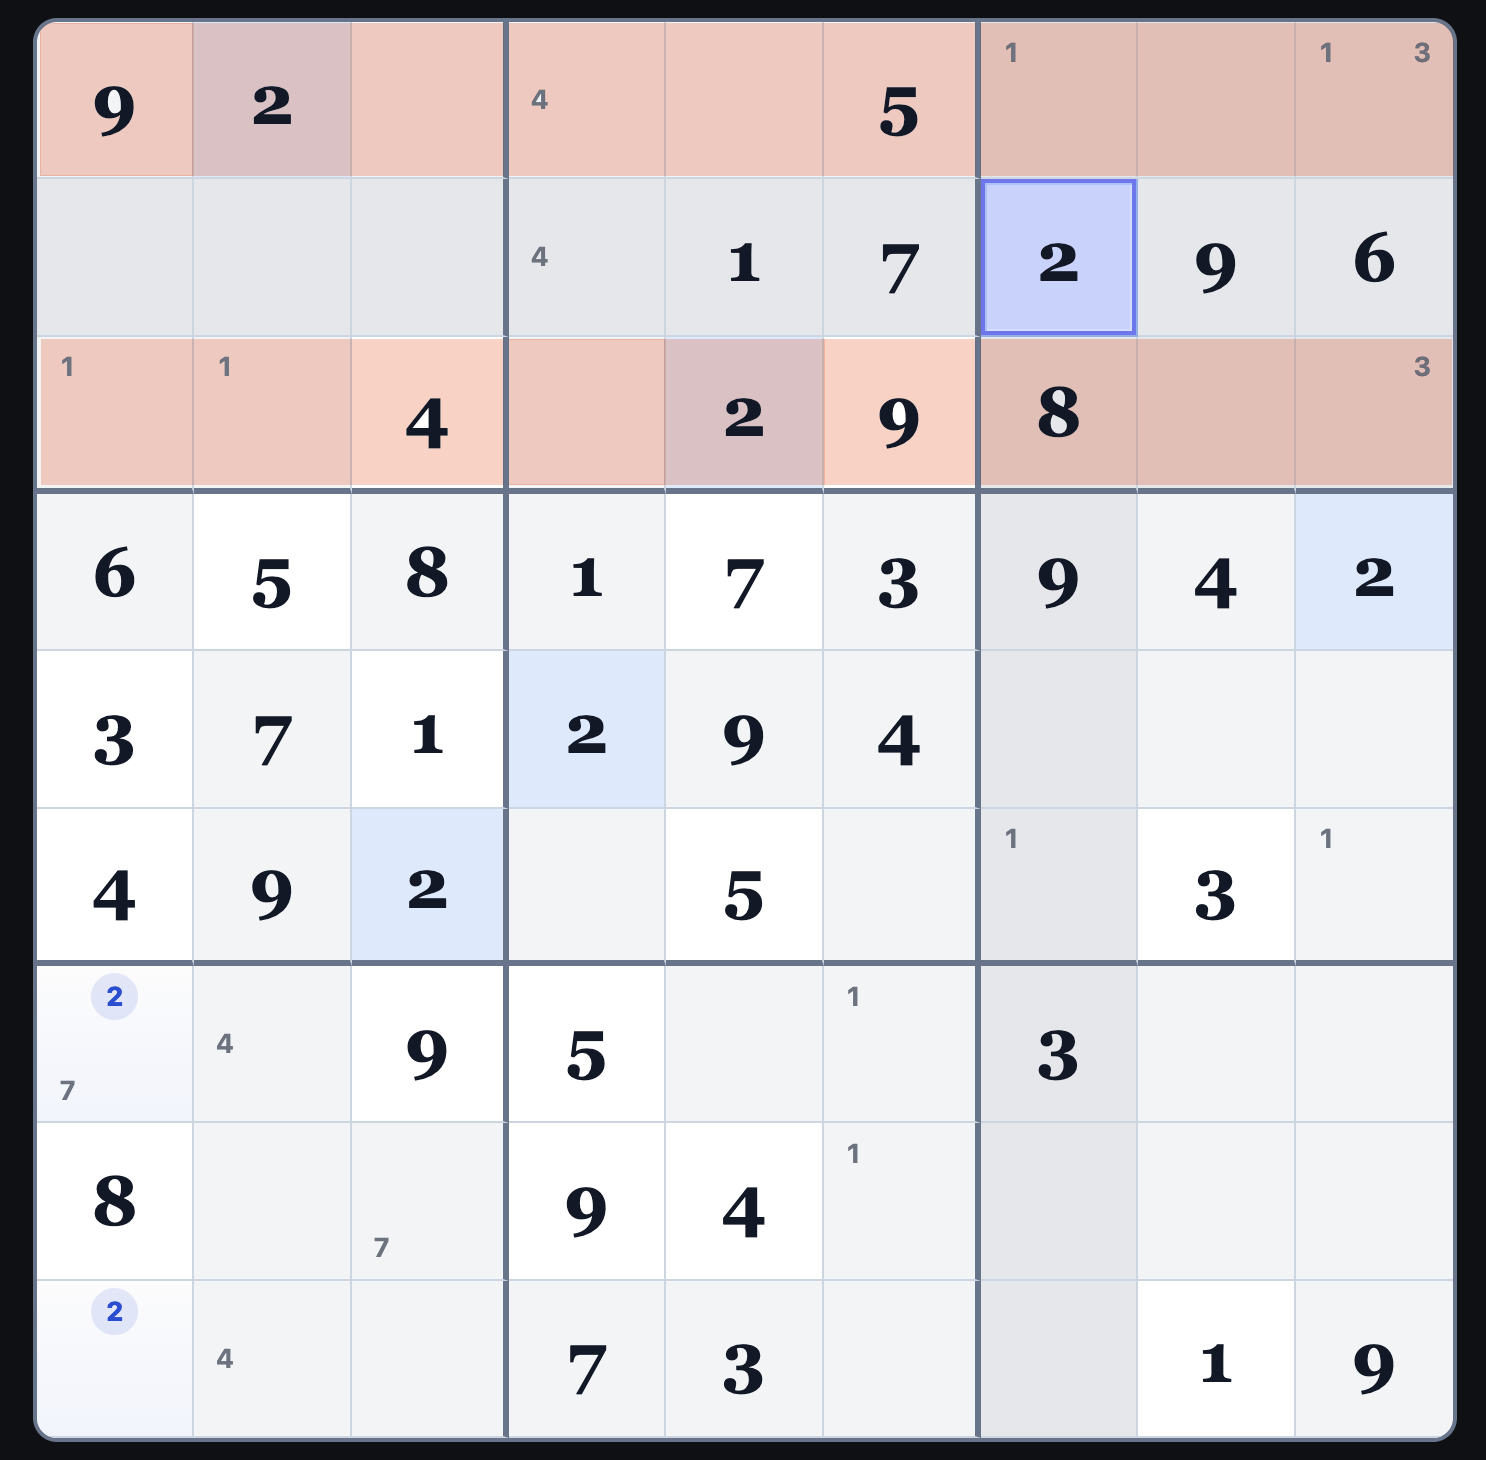
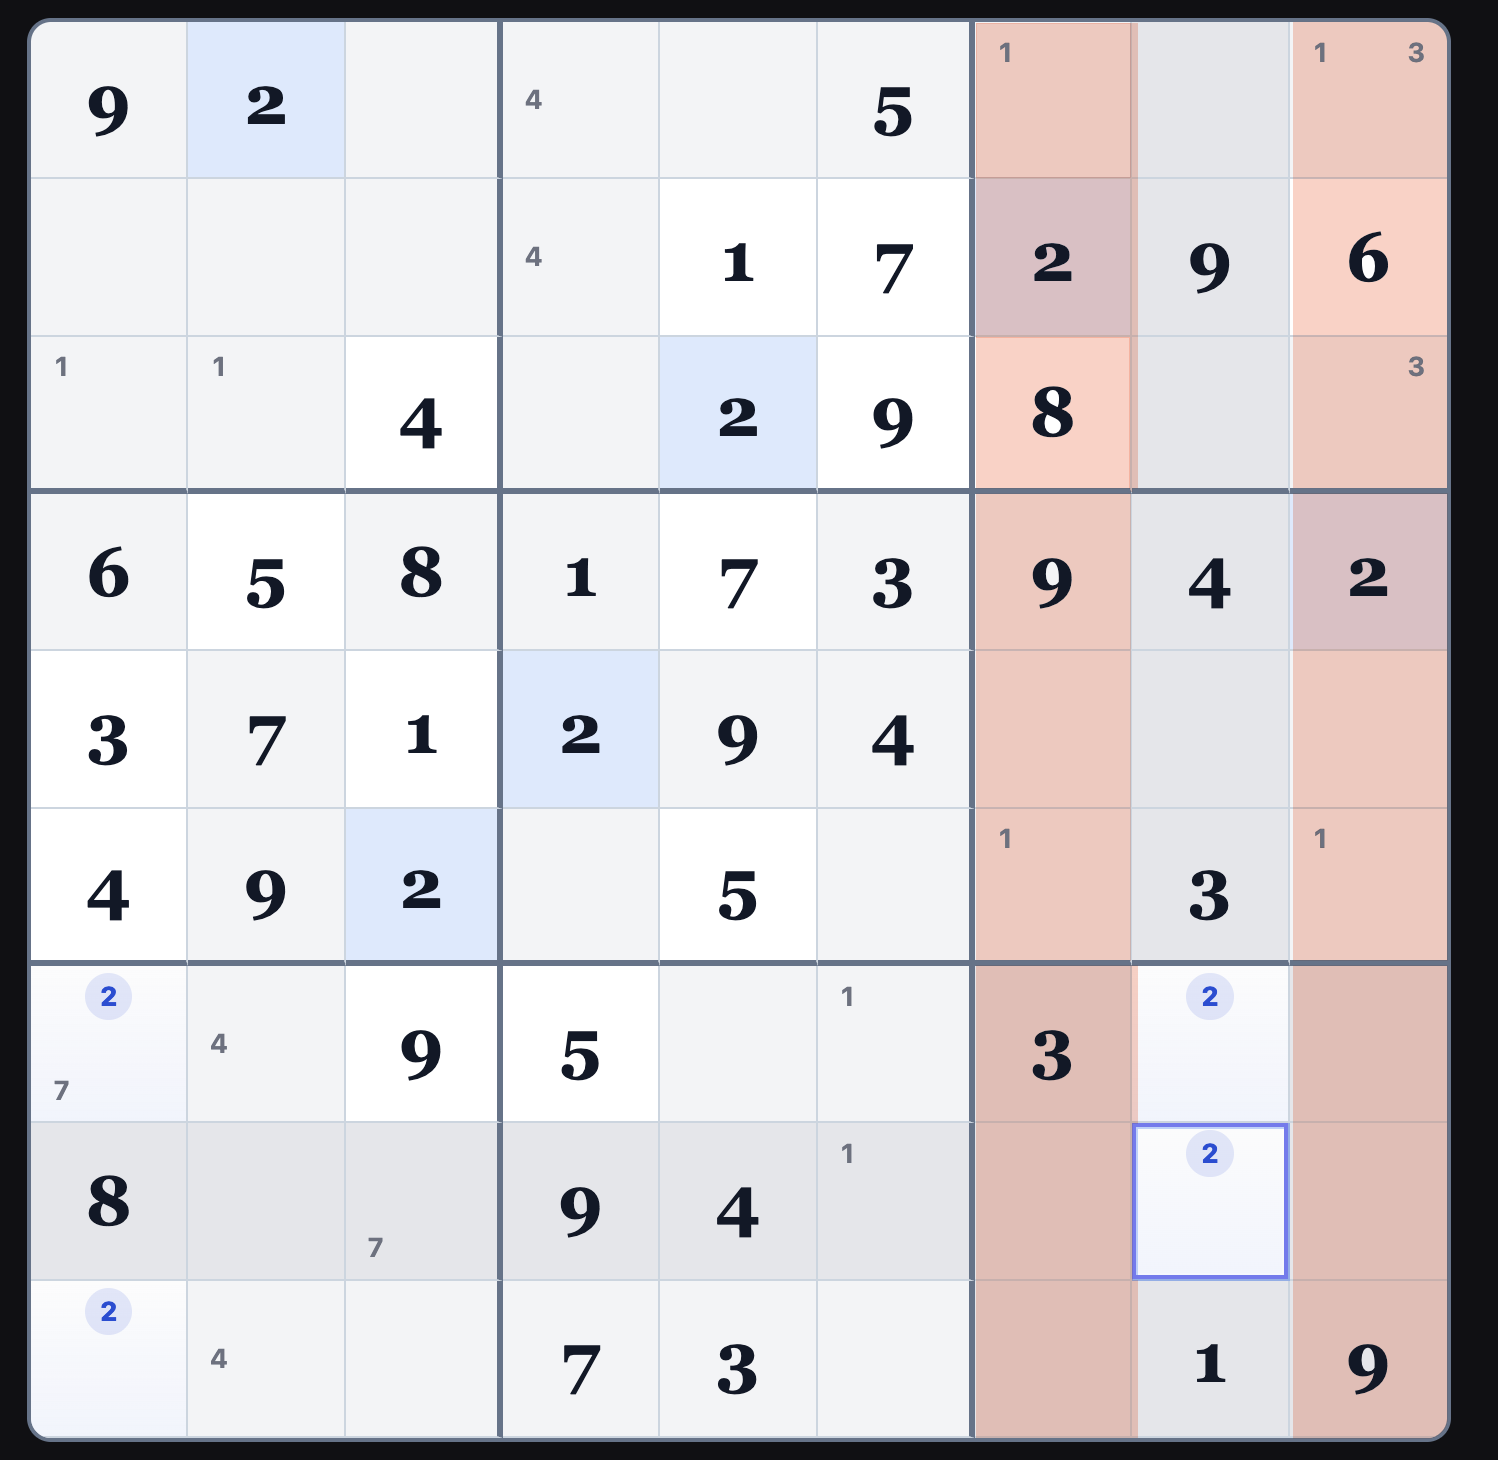
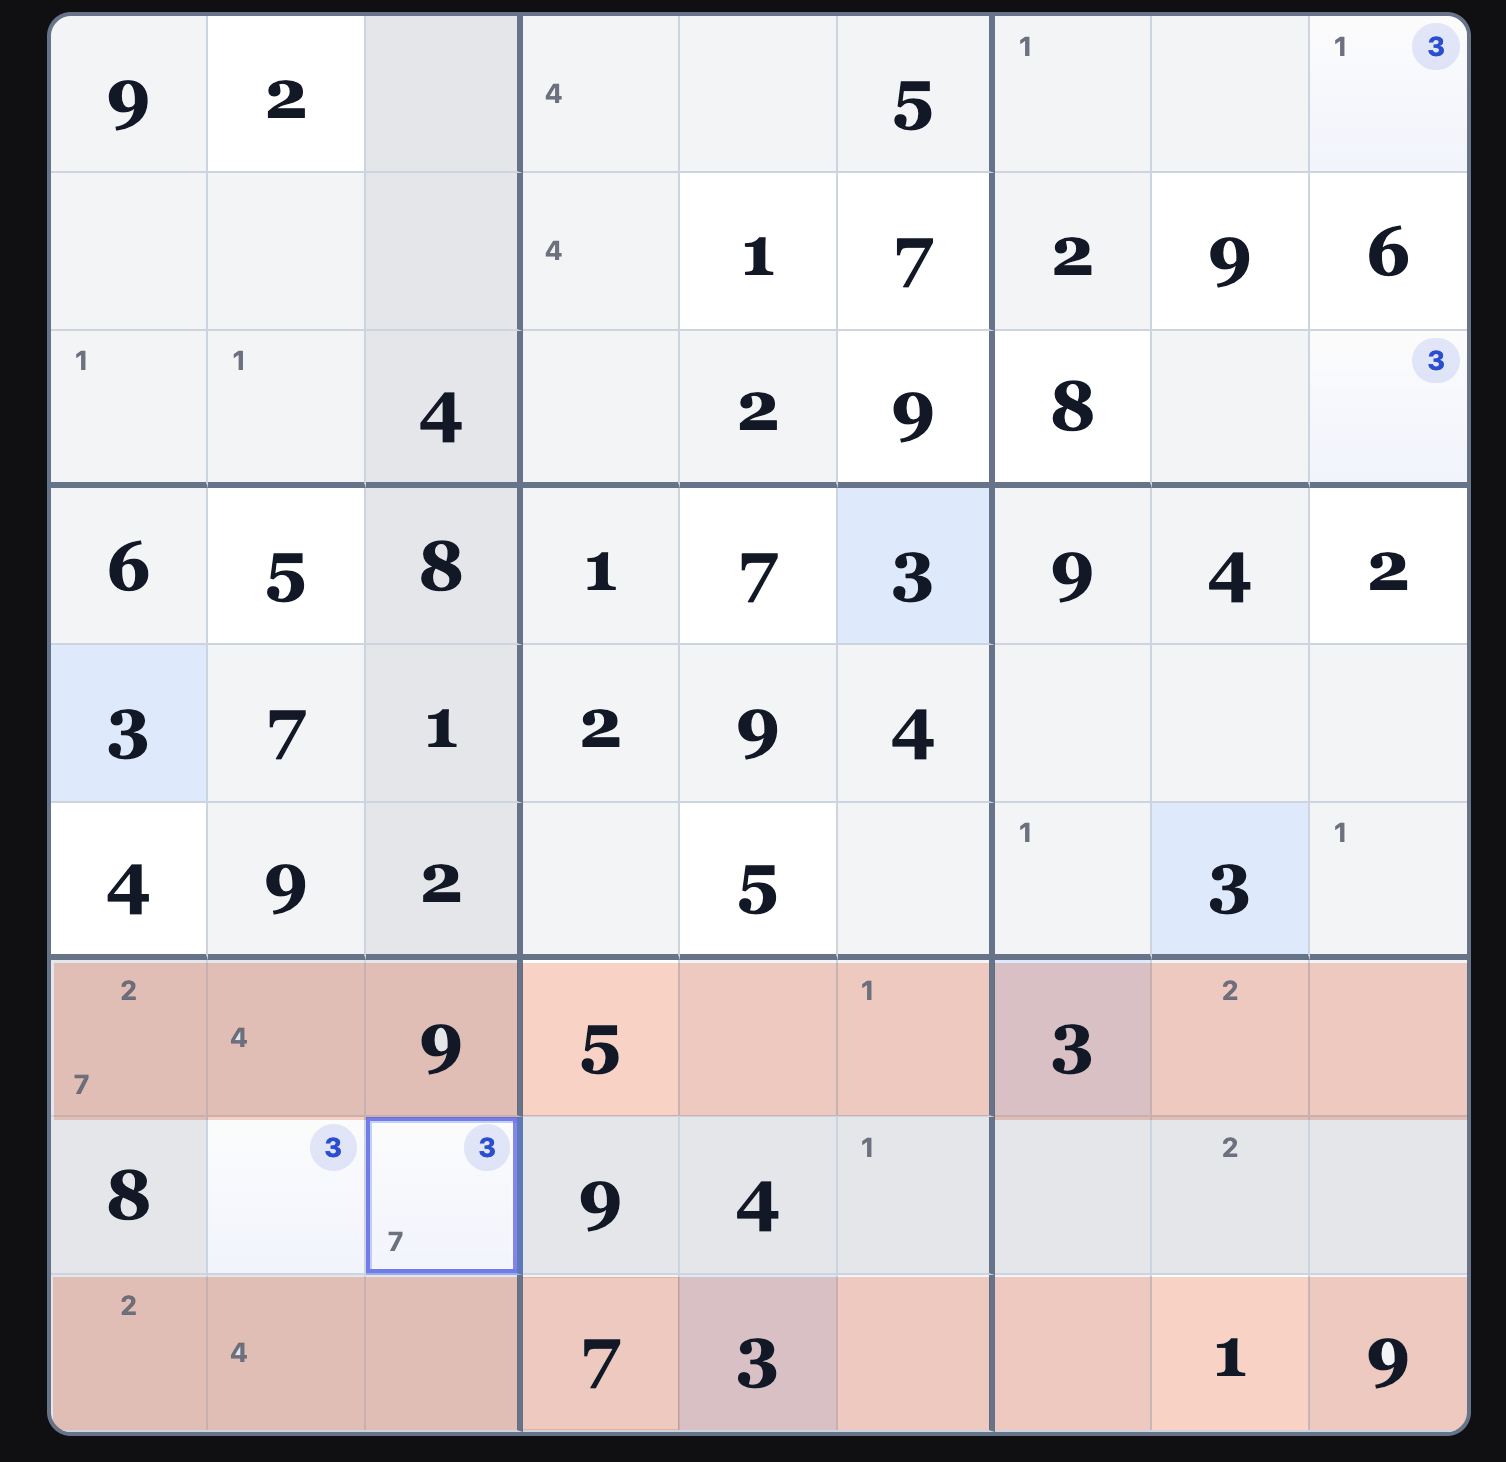
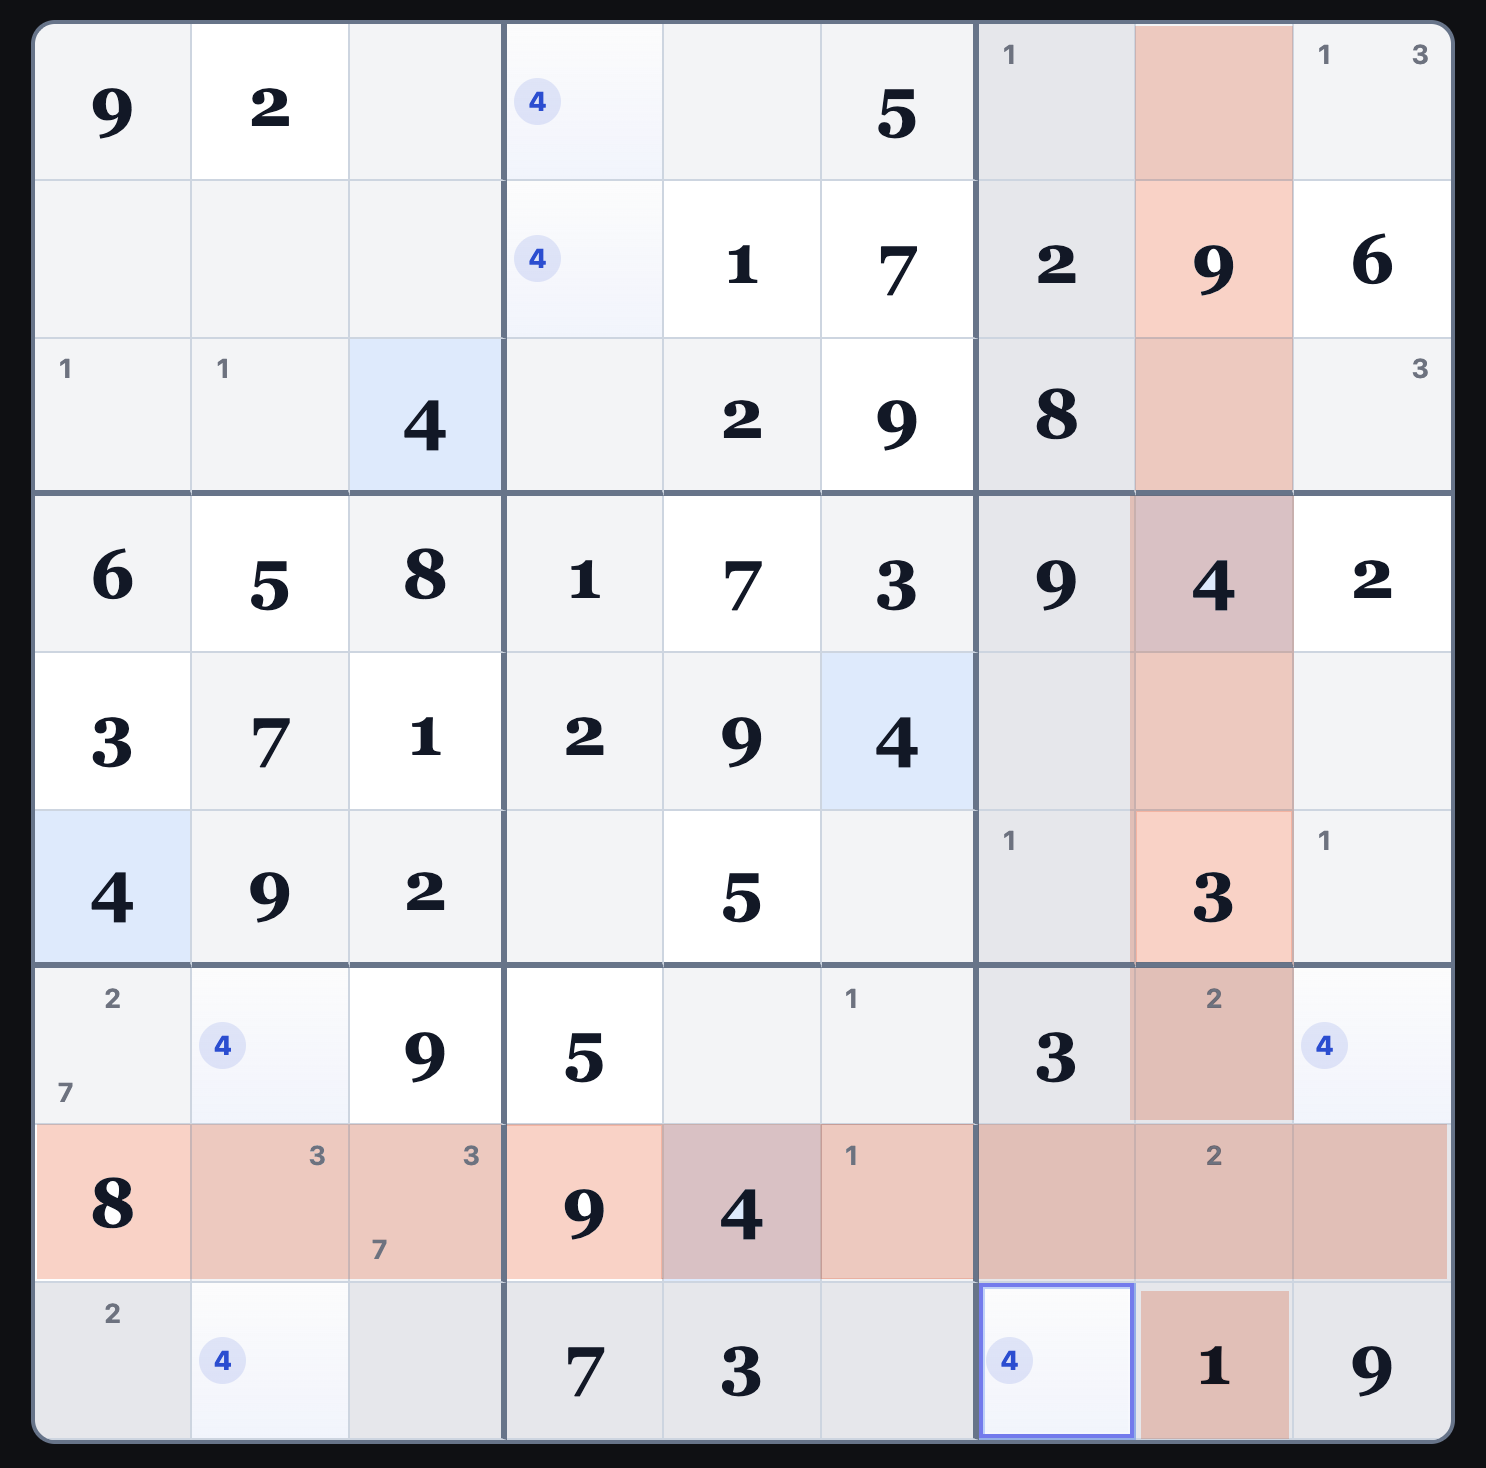
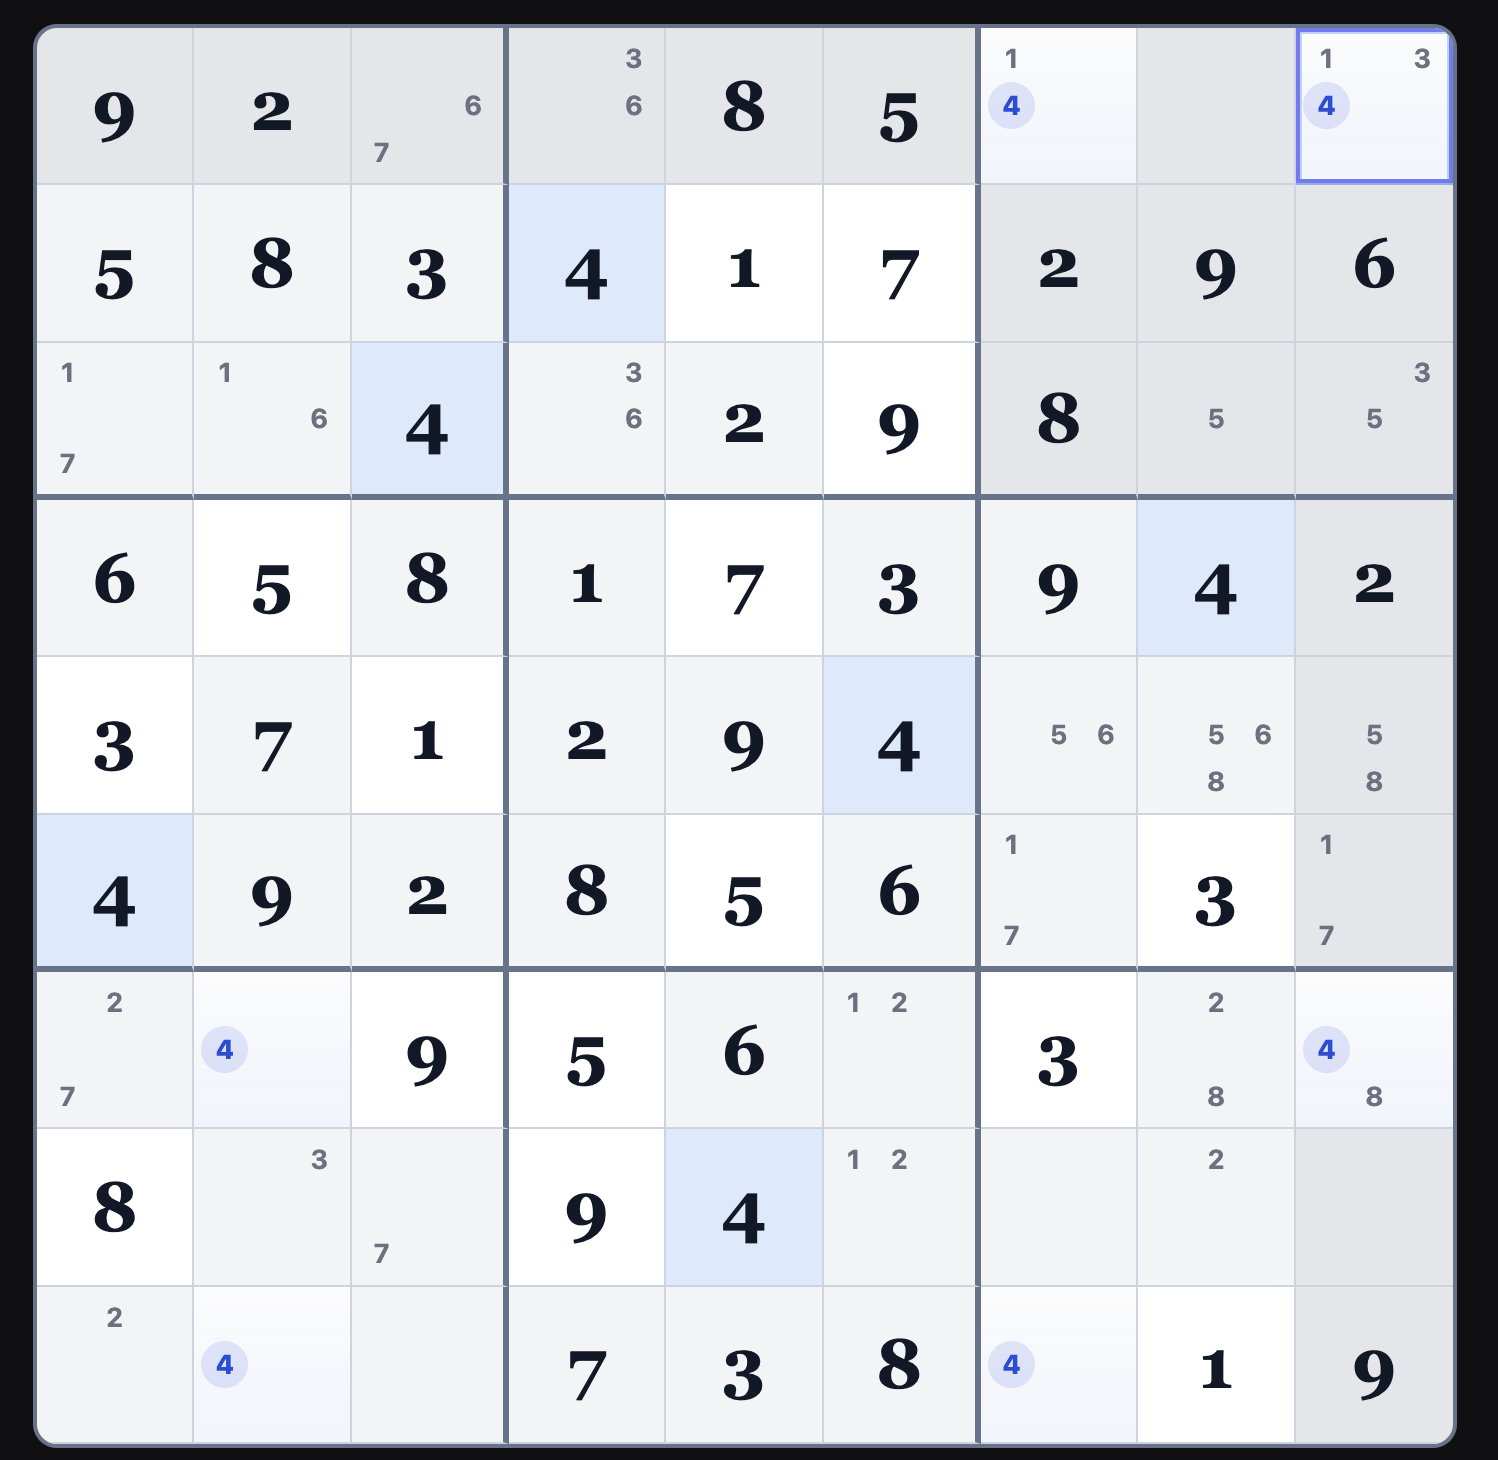
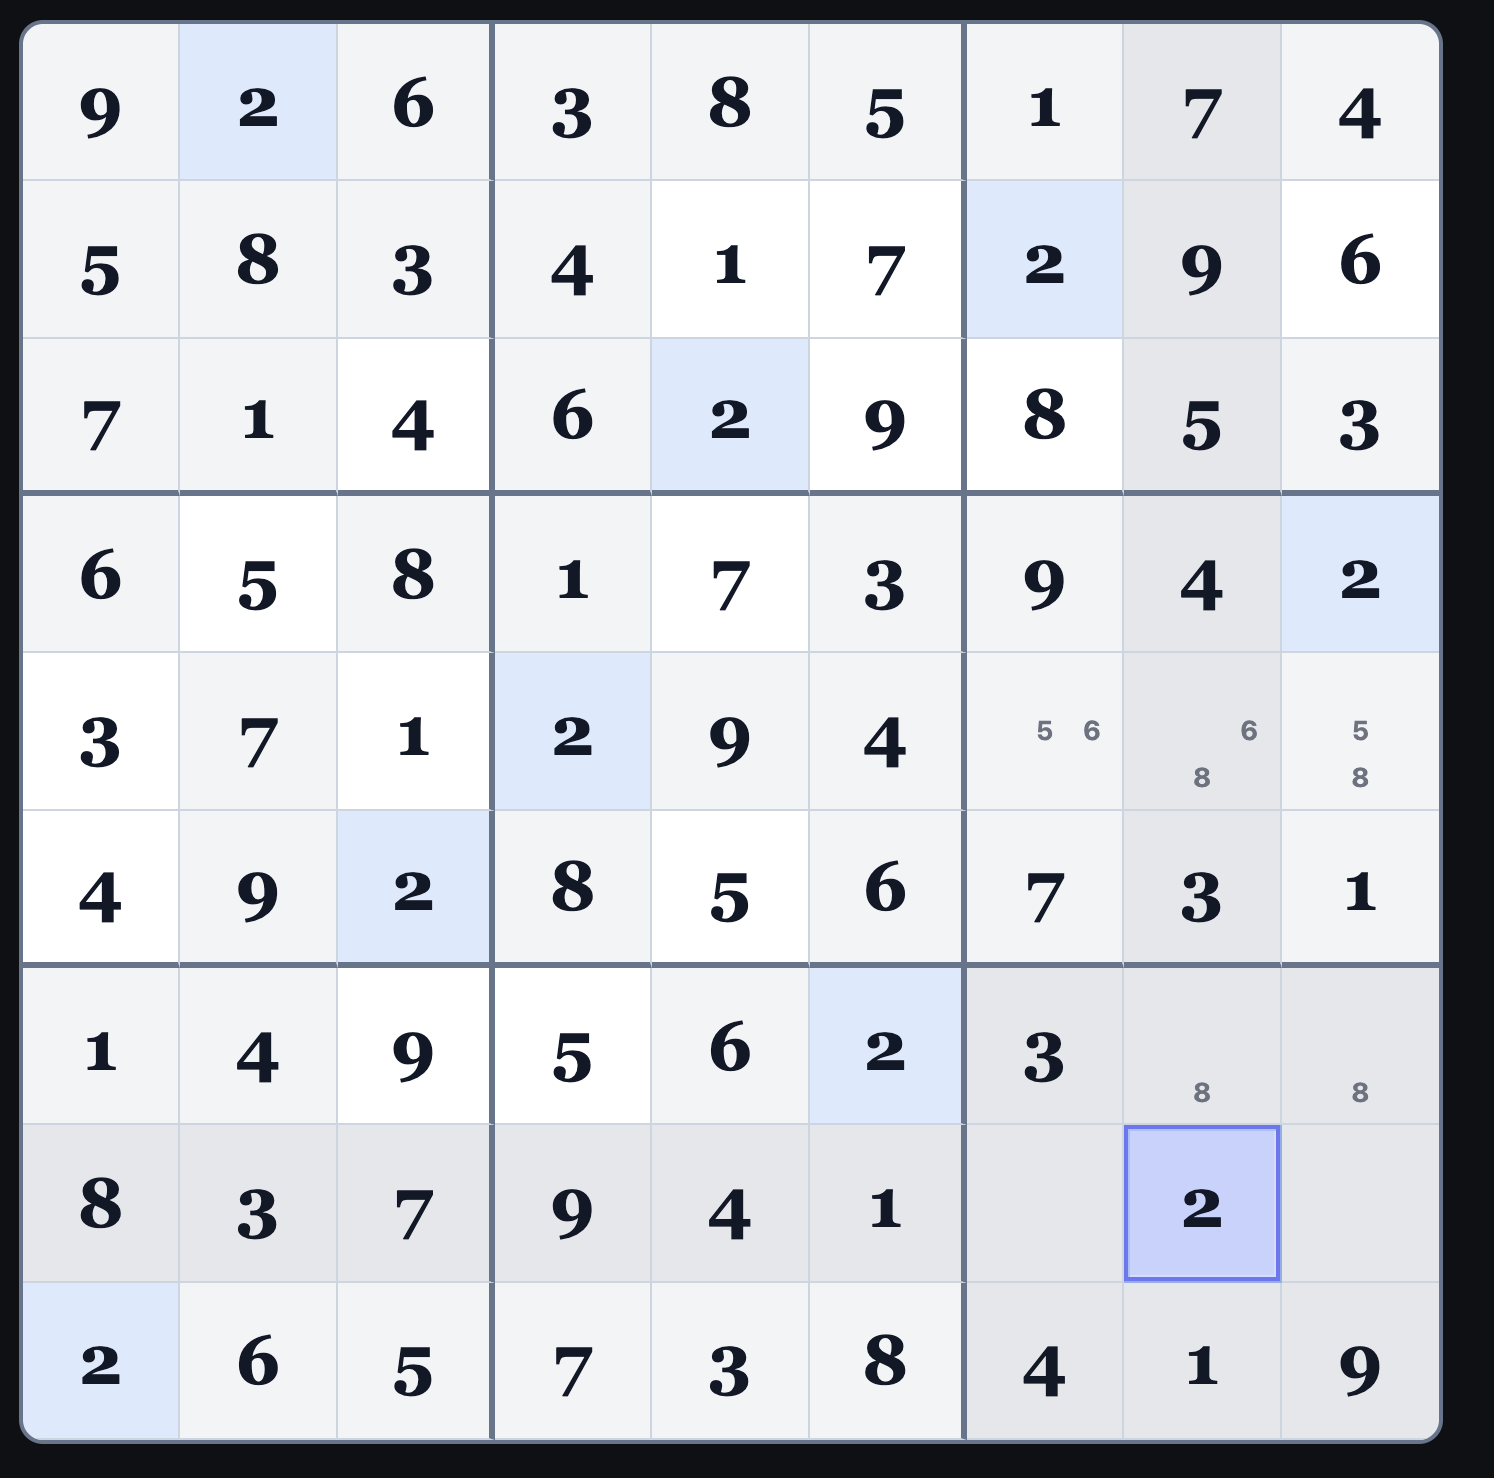
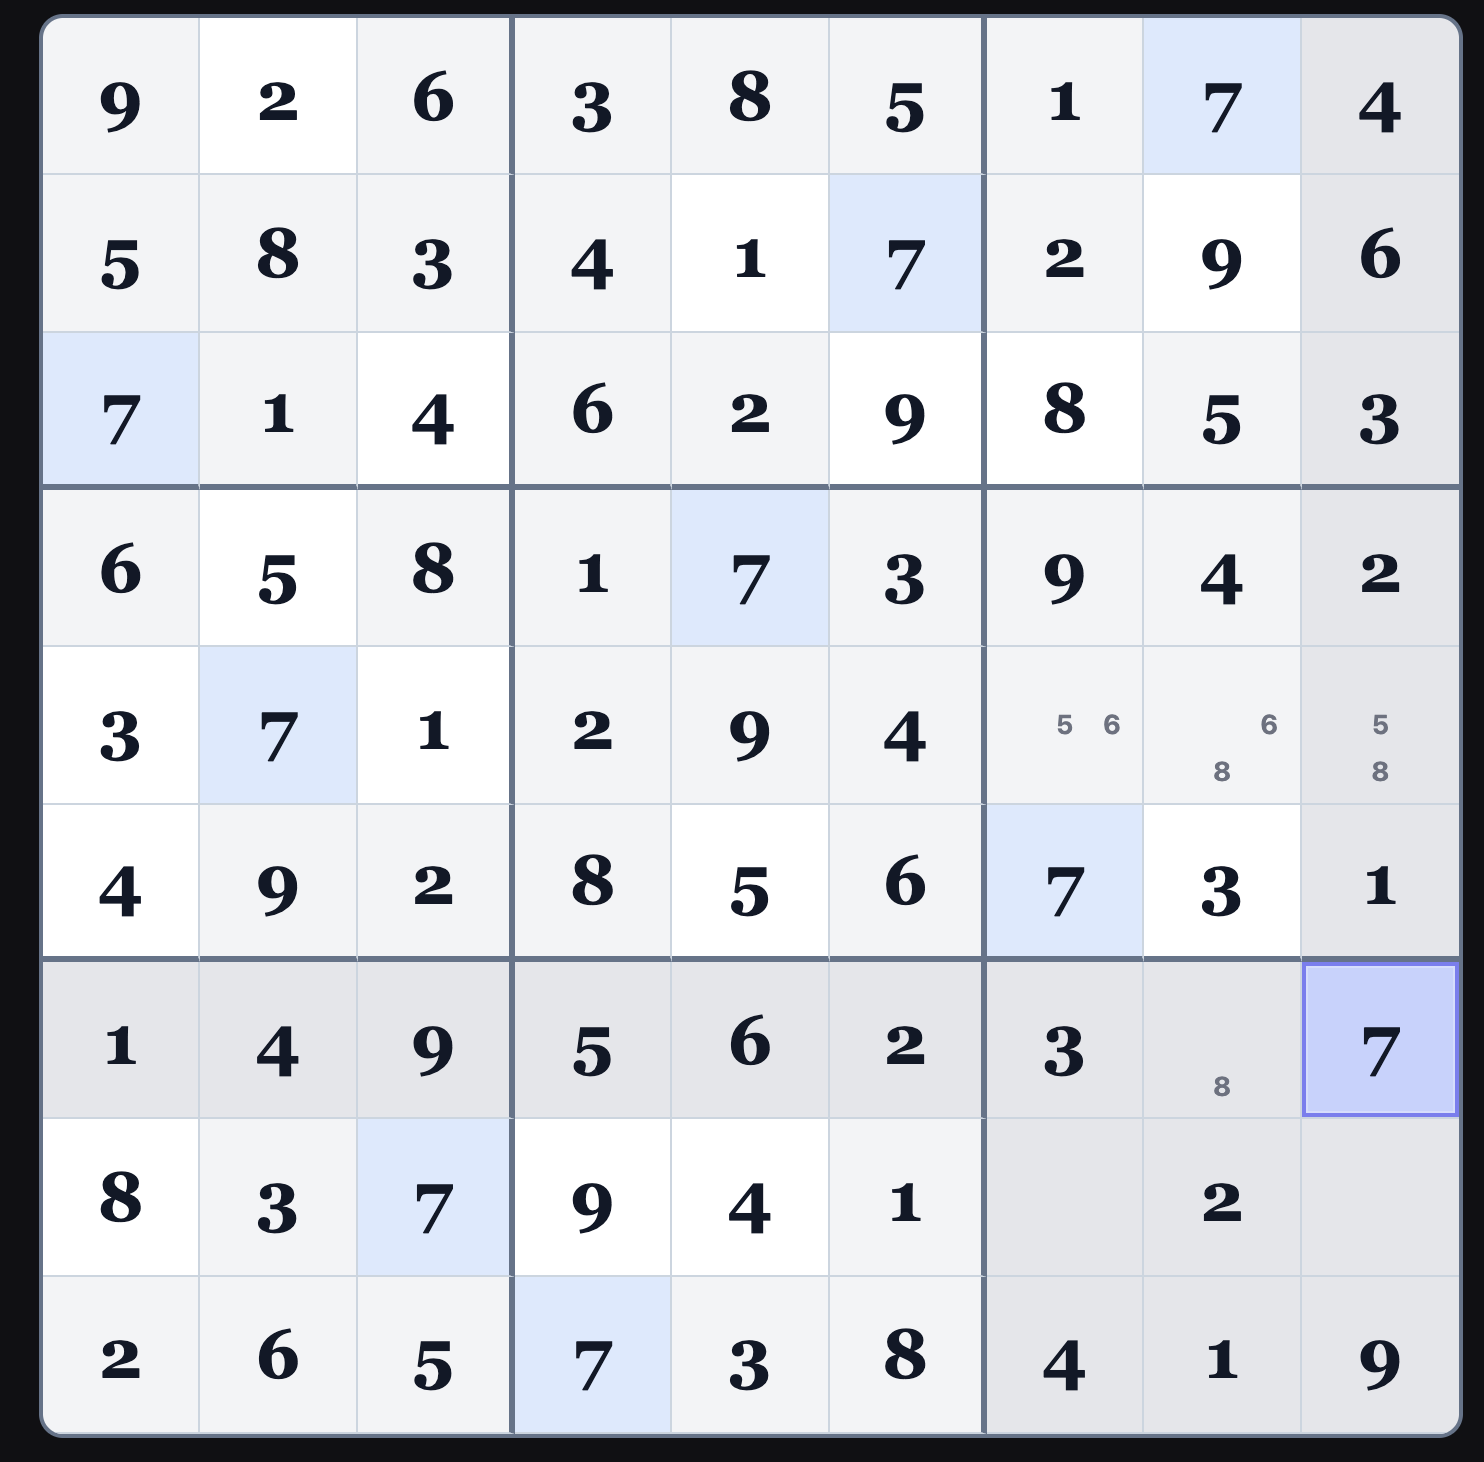
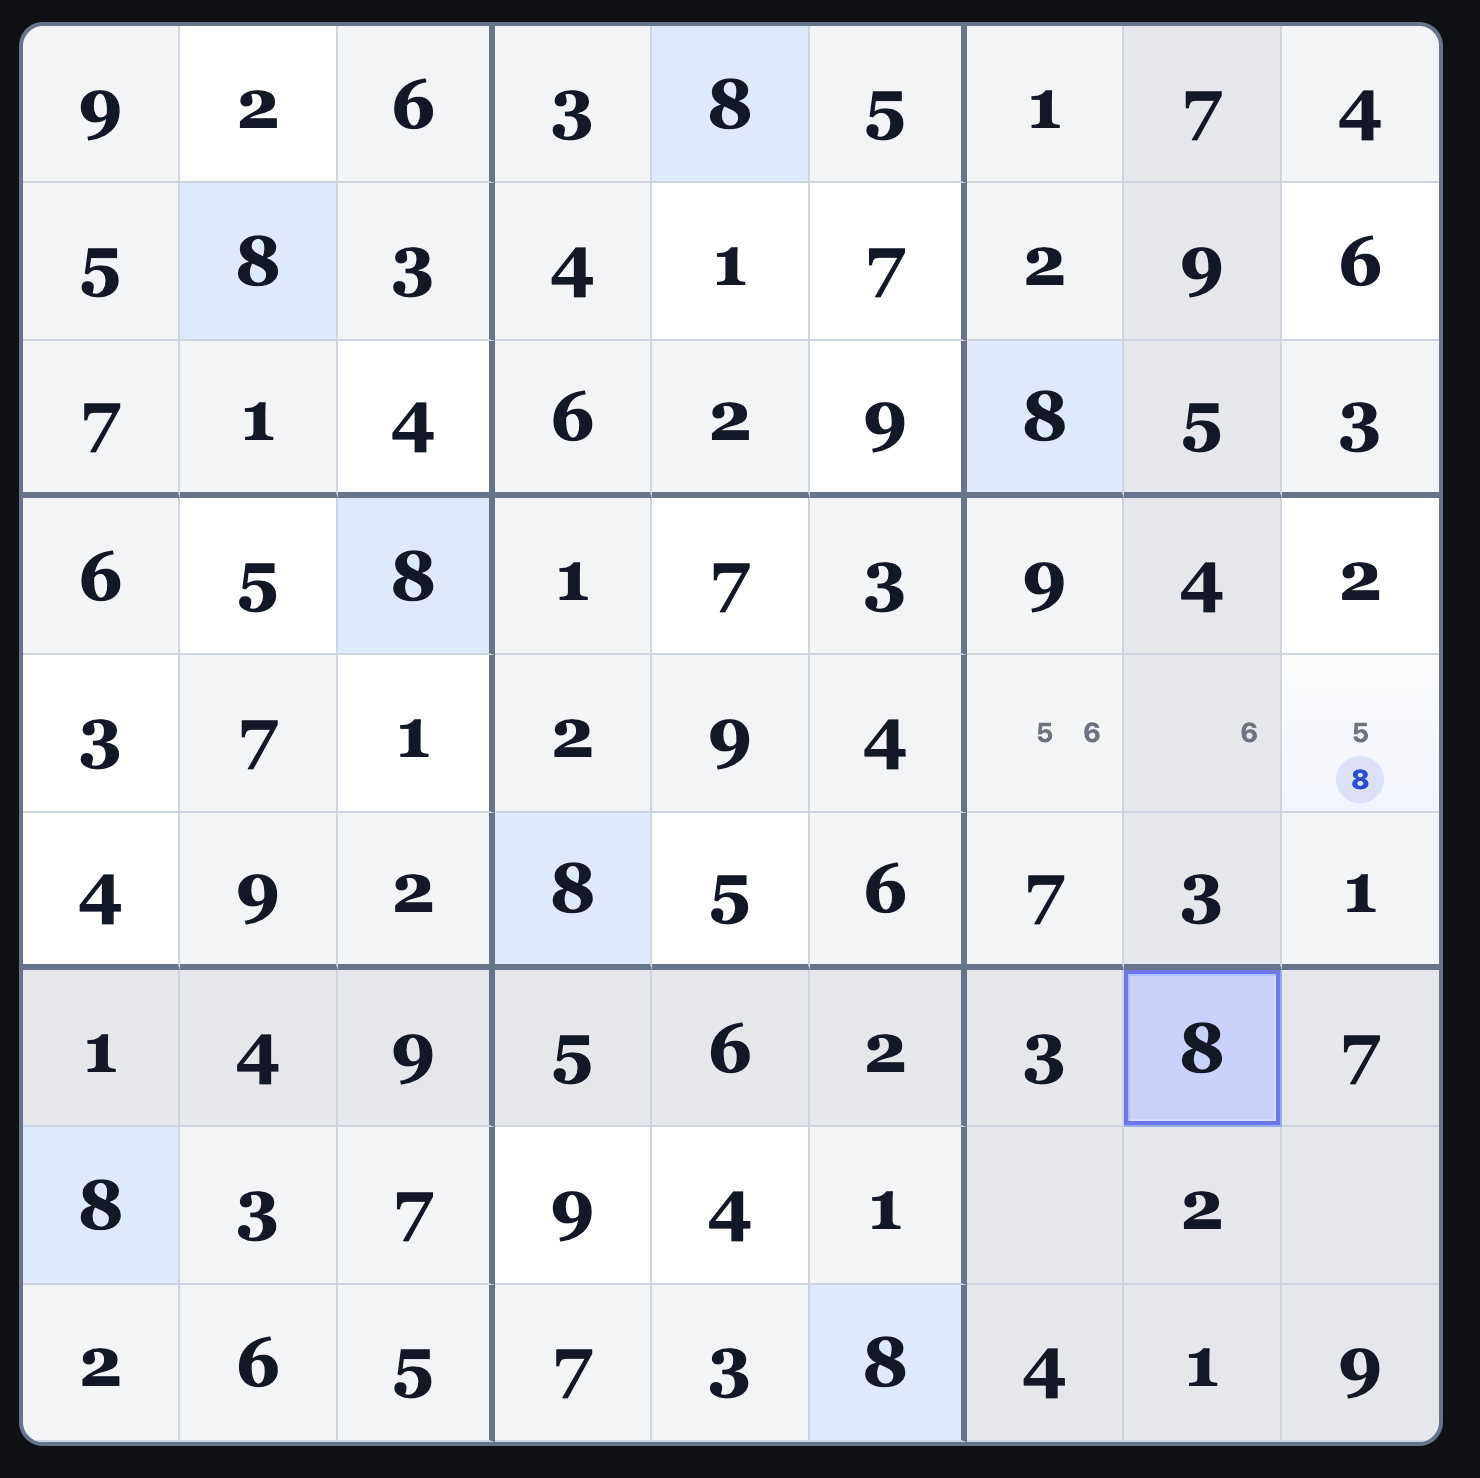
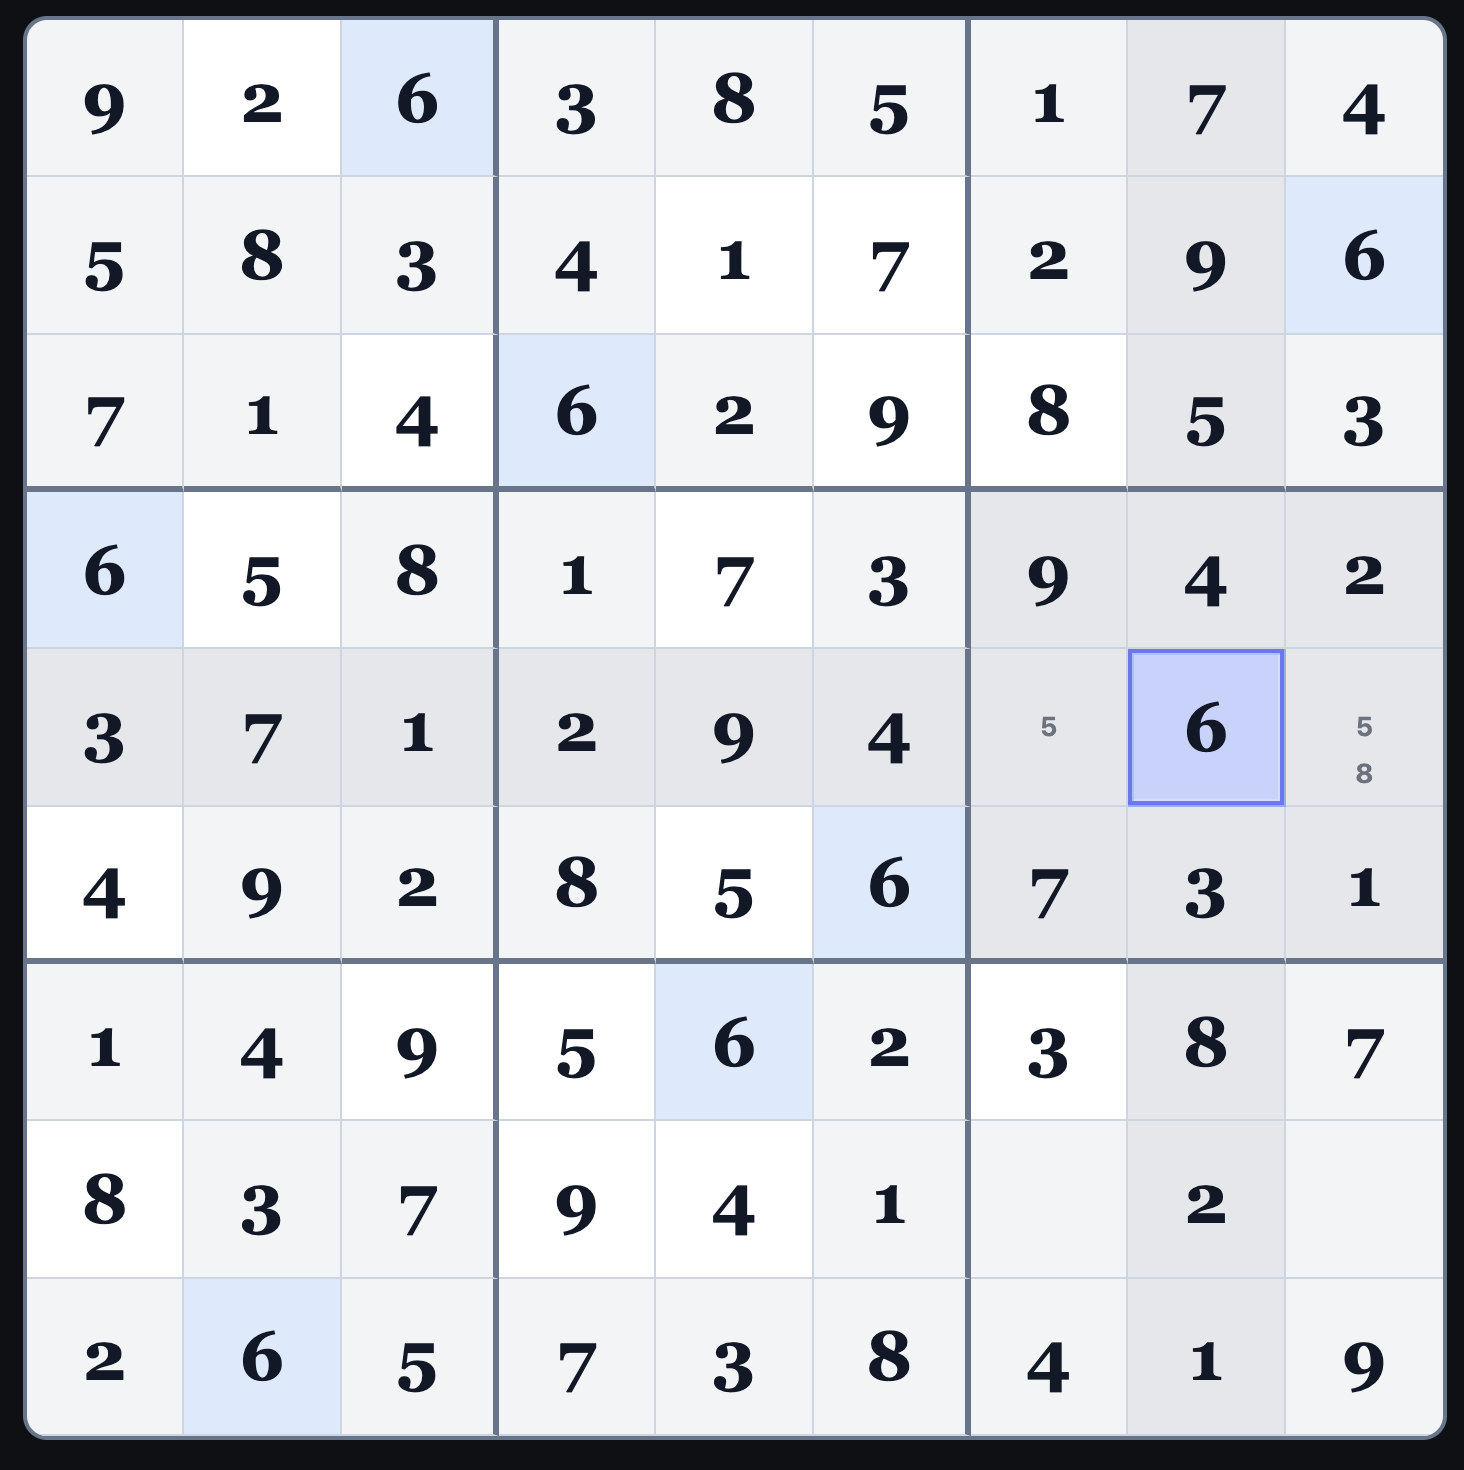
Sudoku is a logic puzzle played on a 9×9 grid divided into nine 3×3 blocks.
The objective is to fill the grid with the numbers 1 through 9 so that each number
appears exactly once in every row, every column, and every 3×3 block. Some numbers are
given at the start, and these serve as clues that restrict where the remaining numbers can go.
The puzzle is solved not by guessing but by systematically applying logic to determine
which numbers are possible or impossible in each square until the grid is complete.
Sudoku solving is basically an exercise in Holmesian logic, not guessing or mystical
wizardry.
“When you have eliminated the impossible, whatever remains,
however improbable, must be the truth.”
— Sherlock Holmes, The Sign of the Four
Pairs and Constraints
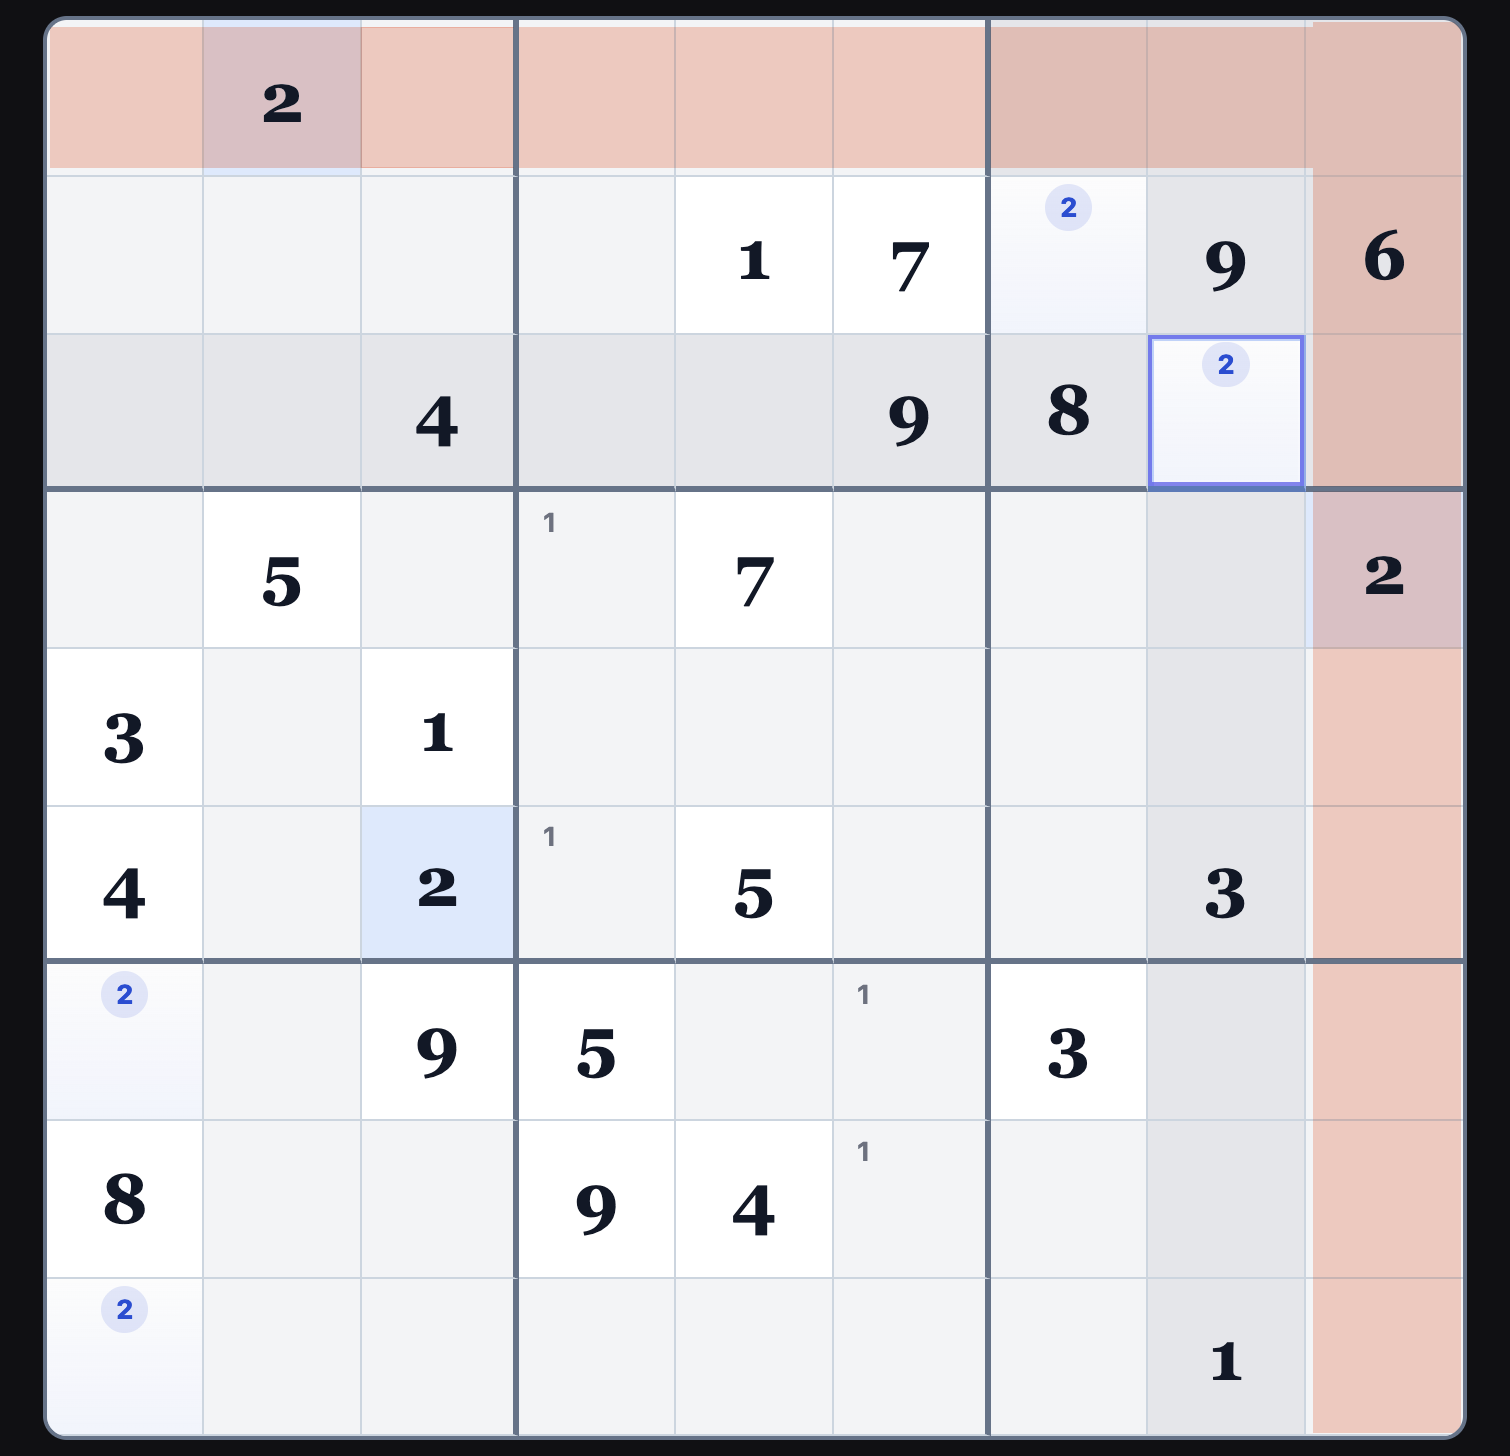
After you’ve filled in the obvious entries and added basic pencil marks, the next step is to look for constraints—places where the puzzle limits what can go where.
Sometimes you’ll get lucky and a square has only one possible number. But often, the constraints are more subtle.
Constrained Pairs
A constrained pair is when a single number has only two possible spots in a row, column, or box. You don’t know which one is correct yet—but you do know it must be one of those two, and nowhere else in that unit.
This idea is fundamental. Many of the more interesting Sudoku patterns are built on this simple observation.
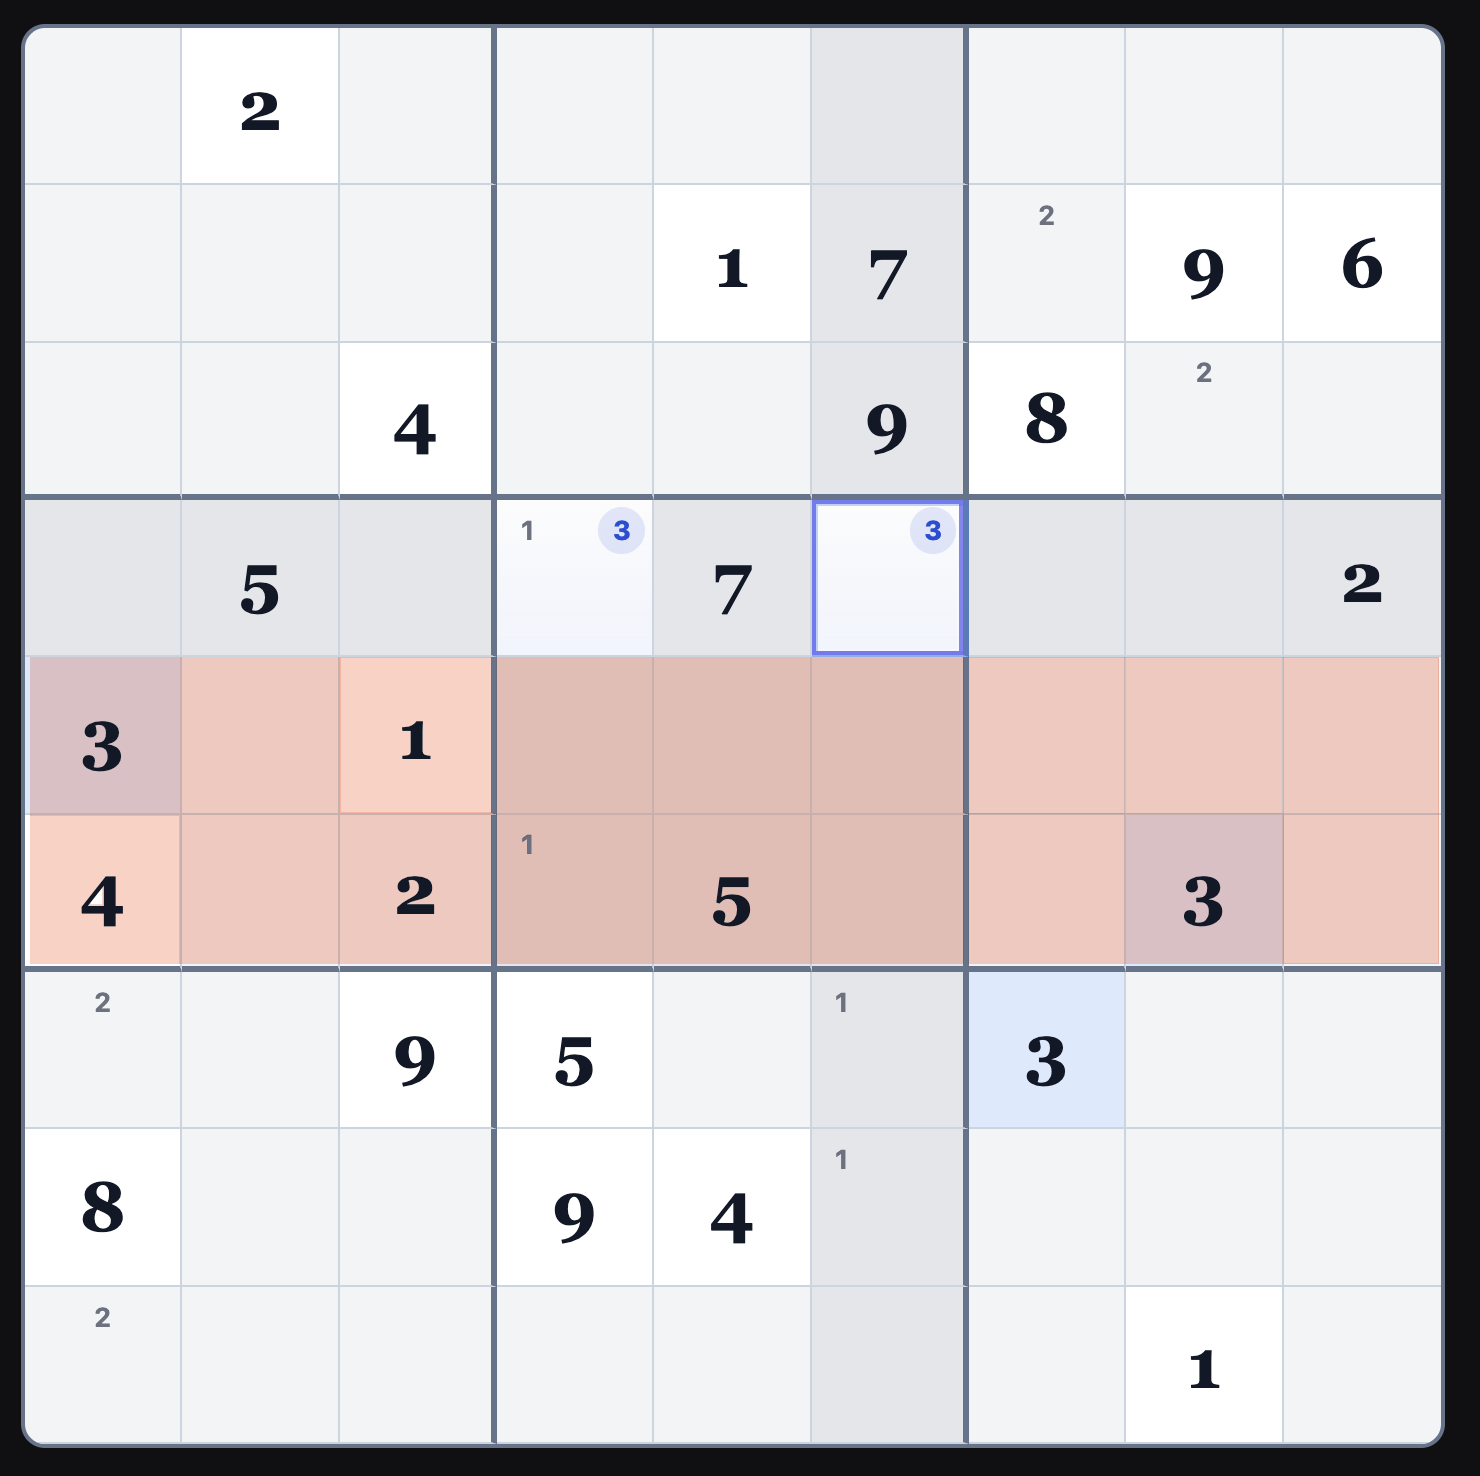
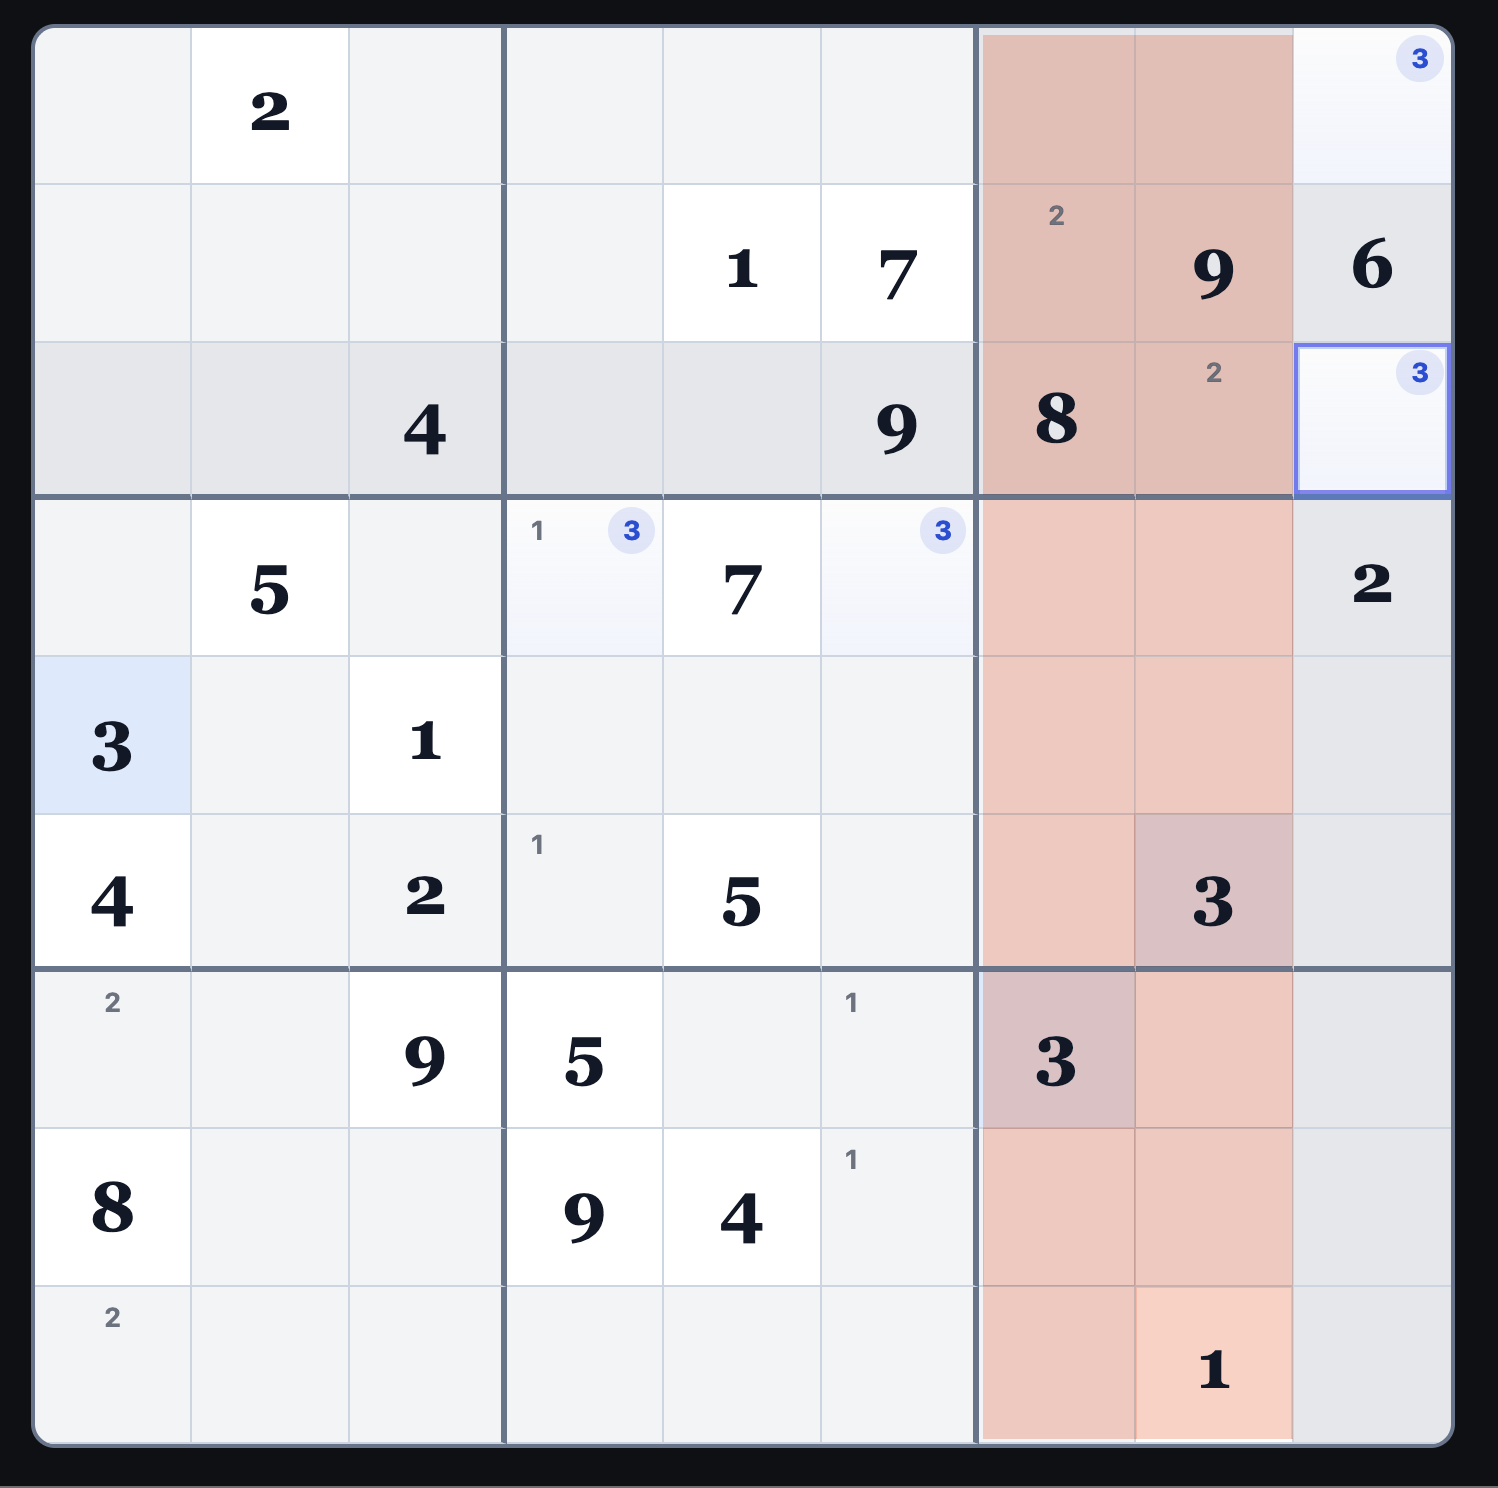
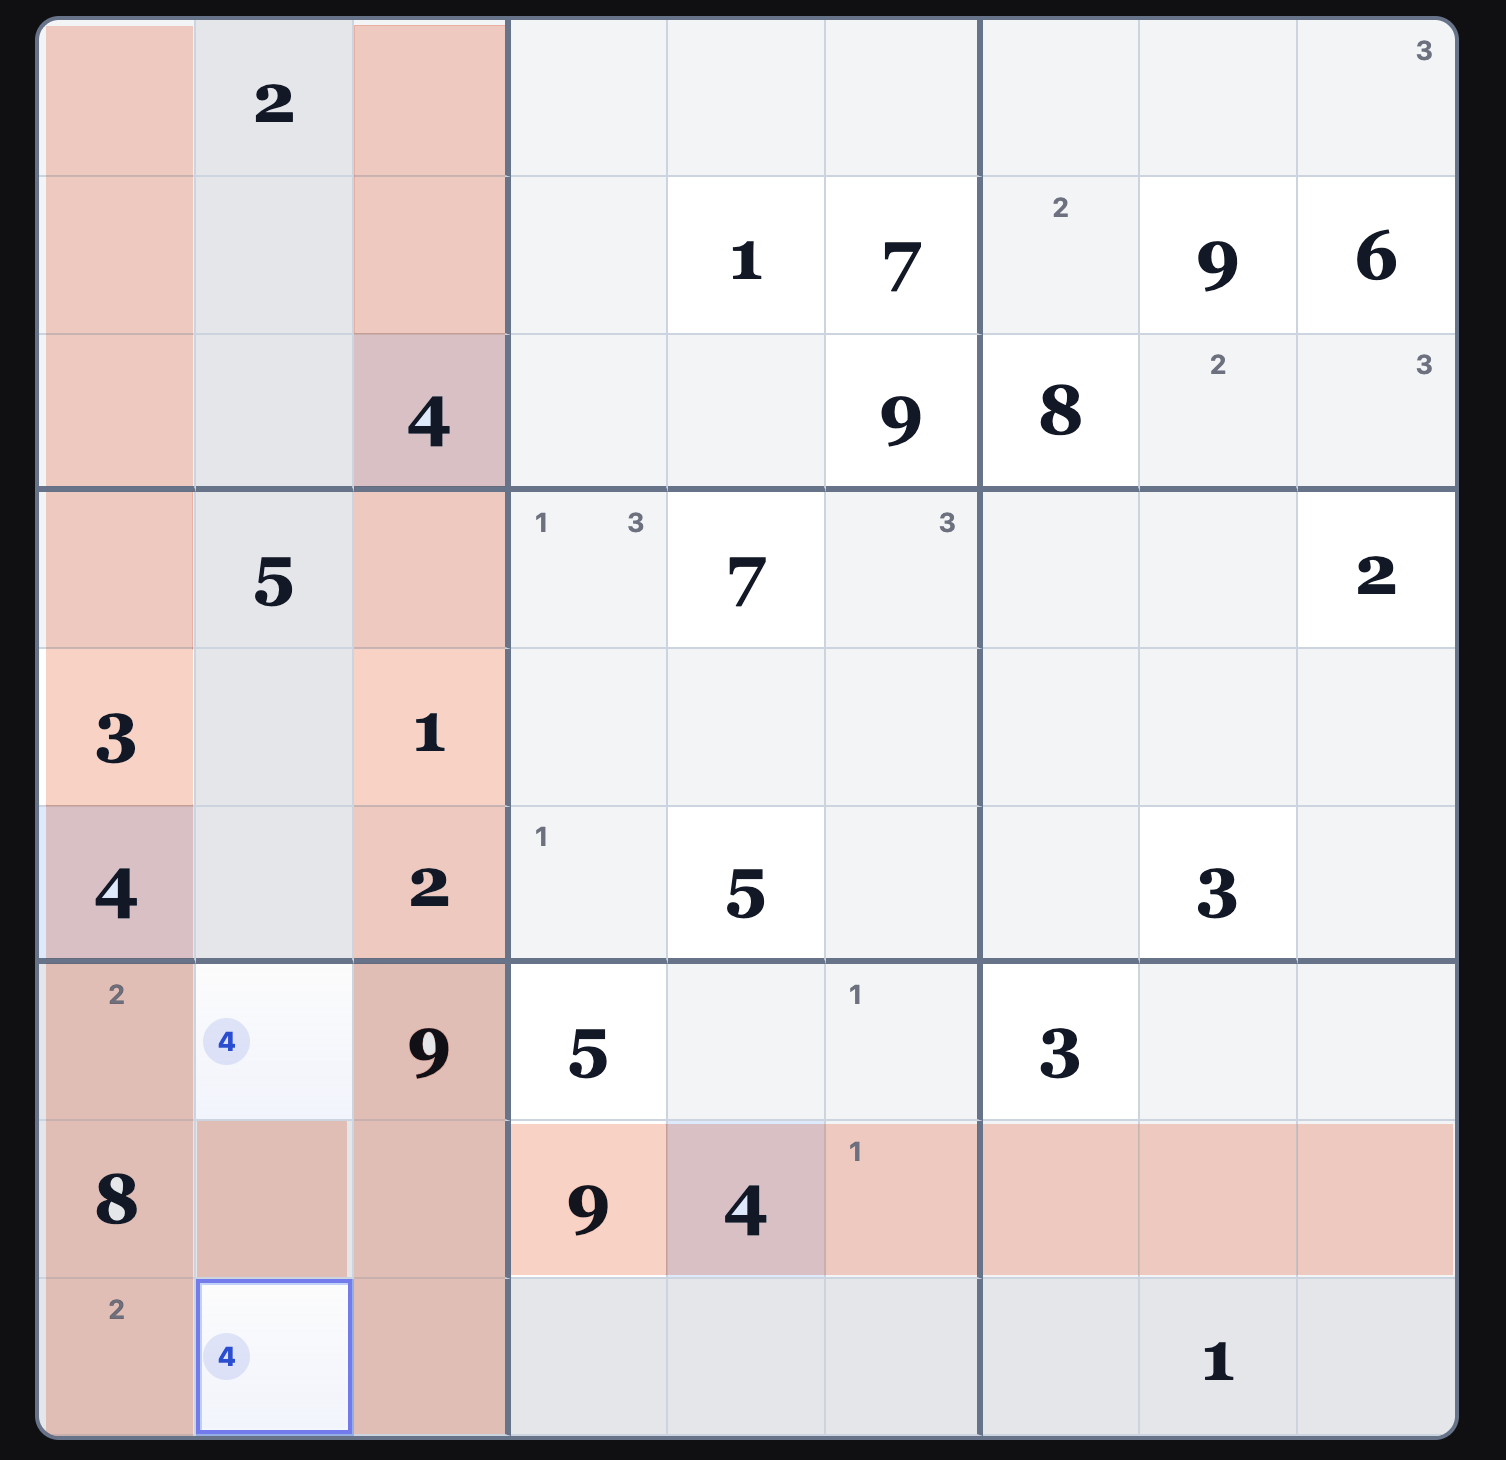
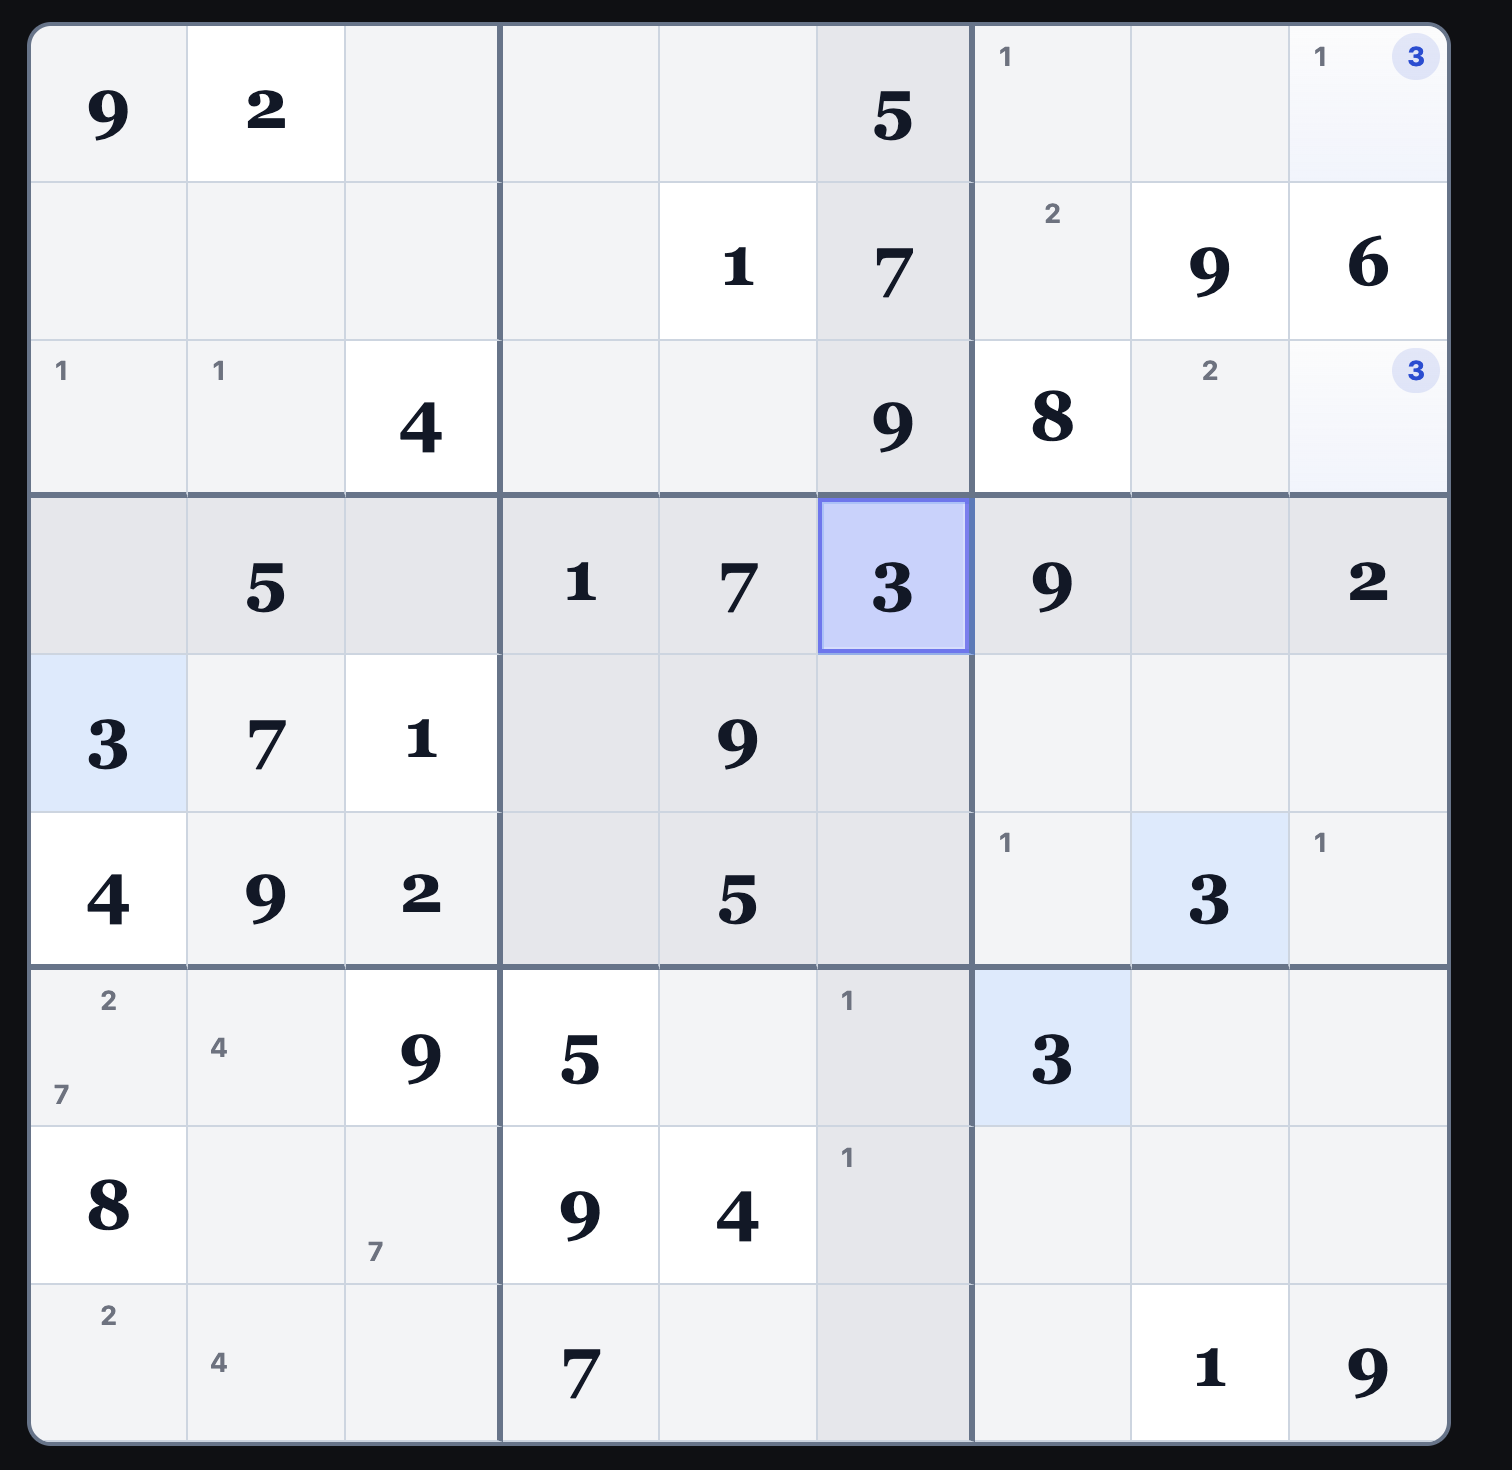
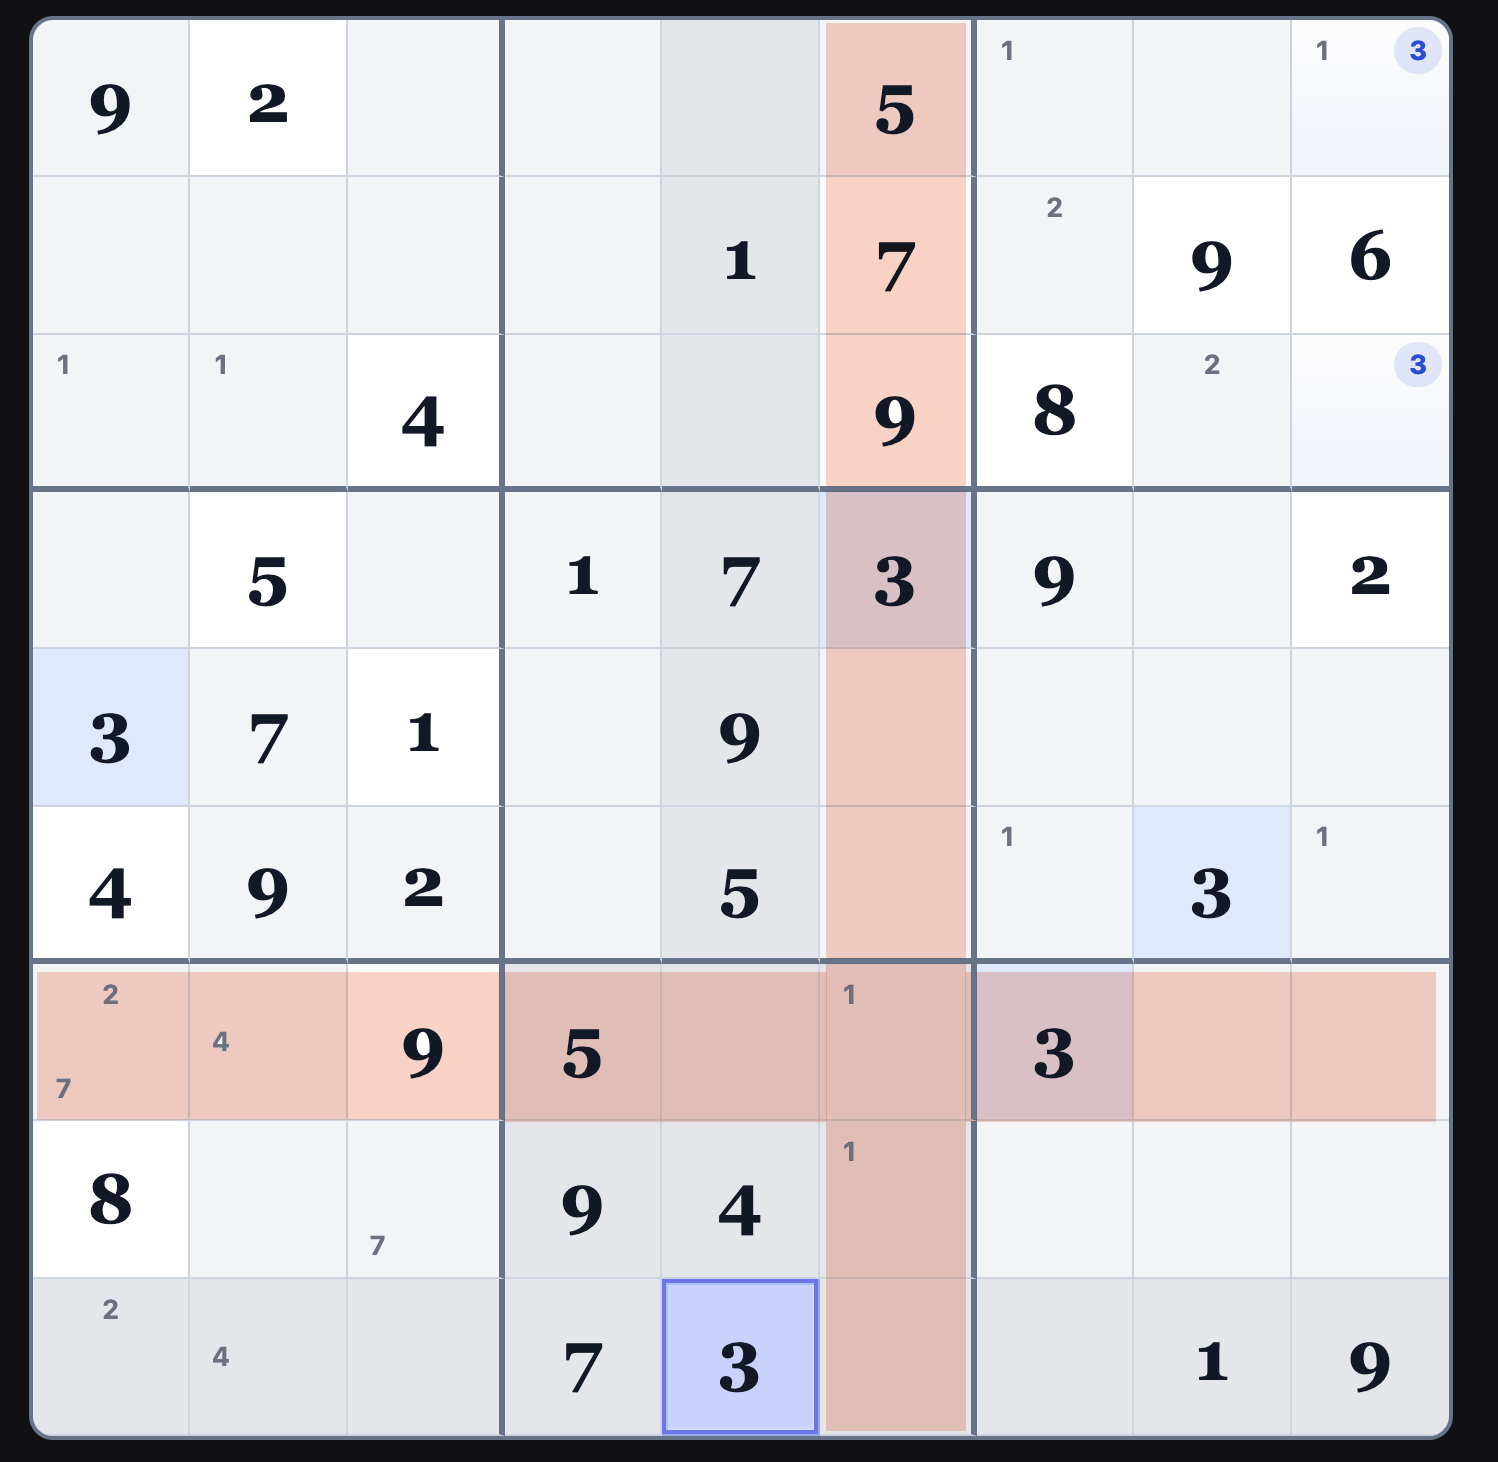
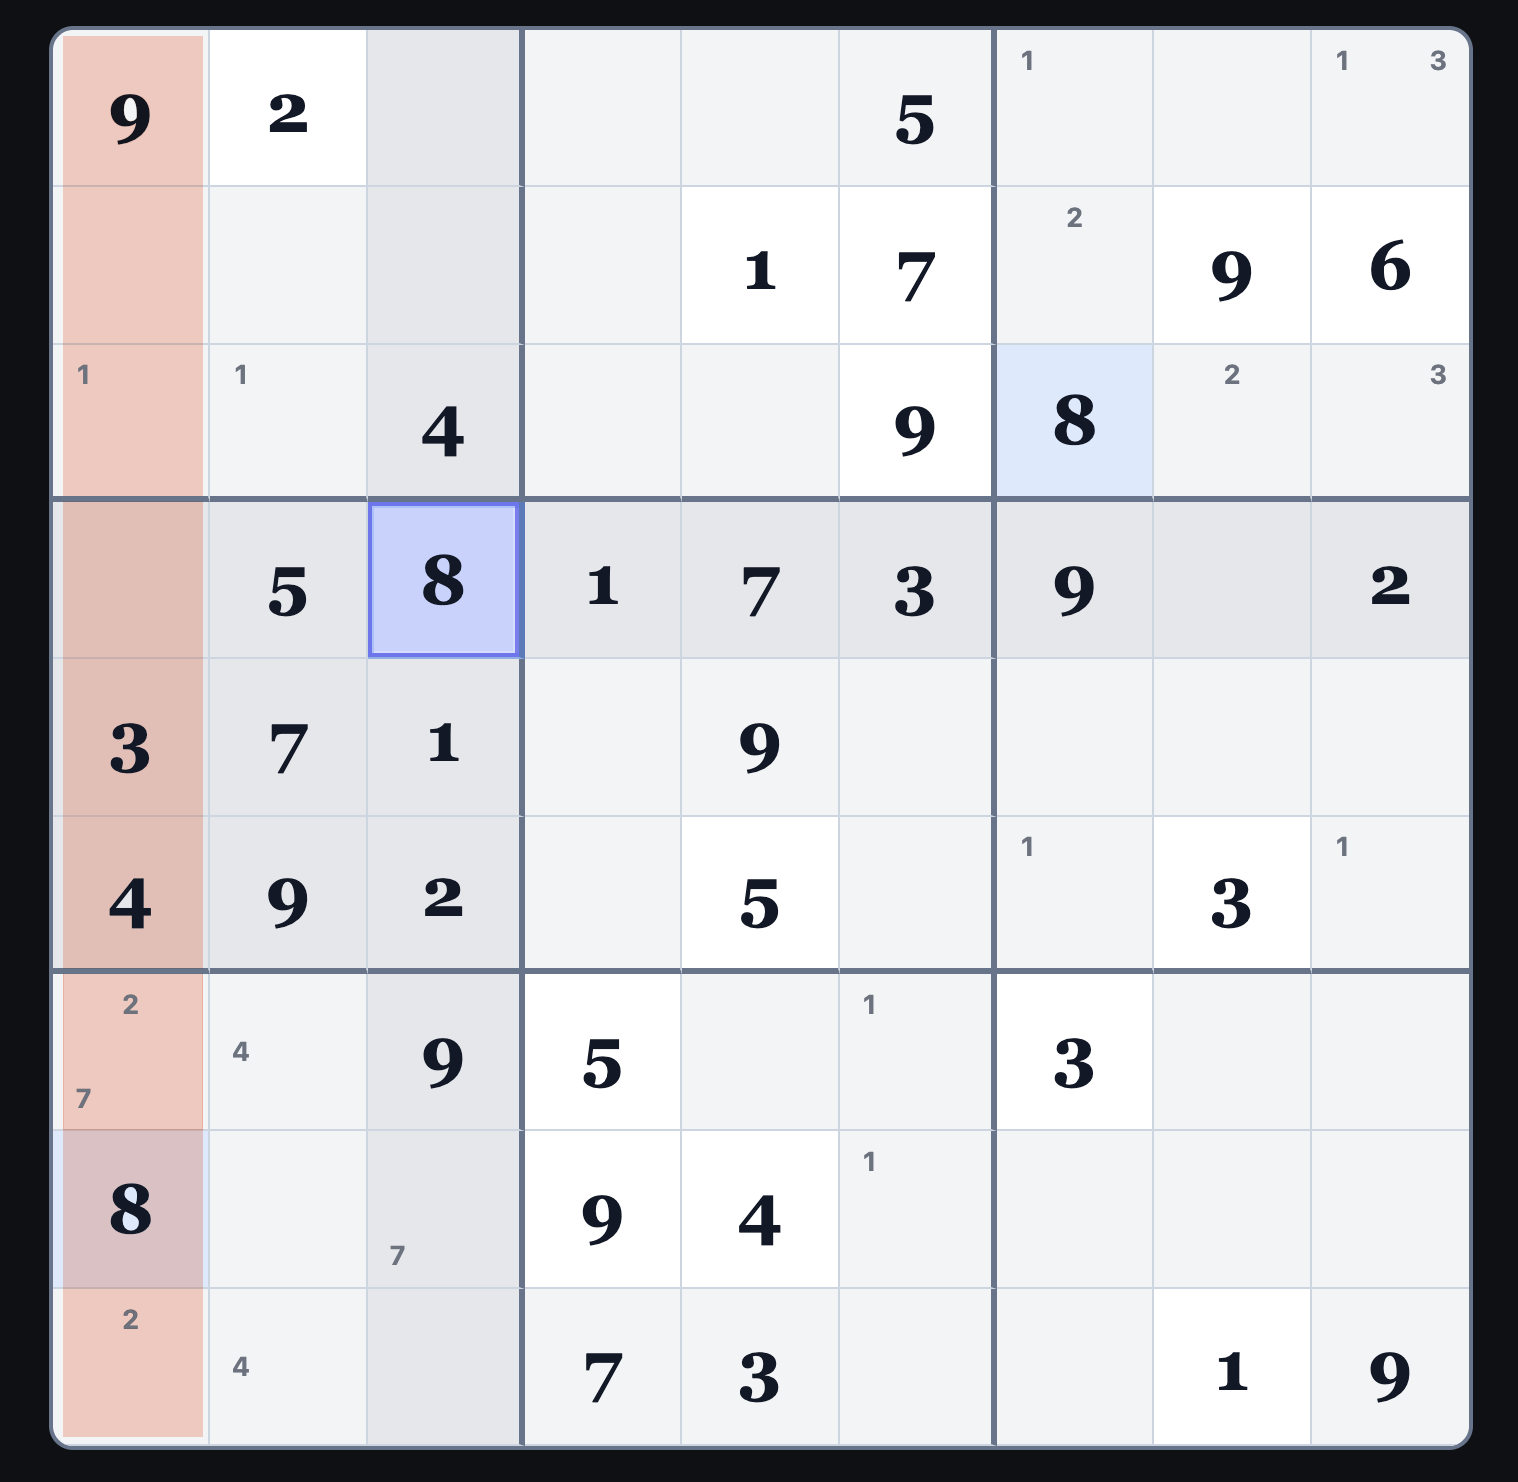
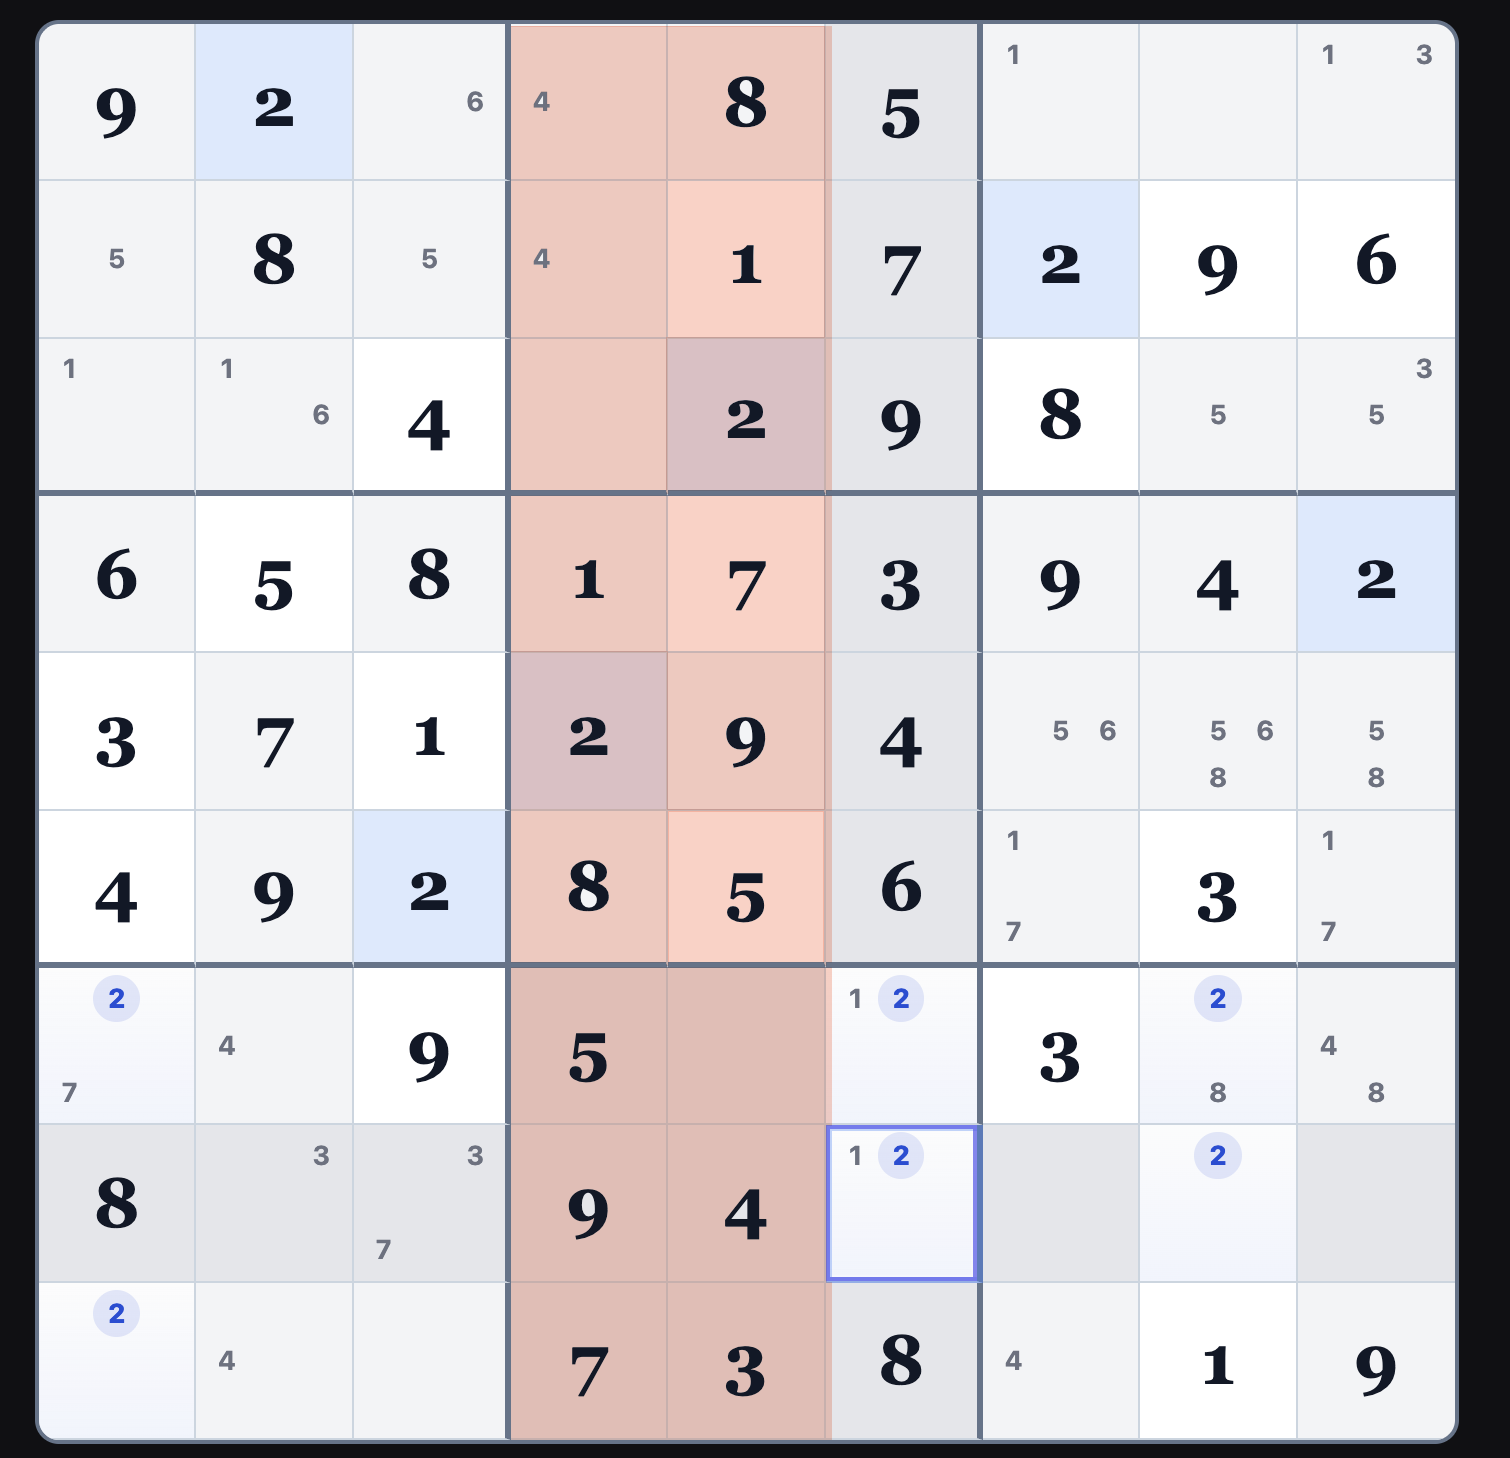
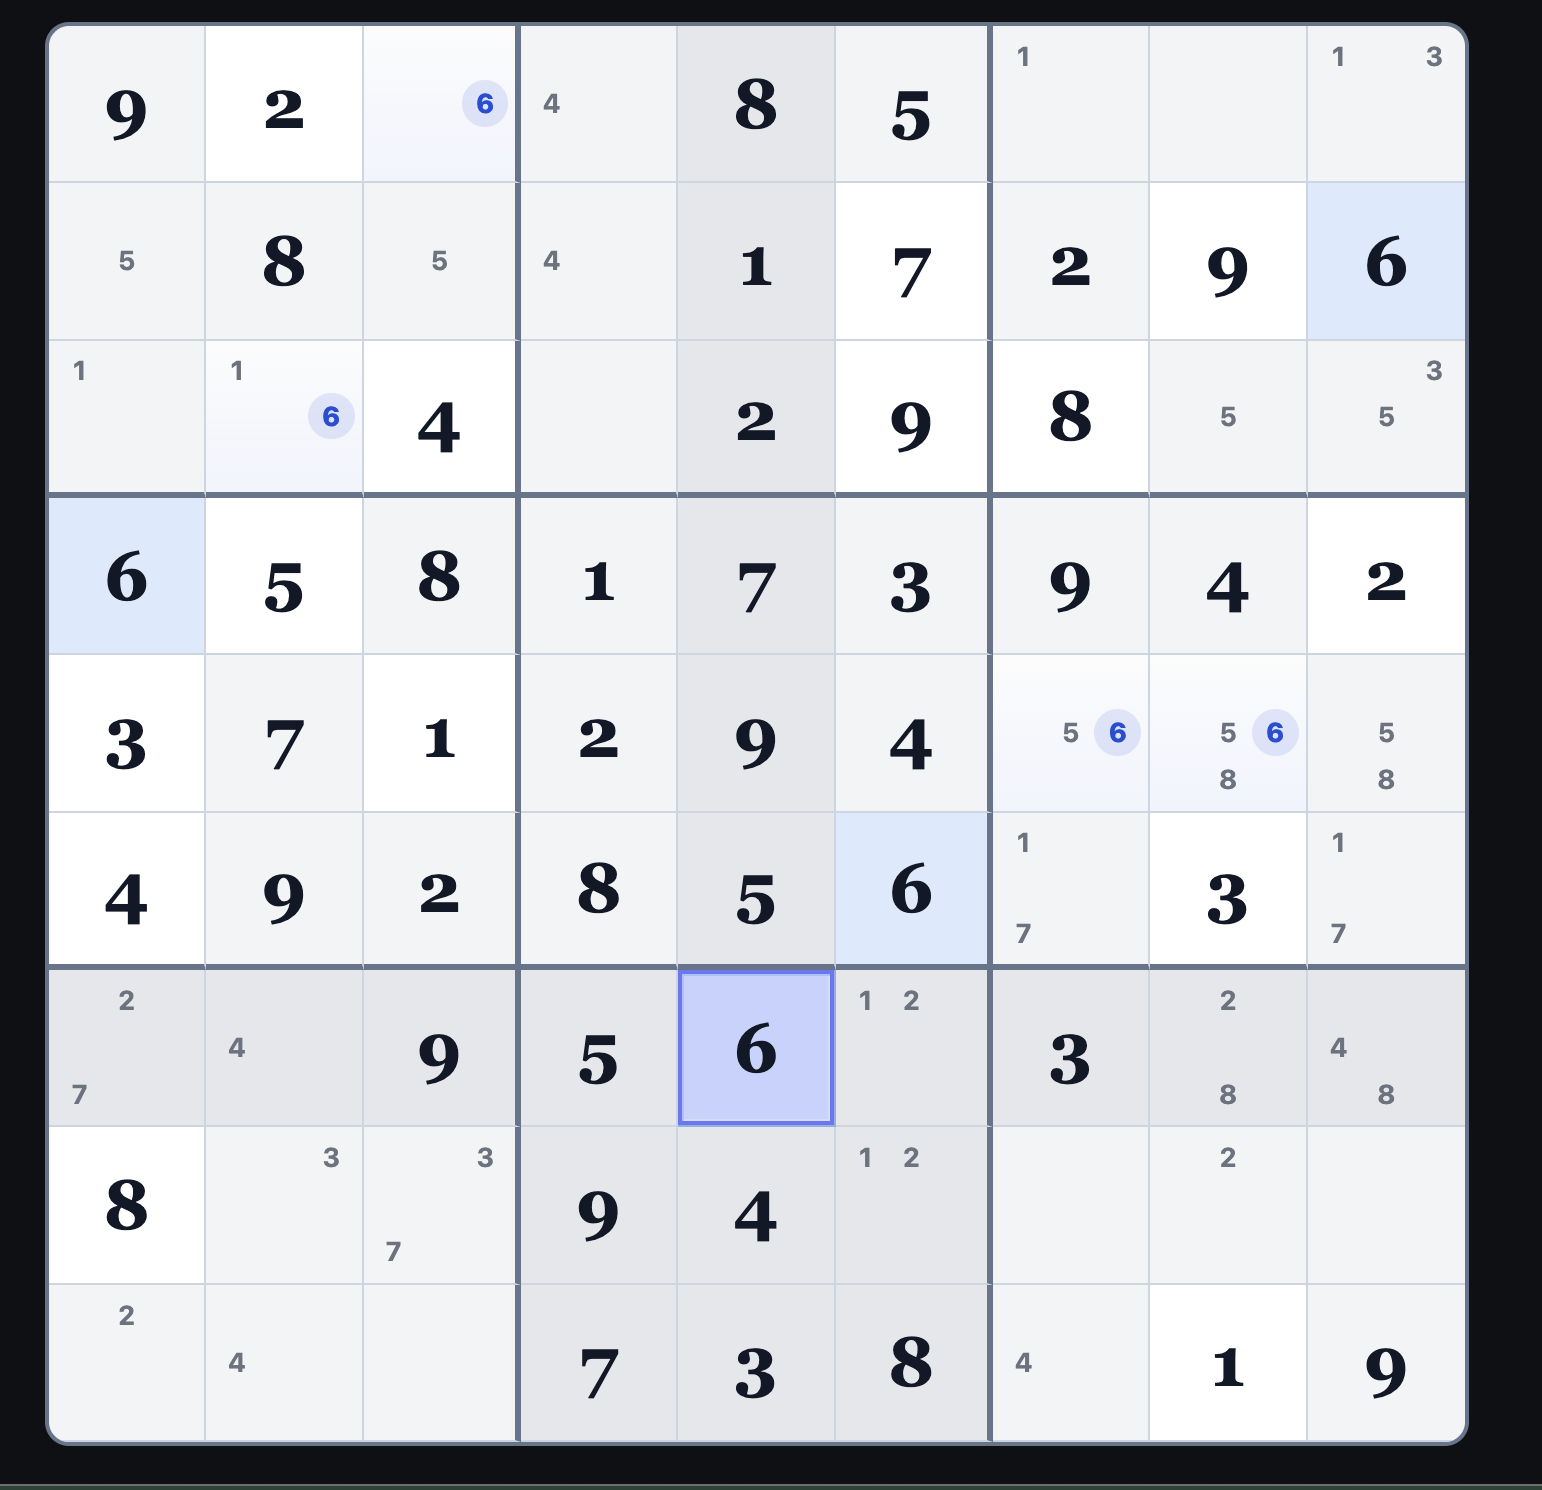
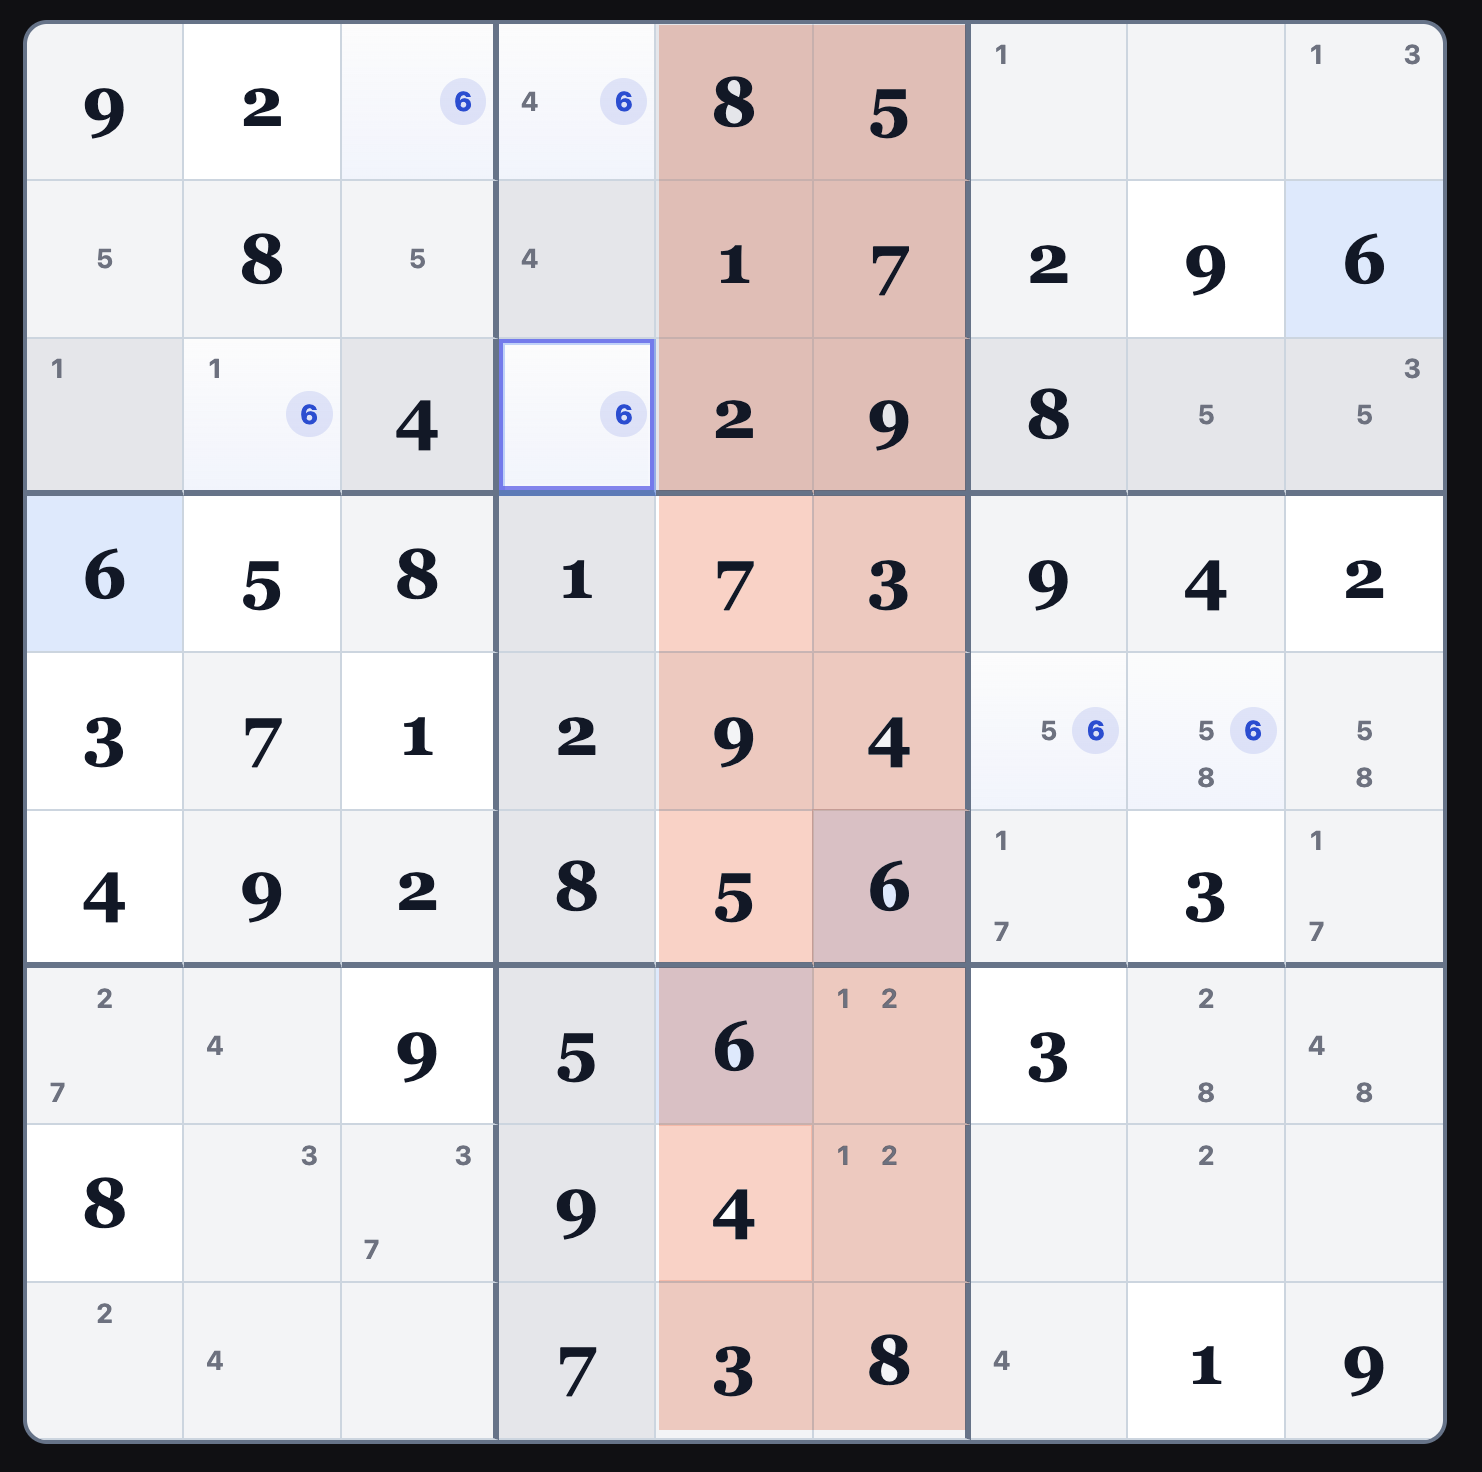
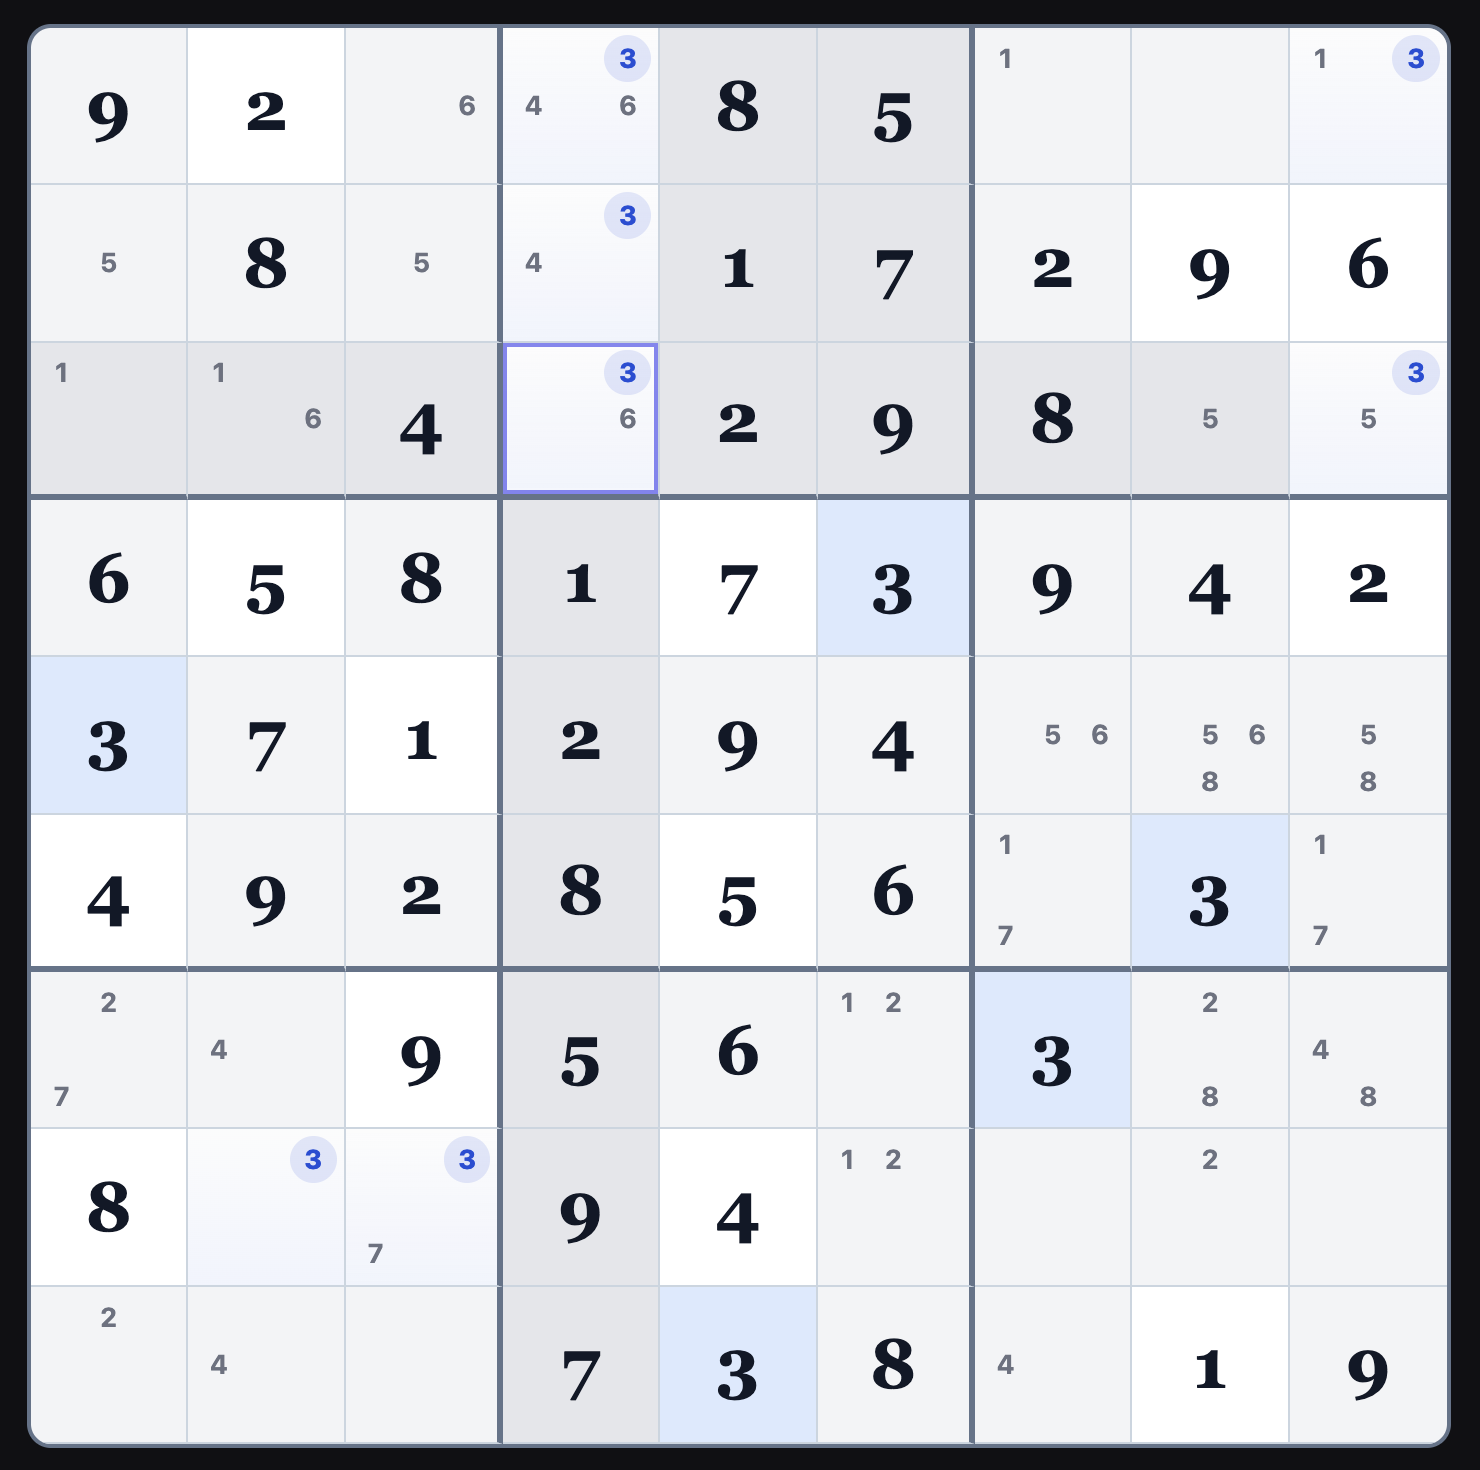
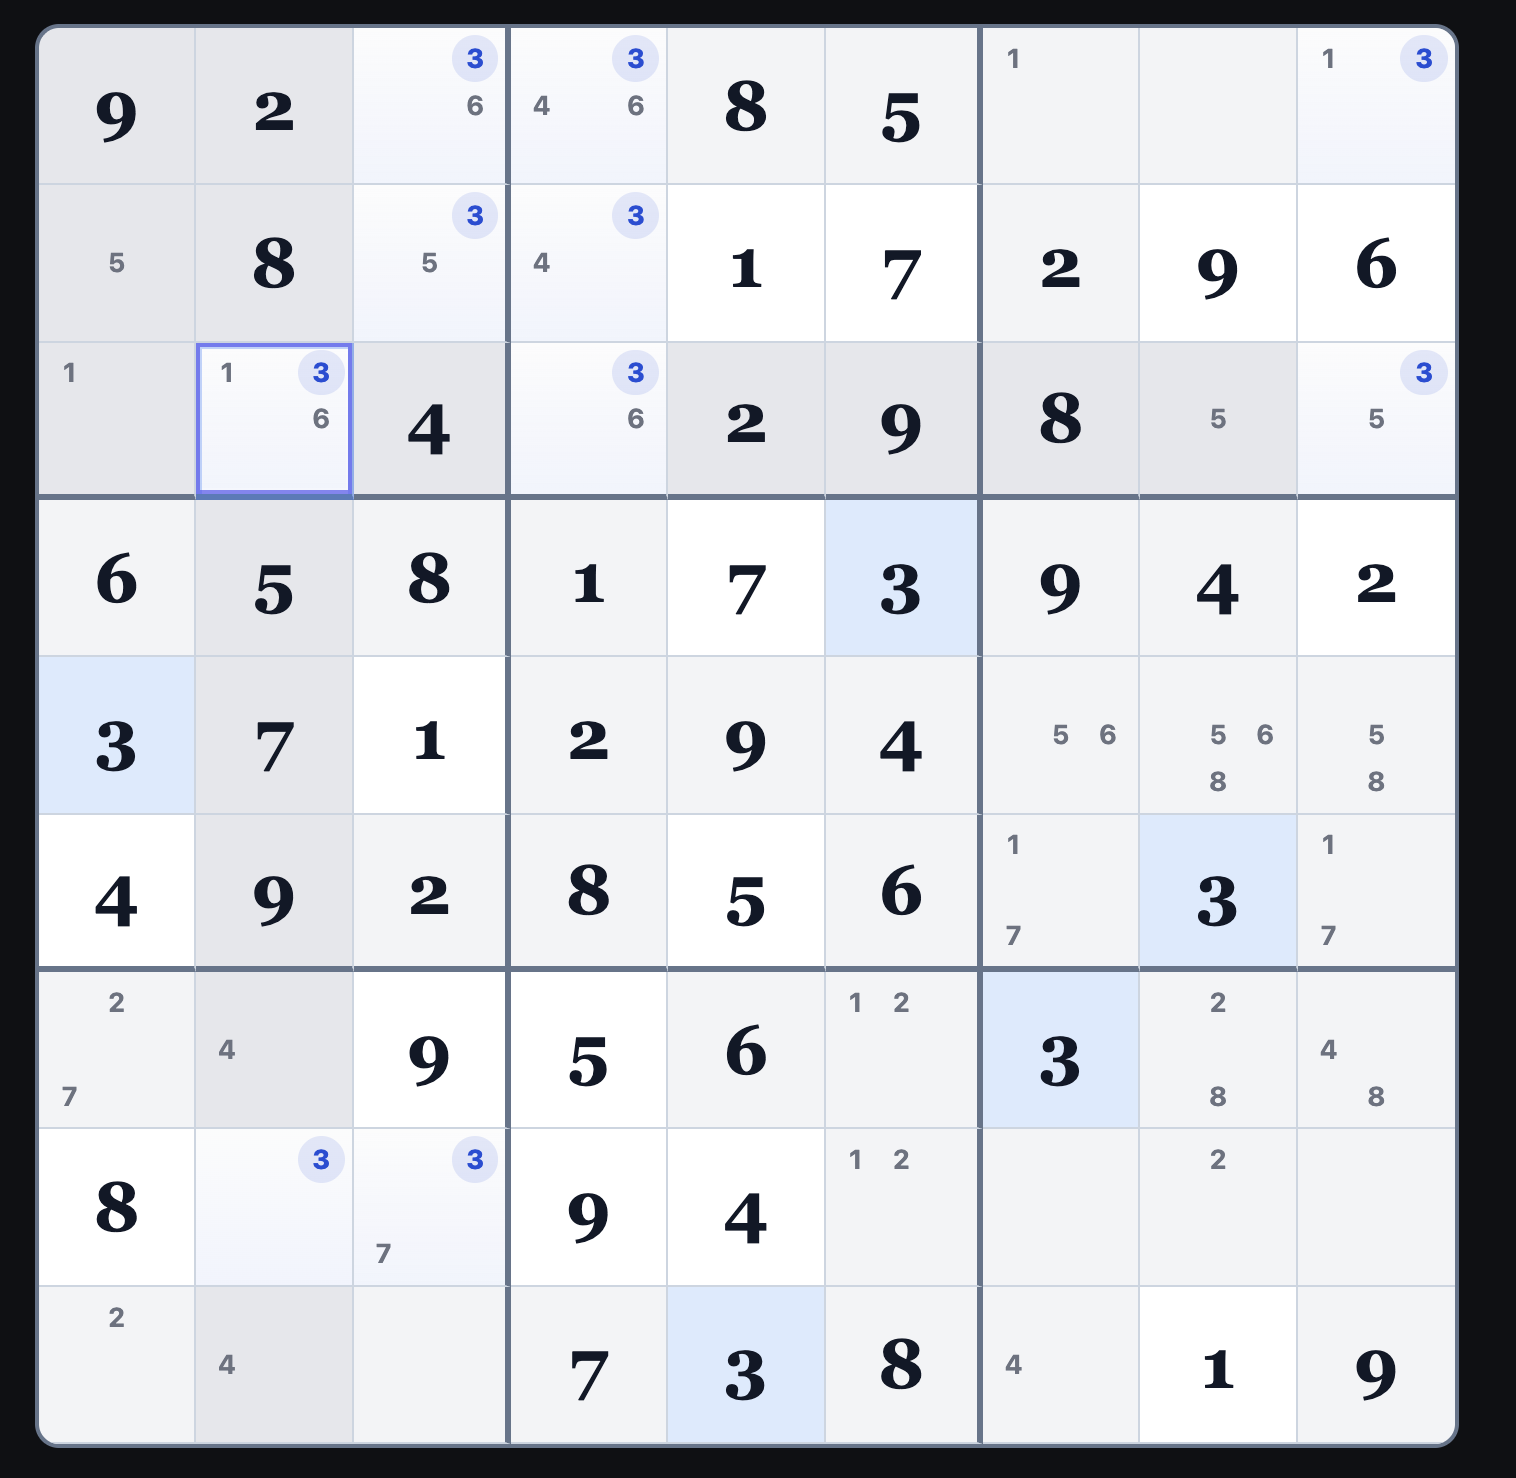
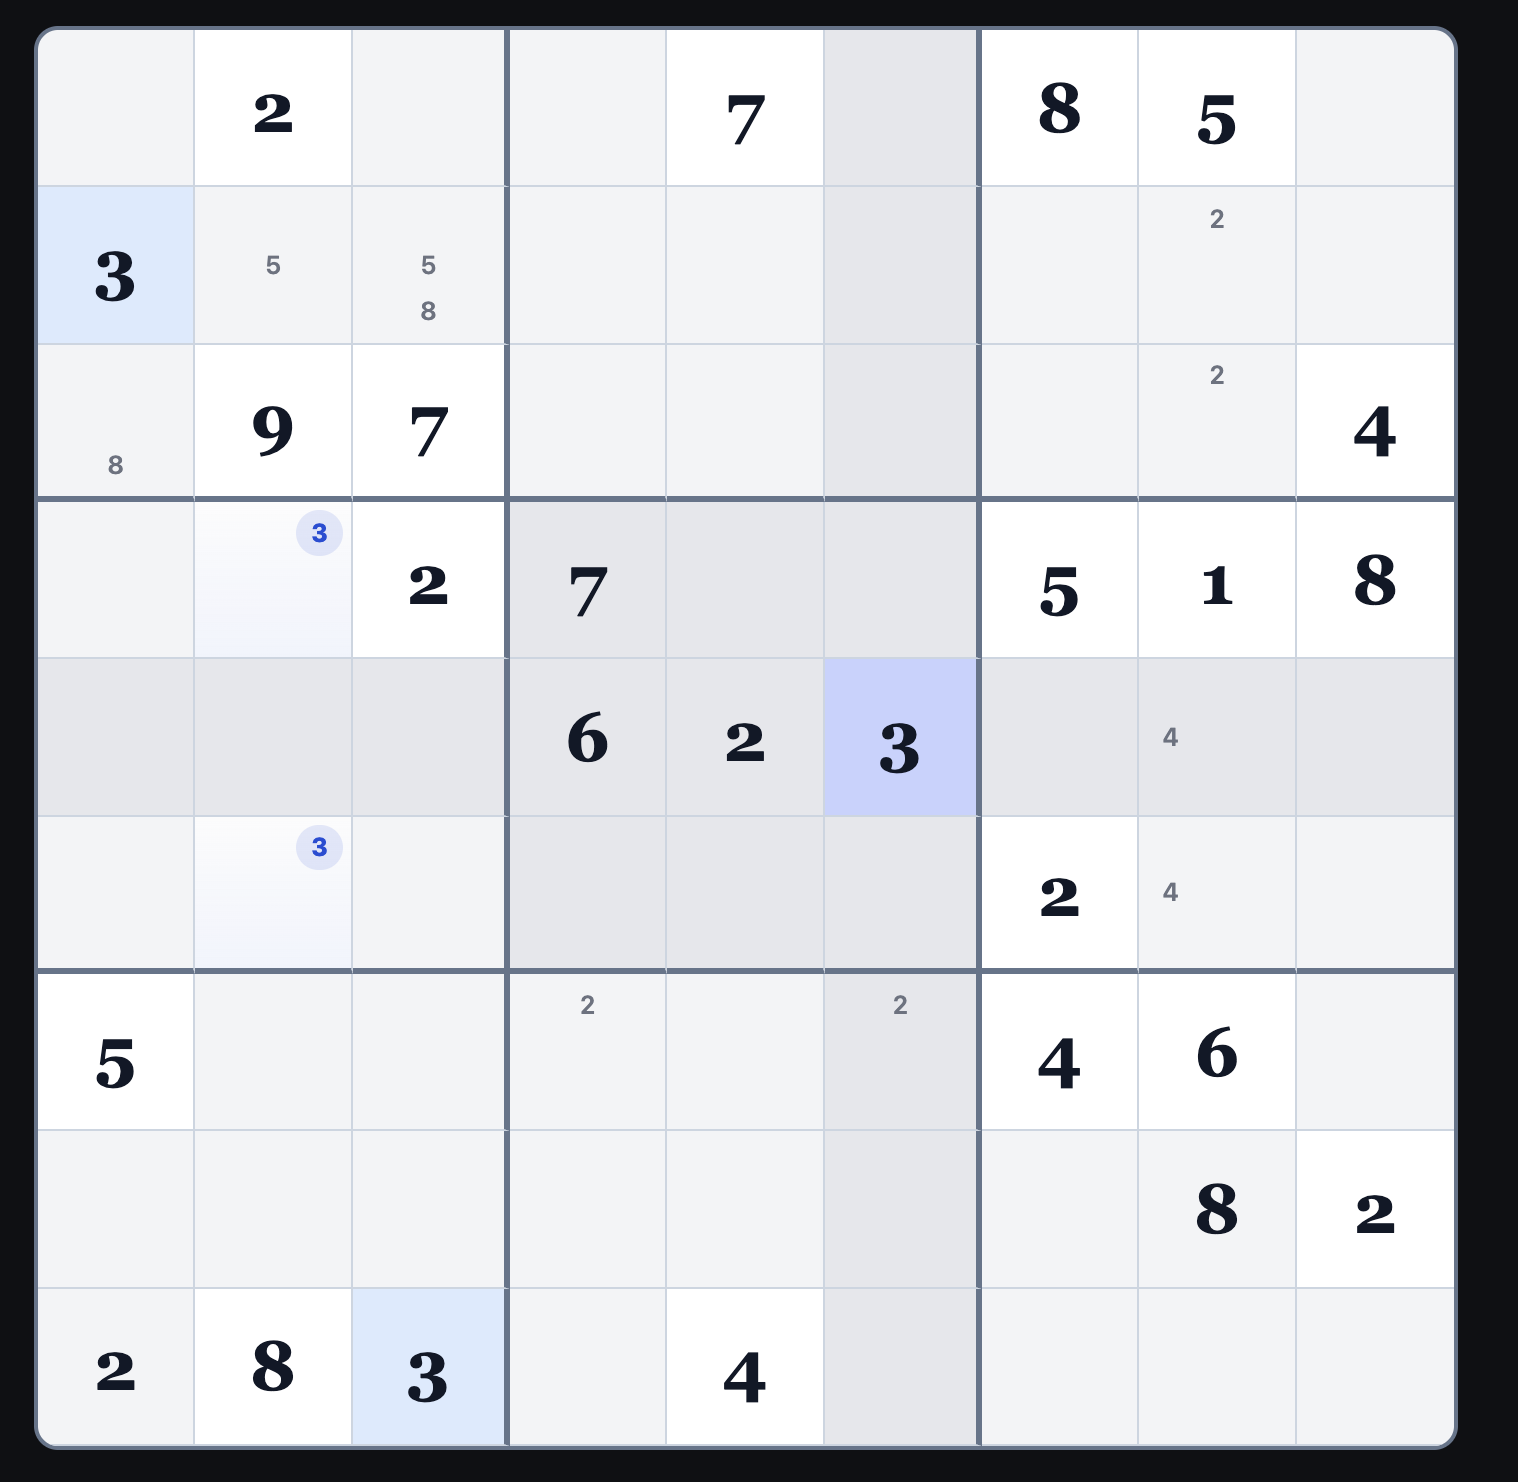
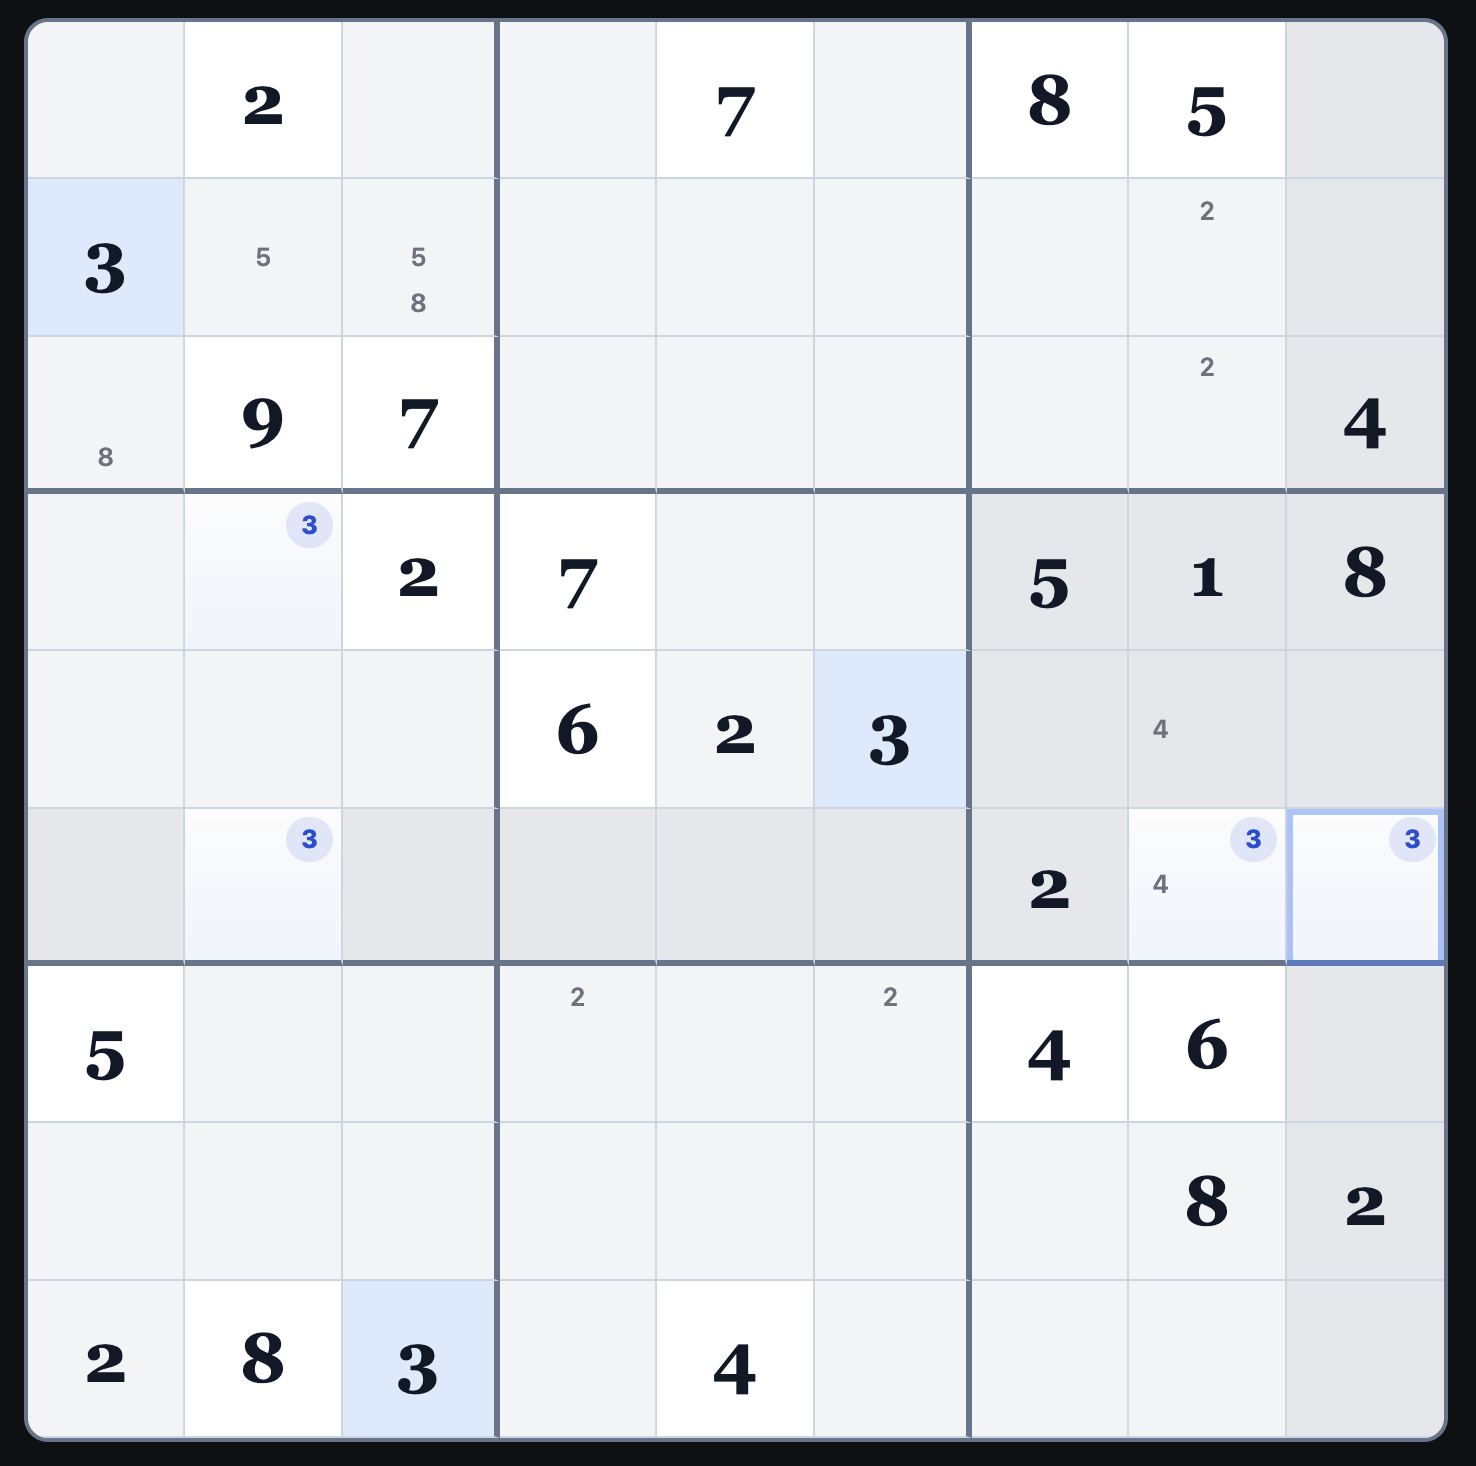
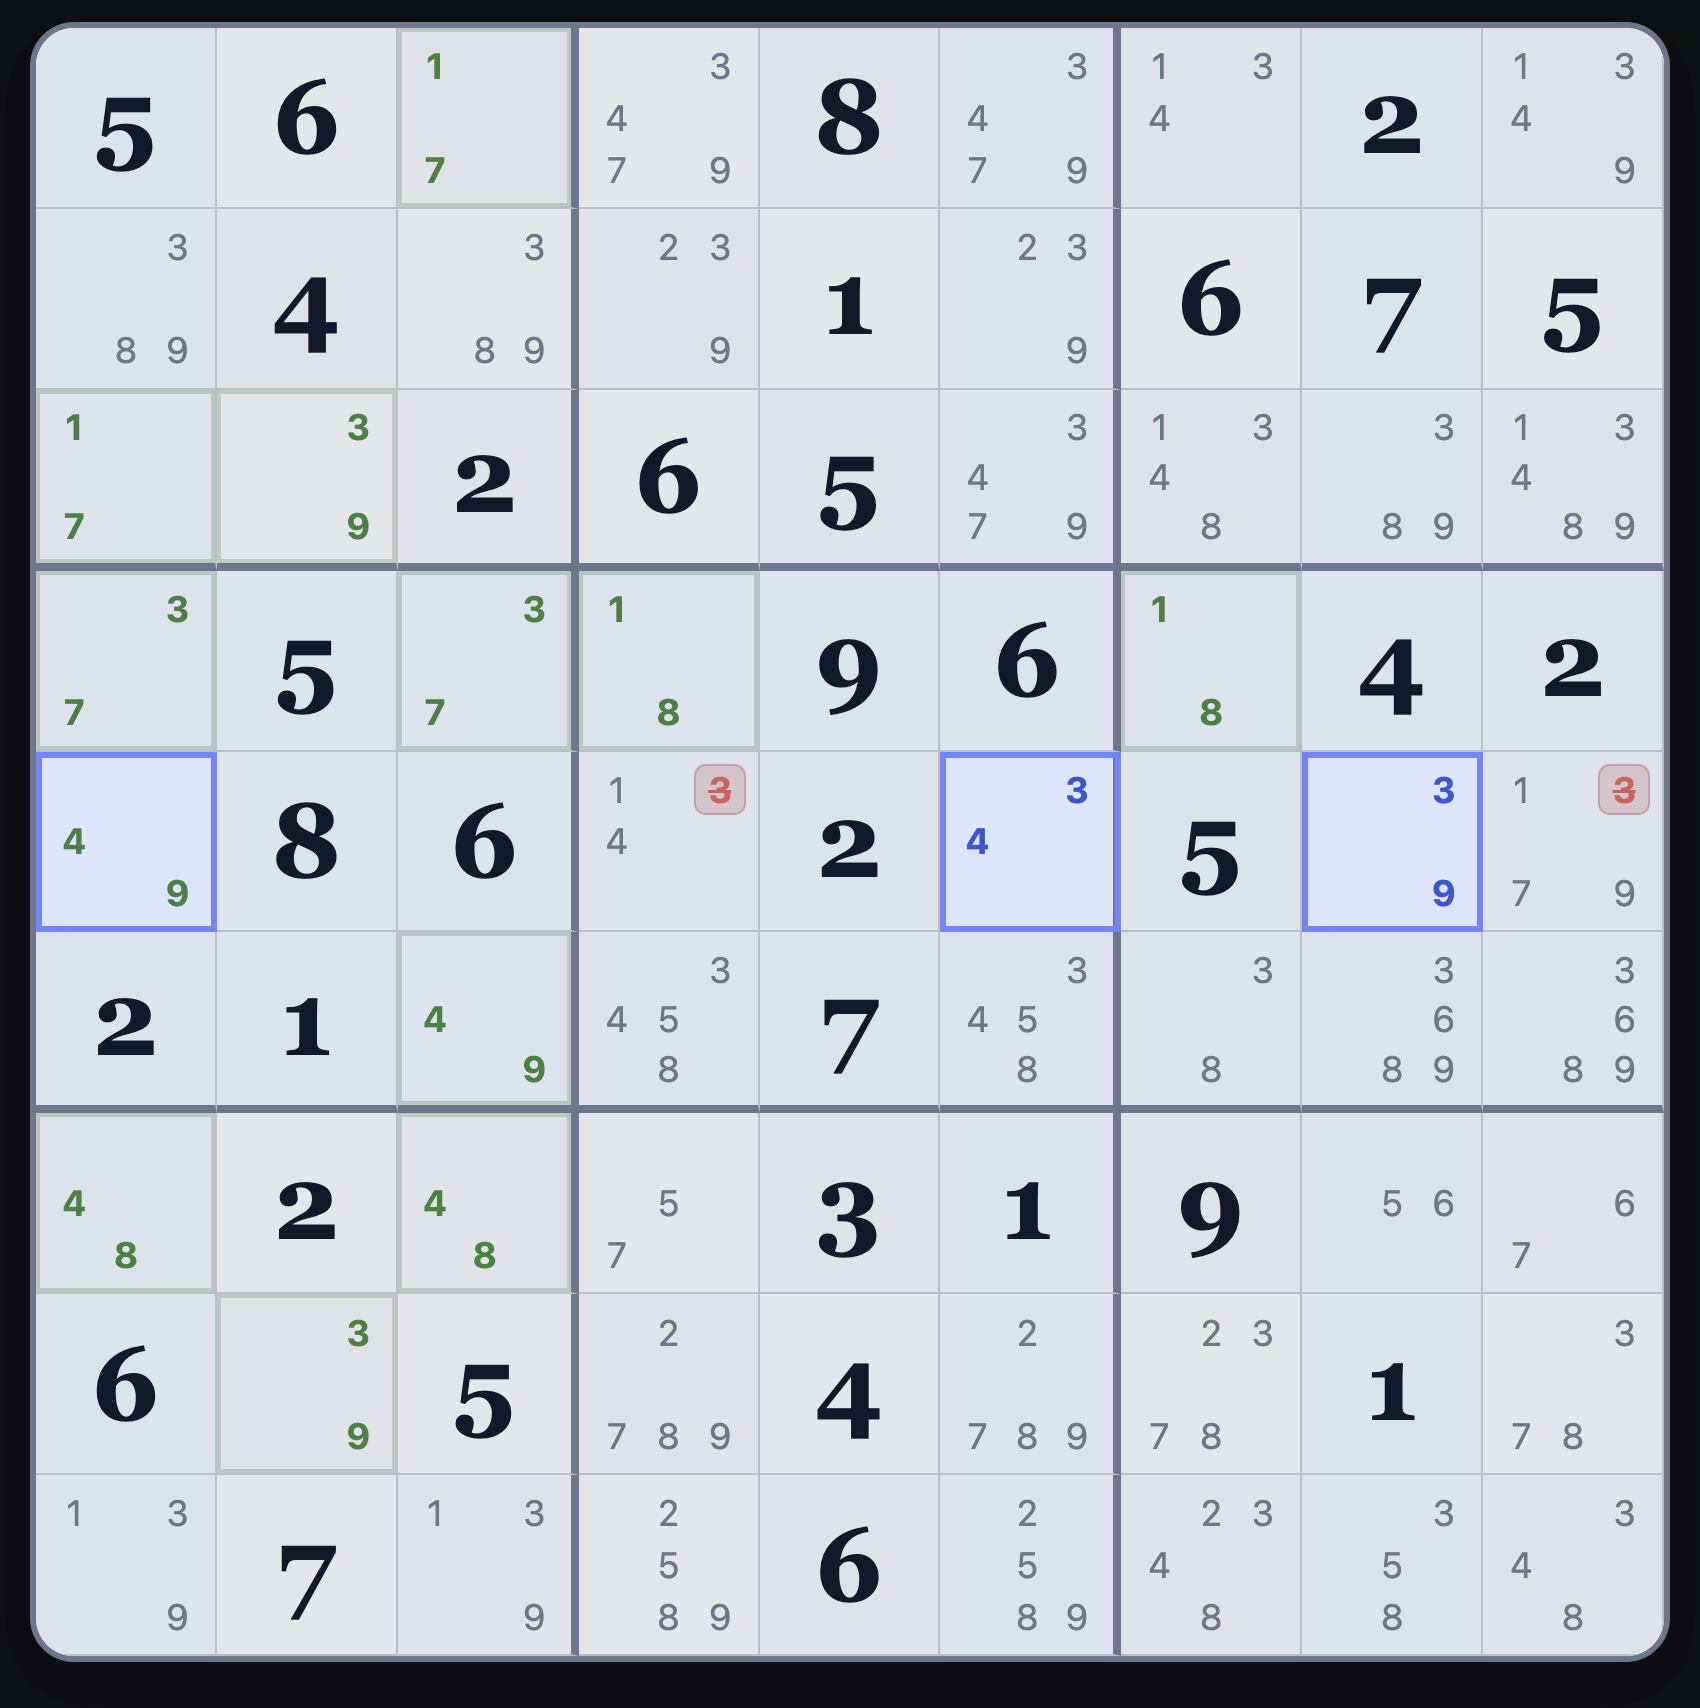
Constraint introduced: The 3 placed in r5c5 restricts the remaining 3s in block 6 to row 6.
Constrained Pair: In block 6, the 3s are limited to two cells in row 6.
Follow the Pointing Pairs!
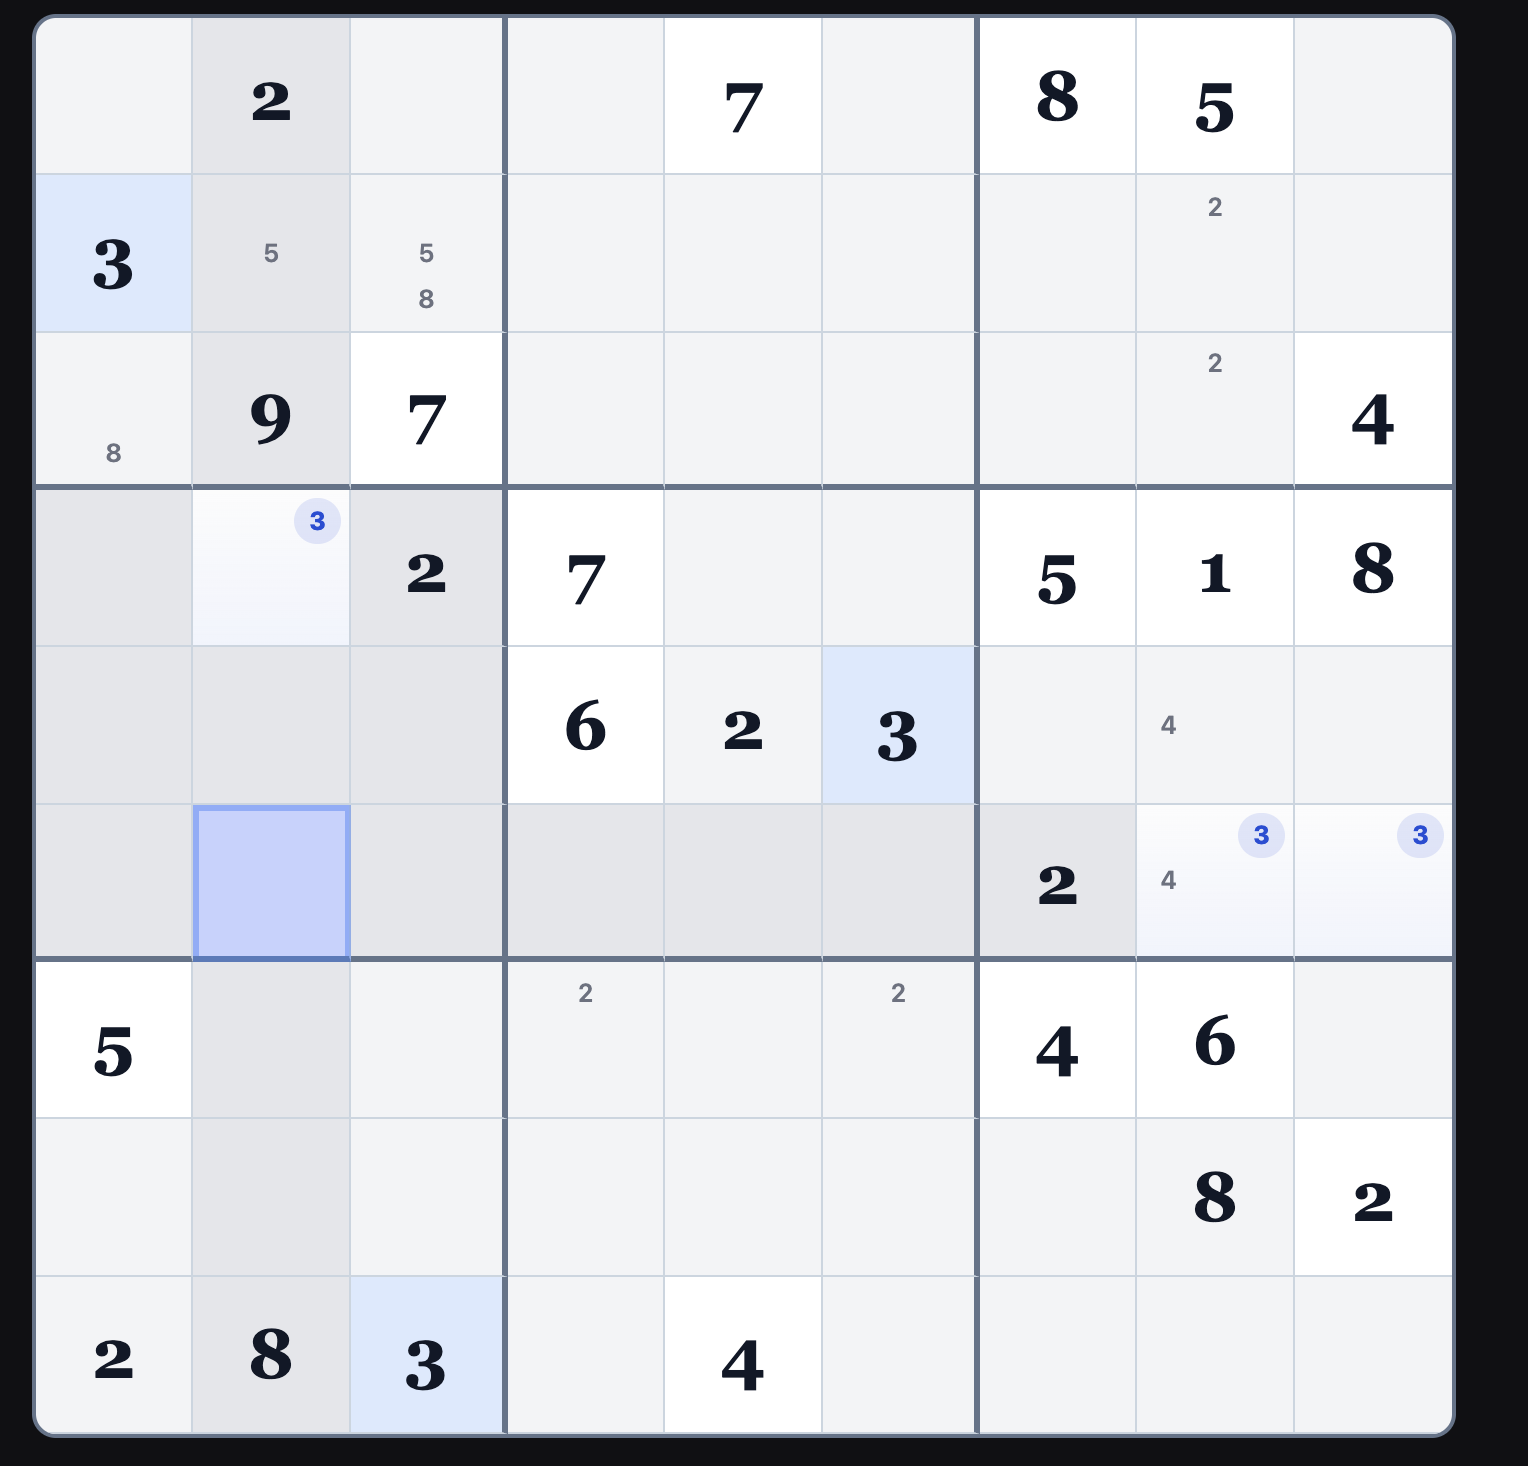
Pointing Pair: Because both 3s in block 6 lie in row 6, no other 3s can appear in that row outside the block.
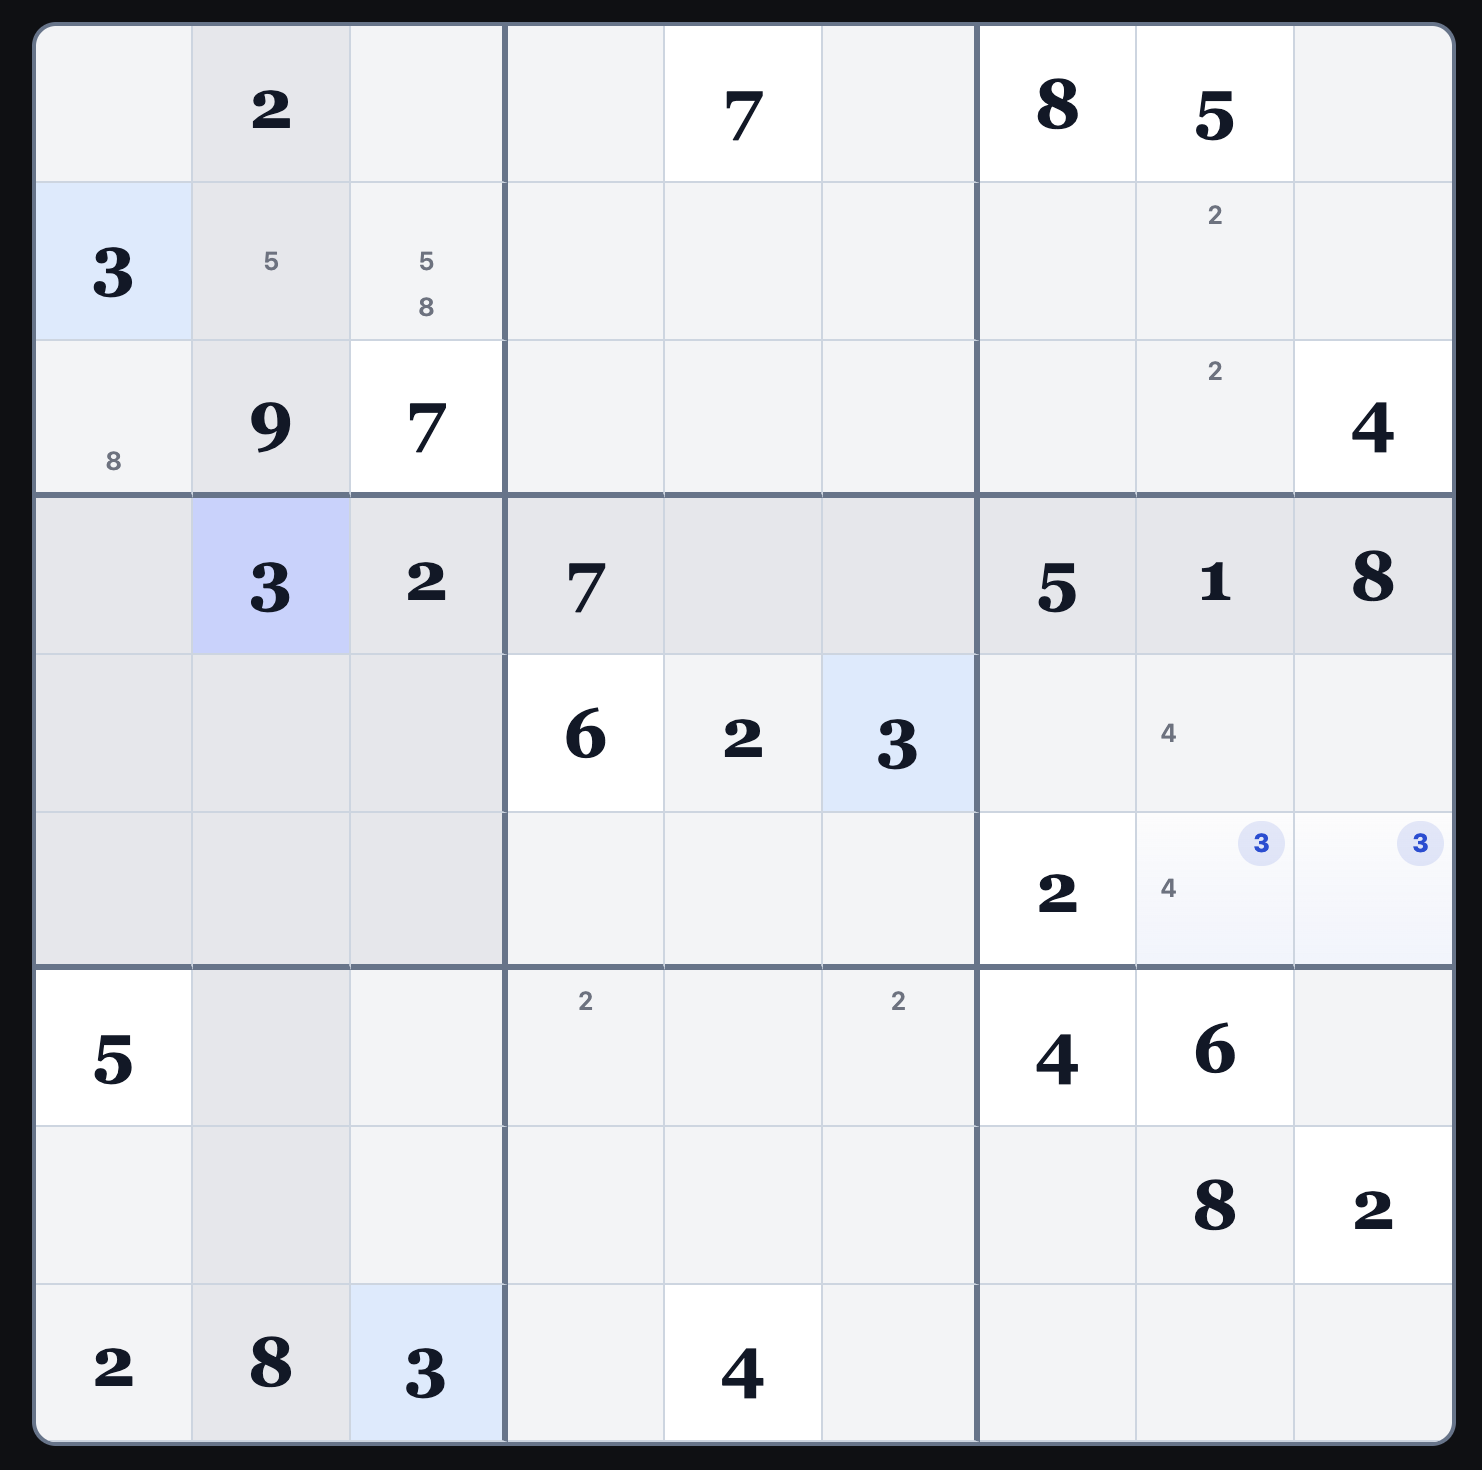
Result: With row 6 cleared of other 3s, the only remaining position for 3 in block 4 is r4c2.
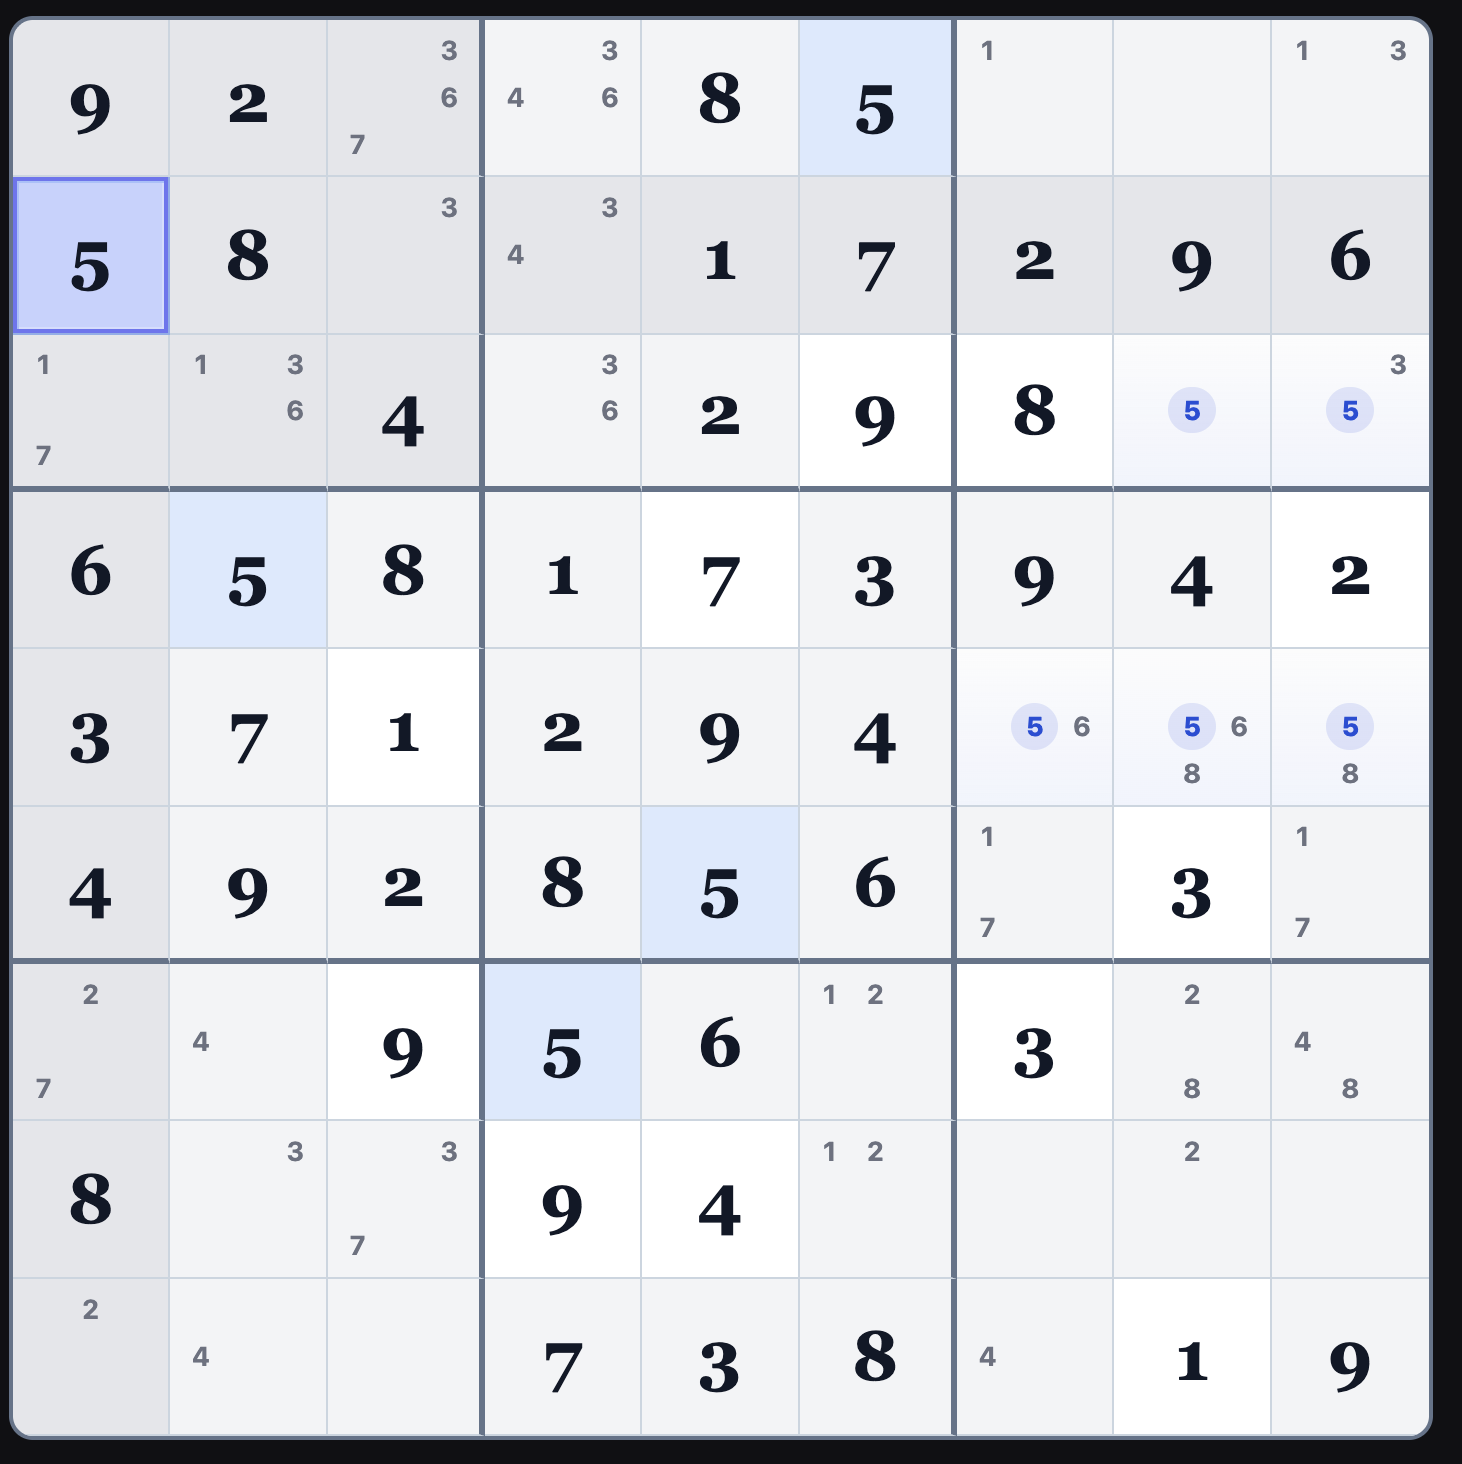
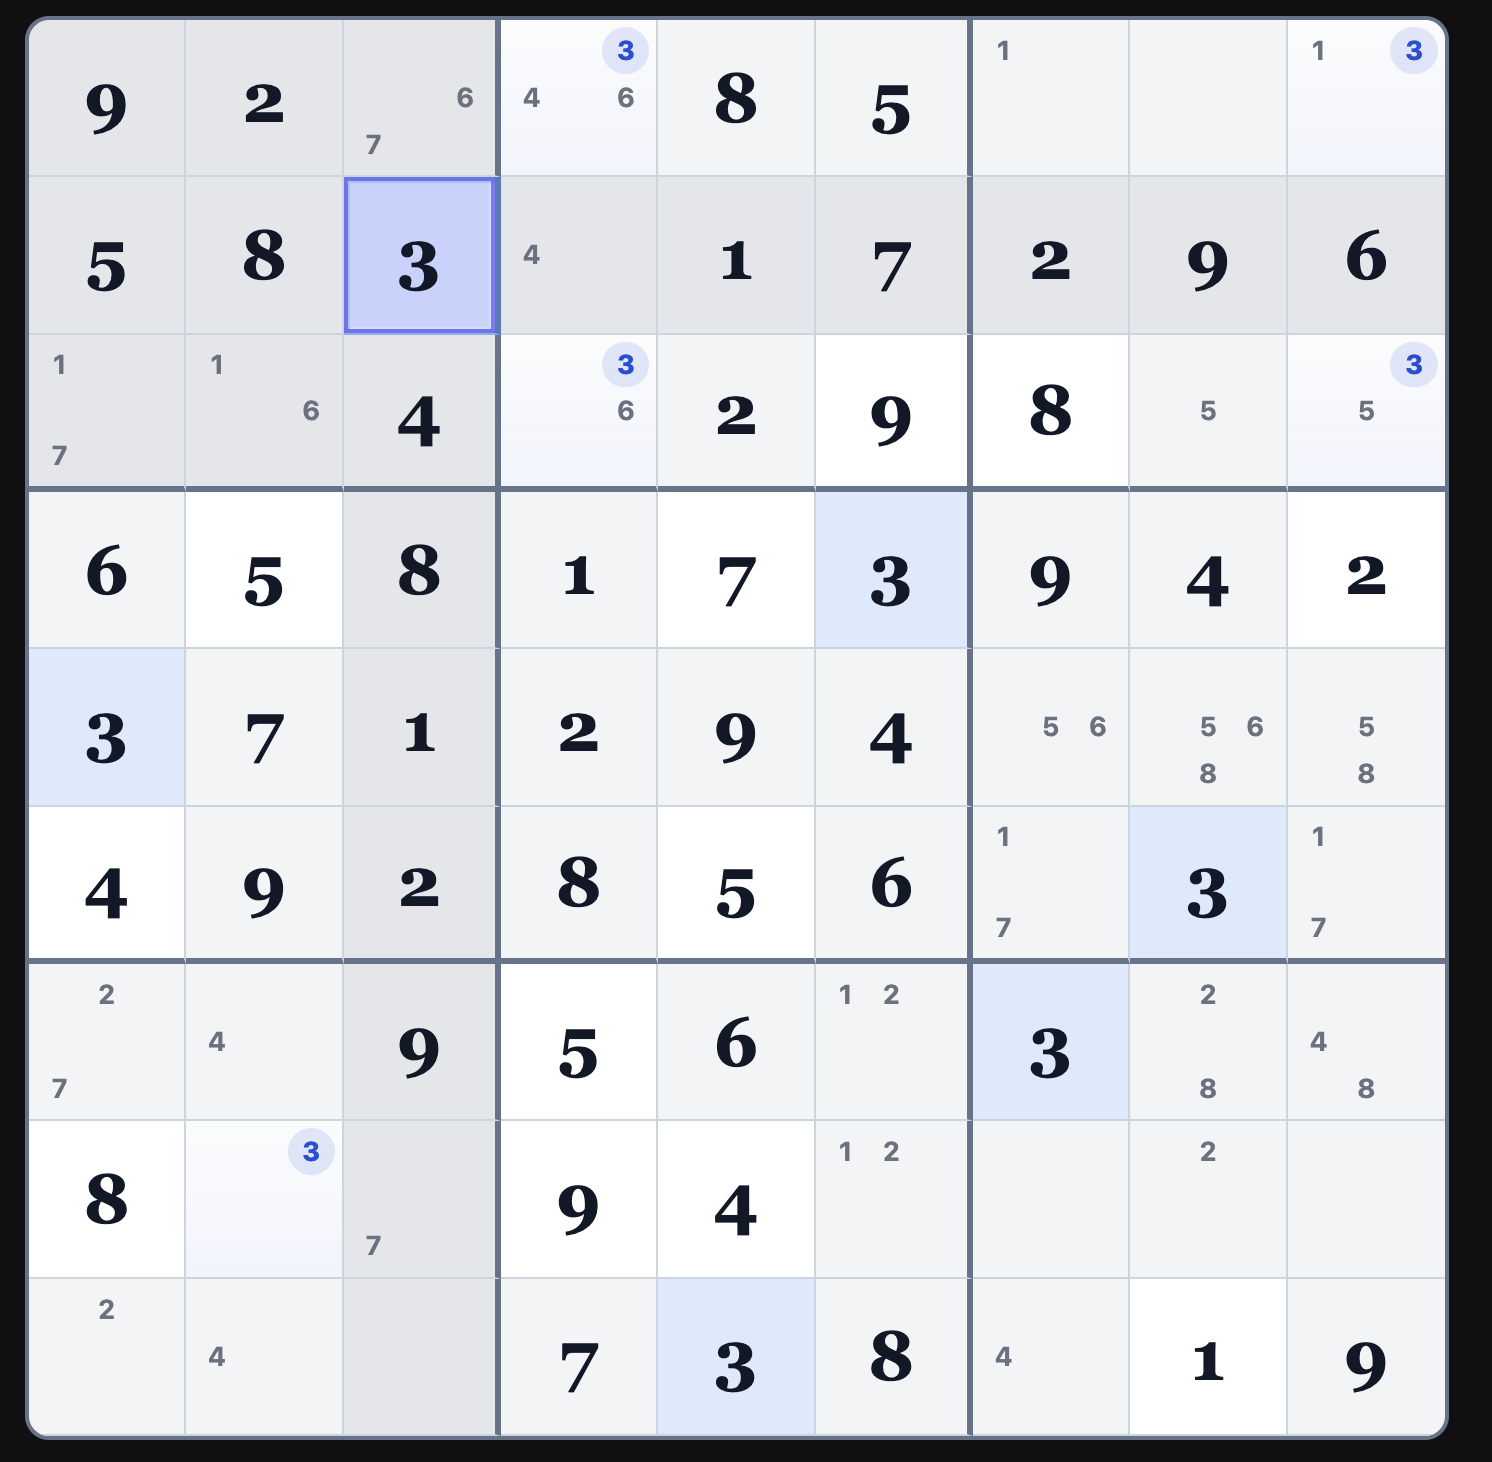
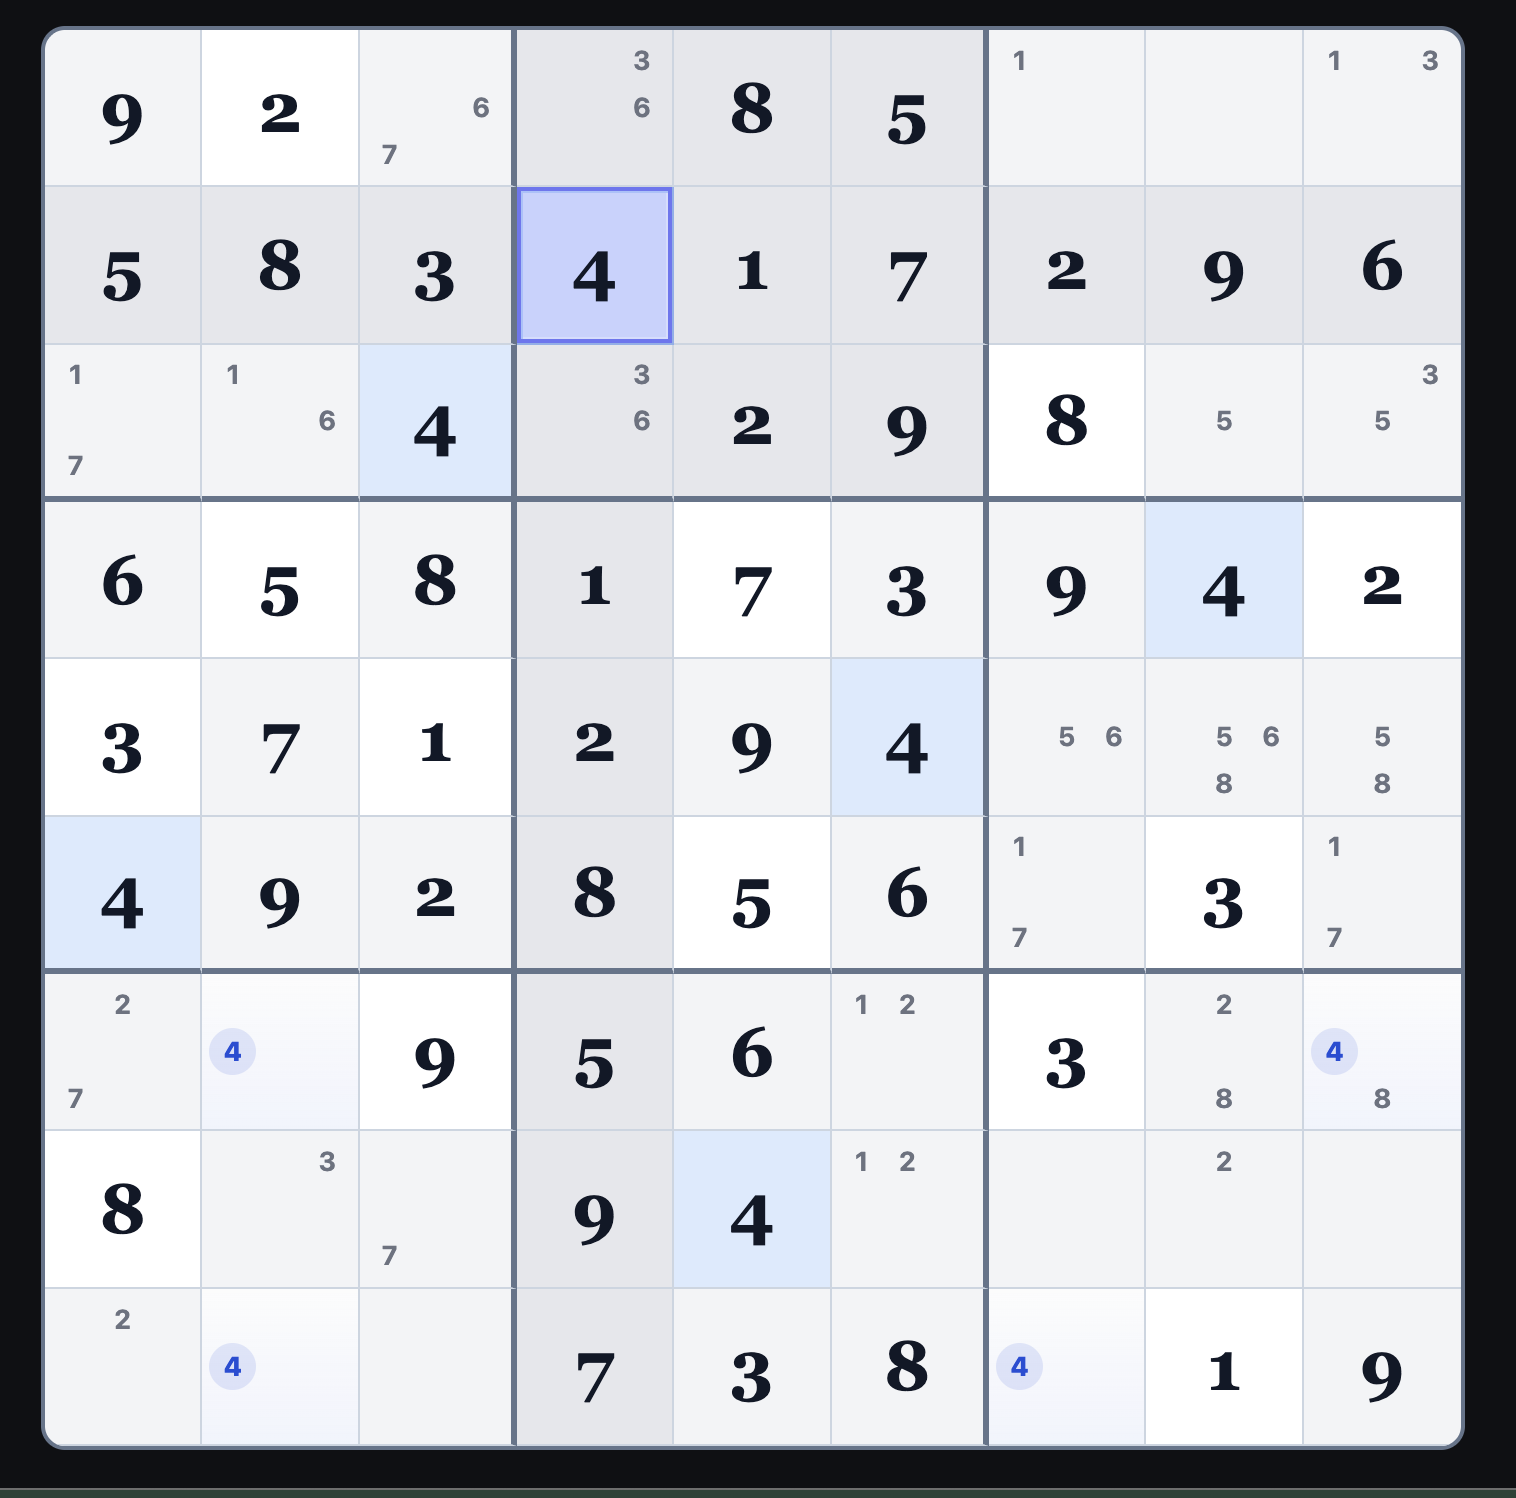
Pointing Pairs (and Pointing Triplets)
A pointing pair occurs when all the possible spots for a number within a box lie in a single row or column.
That means the number must go somewhere along that line inside the box, so you can remove that number
from the rest of that row or column outside the box.
This idea also works with three cells, called a pointing triplet.
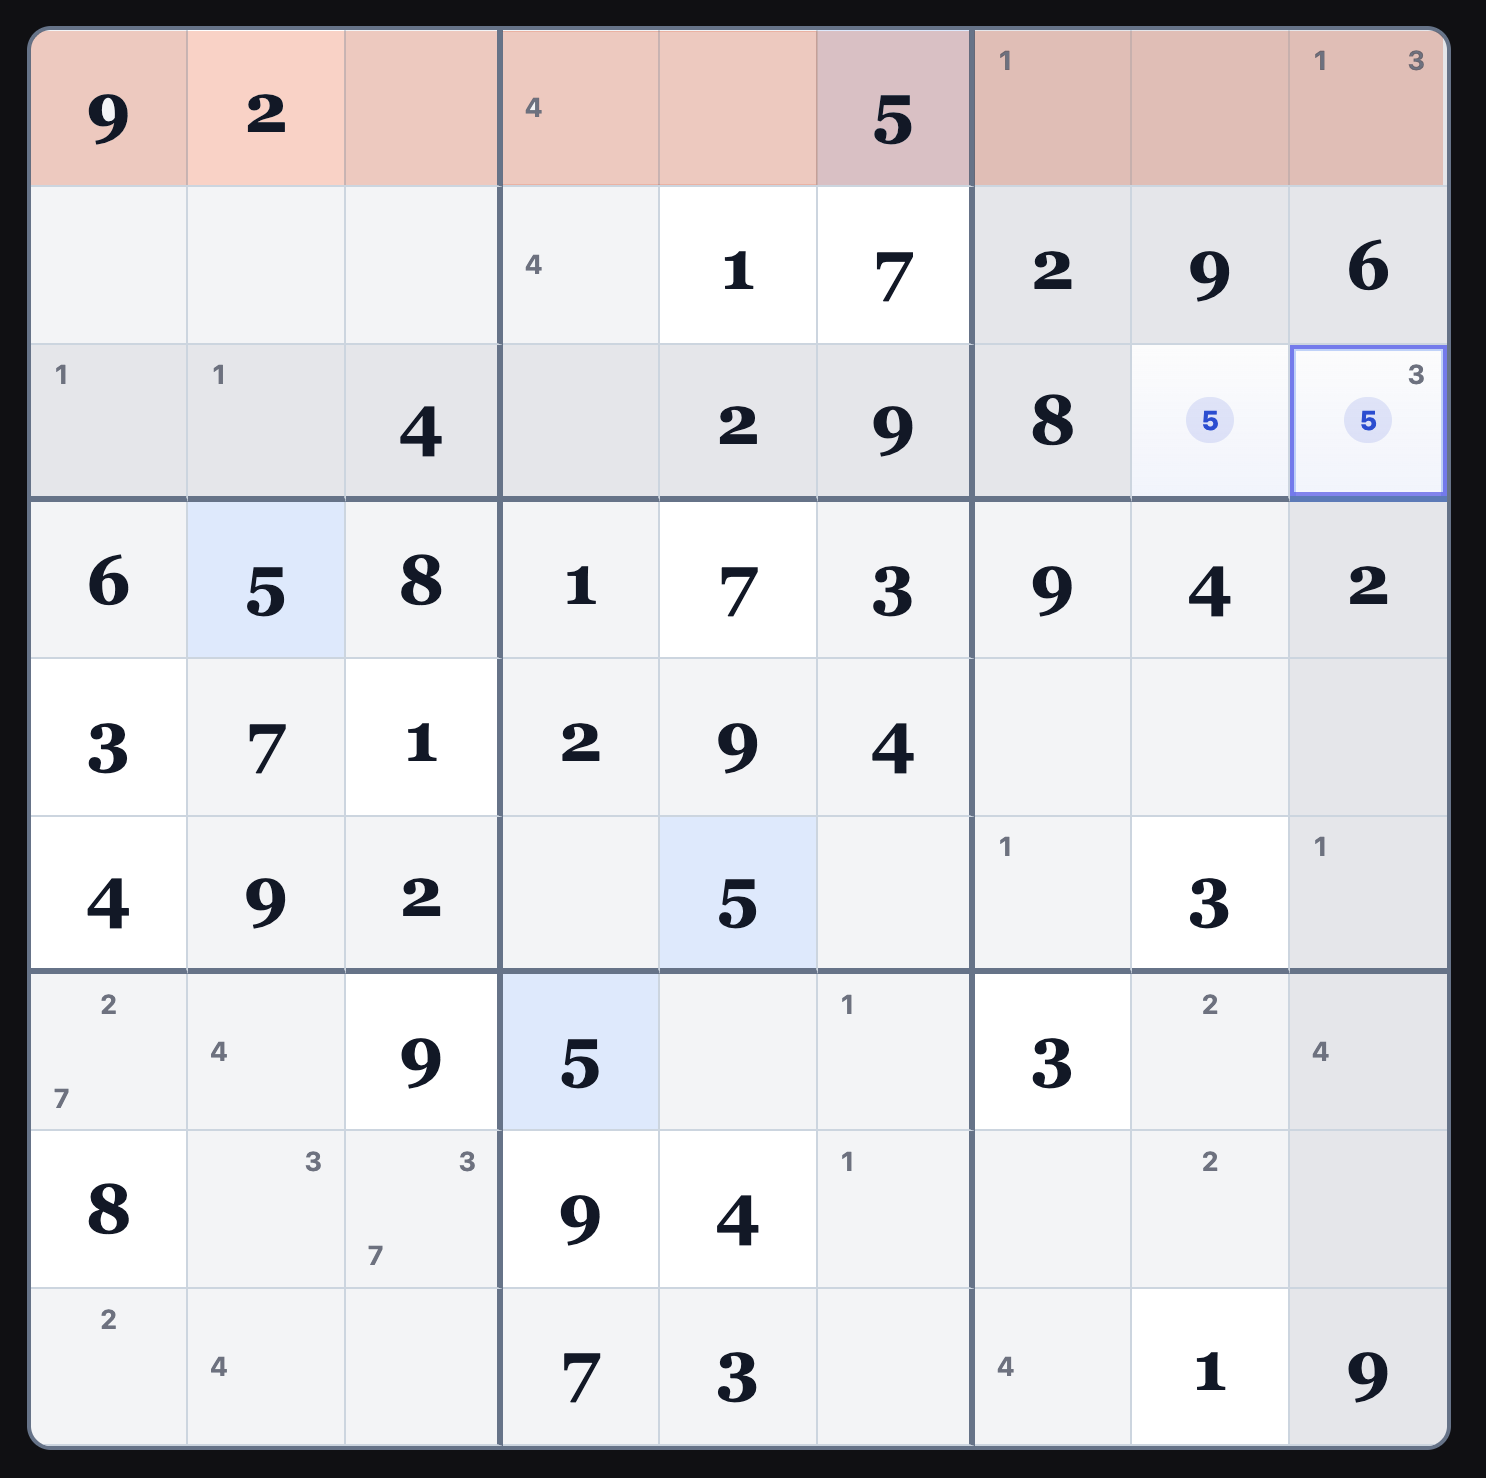
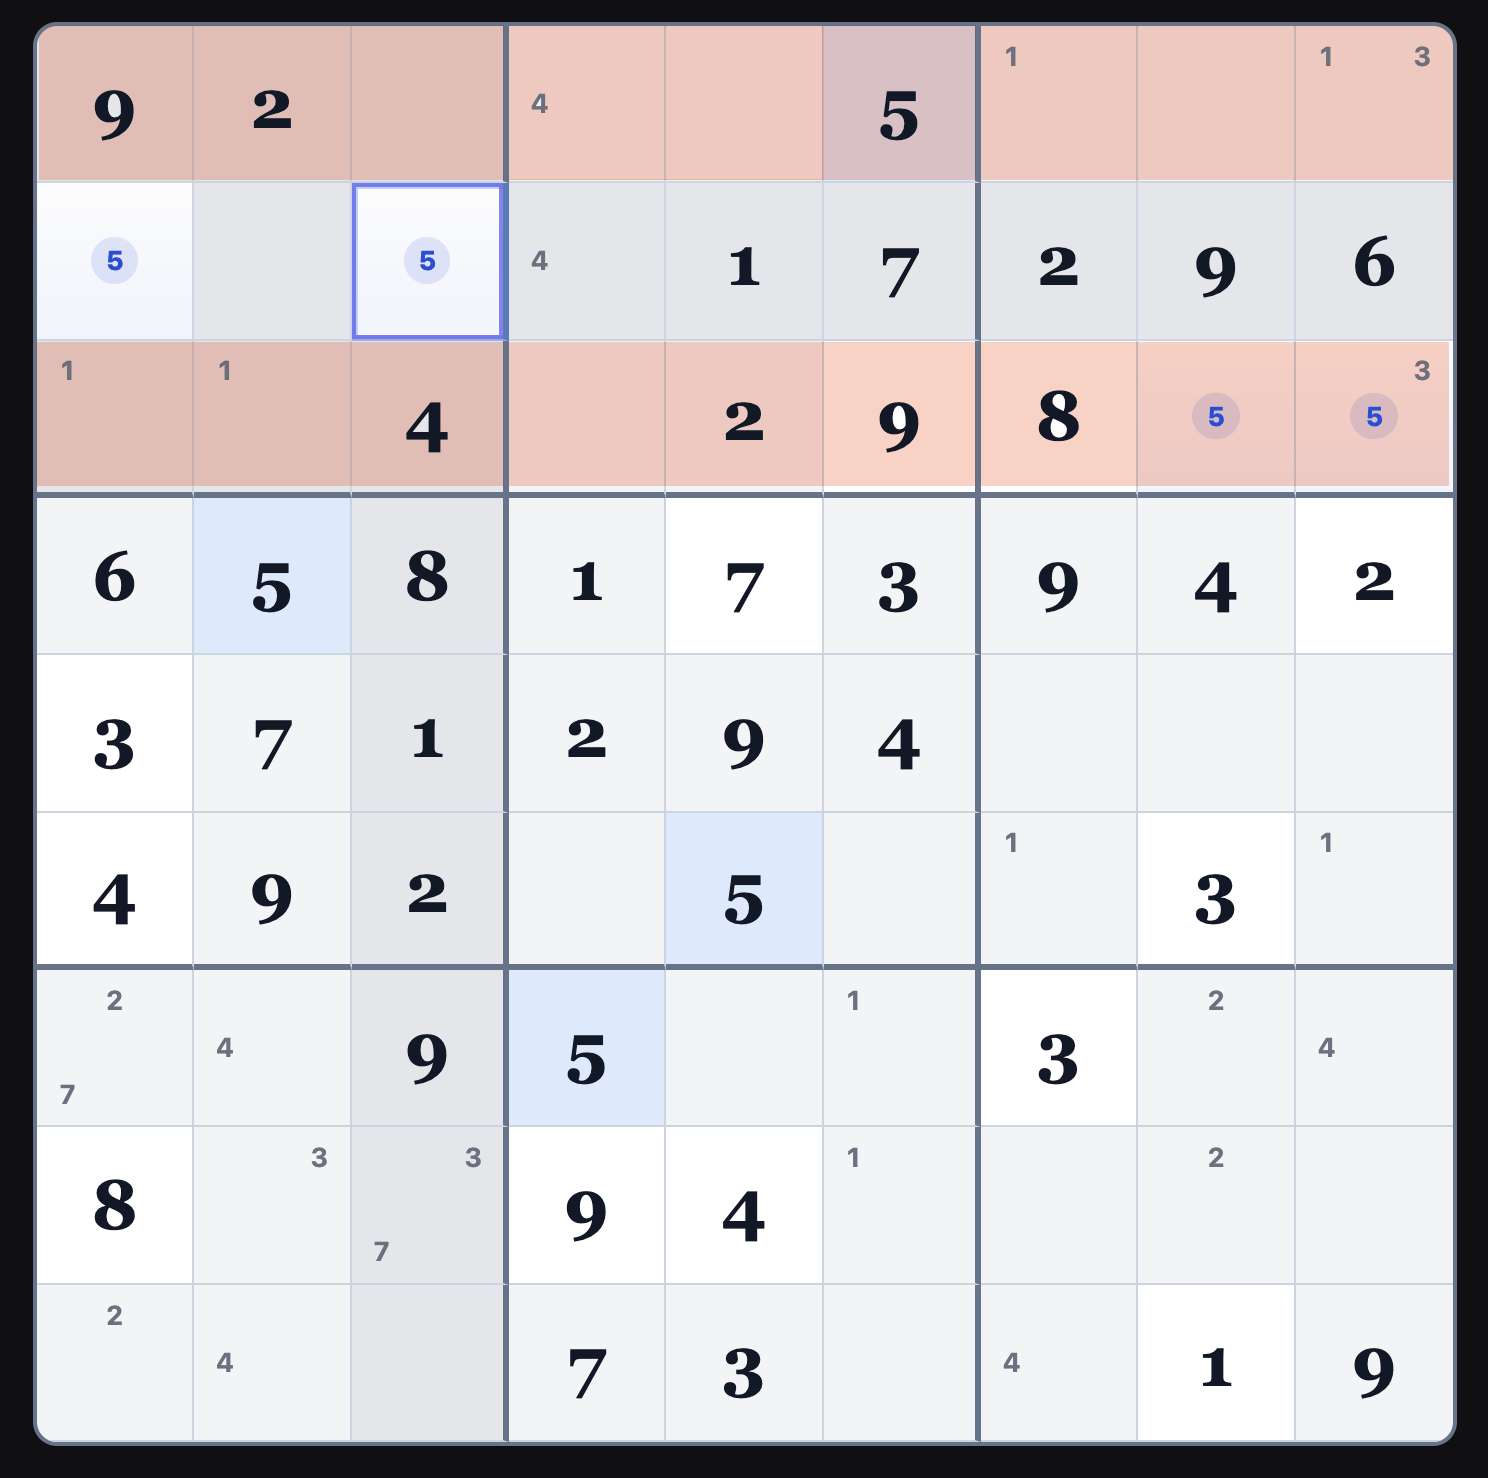
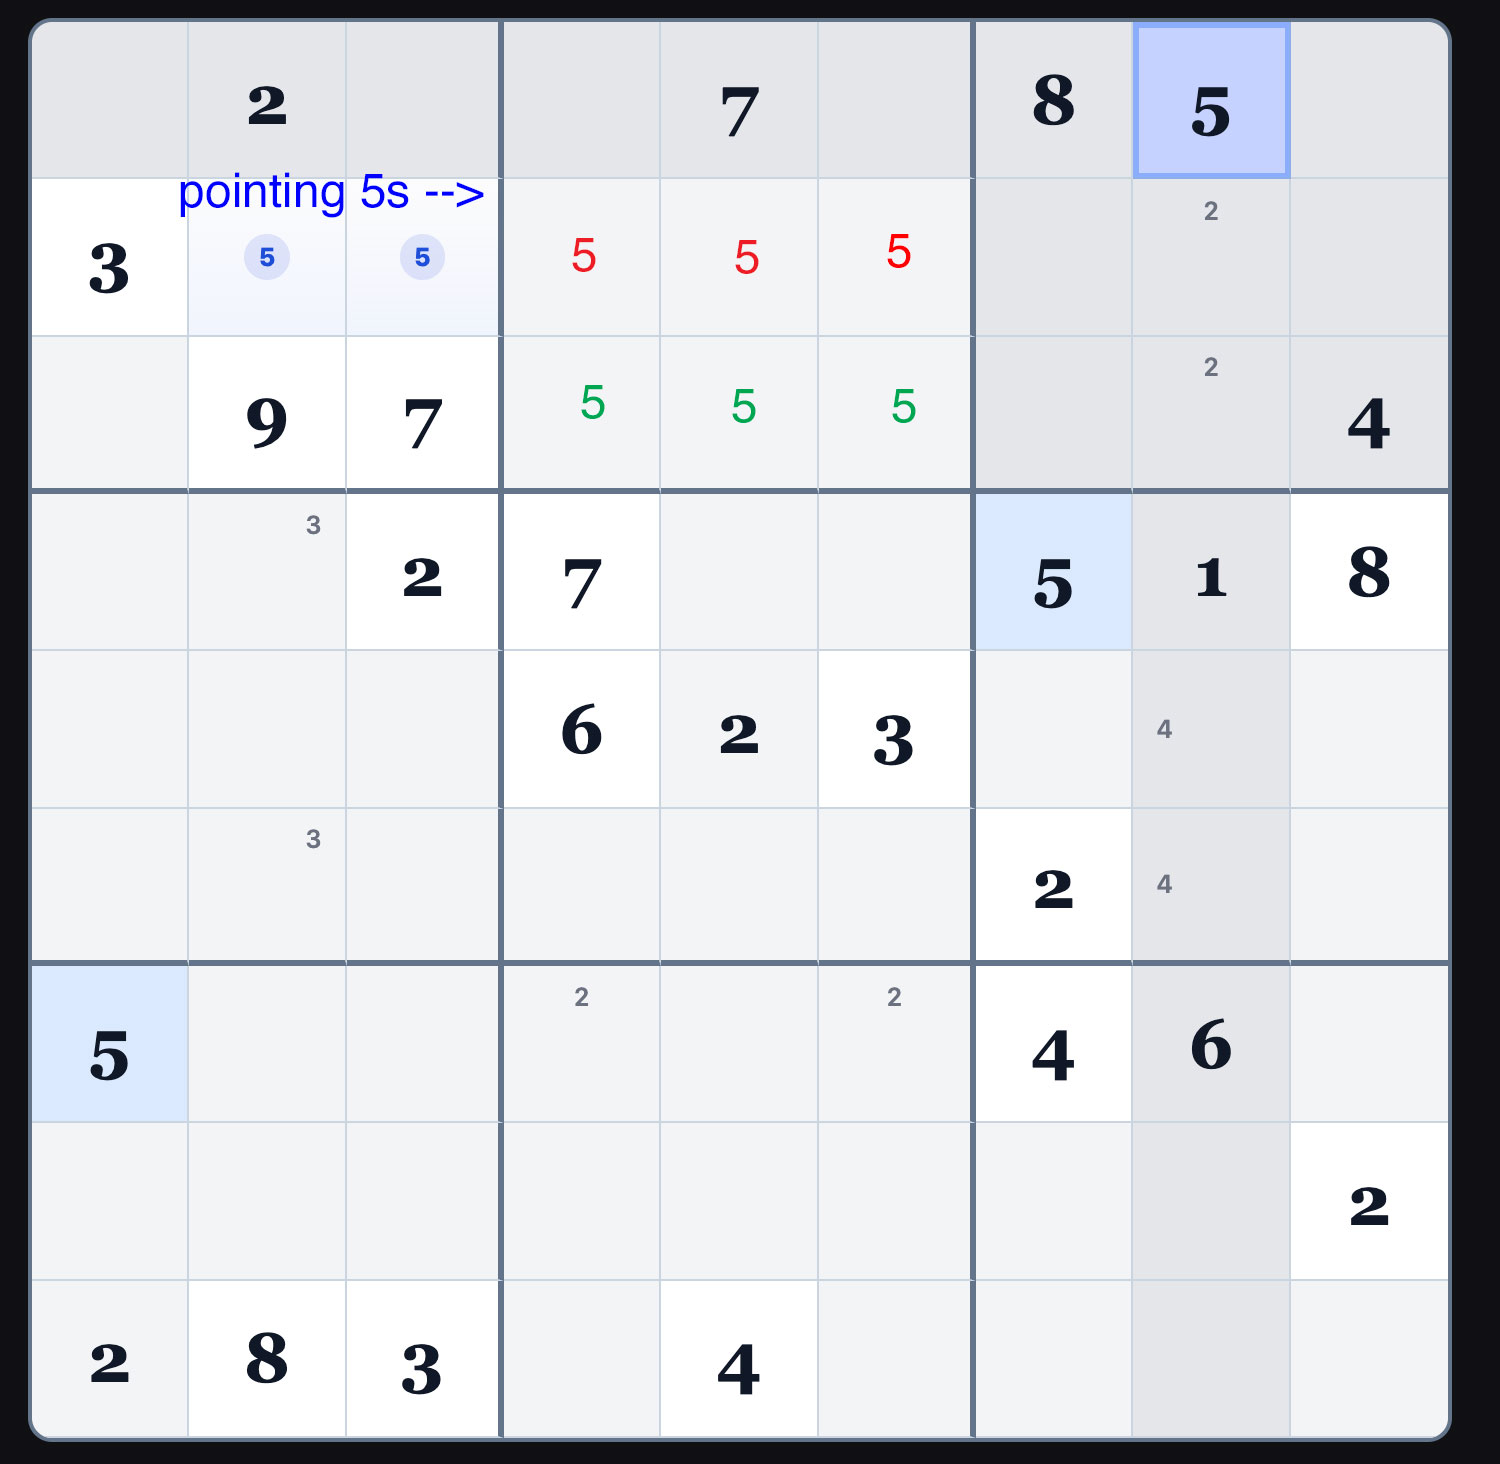
In this example, the 5s in row 2, columns 2 and 3 (r2c2 and r2c3) contain 5s. Therefore, no more 5s are
possible in row 2. Since there is a 5 in row 1 column 7 (r1c7), 5s are only possible in r3c4, r3c5 and r3c6.
Triplets
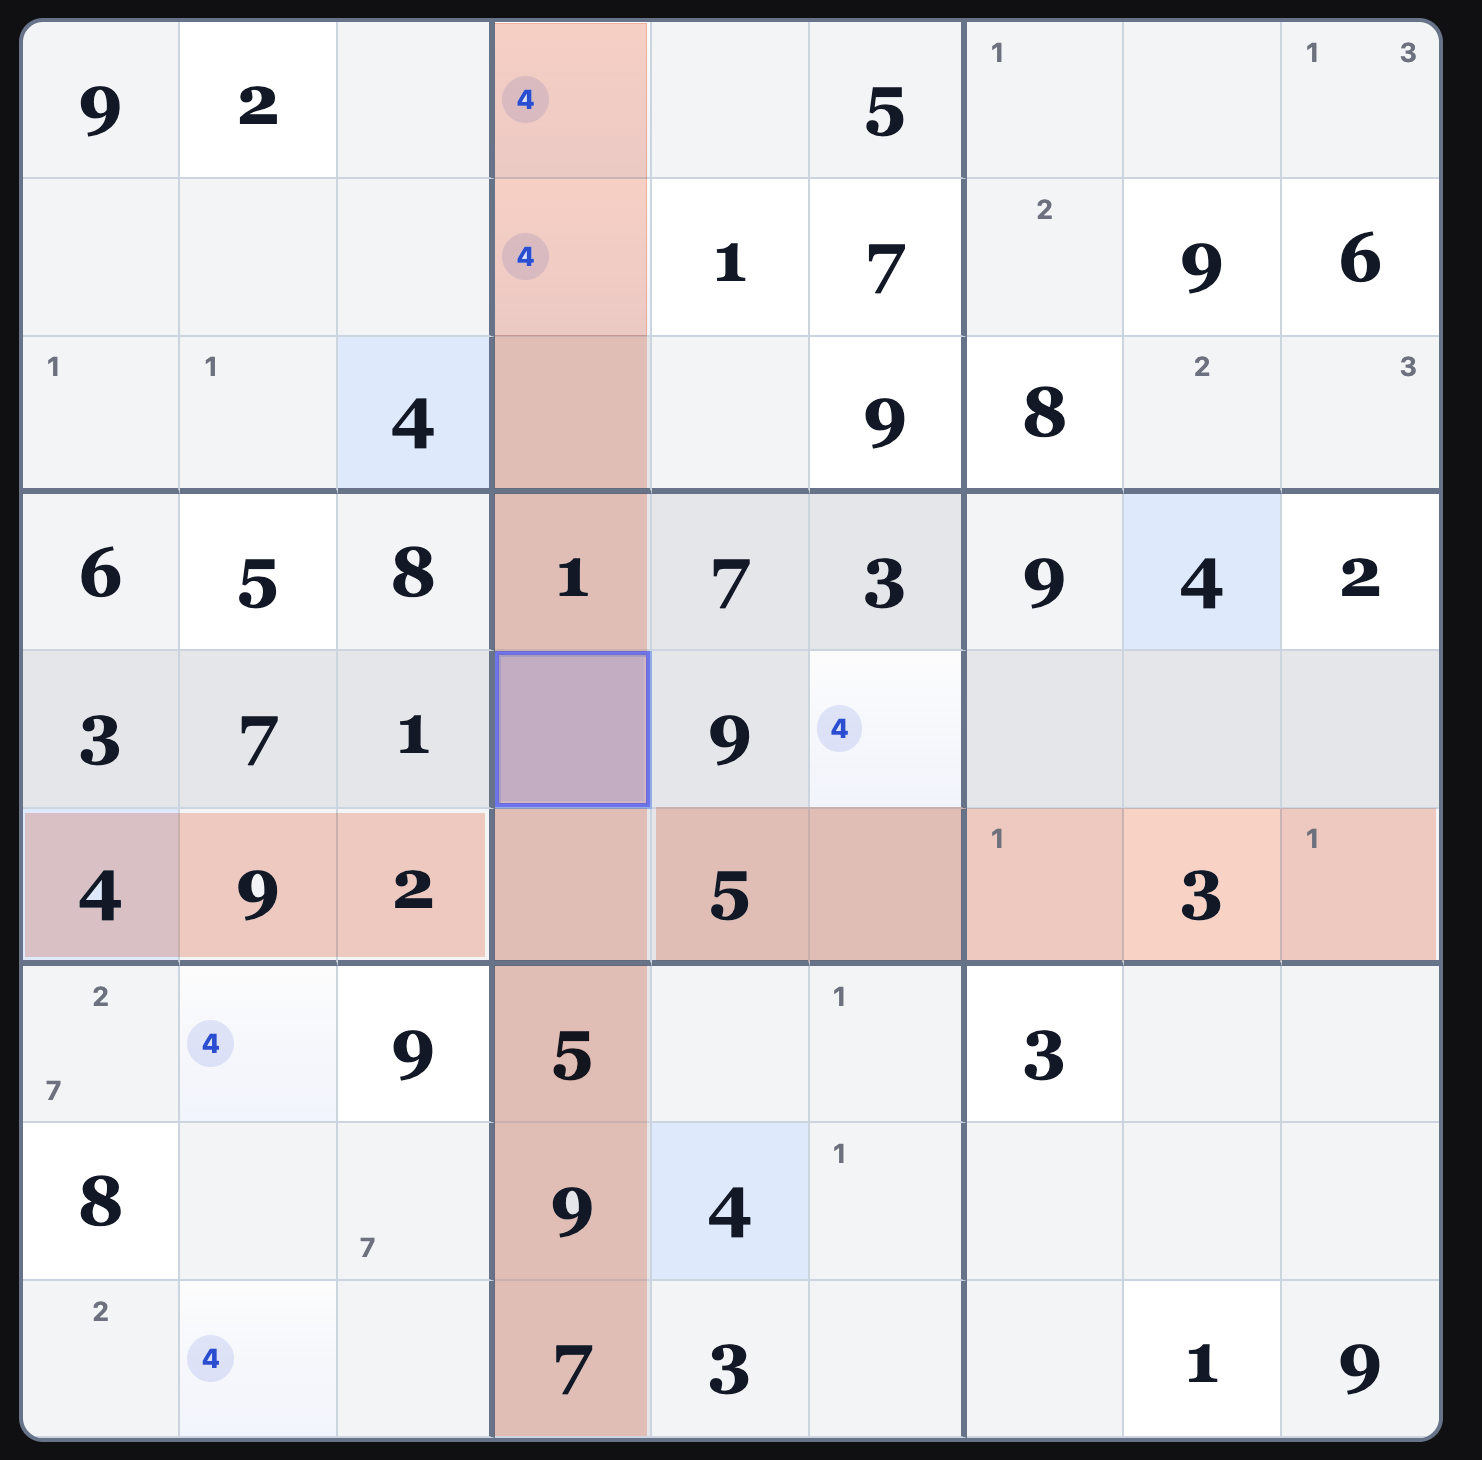
A triplet occurs when three squares in a row, column, or box are limited to the same three numbers.
Those numbers must go in those three squares in some order, so you can remove them from every other square in that unit.
Pairs (Naked and Hidden)
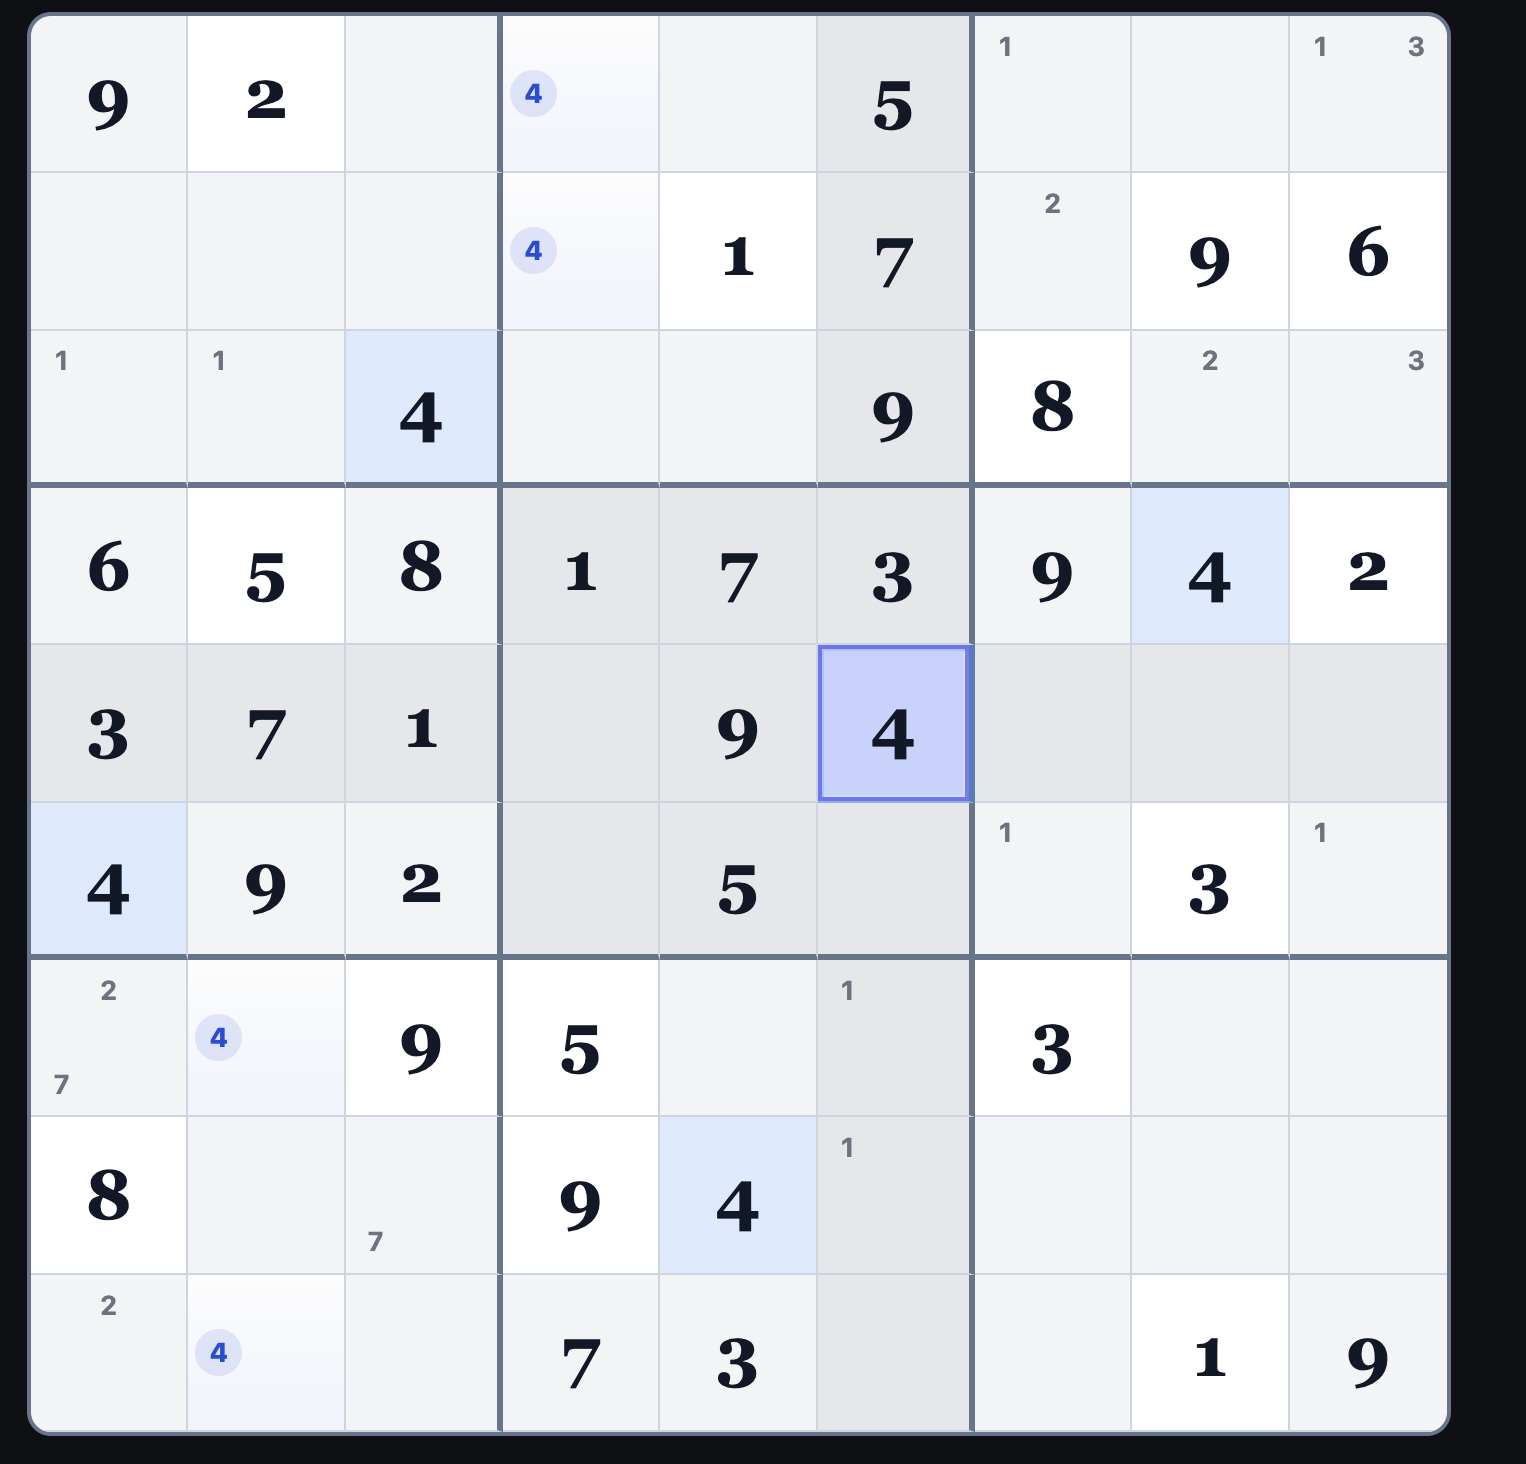
A pair is when two numbers are restricted to the same two squares within a row, column, or box.
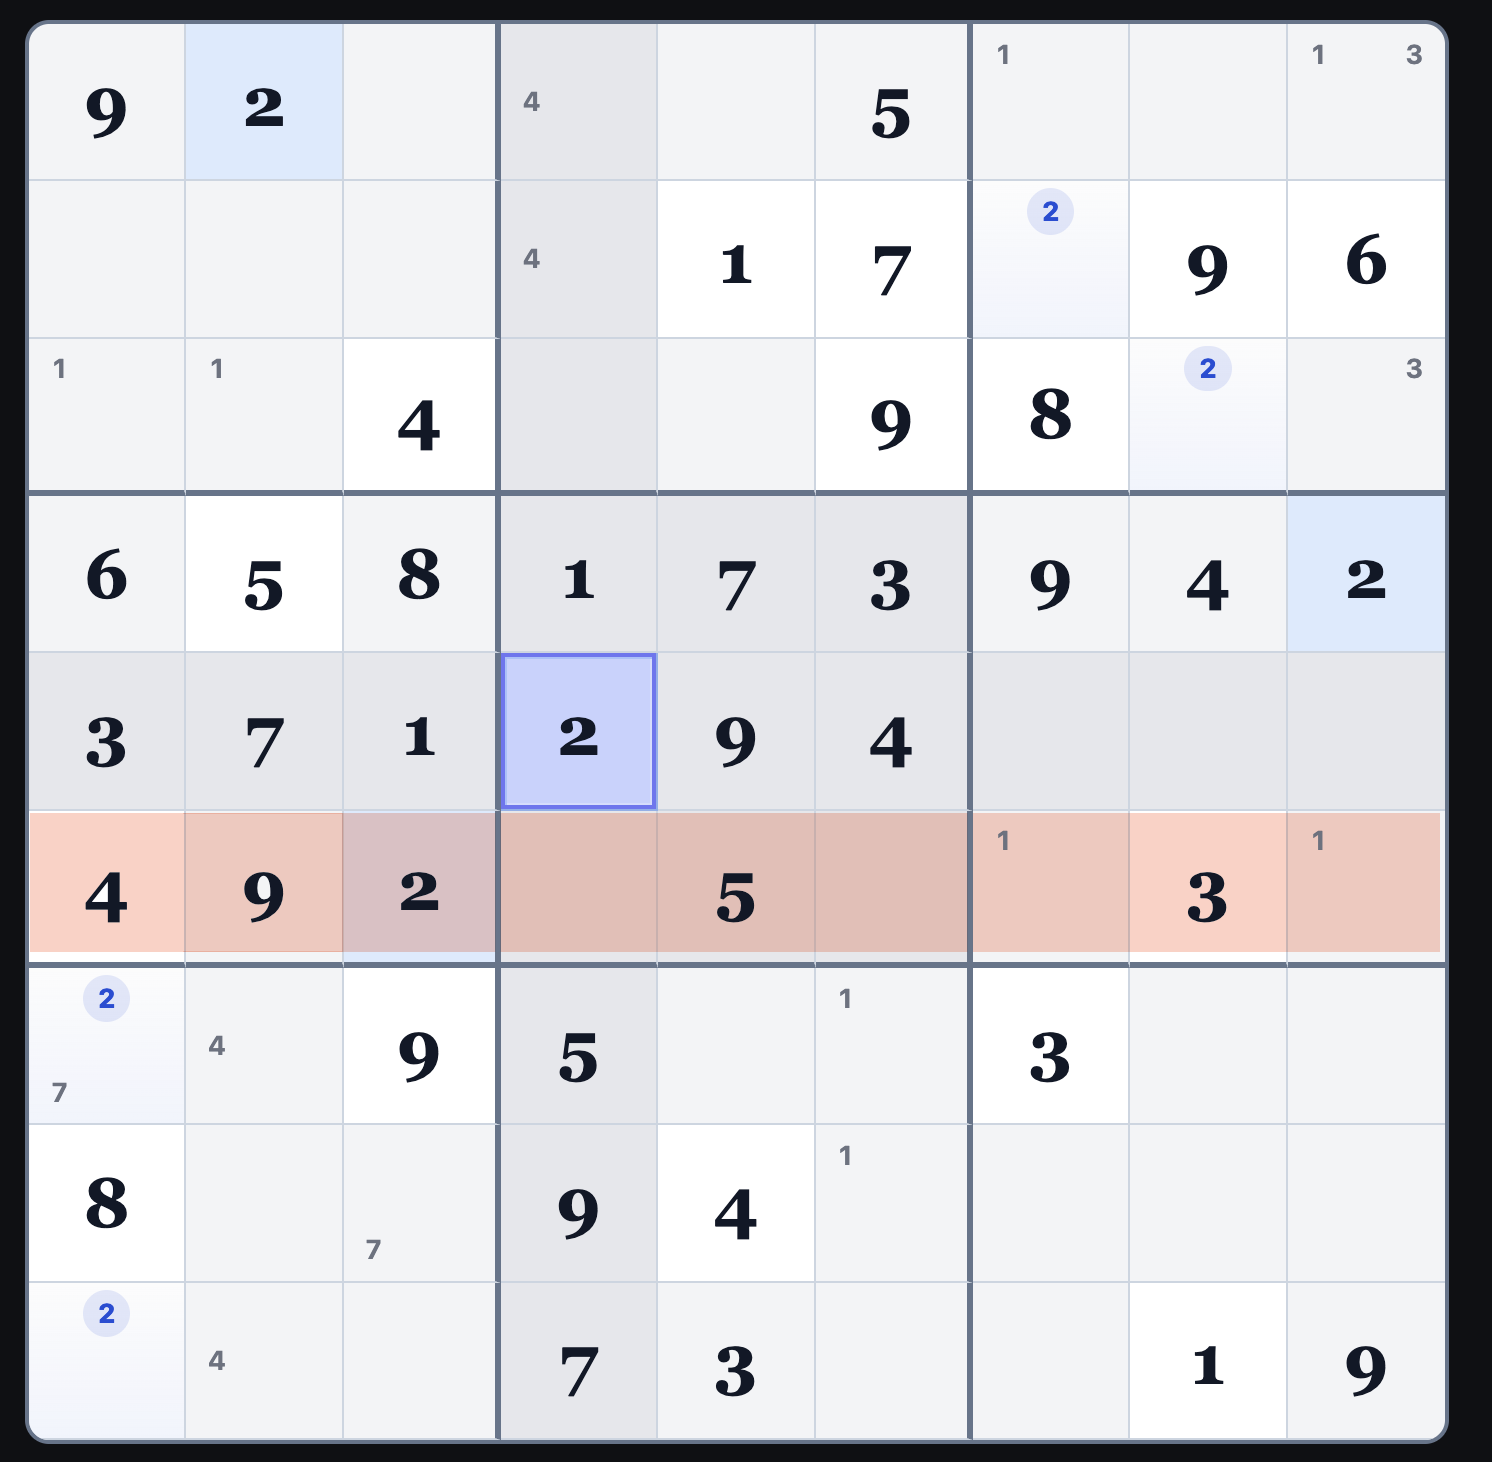
An obvious (naked) pair is when those two squares contain only those two numbers.
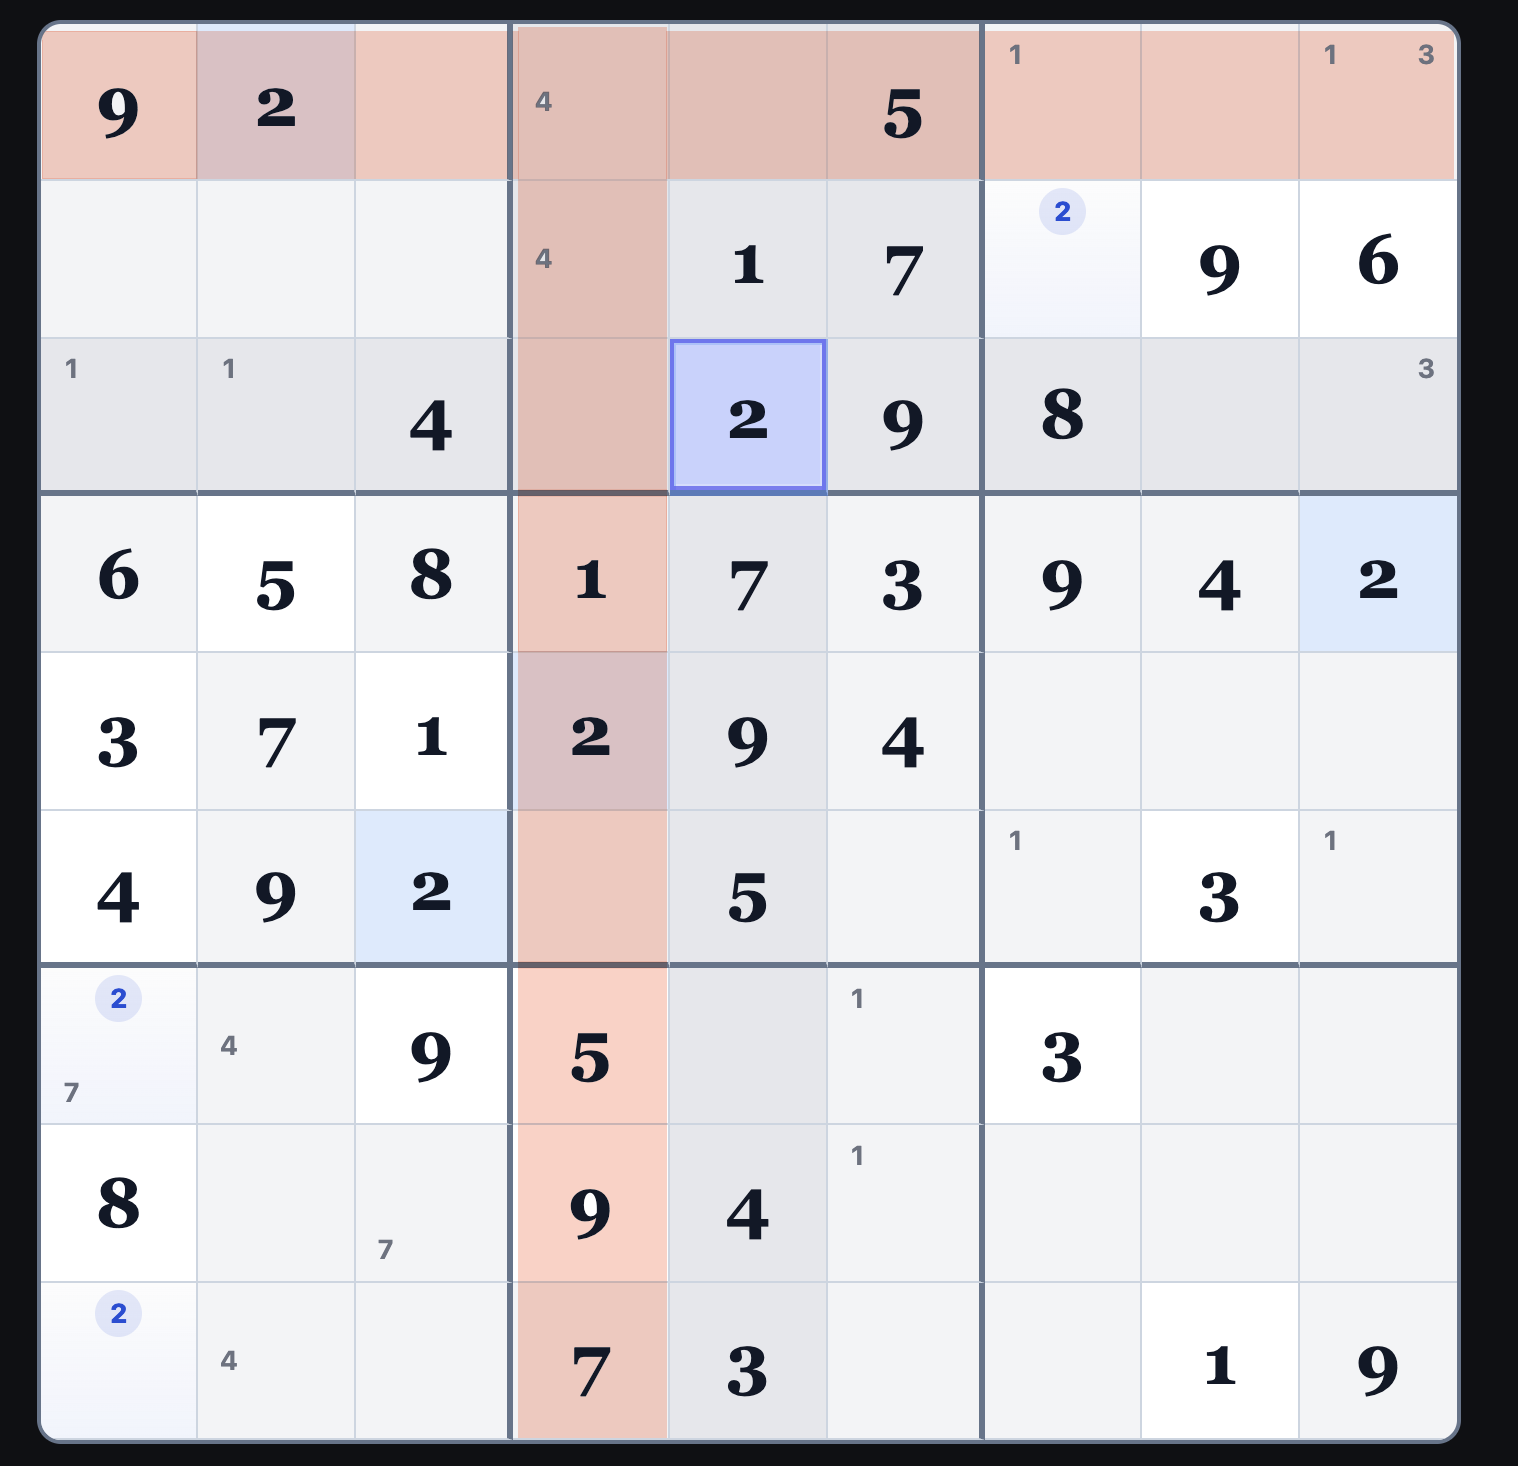
A hidden pair is harder to see because those squares may show other candidates—but if those two numbers appear nowhere else in the unit, they must go there.
Once you identify a pair, you can remove those numbers from all other squares in that unit—or strip away extra candidates inside the pair.
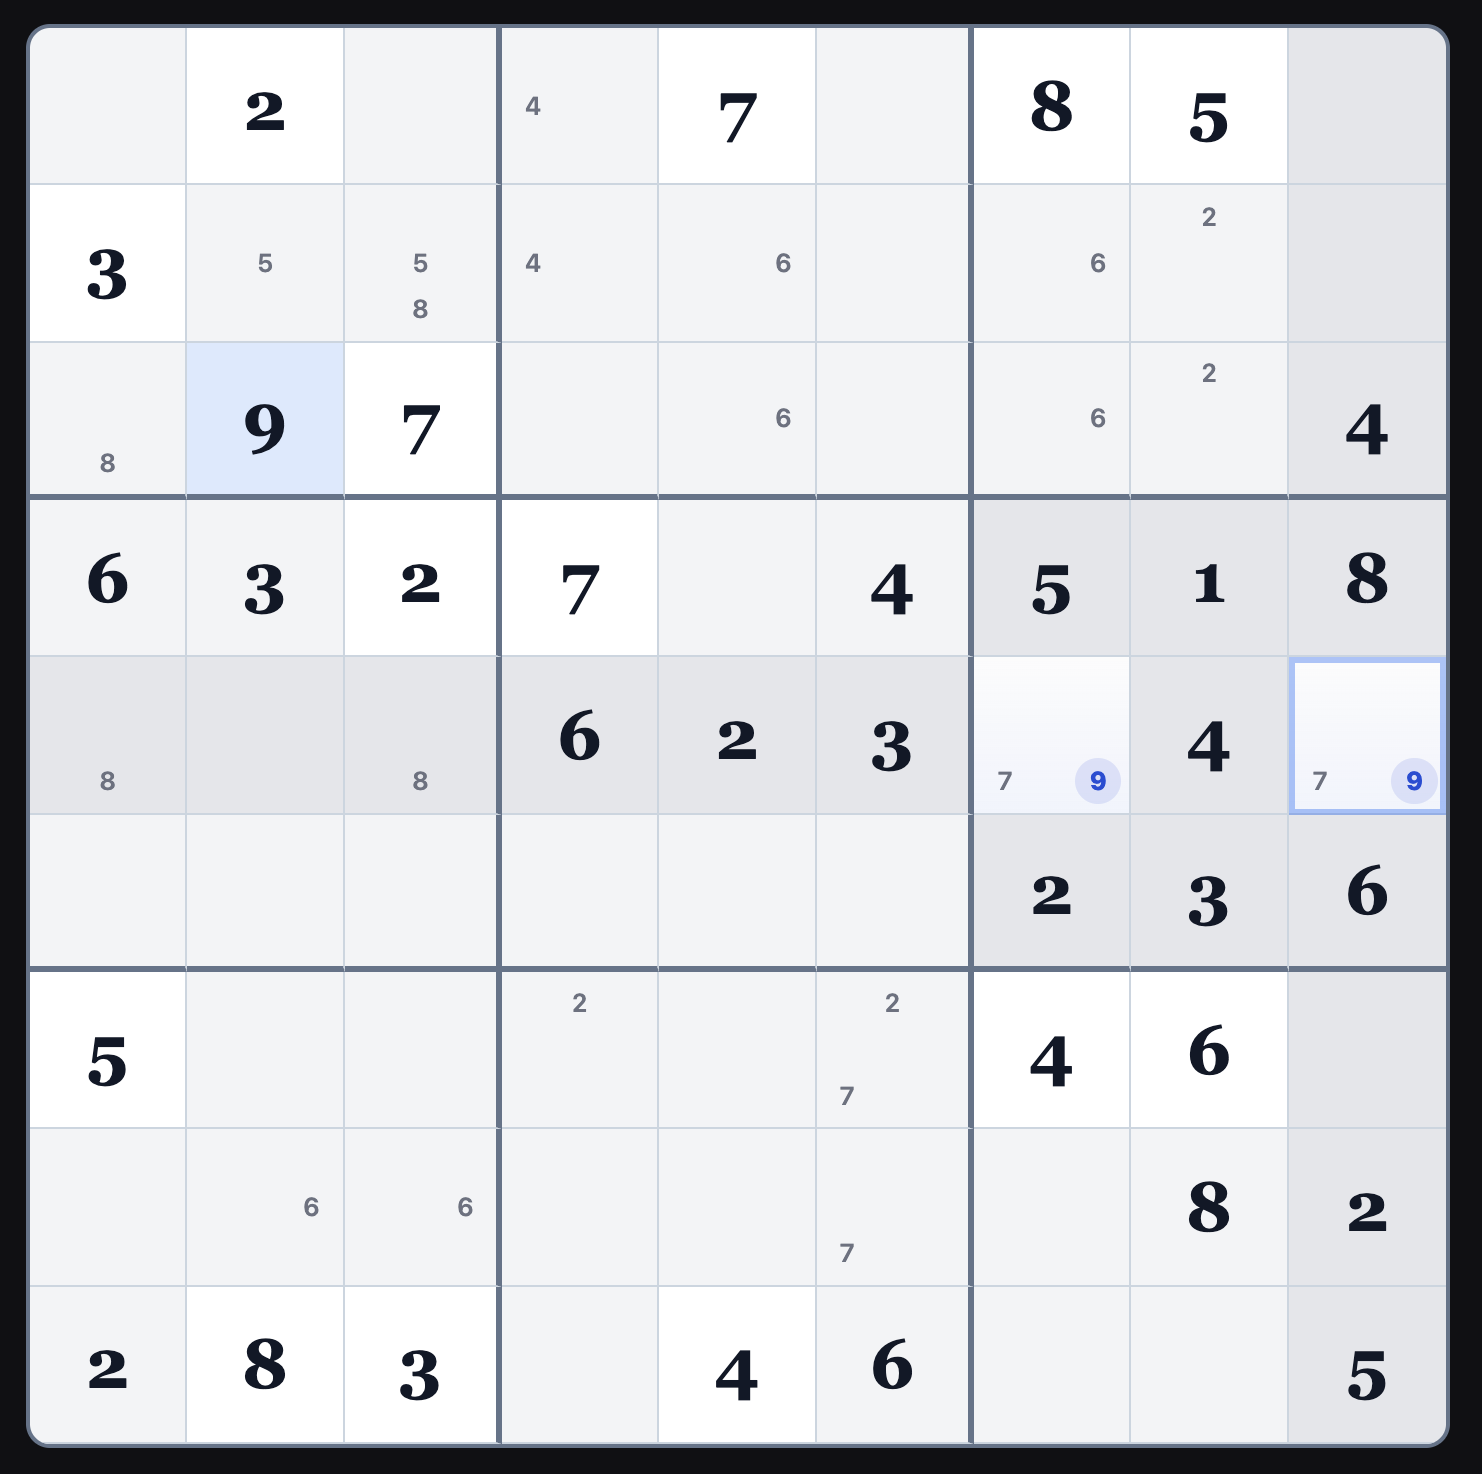
Obvious Pair: The {7,9} pair in block 6 is obvious. No other number is available. But because of the pointing 9s, in row 5,
we know that the 9 in block 4 must be in row 6.
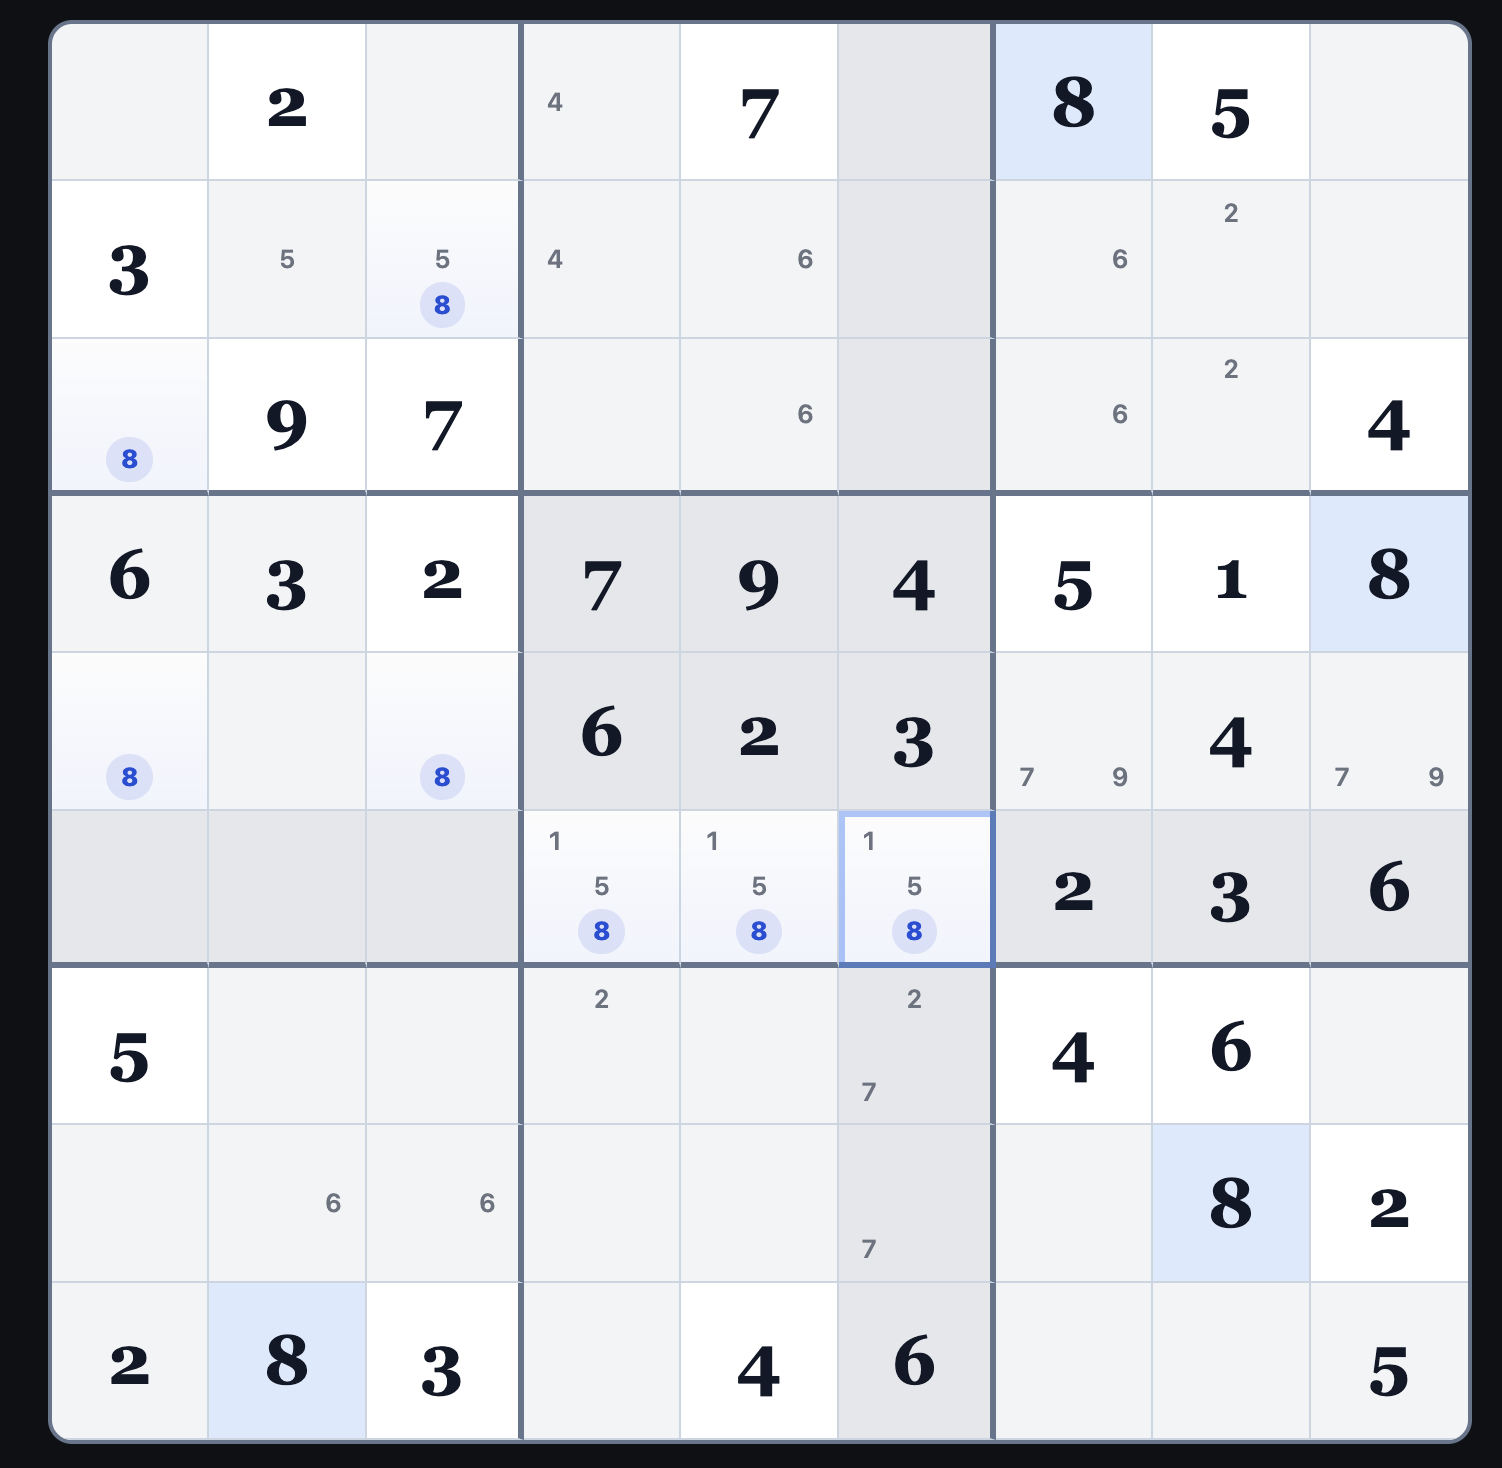
Obvious Triple: Therefore, the only spot open for 9 in block 5 is row 4 column 5 (r4c5). Because of entering the 9 in r4c5, only 1, 5 and 8 are available to use in block 5 row 6.
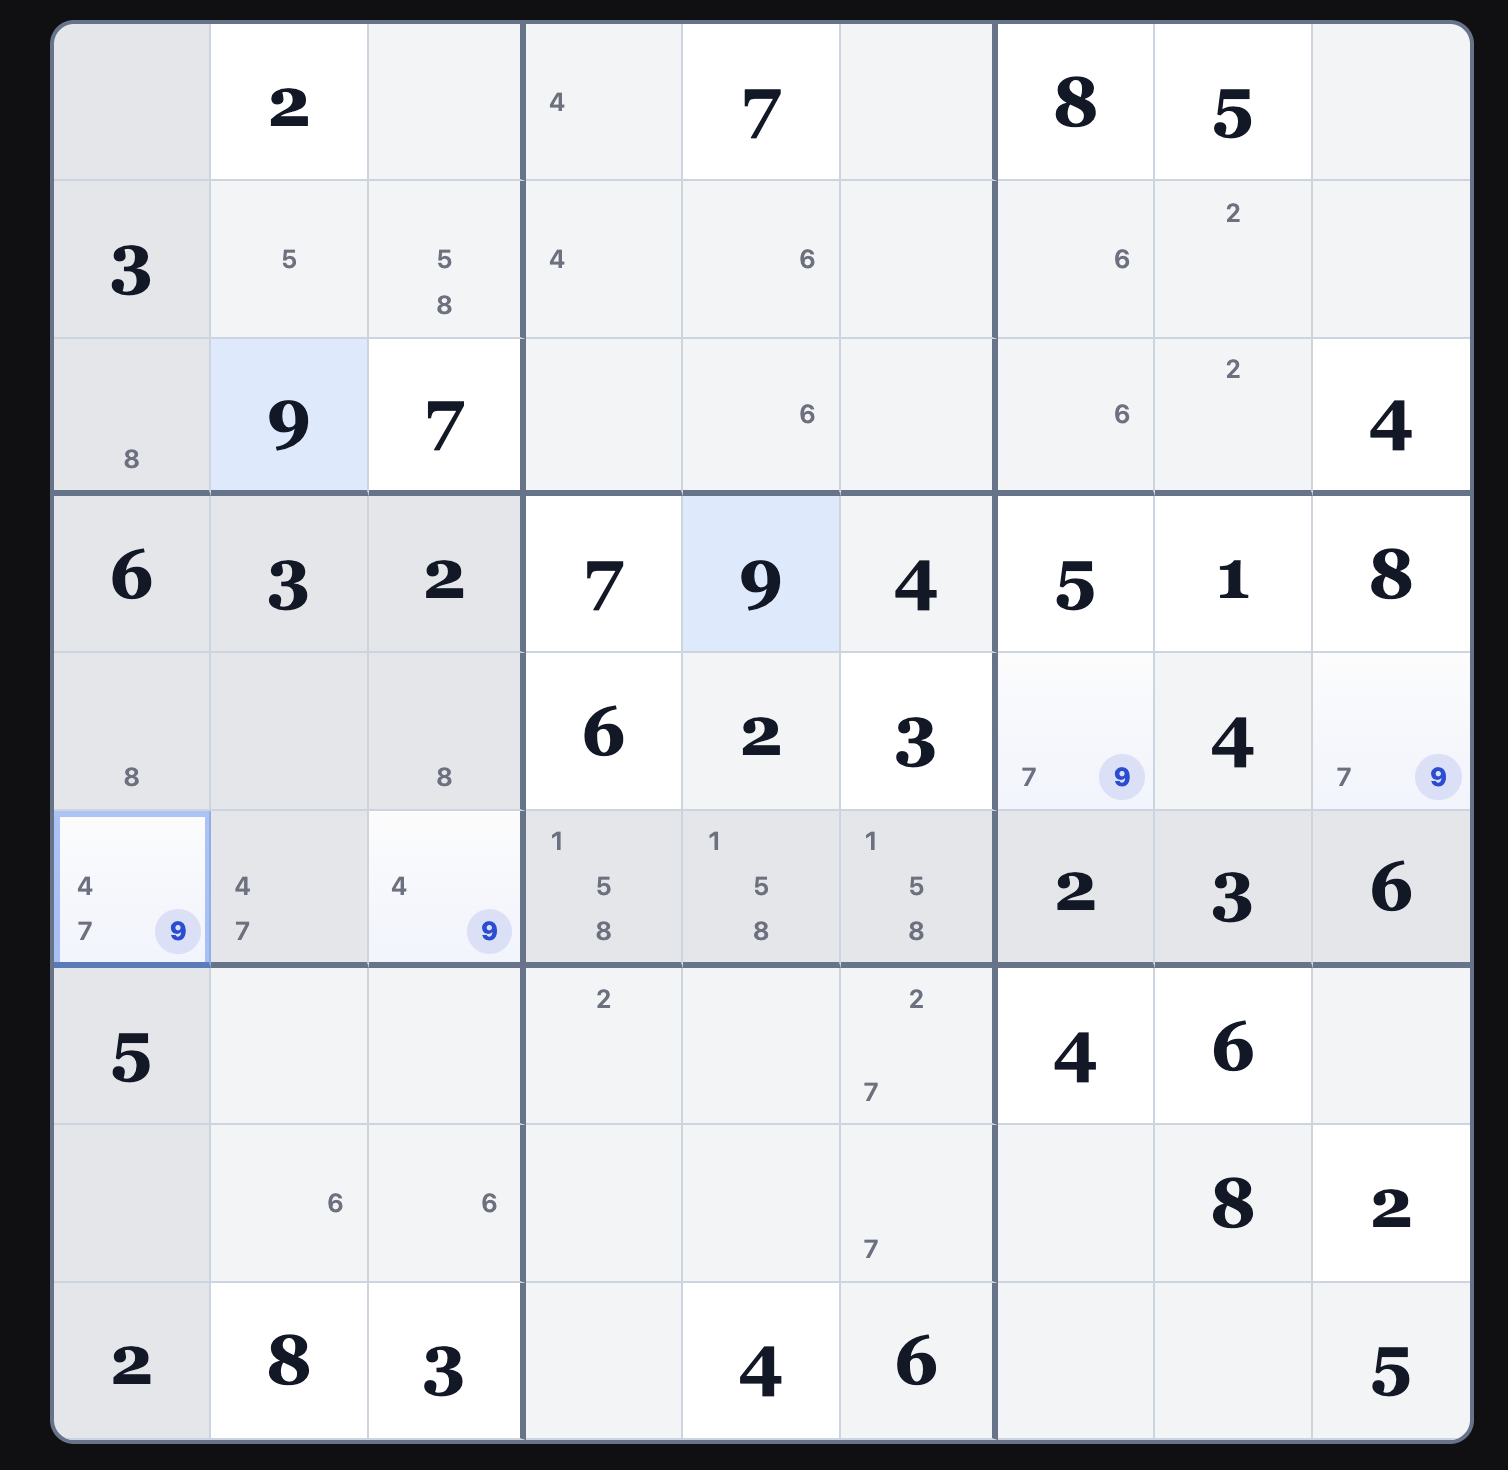
Pointing Triple: Because of the now pointing triple in block 5, know that the remaining numbers available in row 6 are 4, 7 and 9.
Result: We can now fill in pencil marks for 1, 5 and 8, the remaining numbers of block 4.
Snyder Pairs
A Snyder pair is a special case you can often spot early: within a box, a number appears in exactly two squares, and those are the only places it can go.
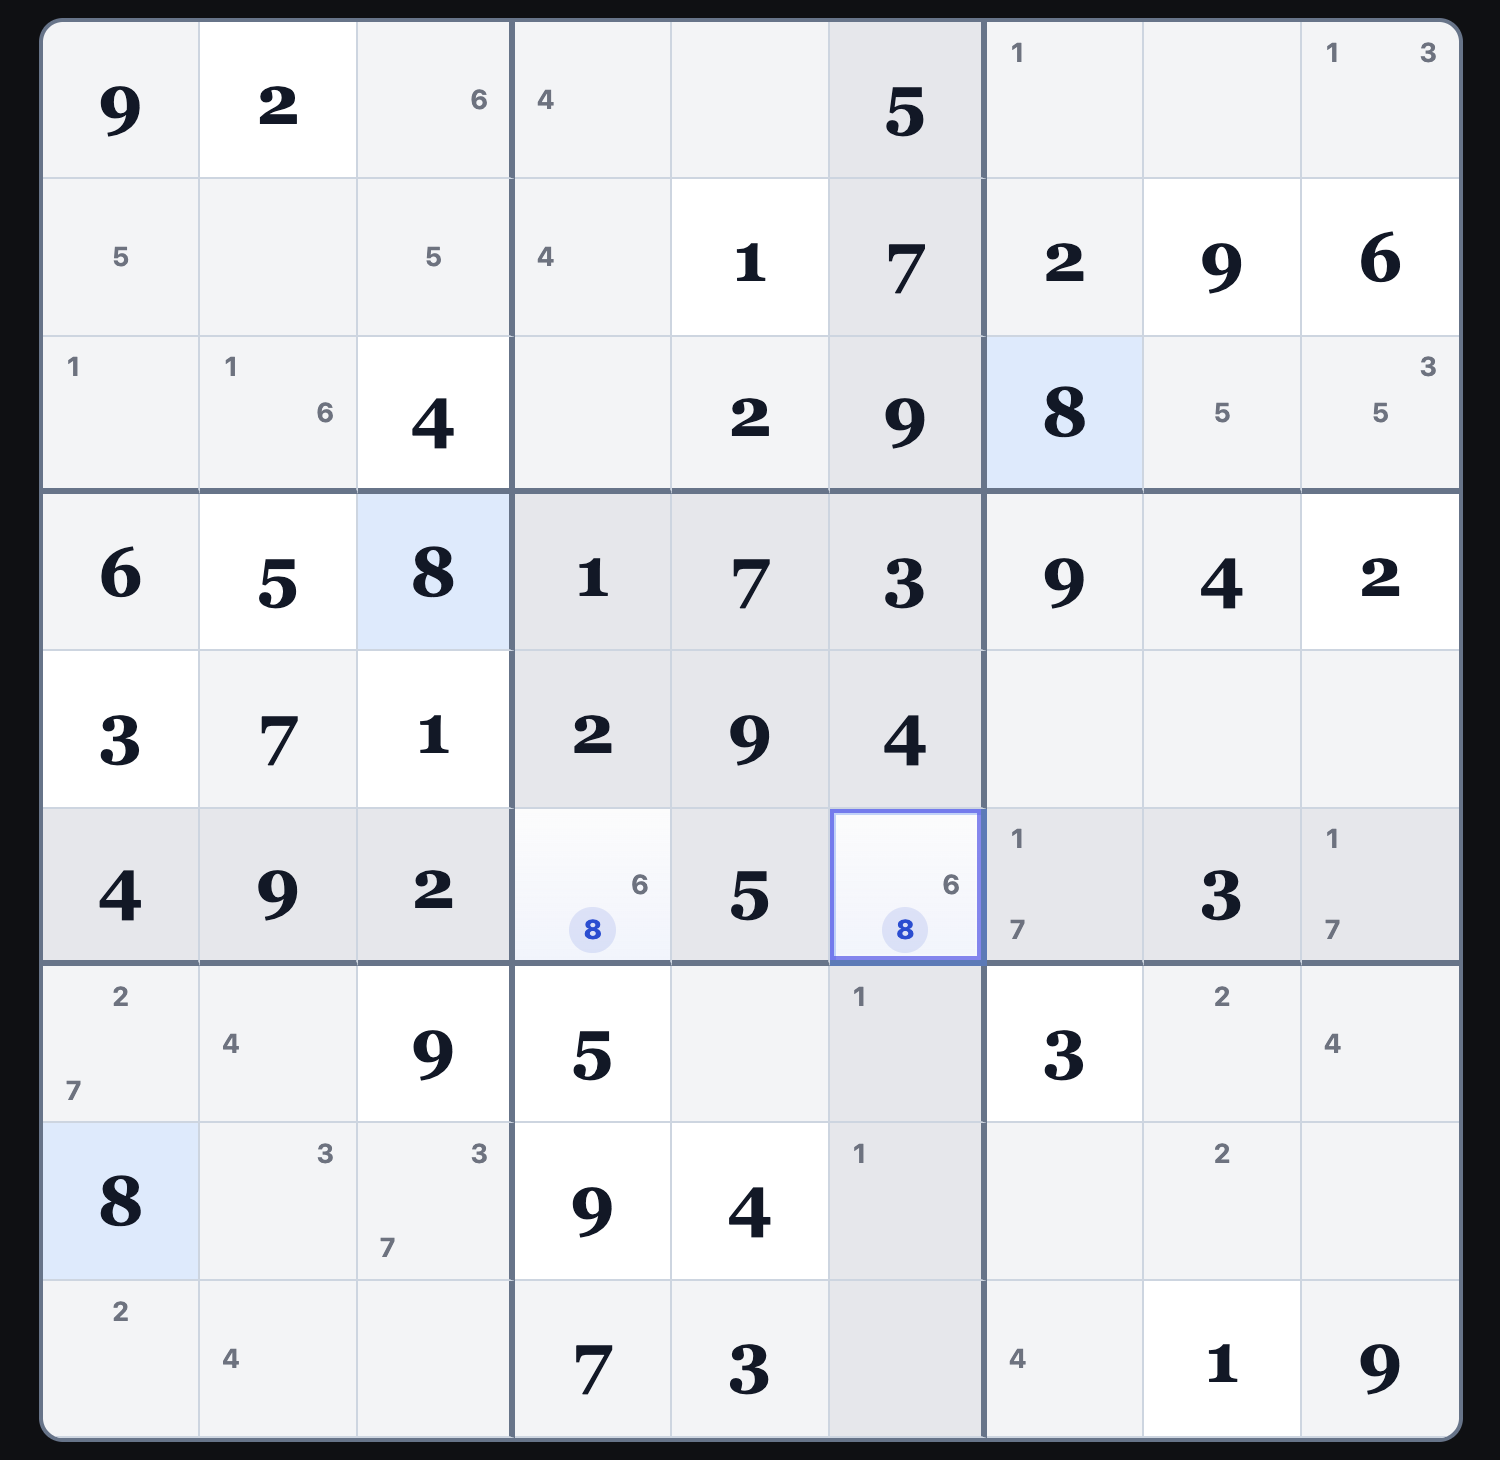
Because you are clearly observing both possibilities (and not inferring them), you can confidently use that pair to make eliminations—especially if the two squares line up in the same row or column.
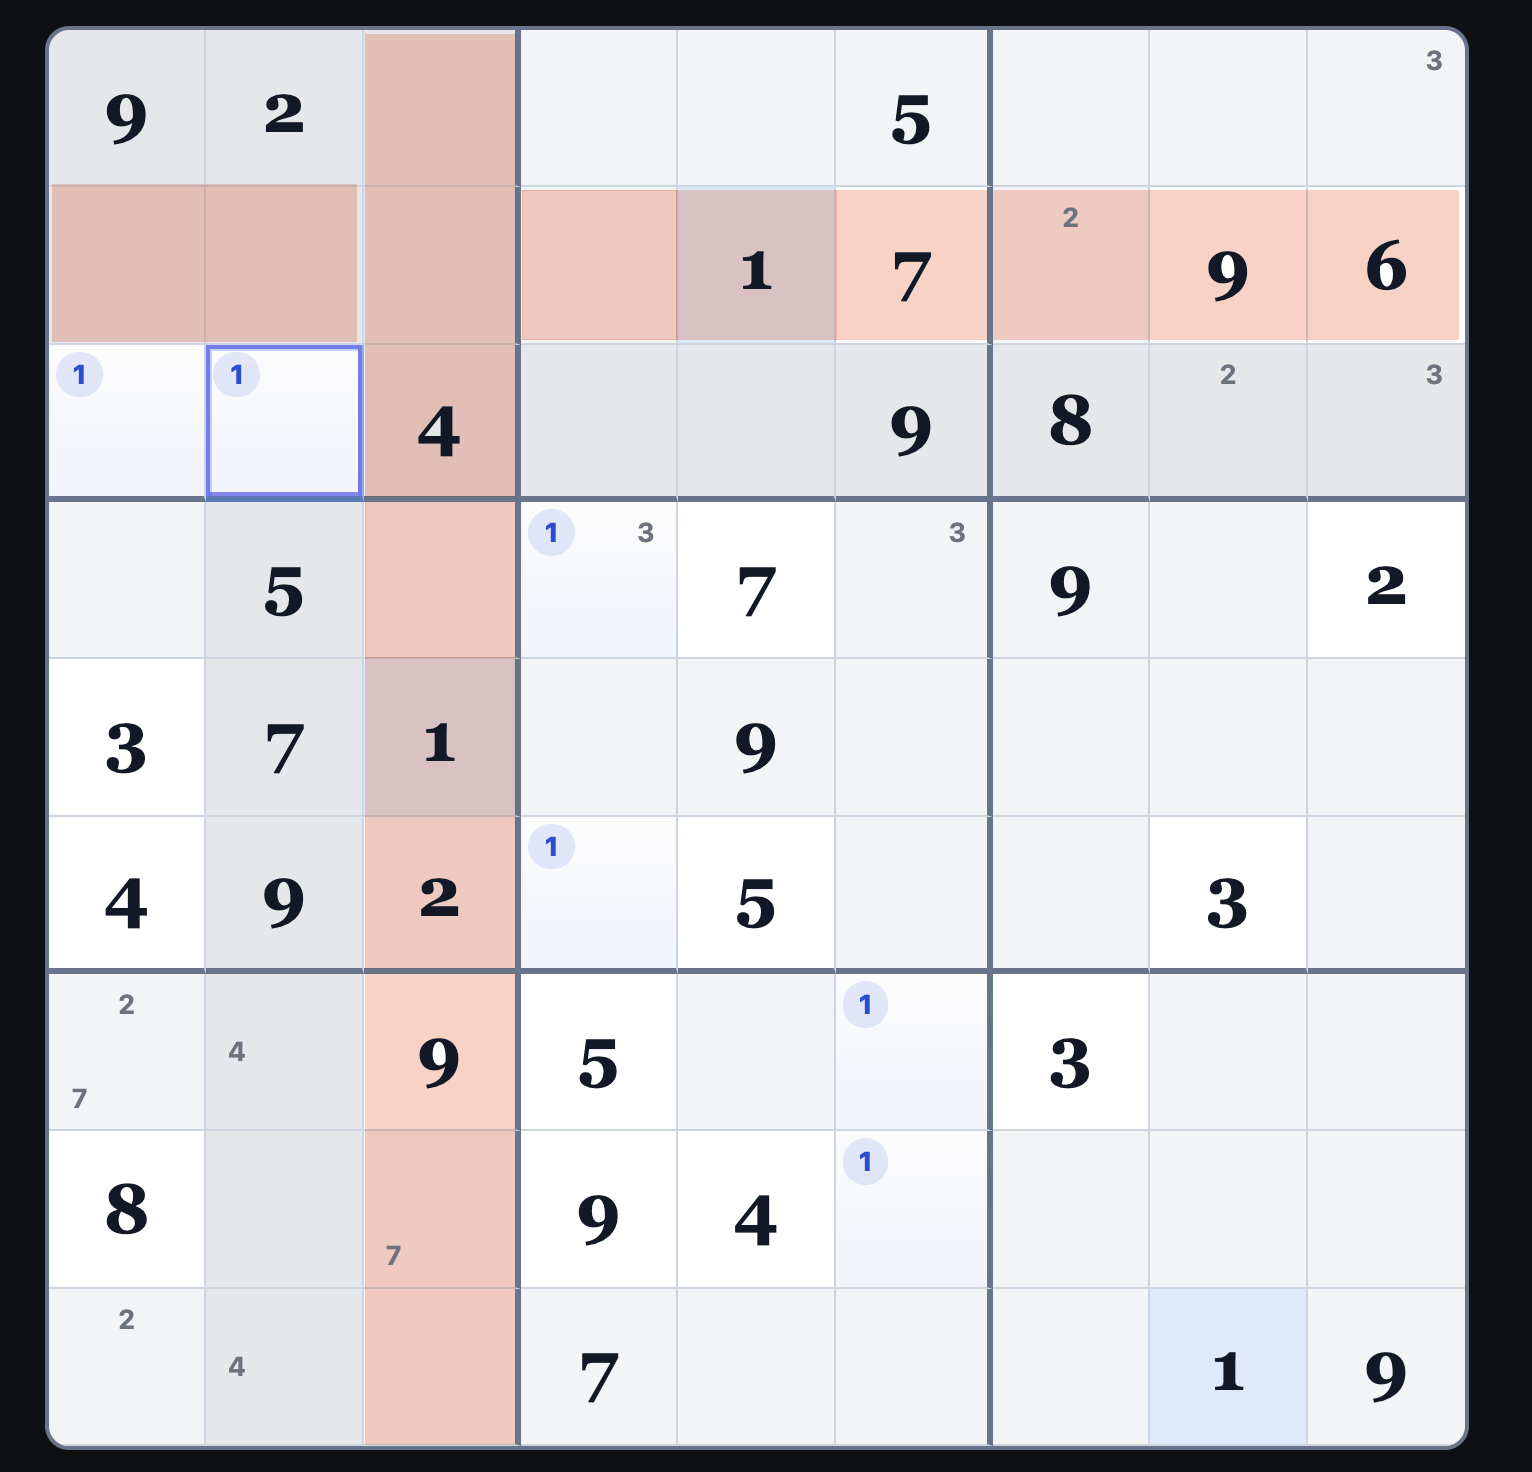
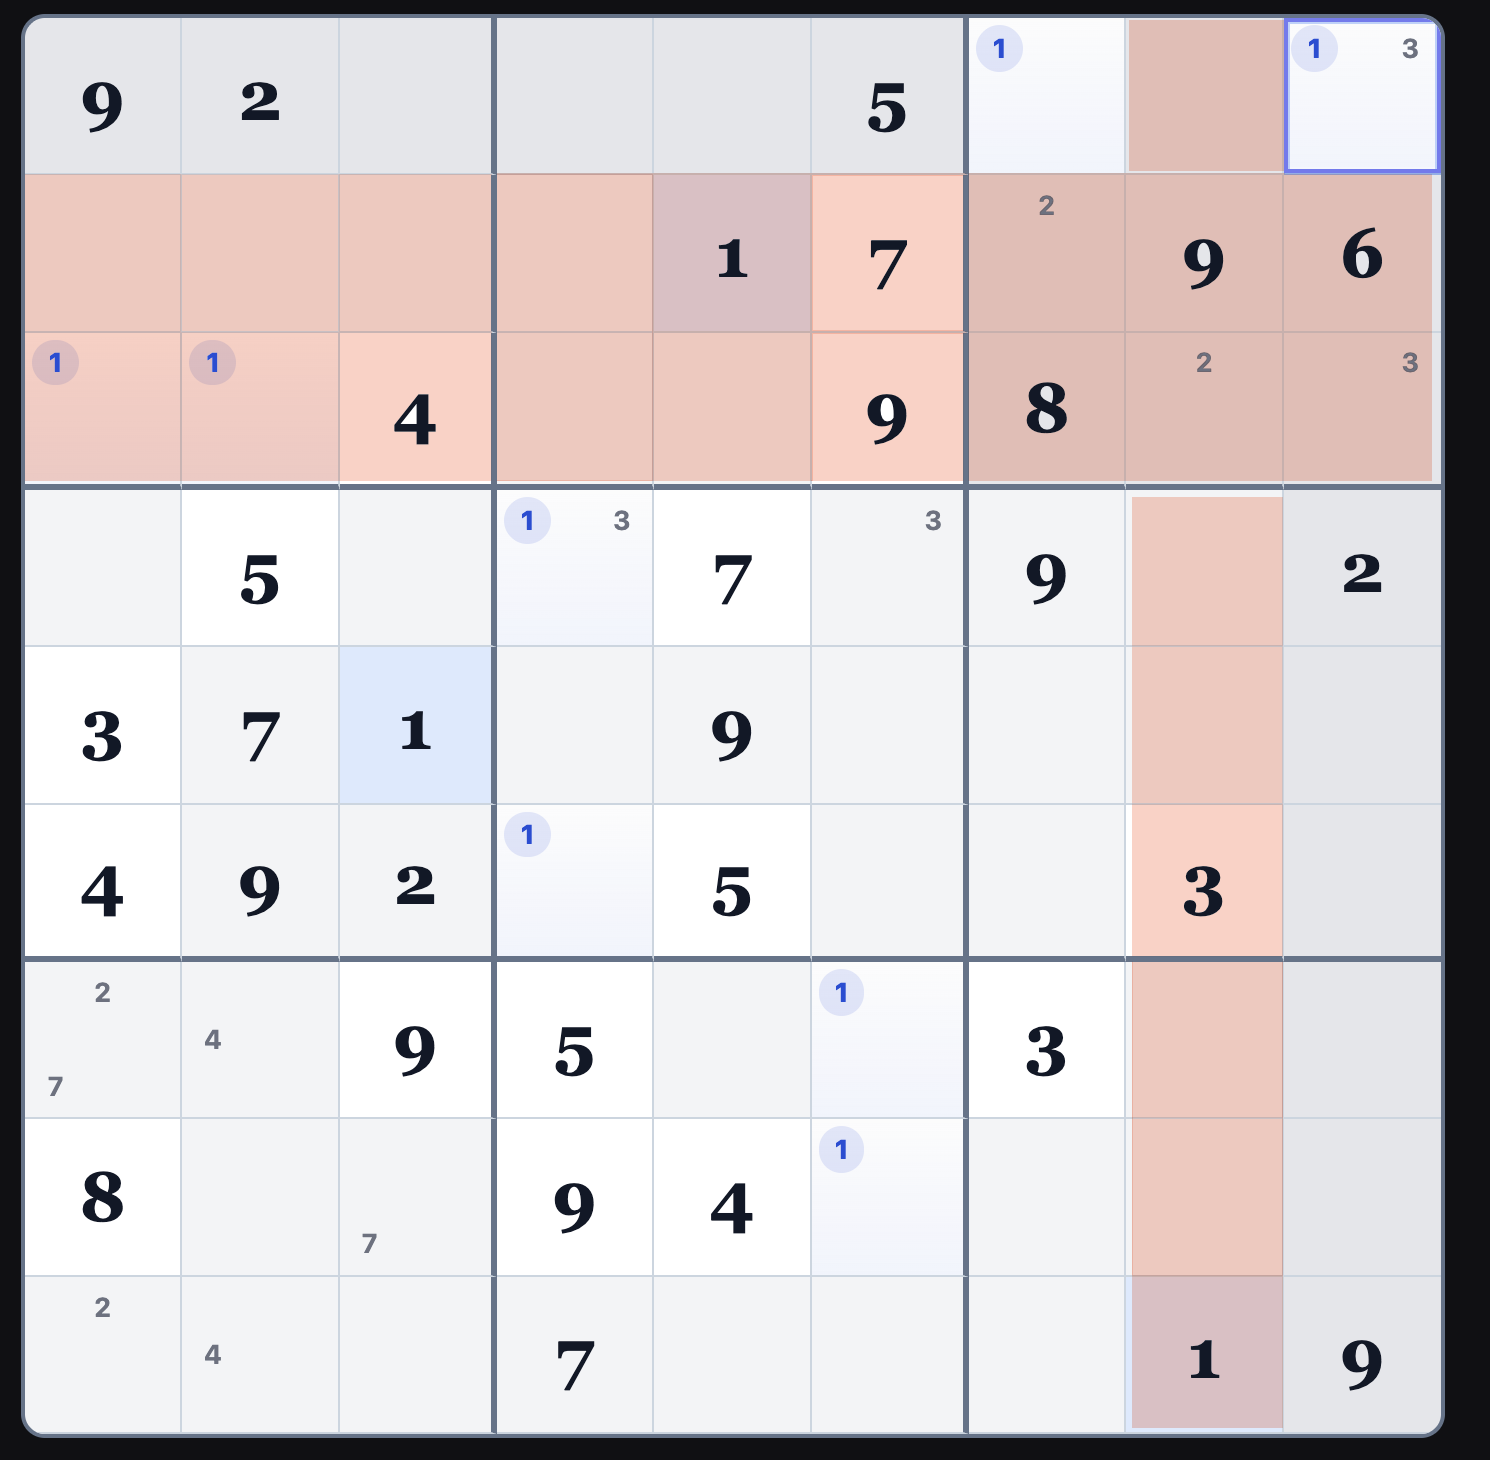
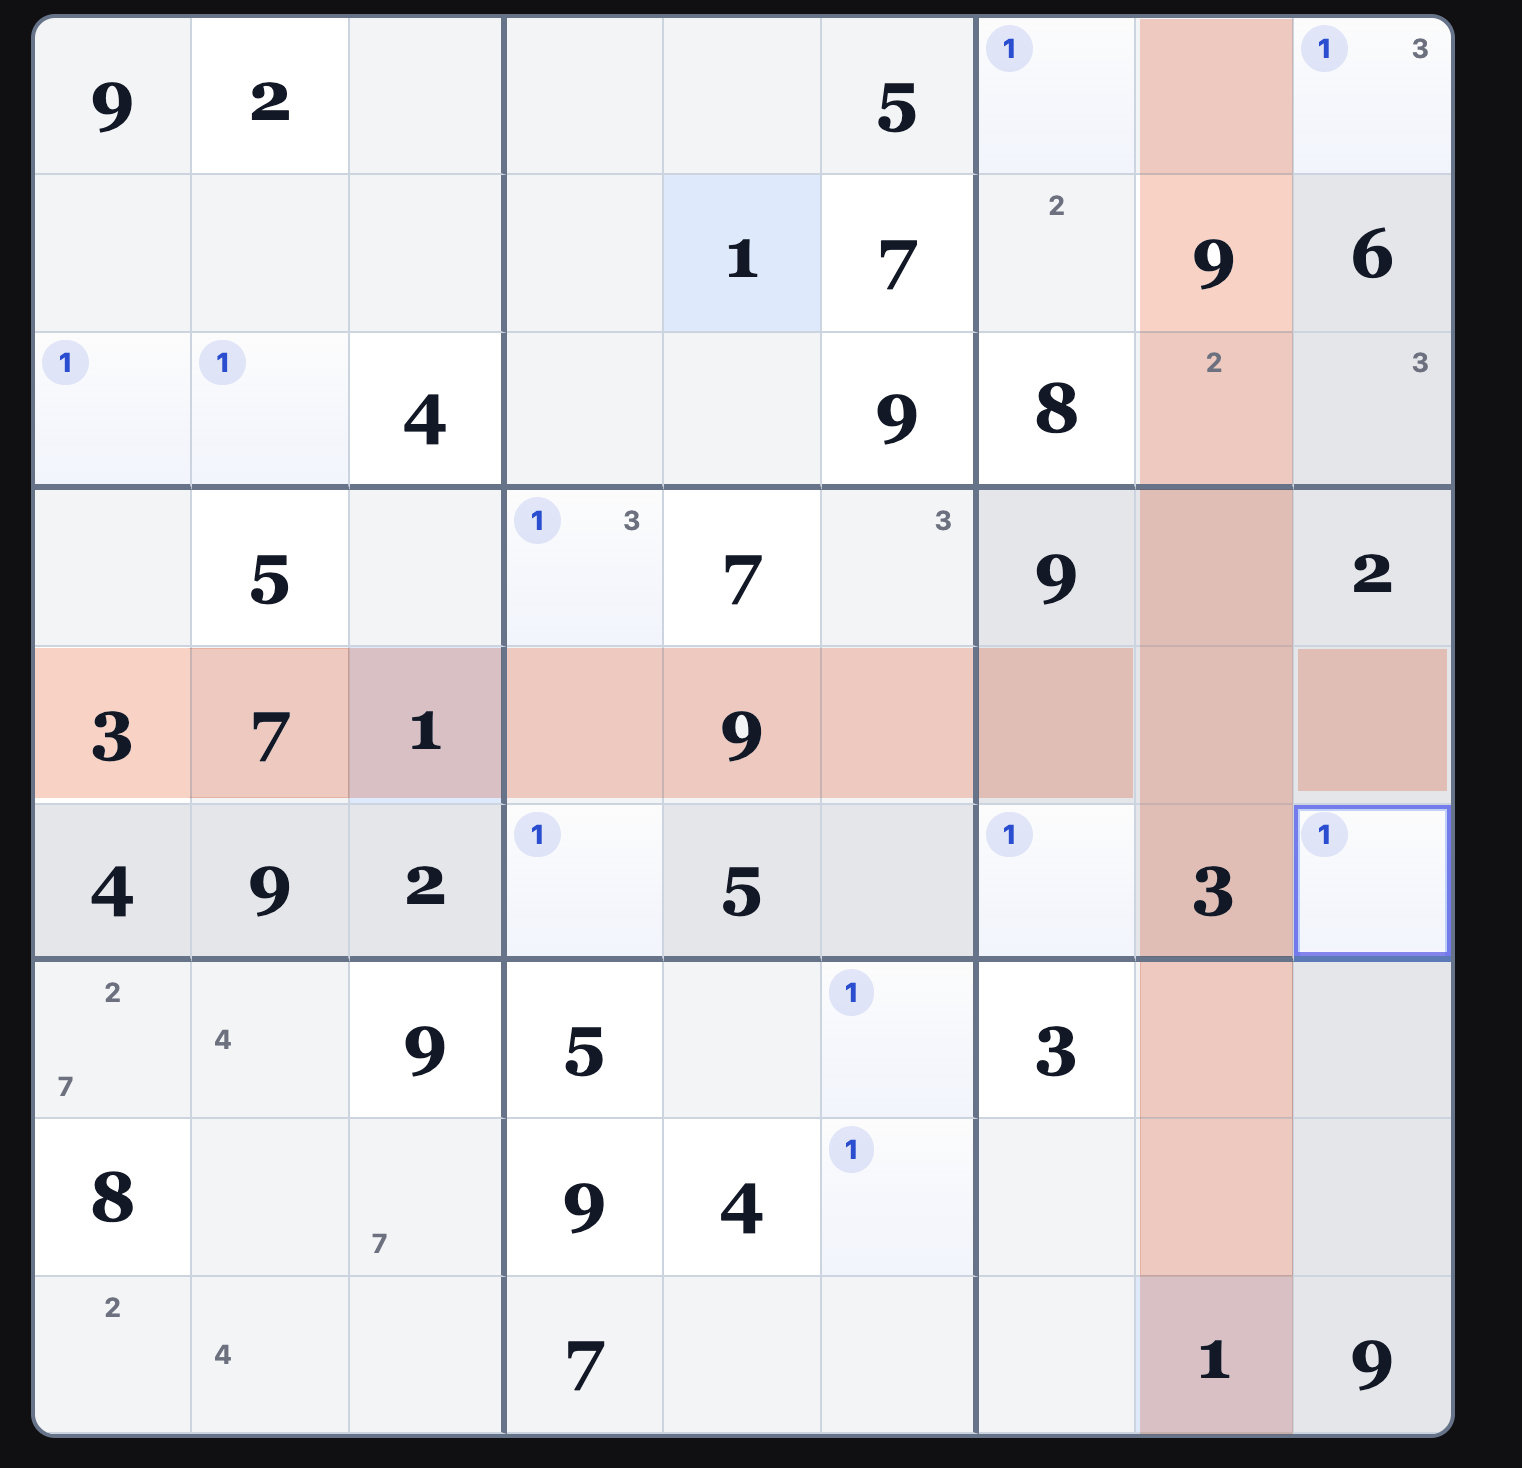
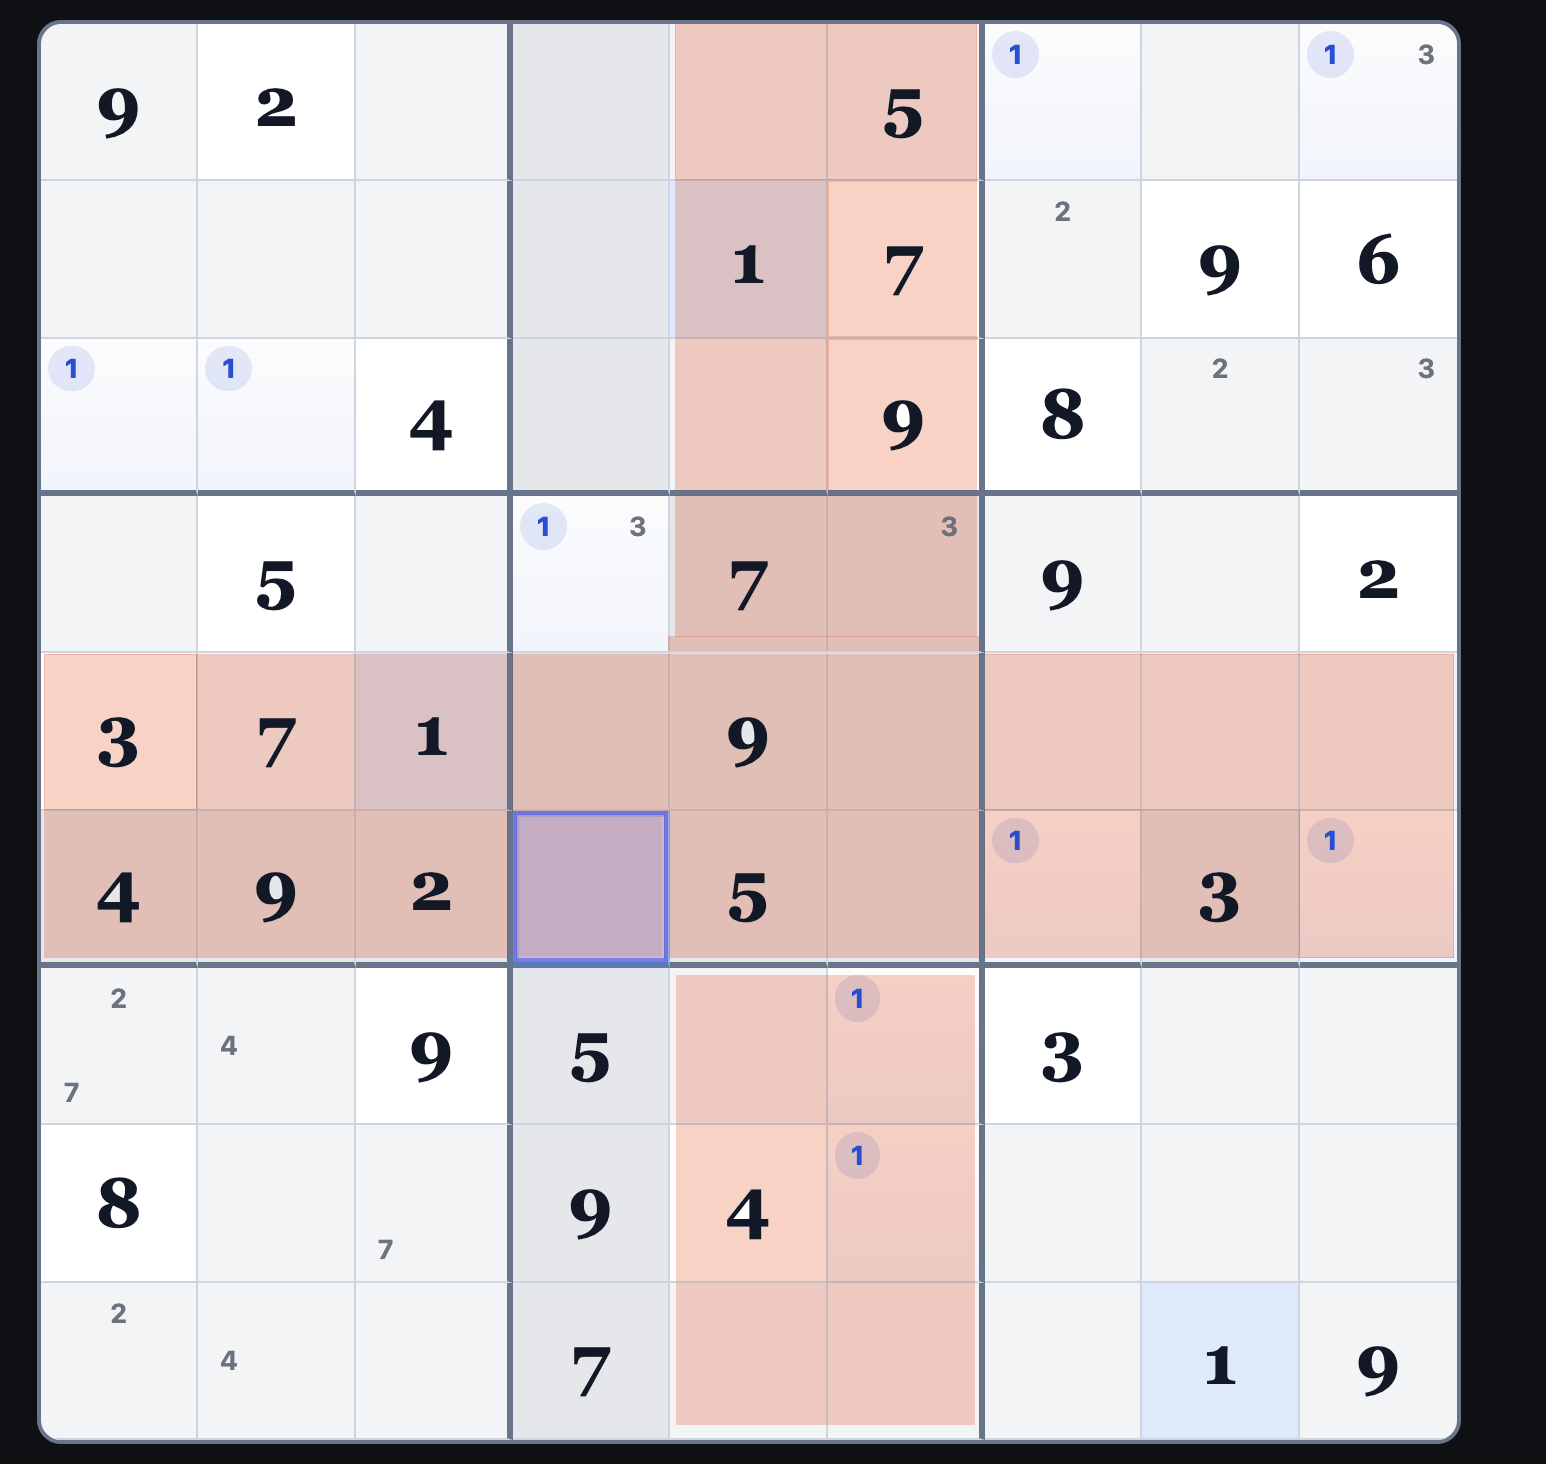
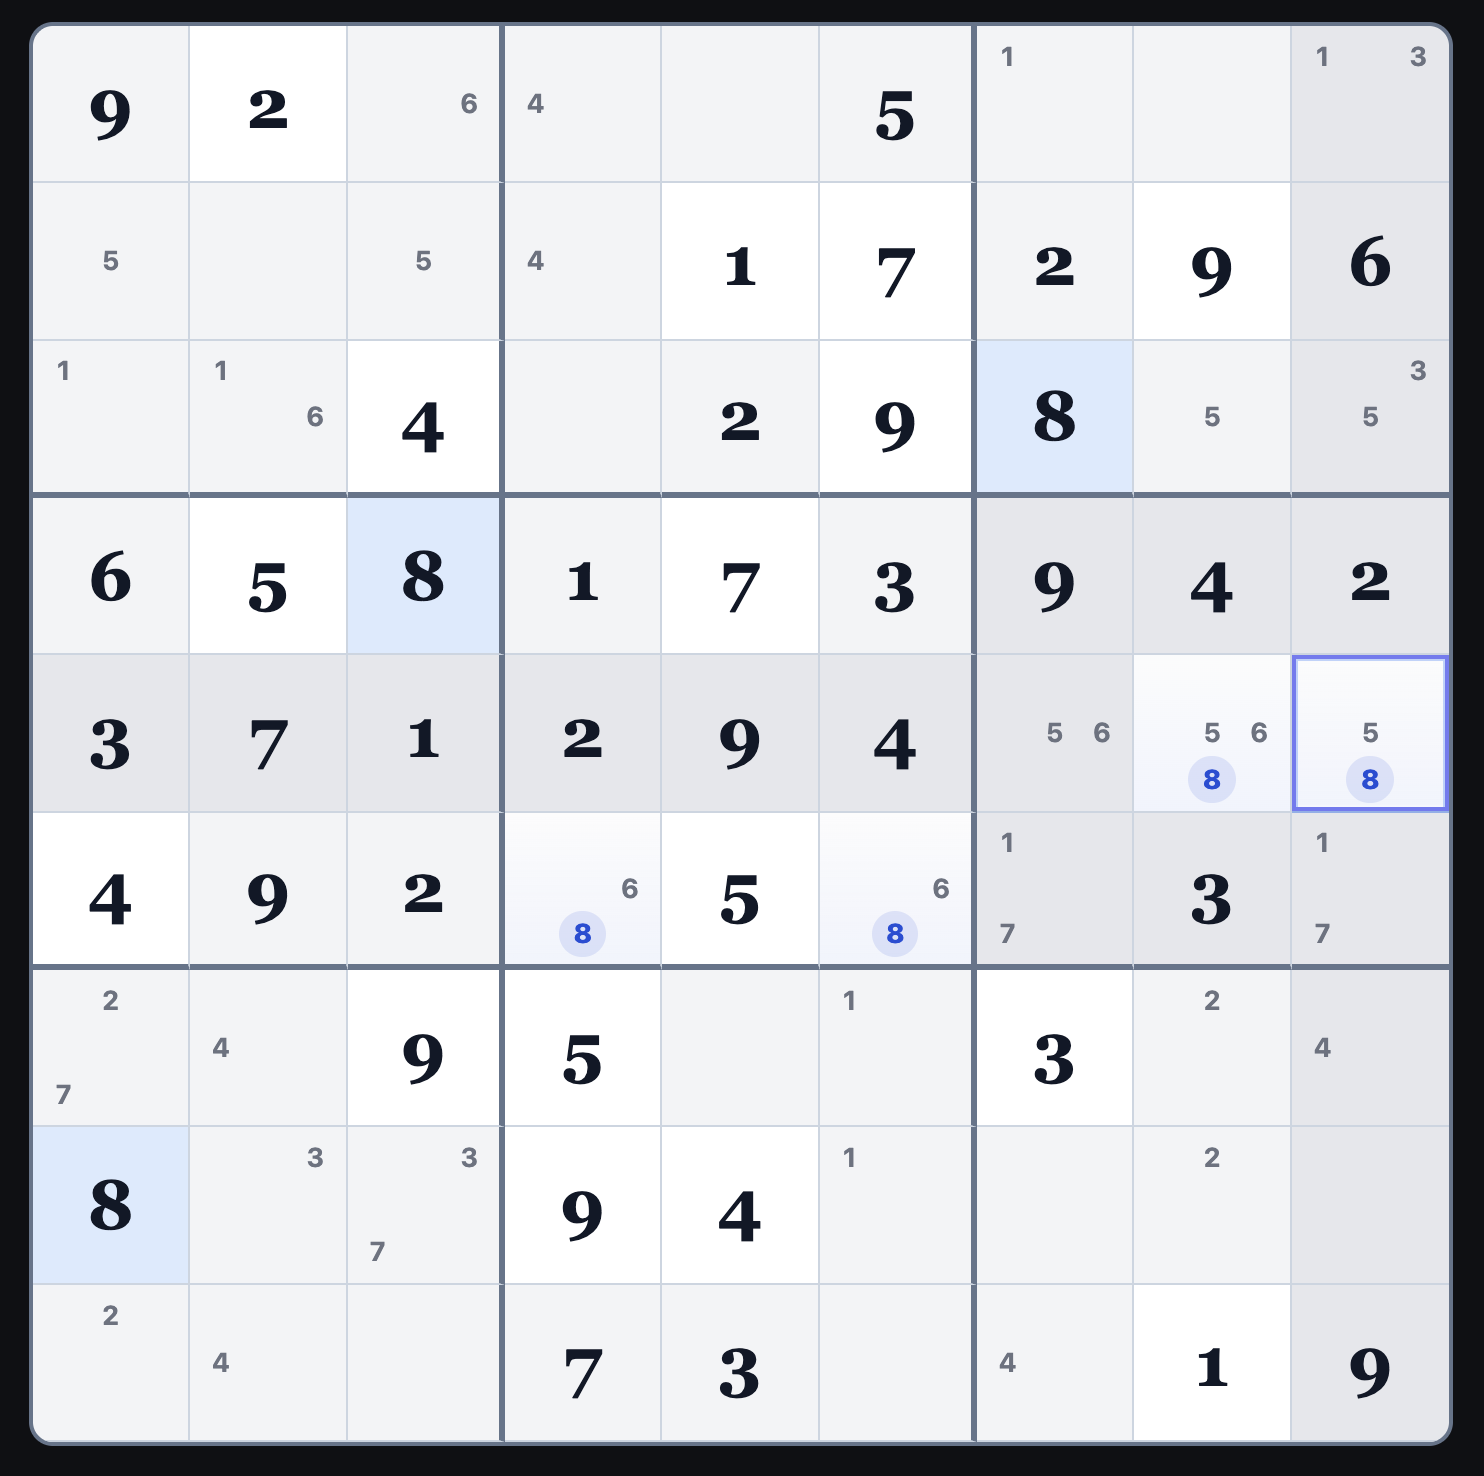
Y-Wing
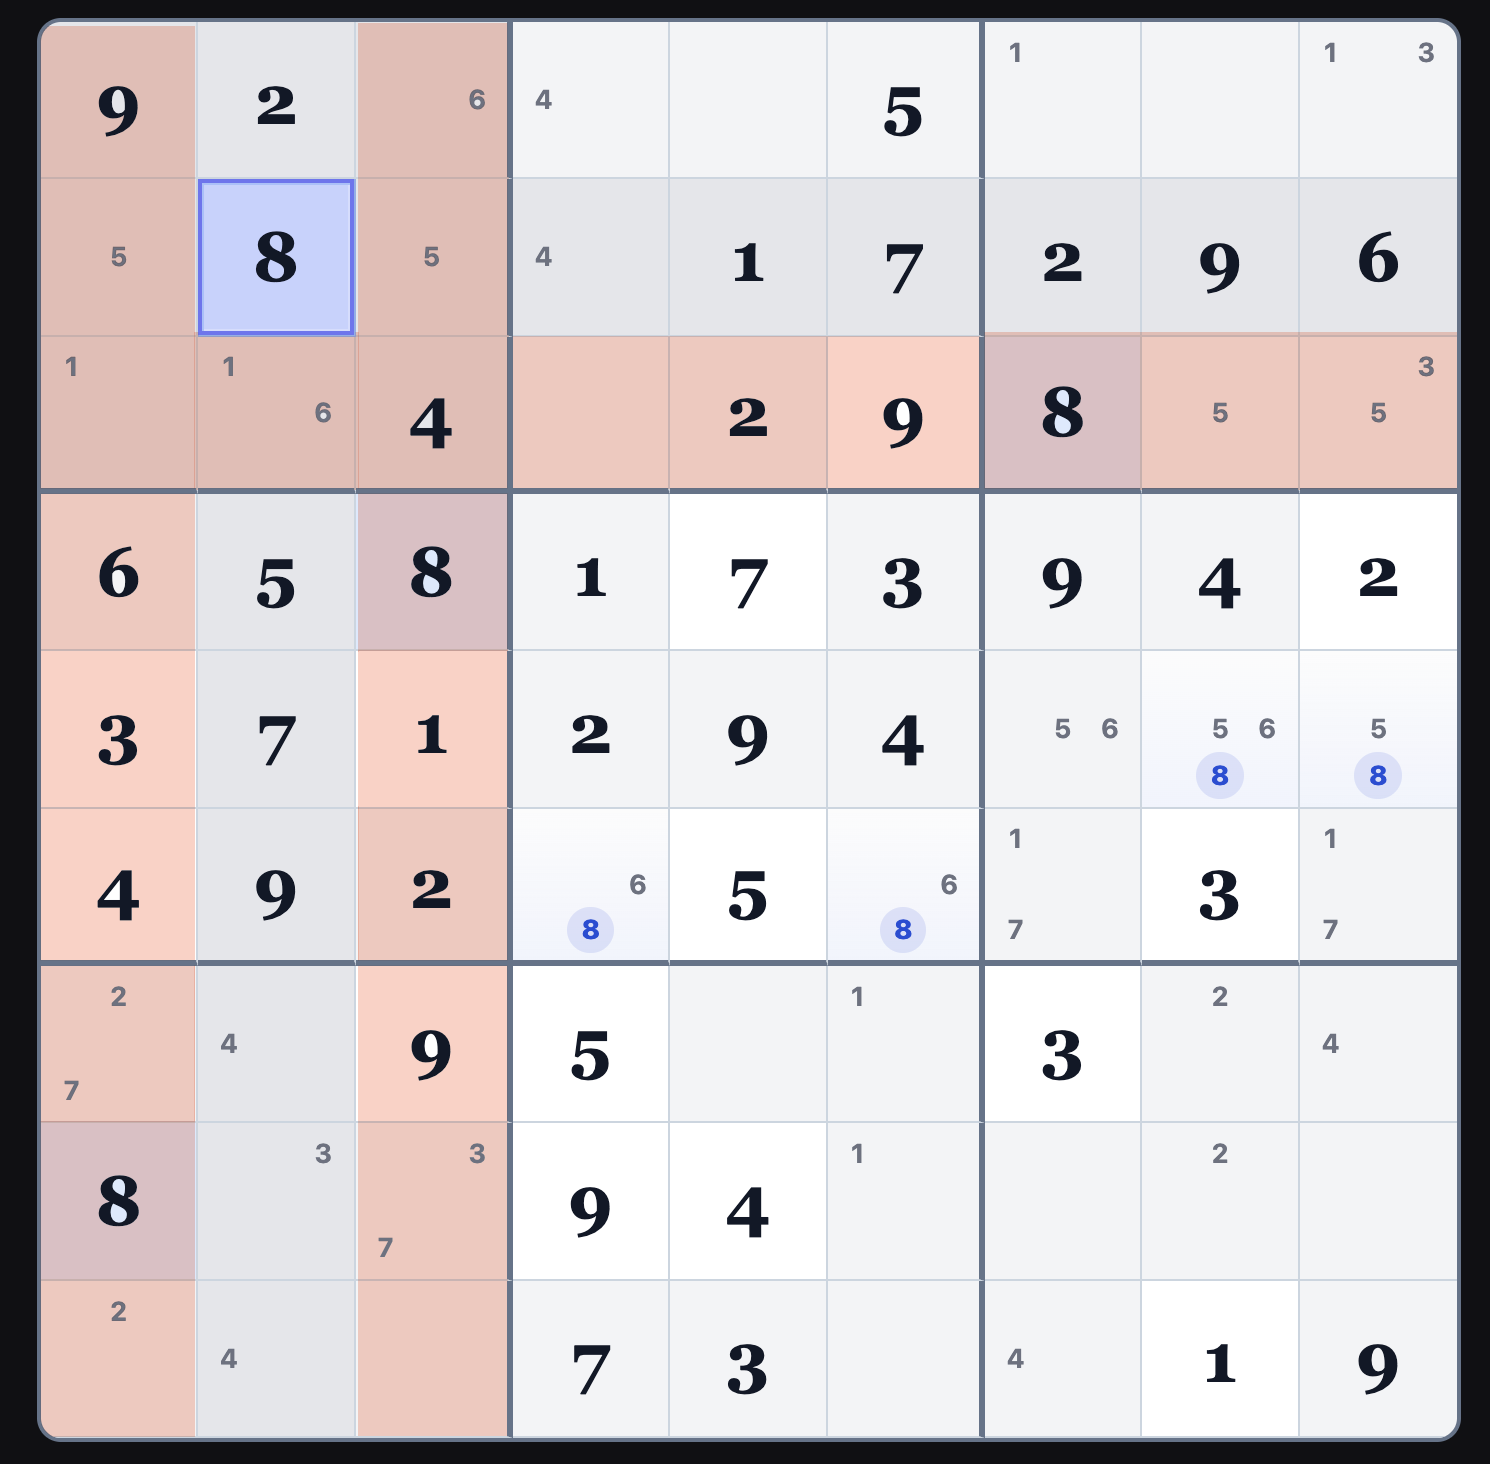
Y-WingY-Wing
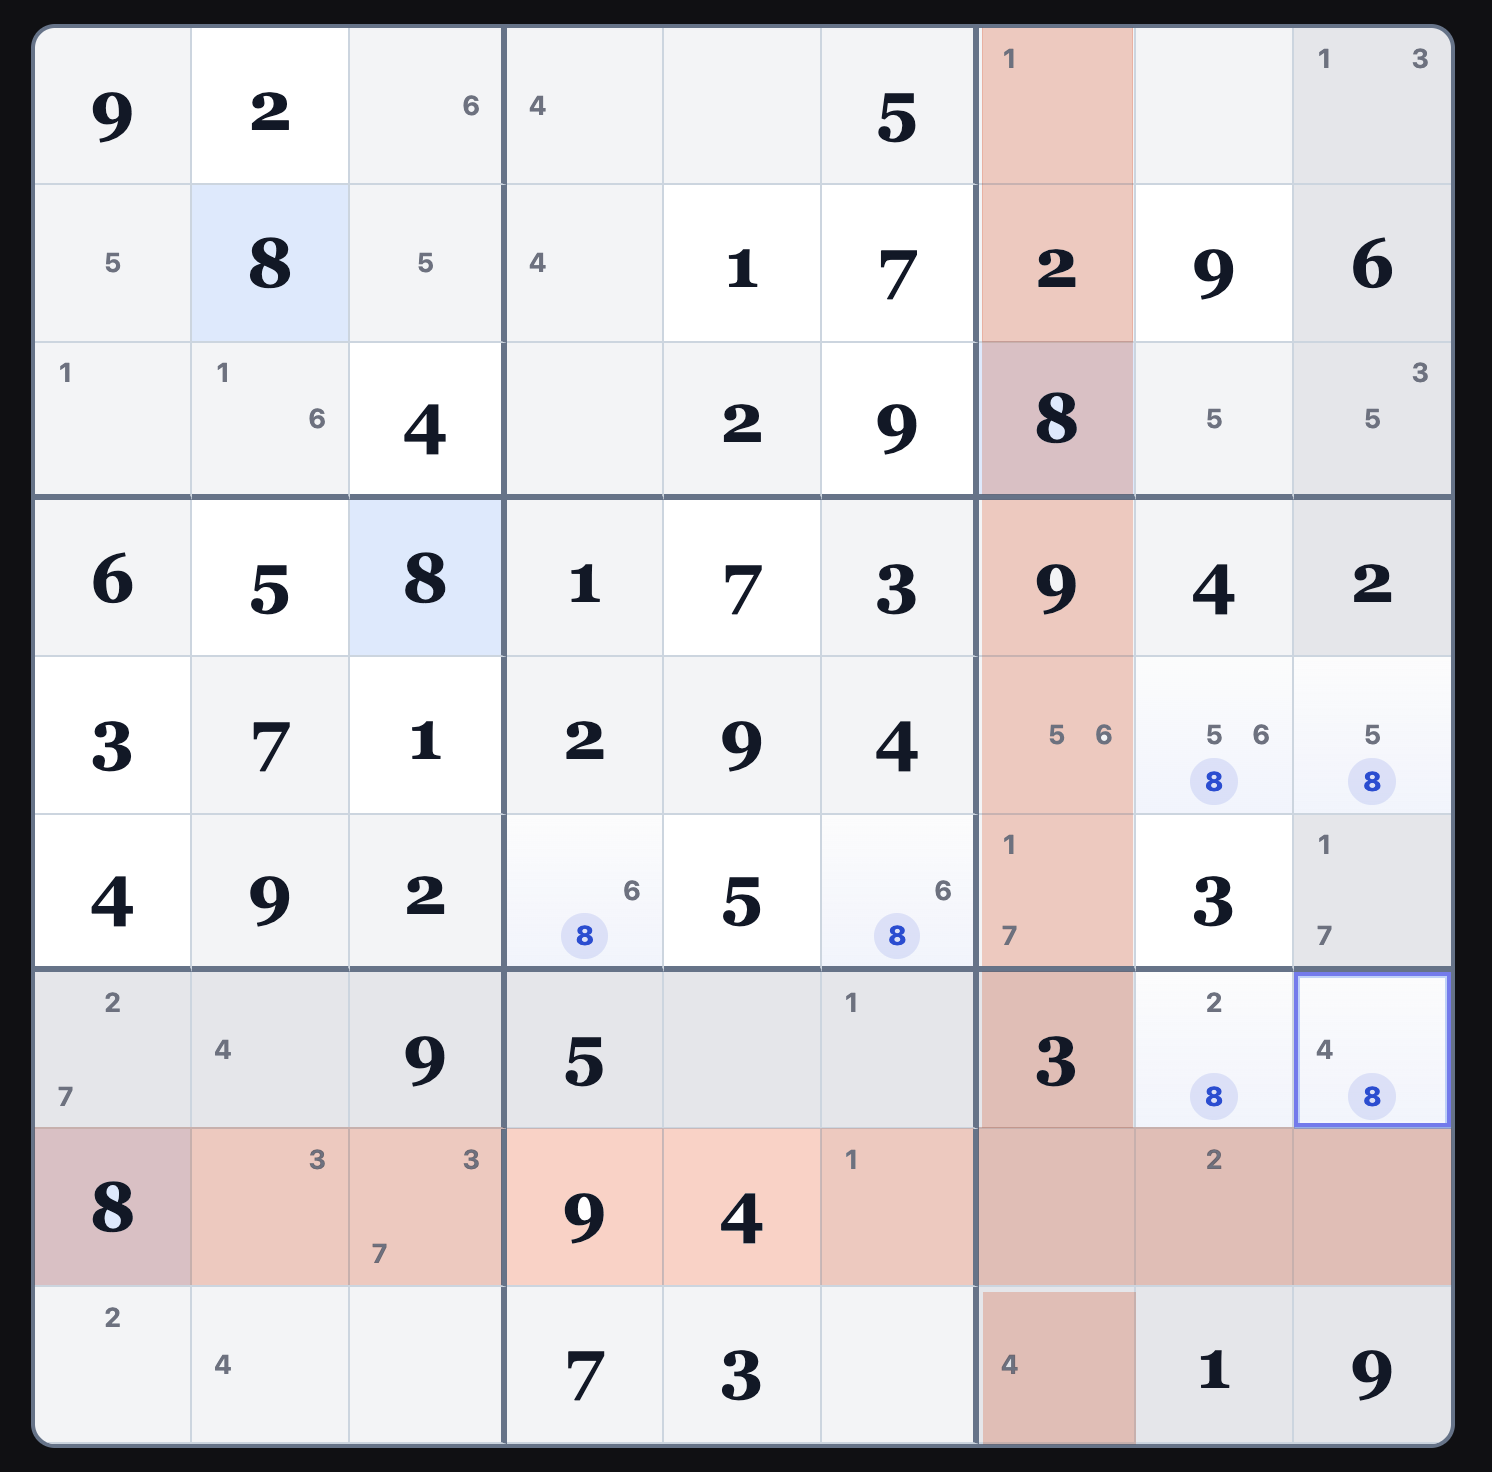
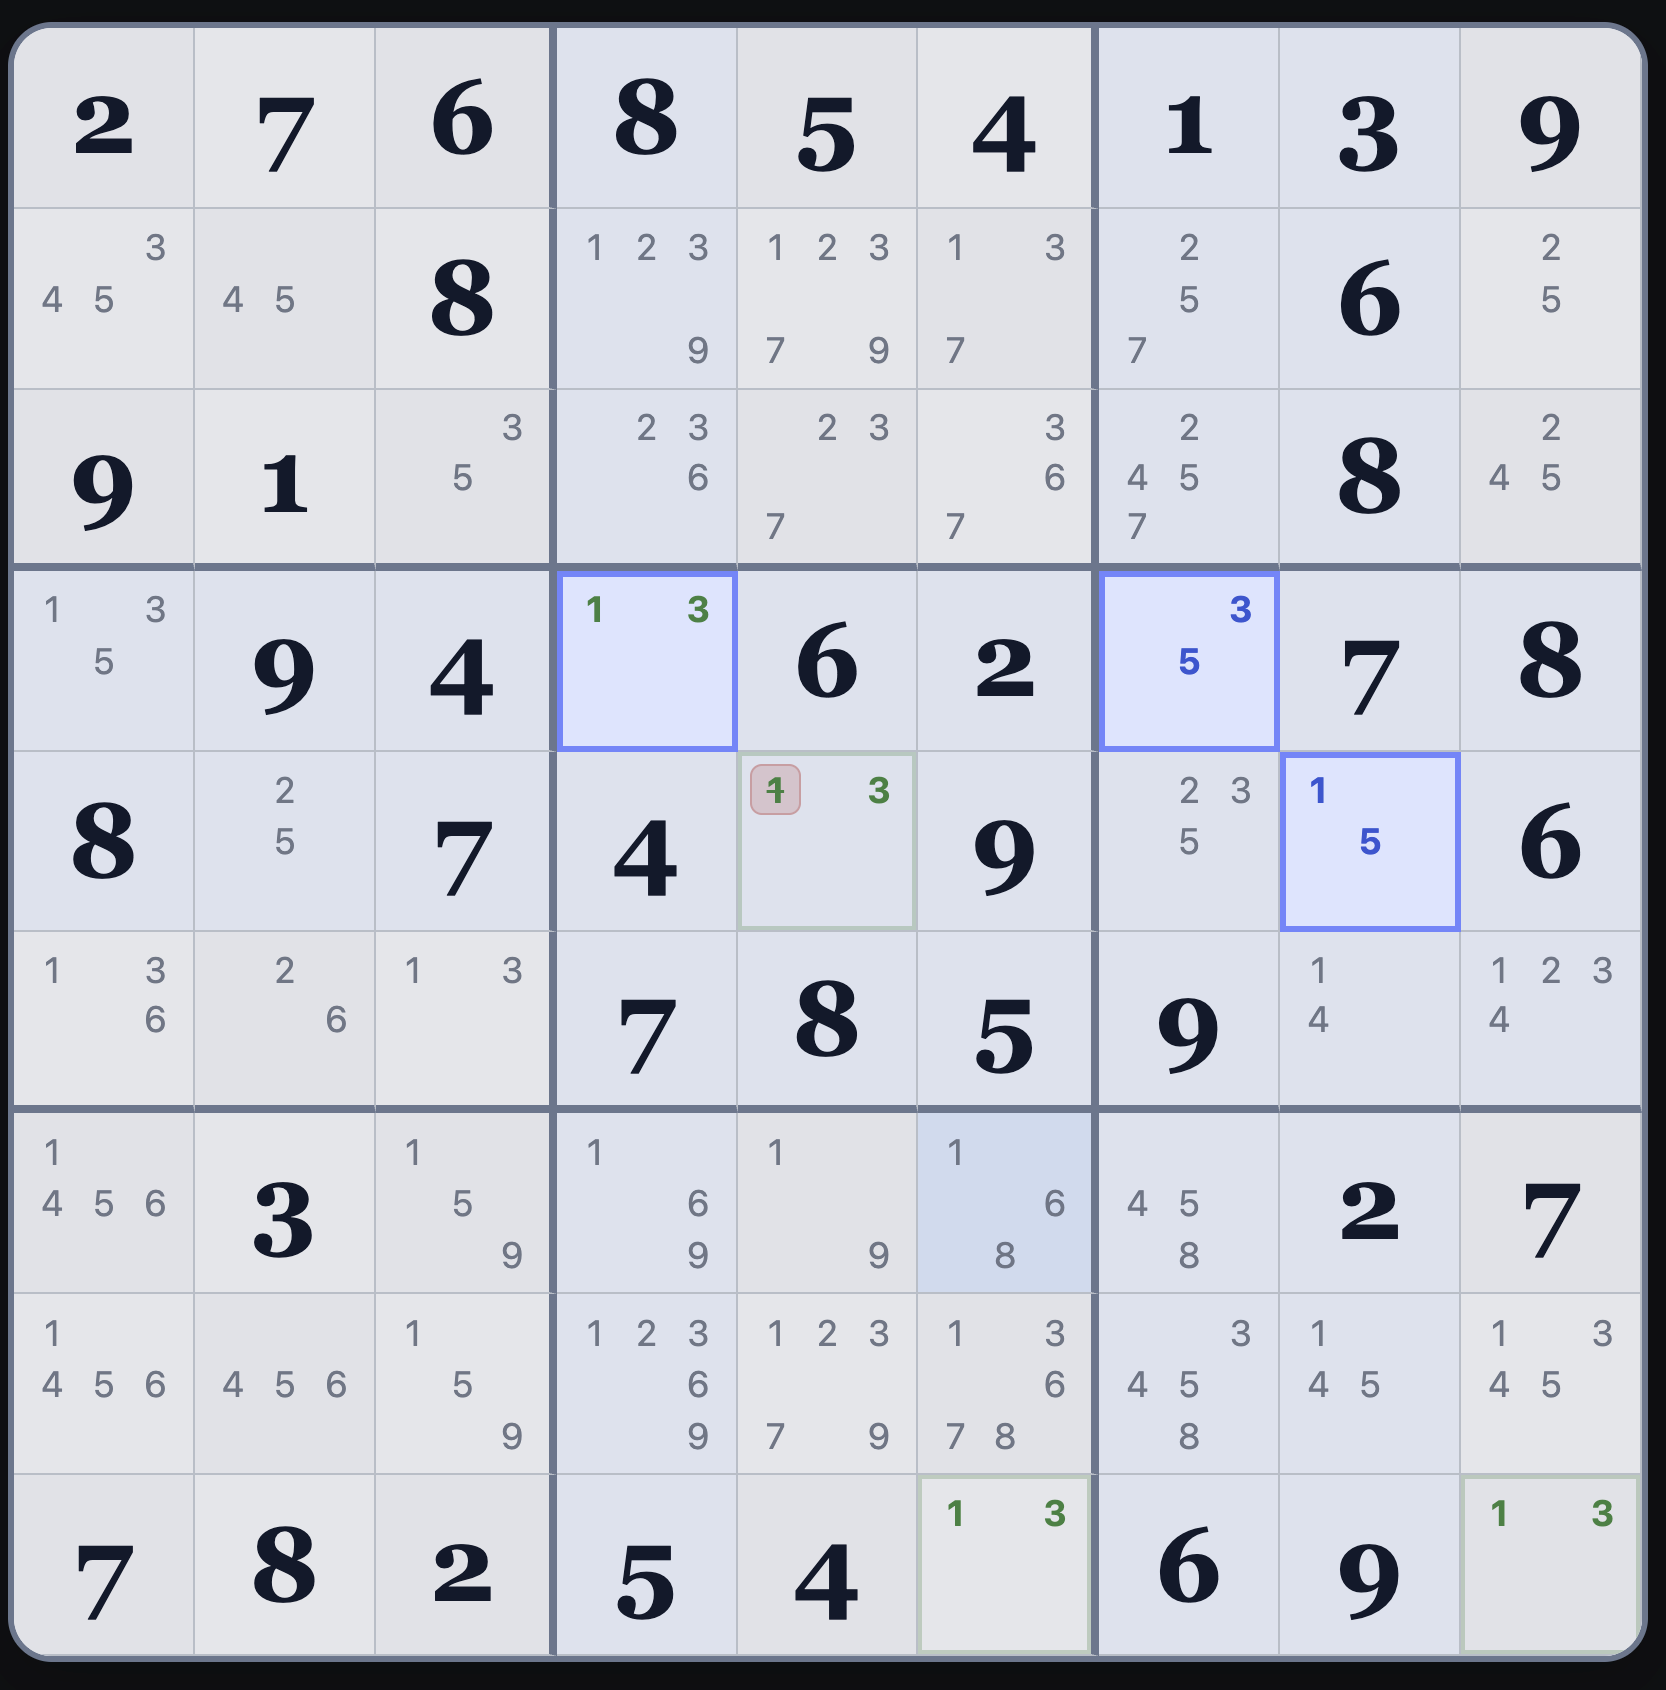
A Y-Wing is formed by r4c7 (3/5), r4c4 (3/1), and r5c8 (5/1). Because one of the two wing cells must be 1, the red 1s can be removed from any squares that see both wings..
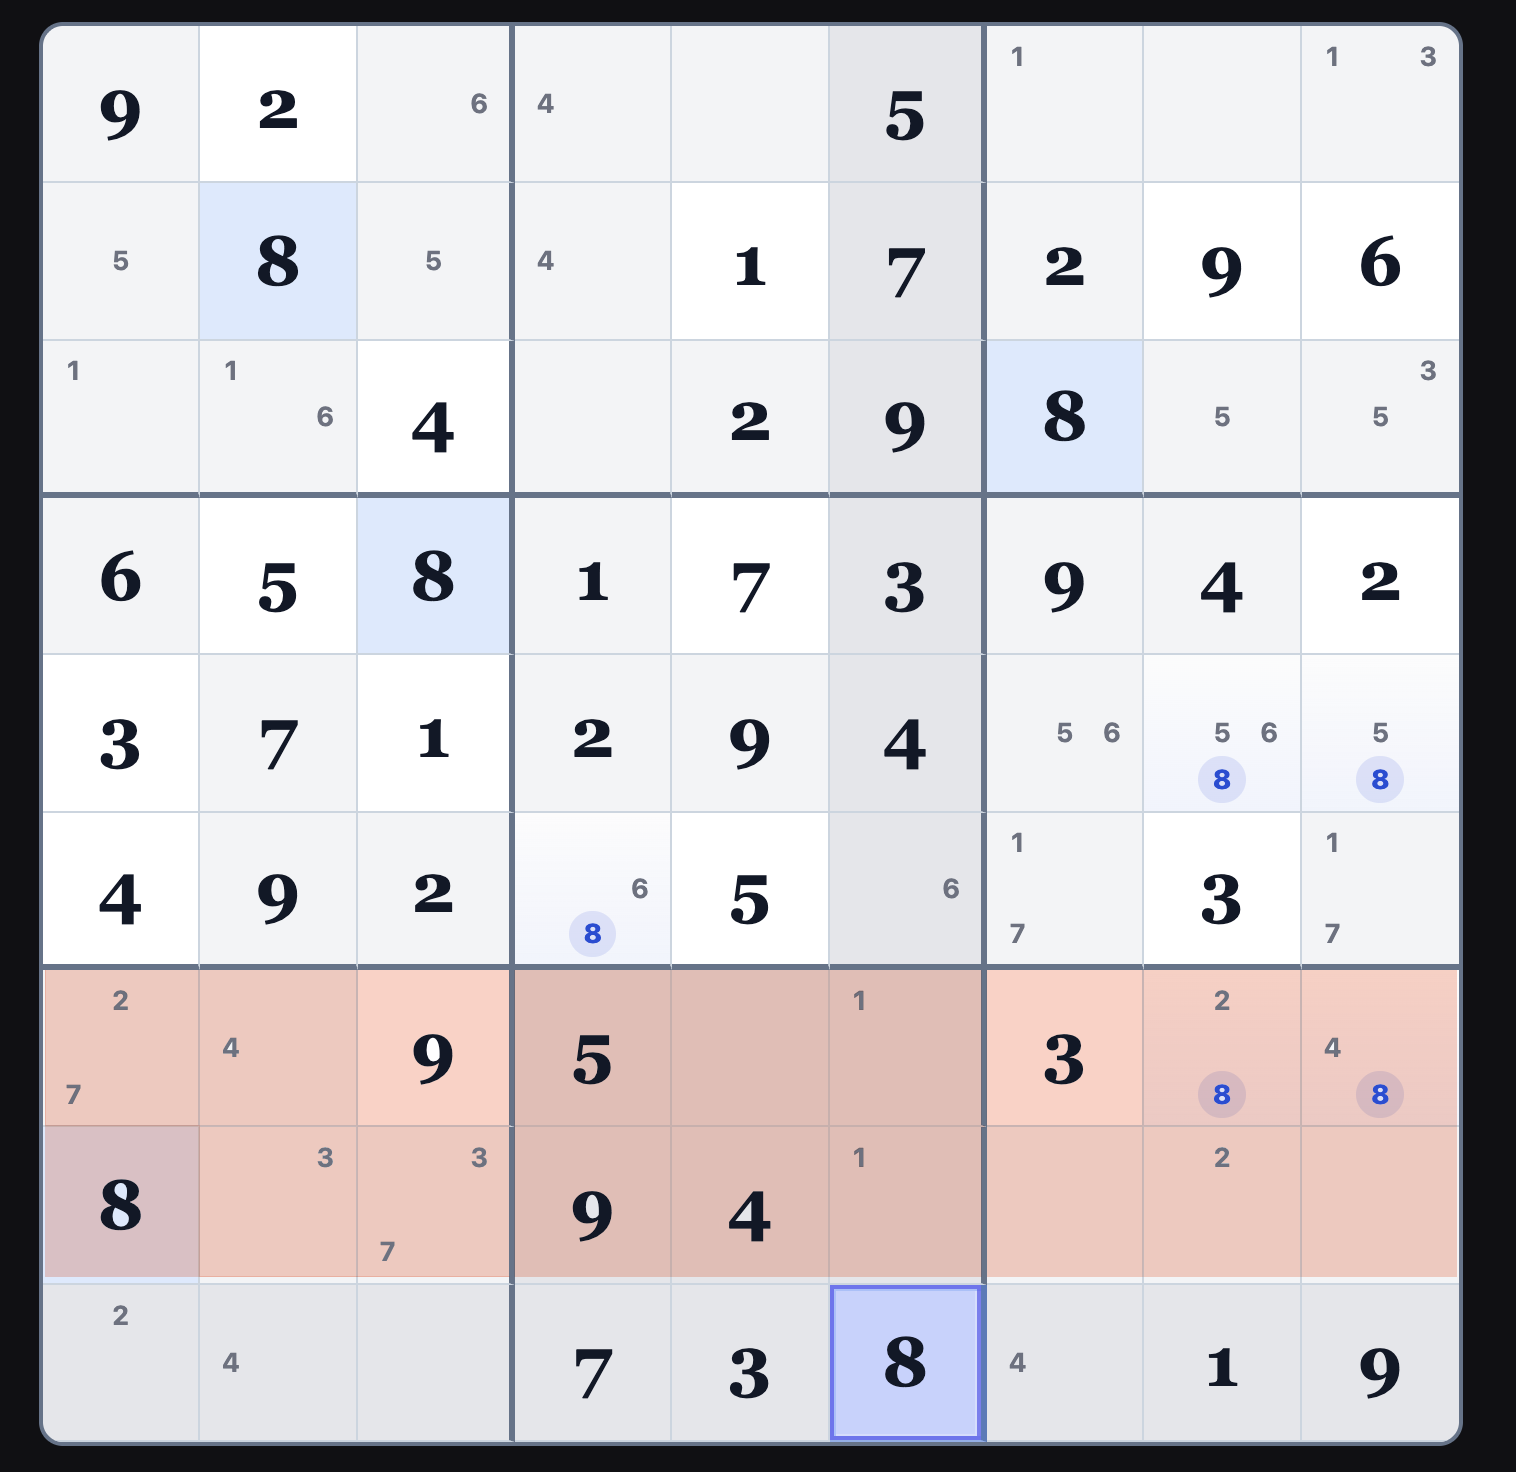
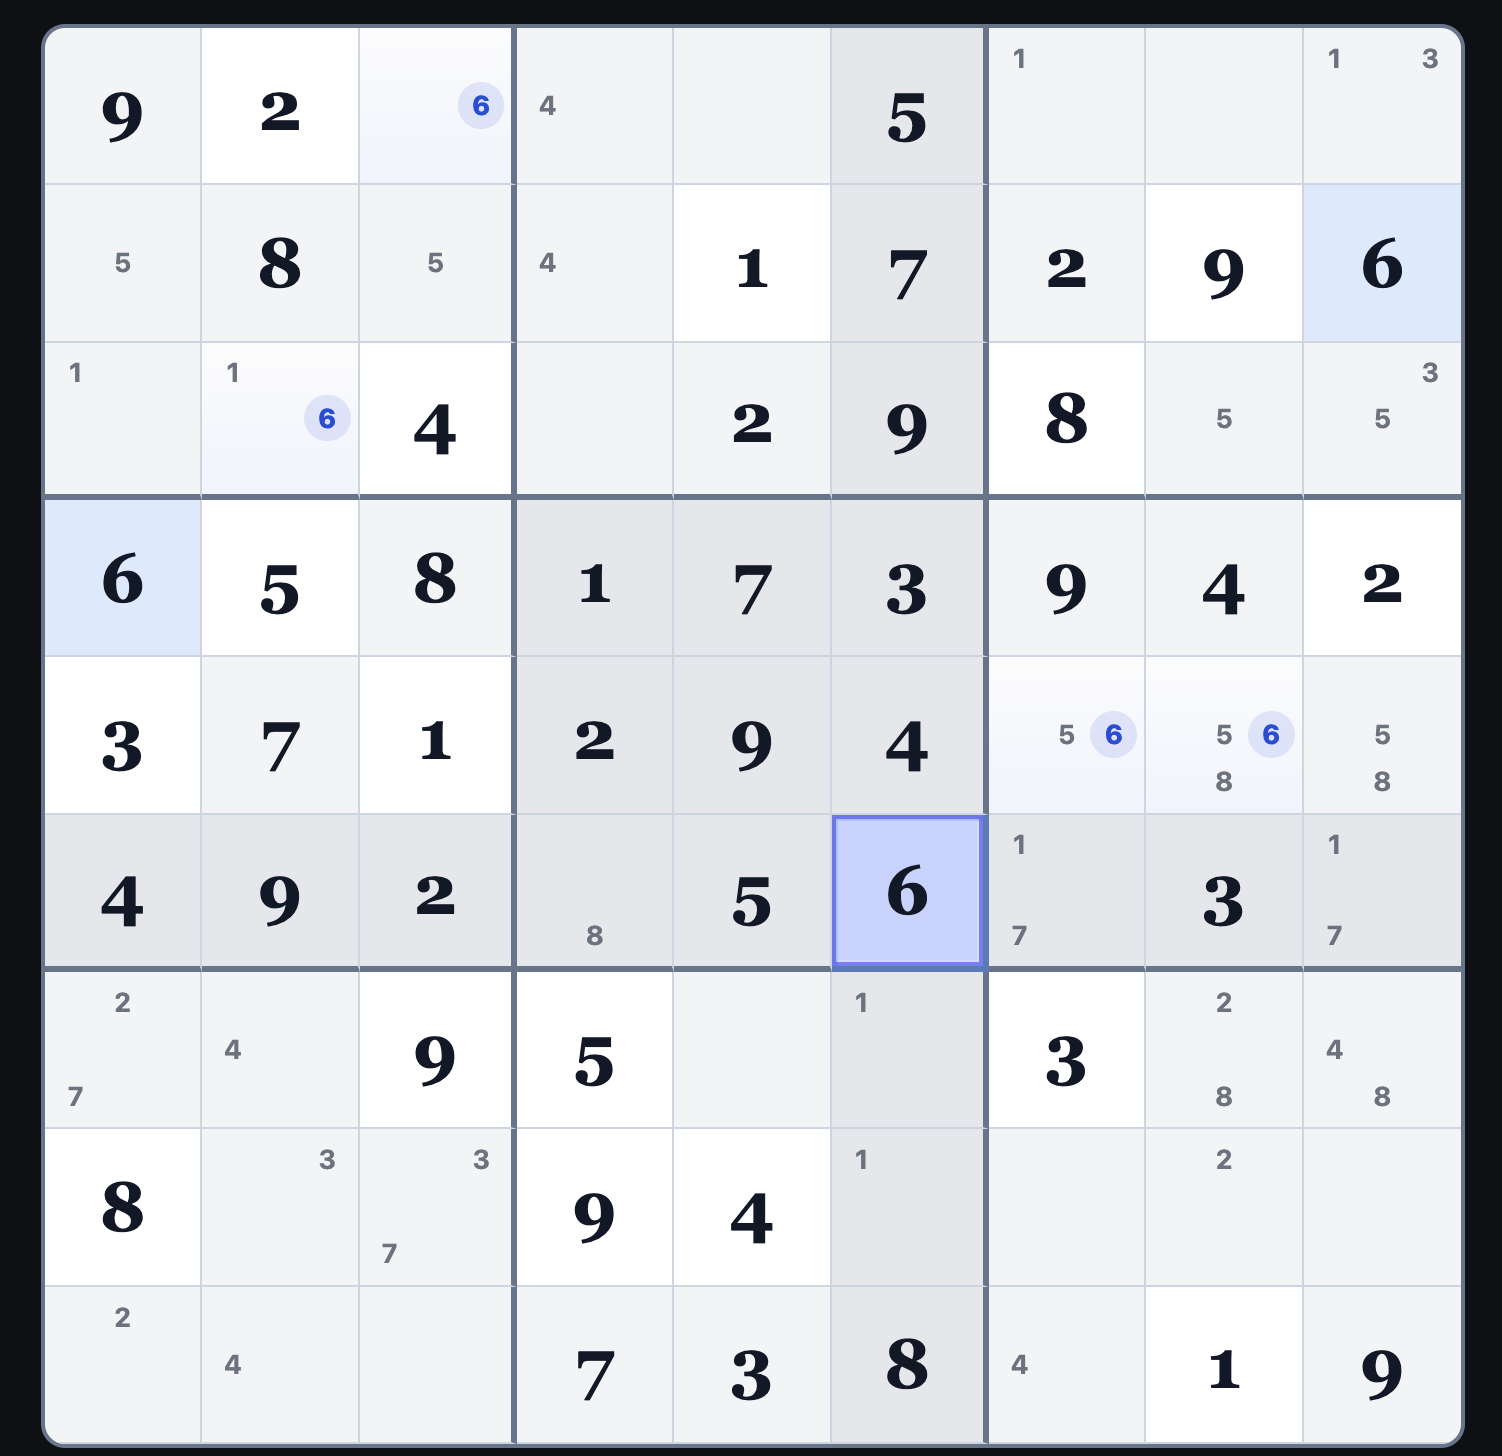
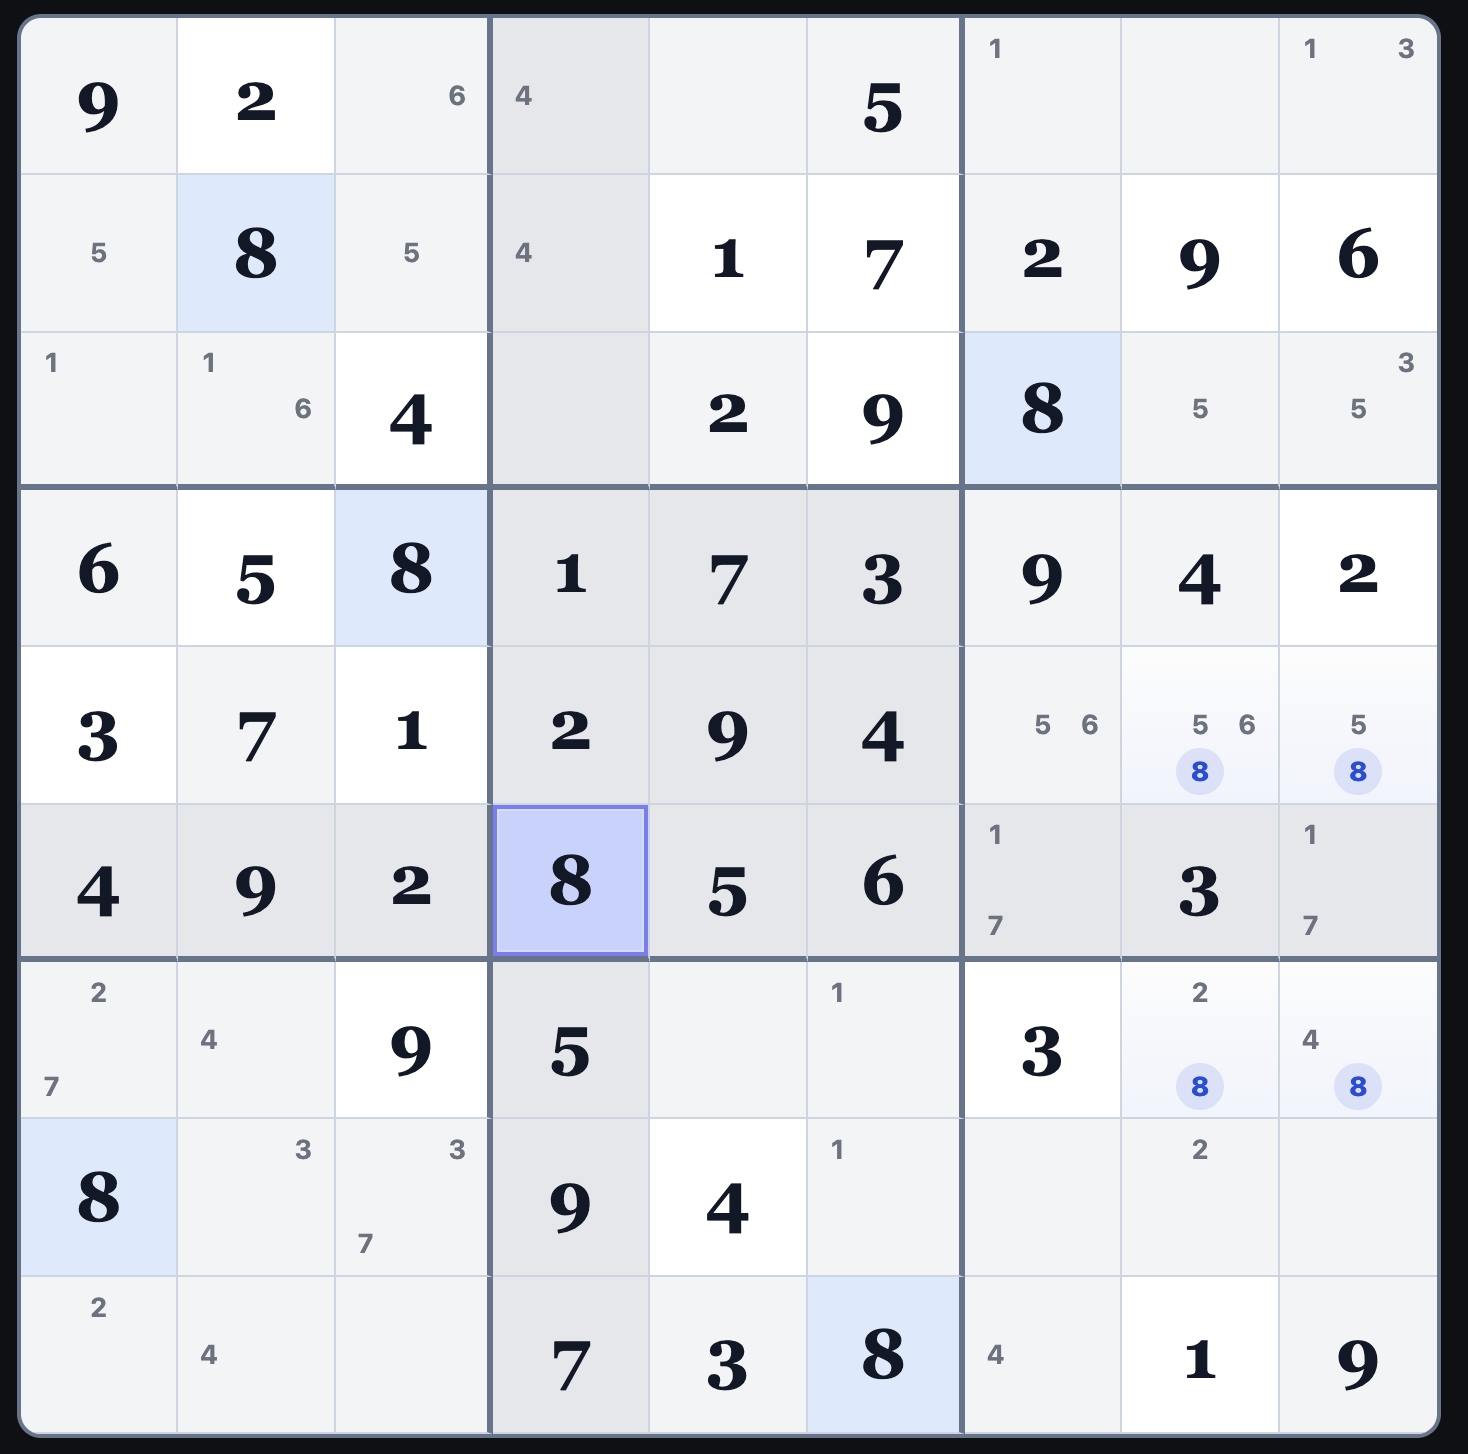
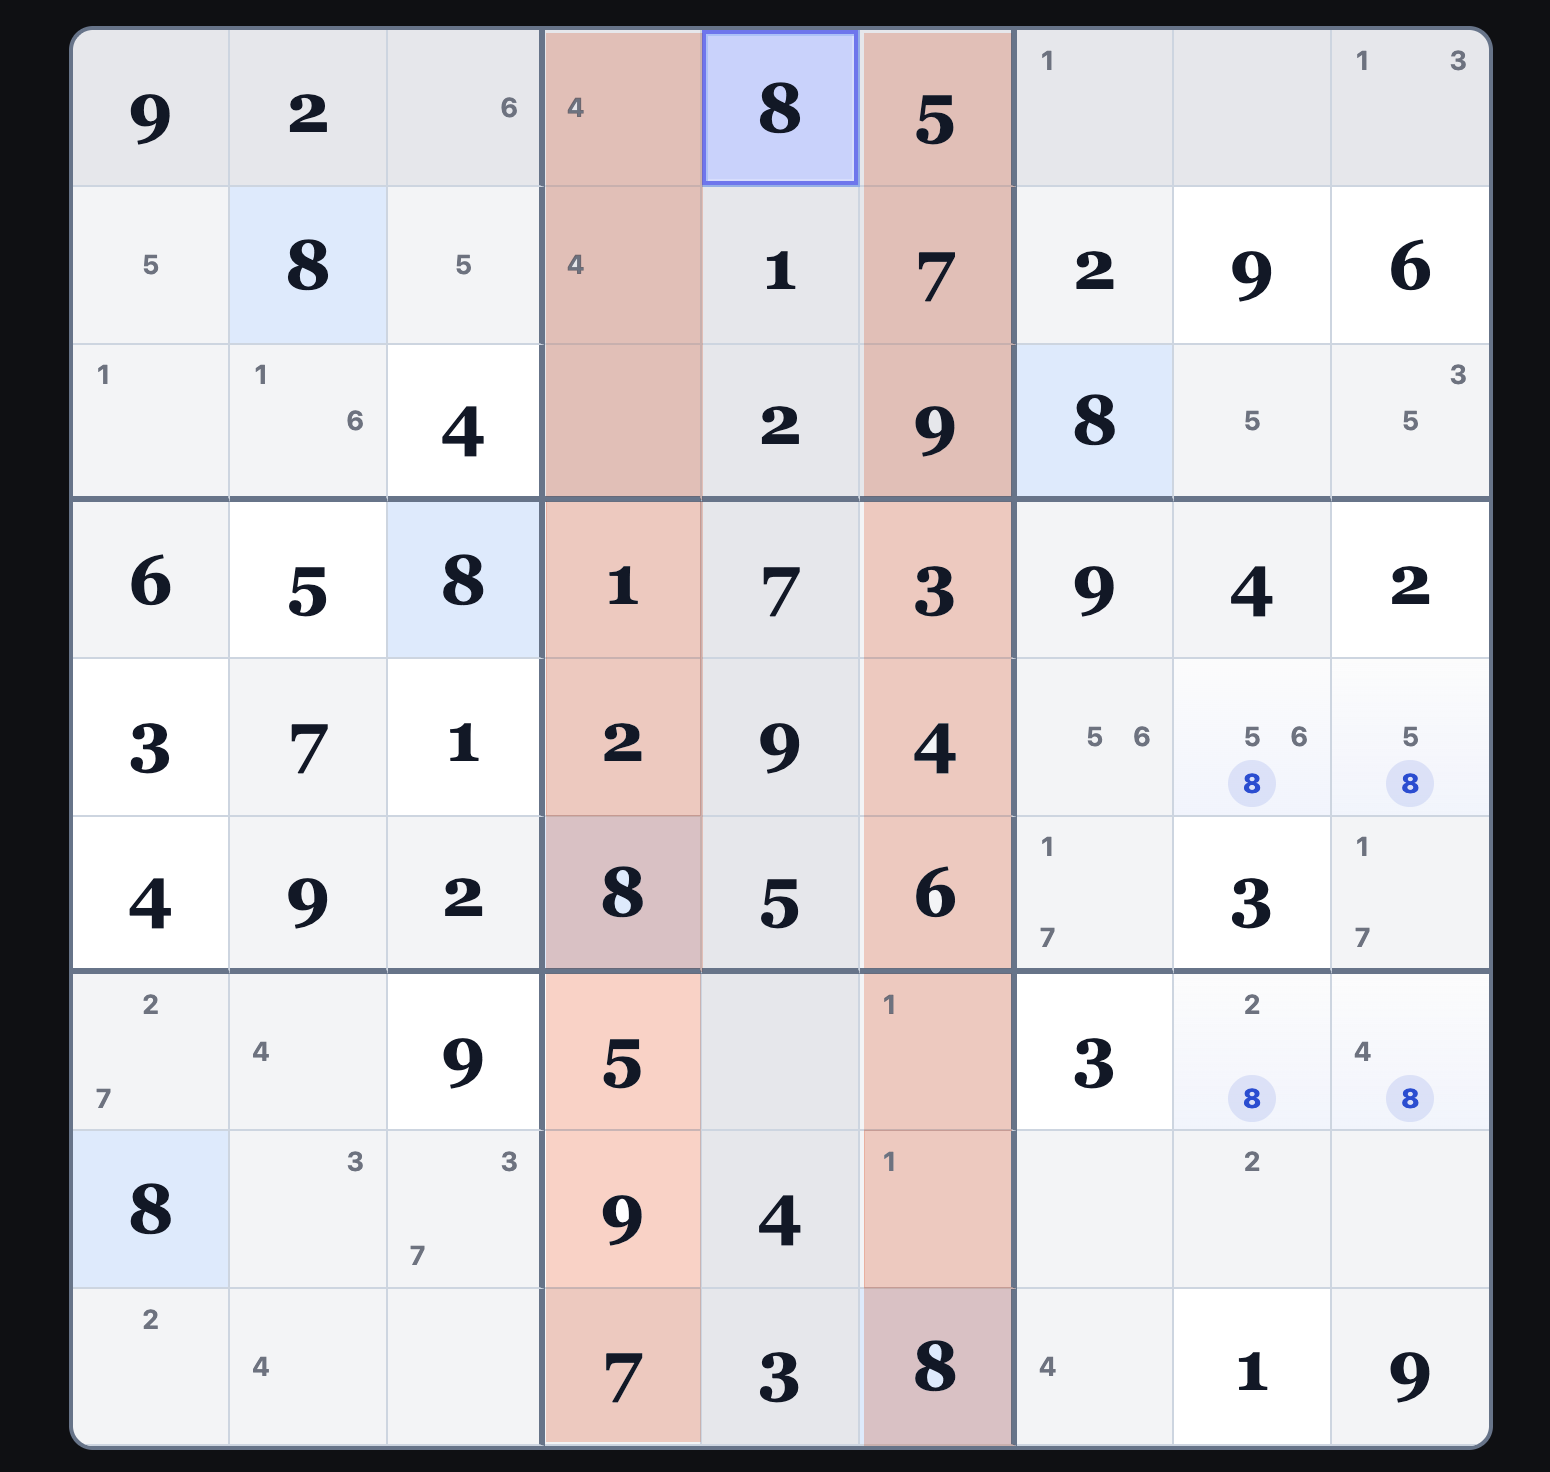
A Y-Wing guarantees one digit (the shared one) appears in one of two places — so anything that sees both places can’t be that digit.
When scanning a board, don’t start with three cells. Start with this:
“Find a cell with exactly 2 candidates.”
That’s your pivot.
Then:
1. Look for two other cells that:
• each share one candidate with the pivot
• each have exactly 2 candidates
• and are not in the same unit as each other
2. Check if those two cells share a third digit
If yes → you have a Y-Wing.
W-Wing
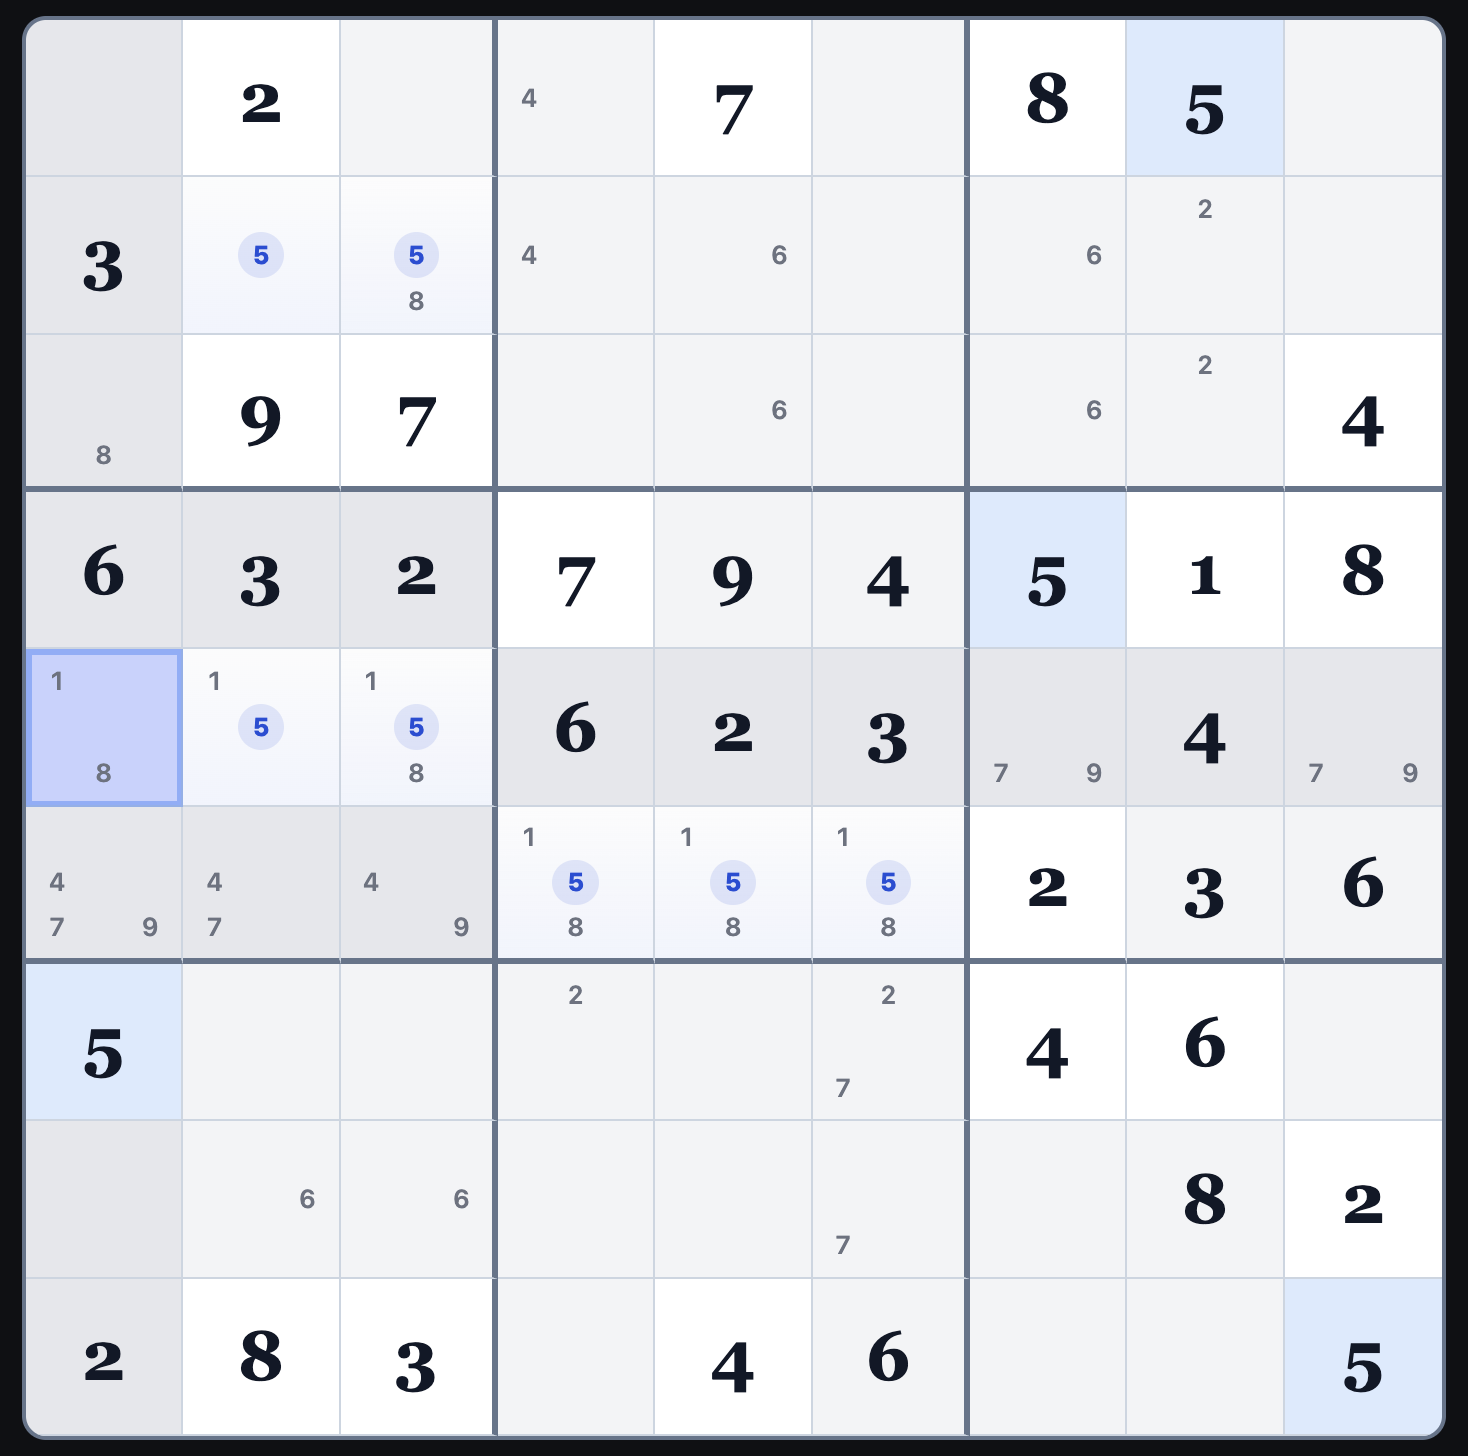
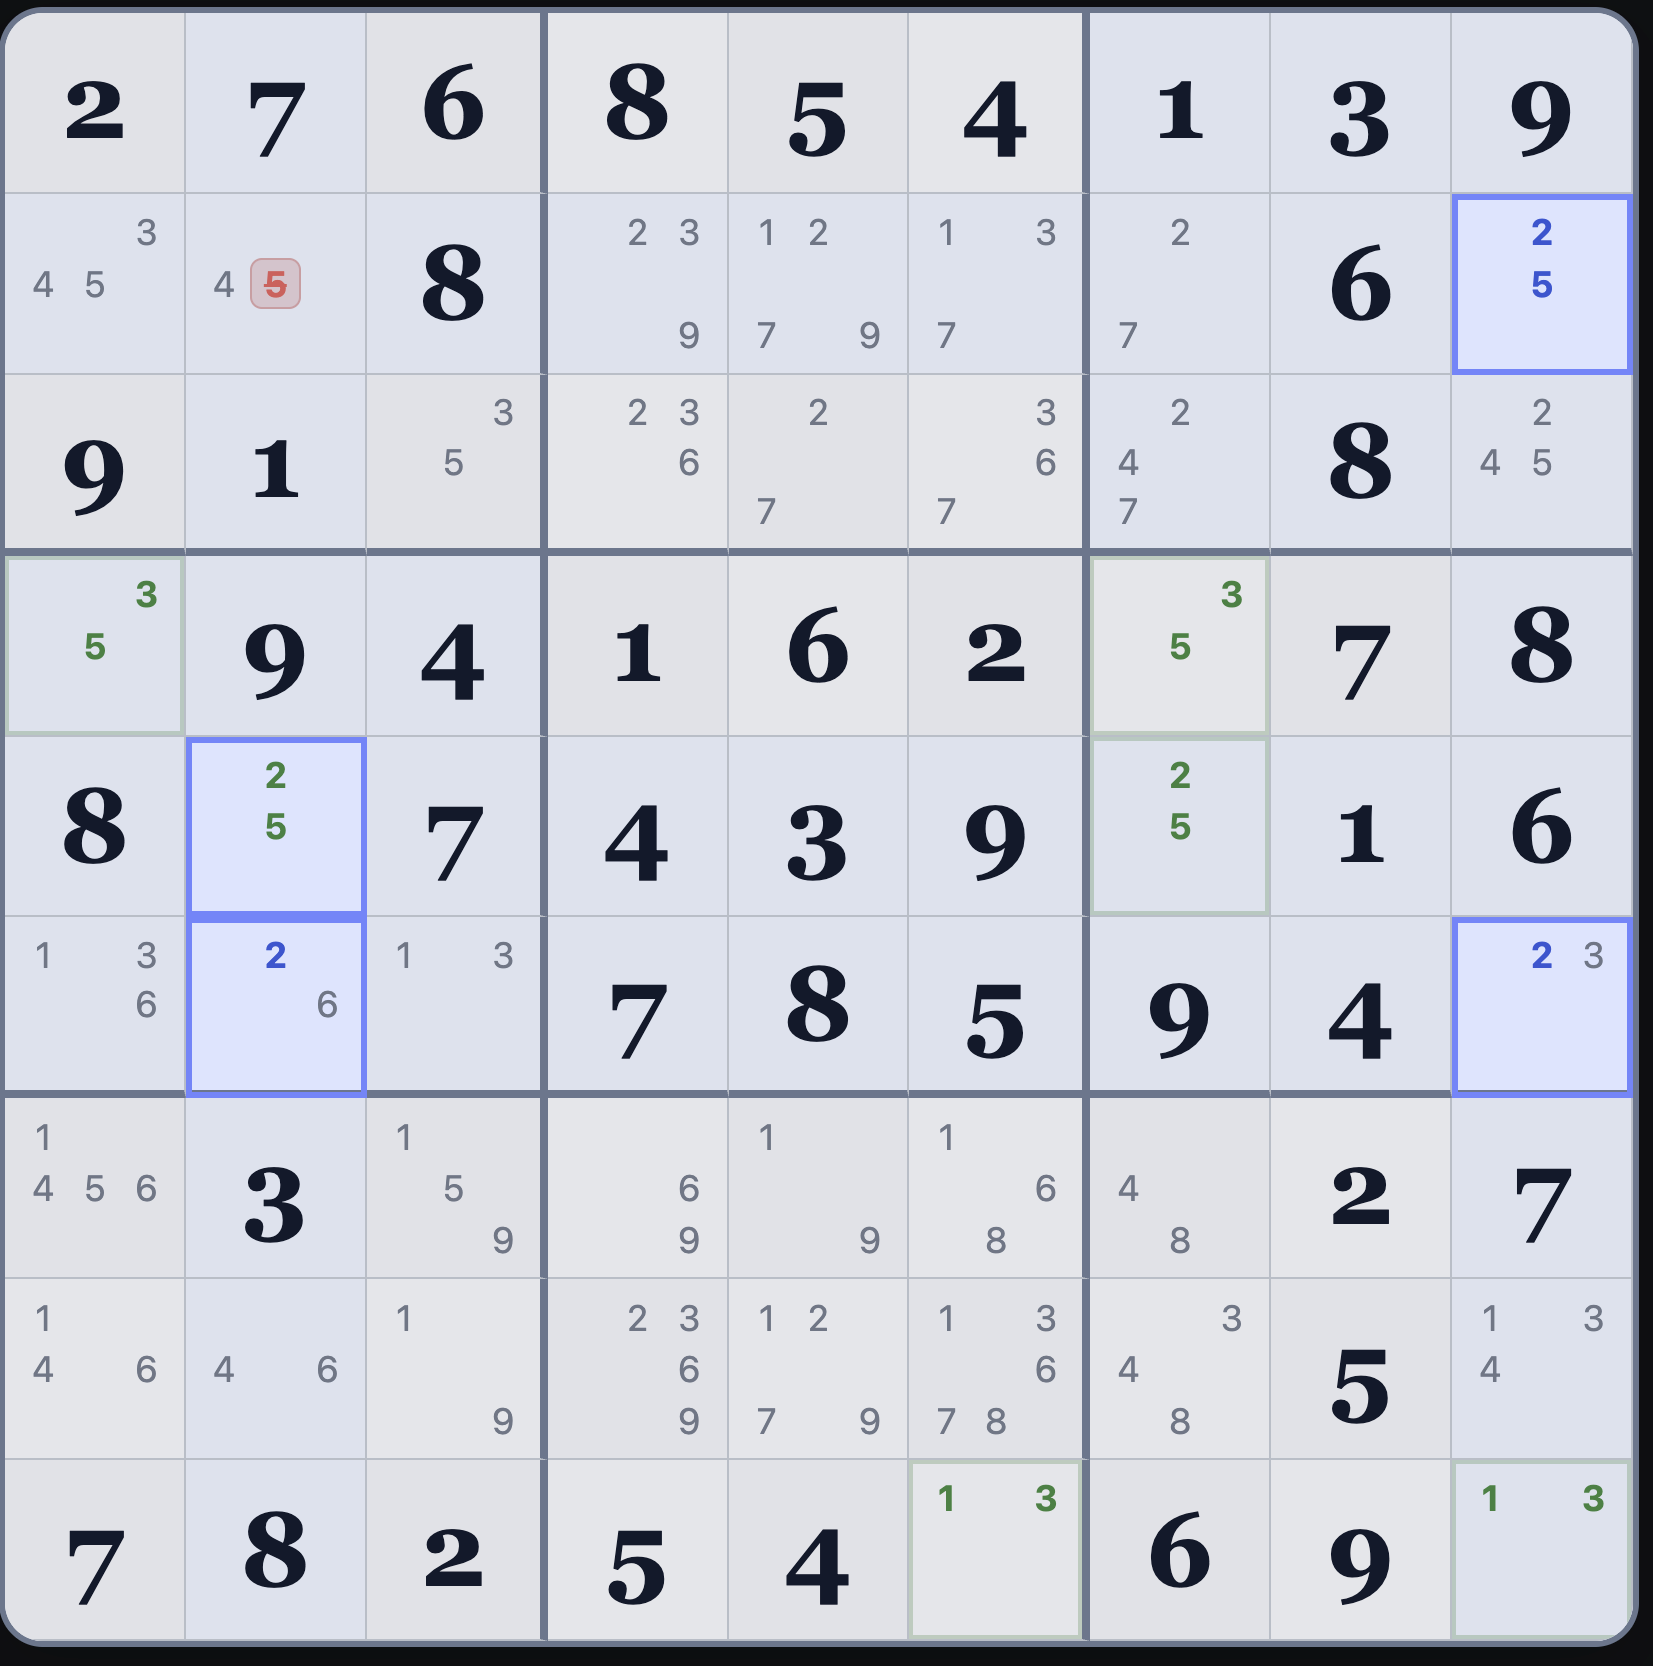
A W-Wing is formed by r2c9 and r5c2, both containing 2/5.
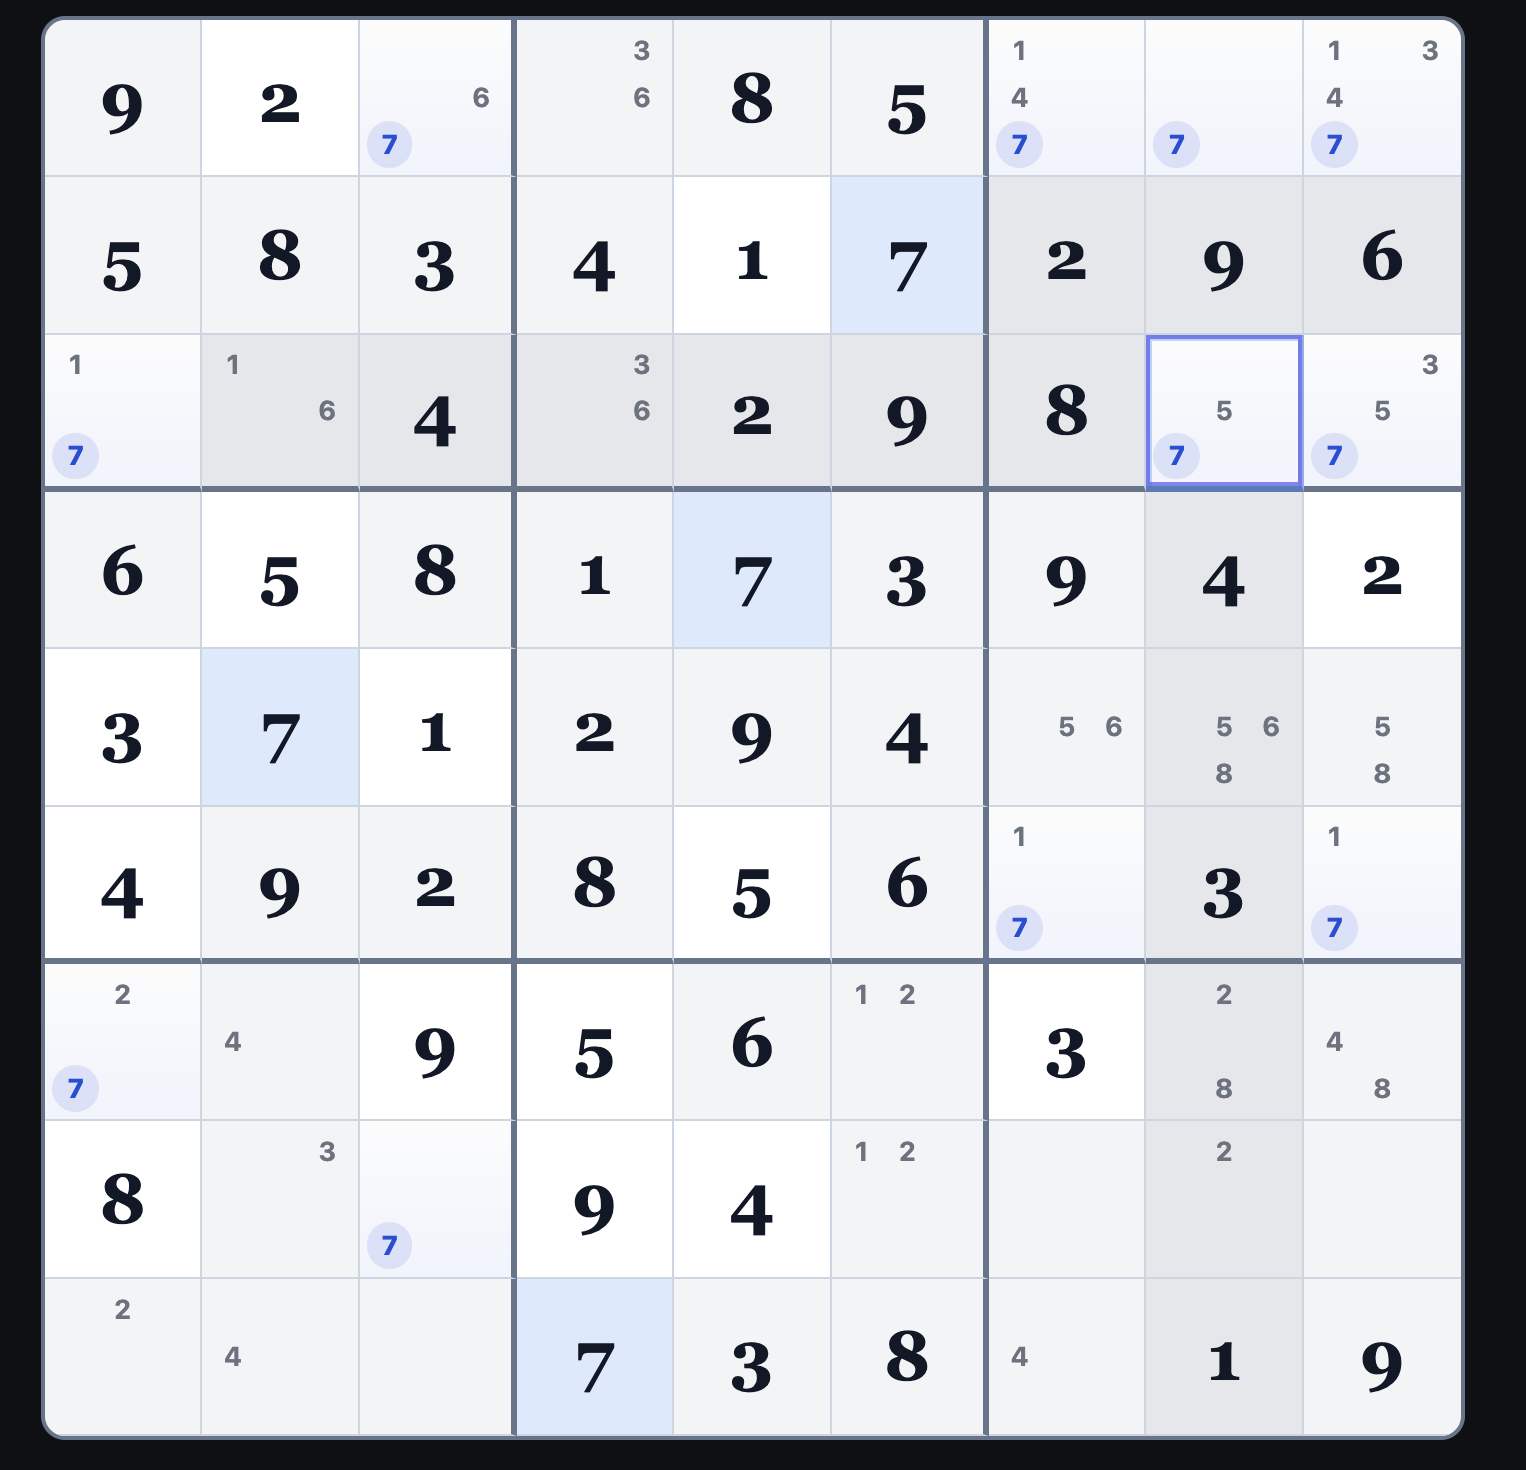
2 is strongly linked in row 6 between r6c2 and r6c9.
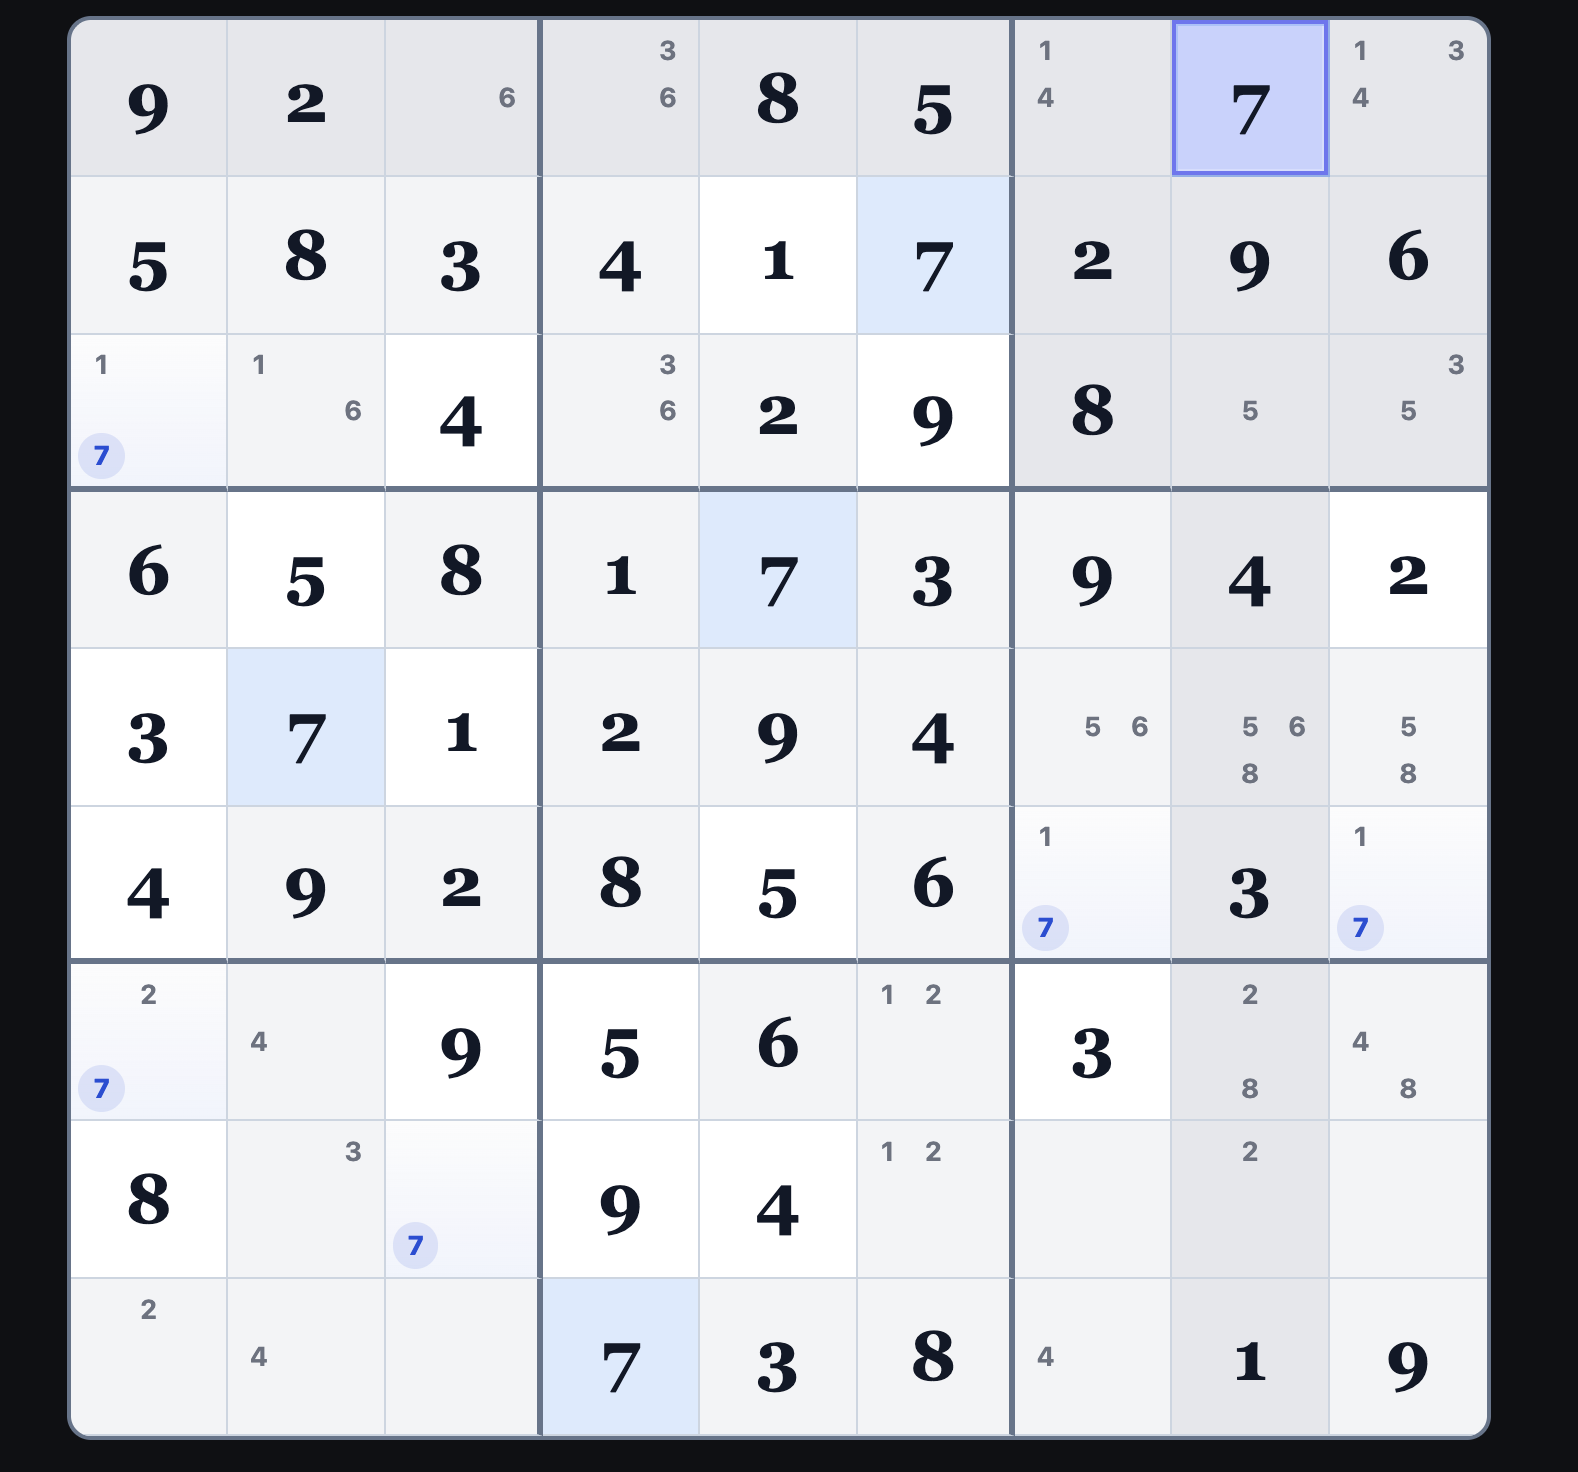
That forces one of the two 2/5 cells to be 5, so the red 5s that see both
highlighted pair cells can be removed.
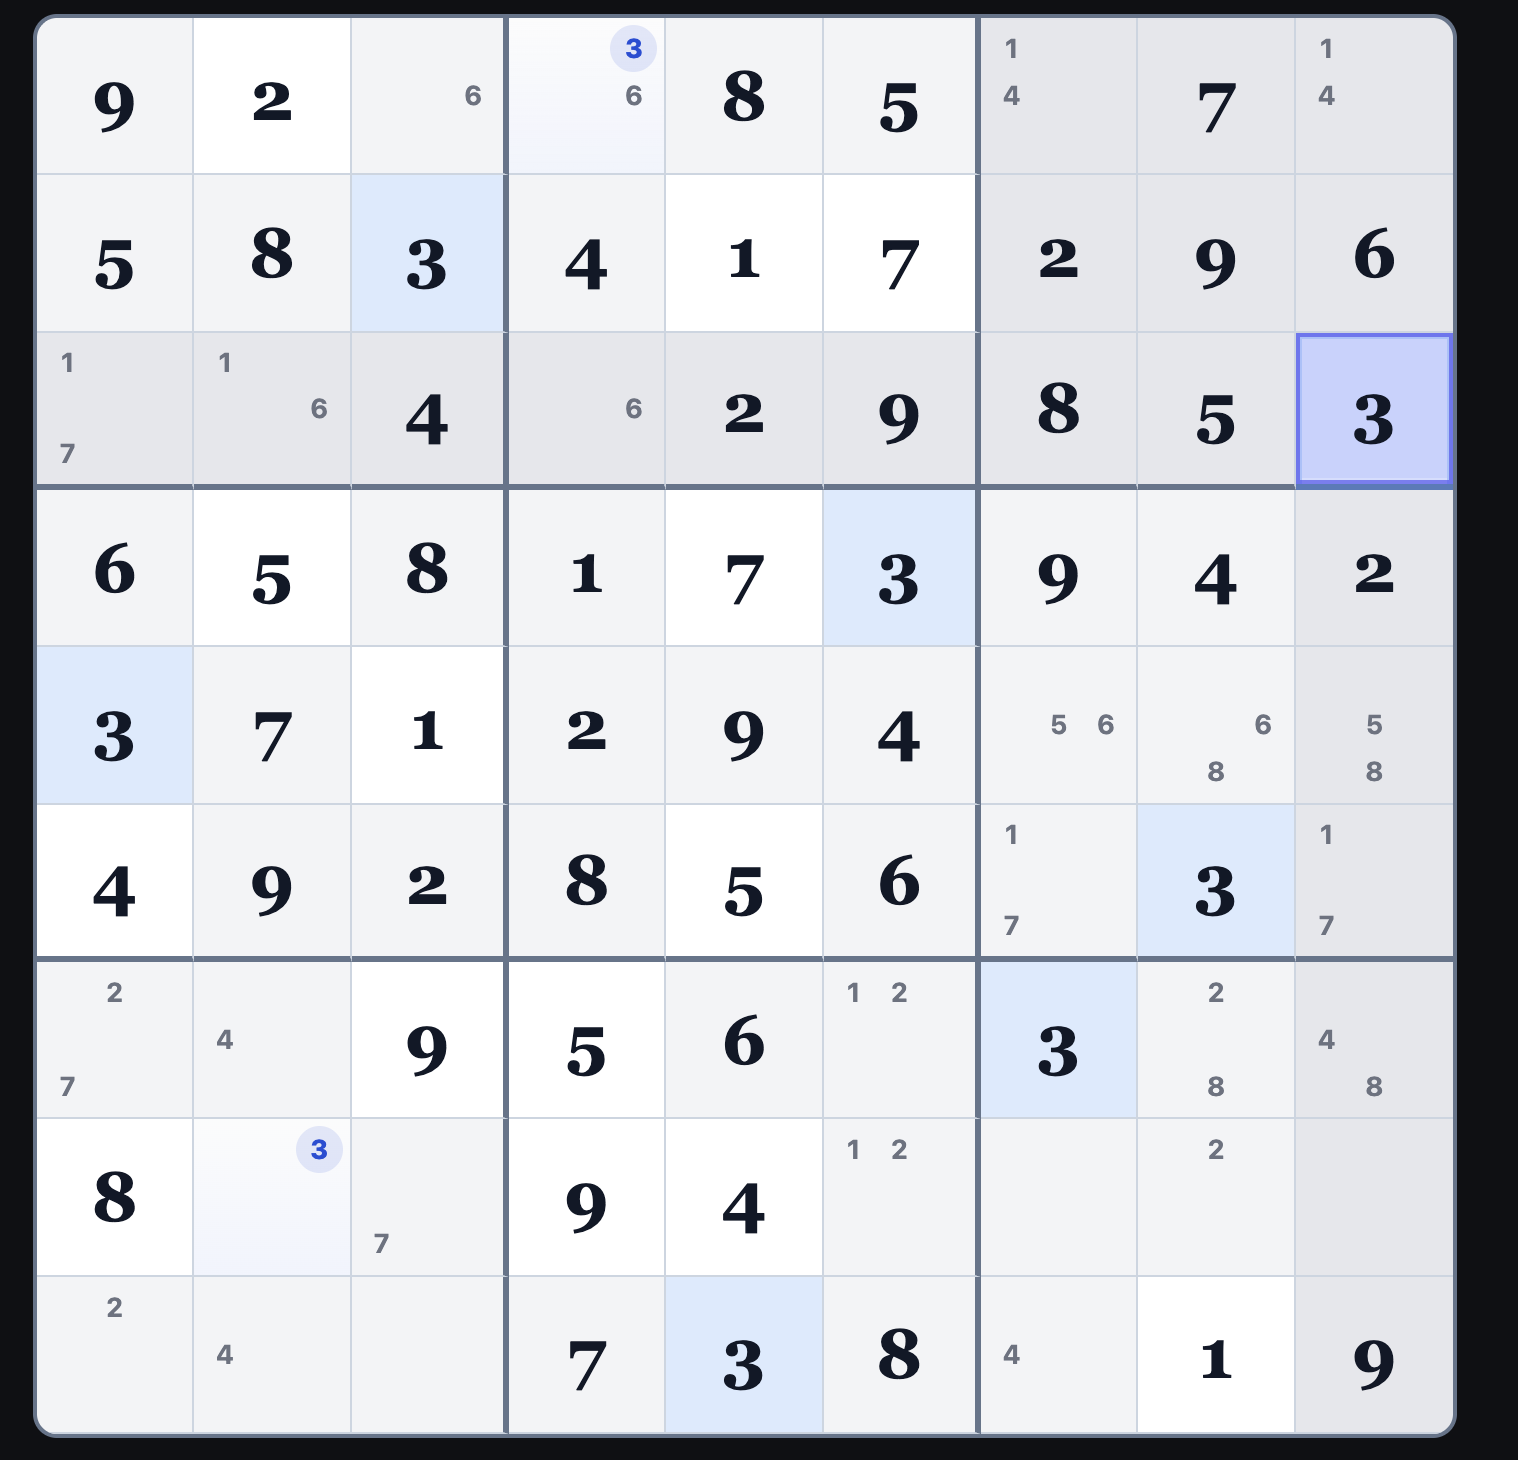
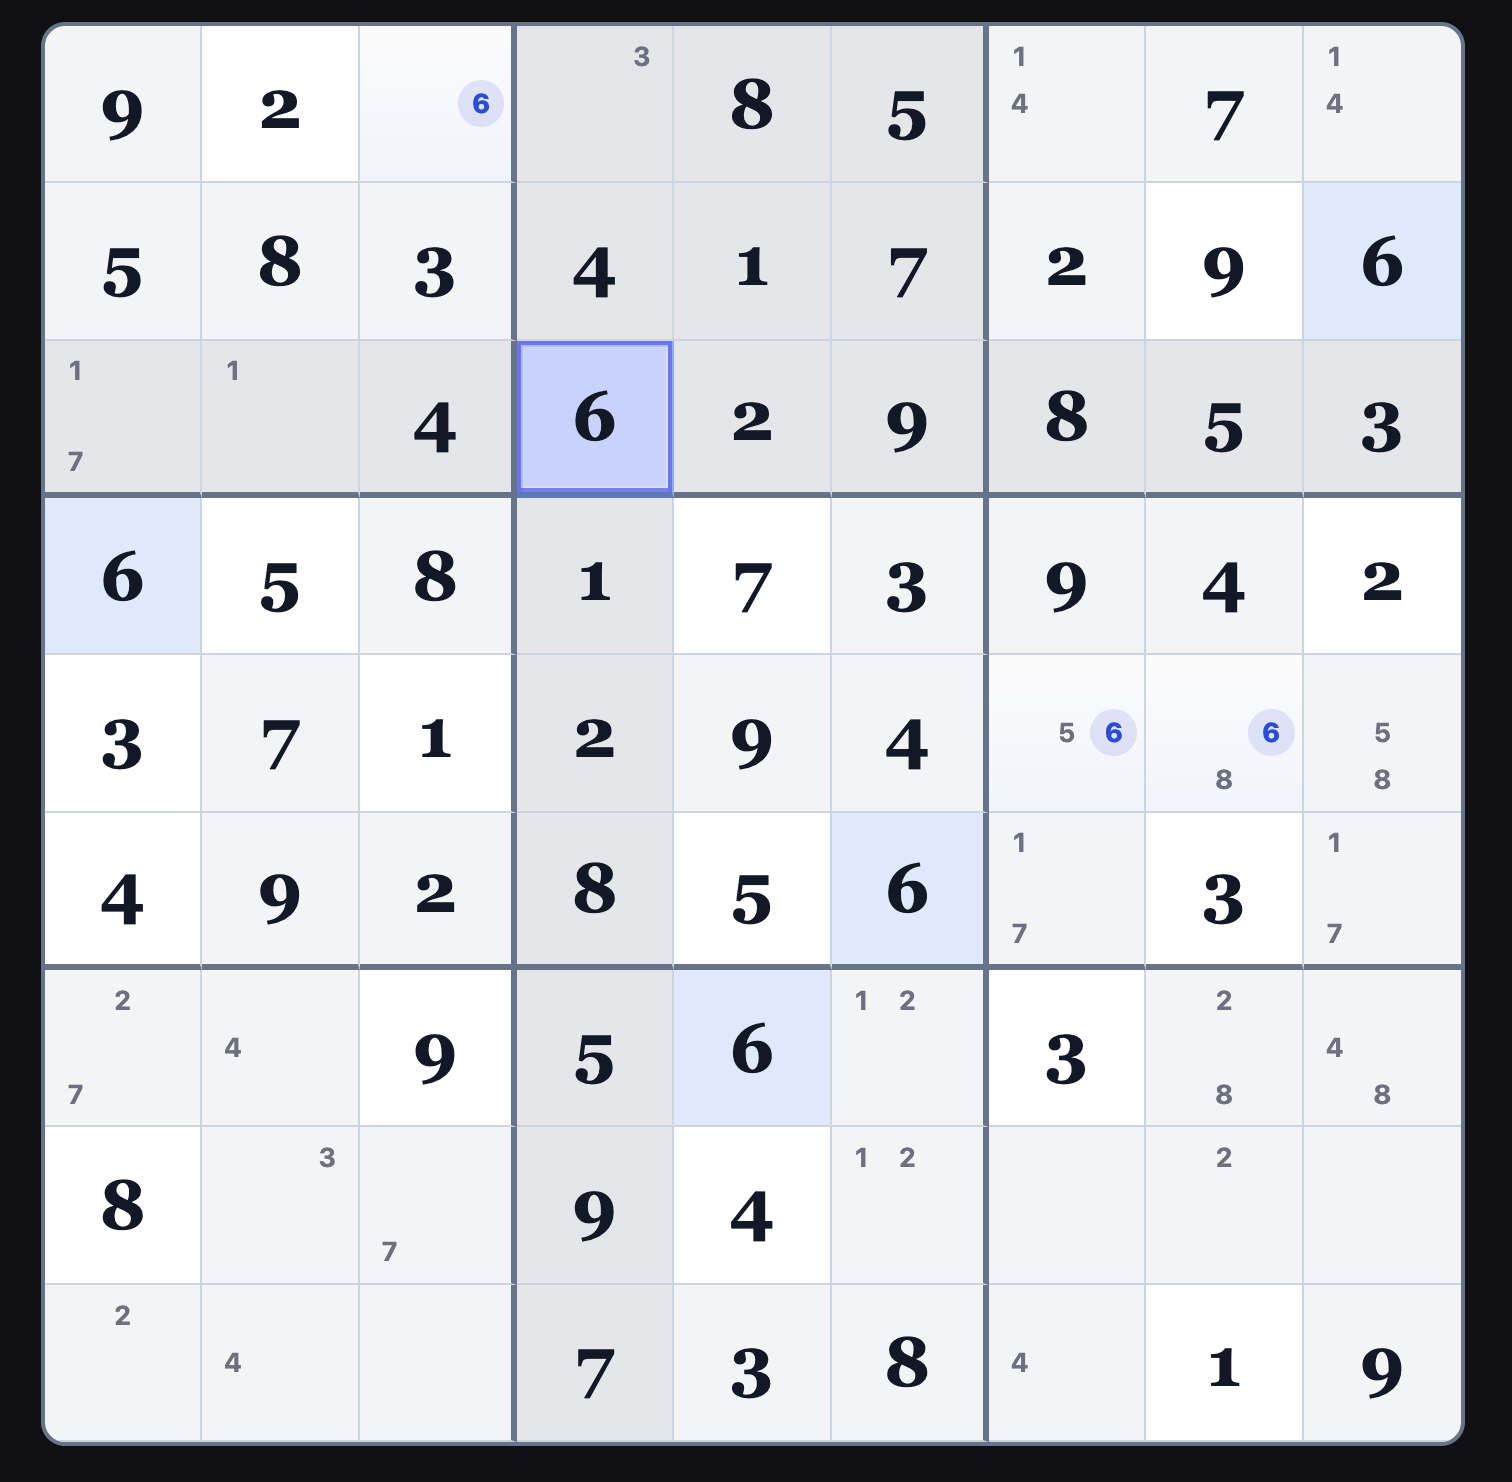
Think of the two highlighted squares as each having exactly the same two possible numbers. You don’t know which is which yet—but they are linked.
Now, elsewhere on the board, there’s a constraint that effectively says: one of those two squares must take a specific number. Because of that, both squares can’t take the other number at the same time.
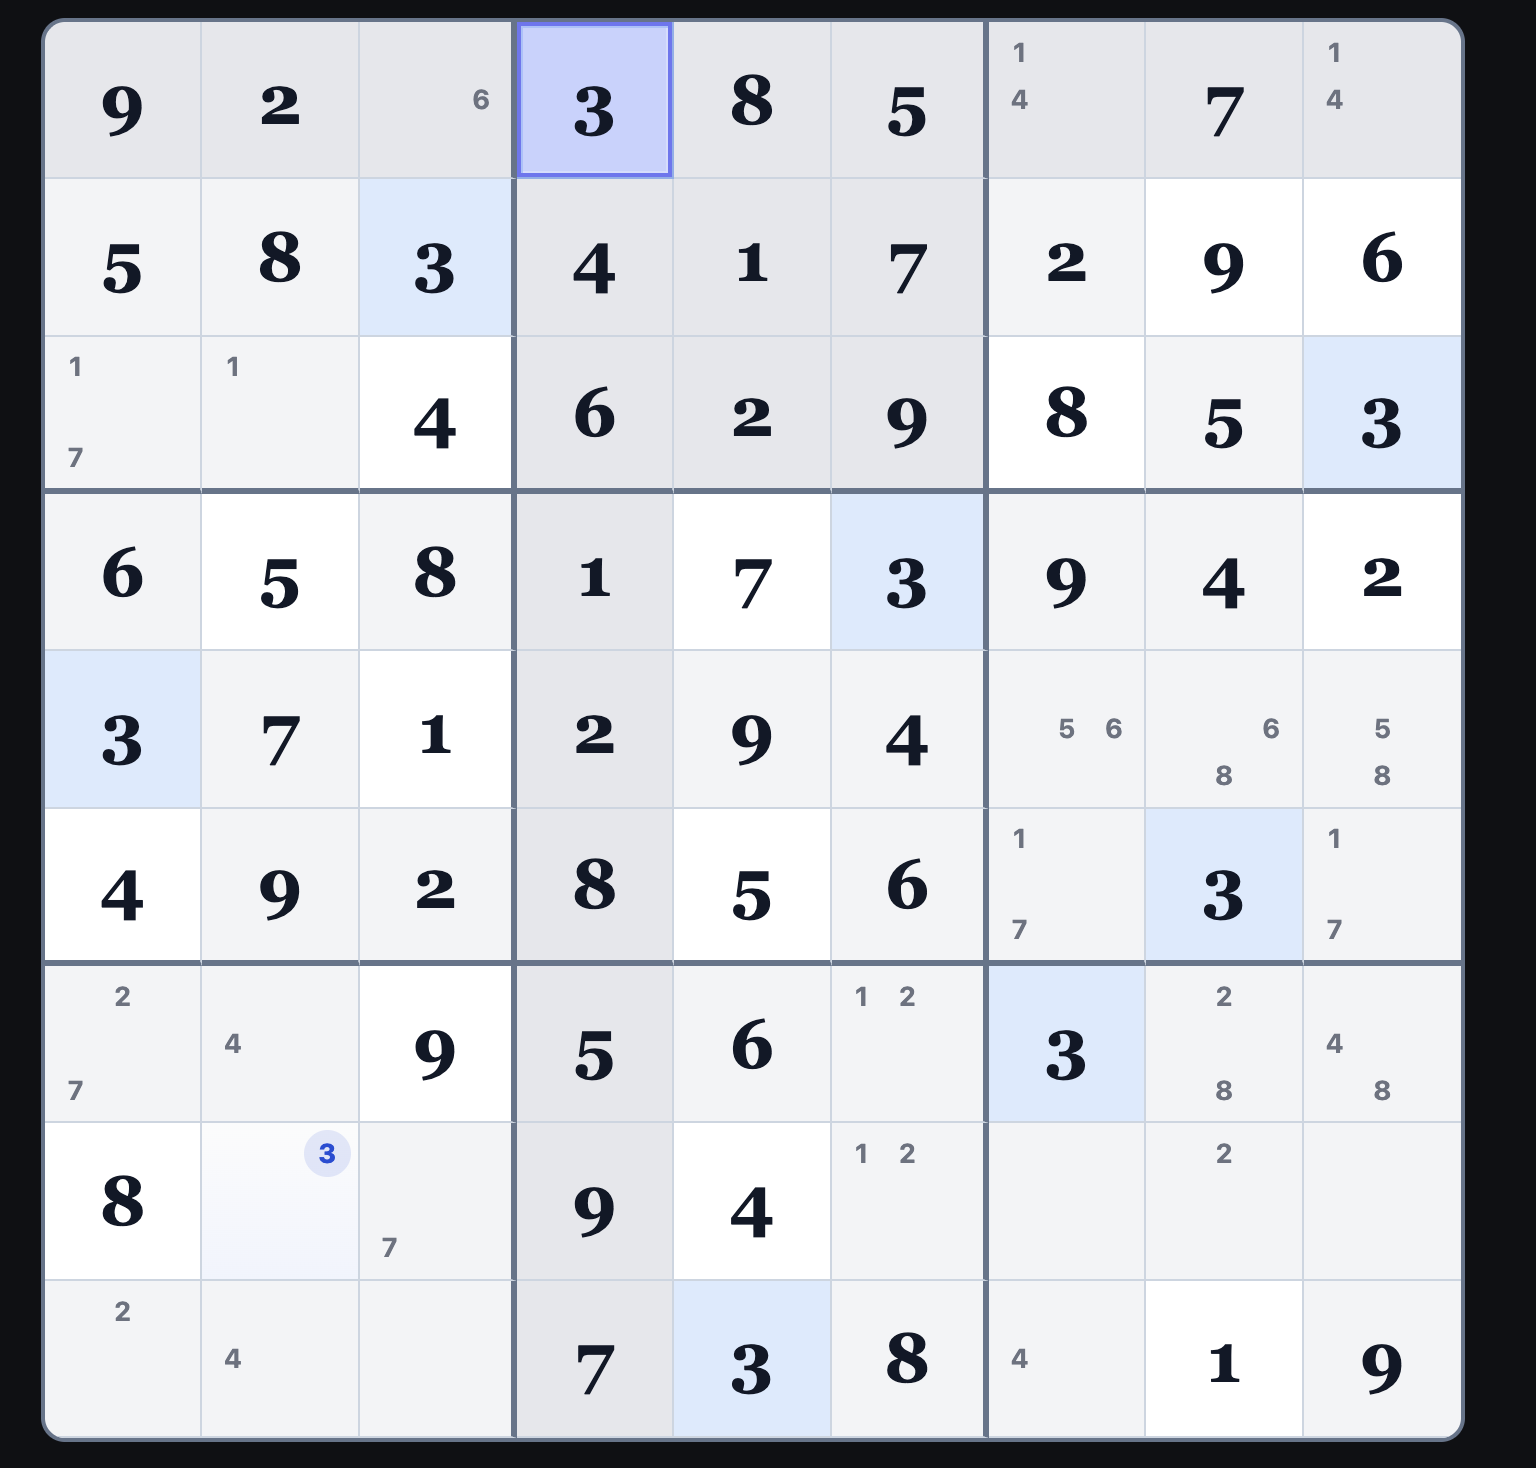
So any square that “sees” both of these (shares a row, column, or box with both) can’t use that other number—because no matter how things resolve, that number will already be used in one of the two linked squares.
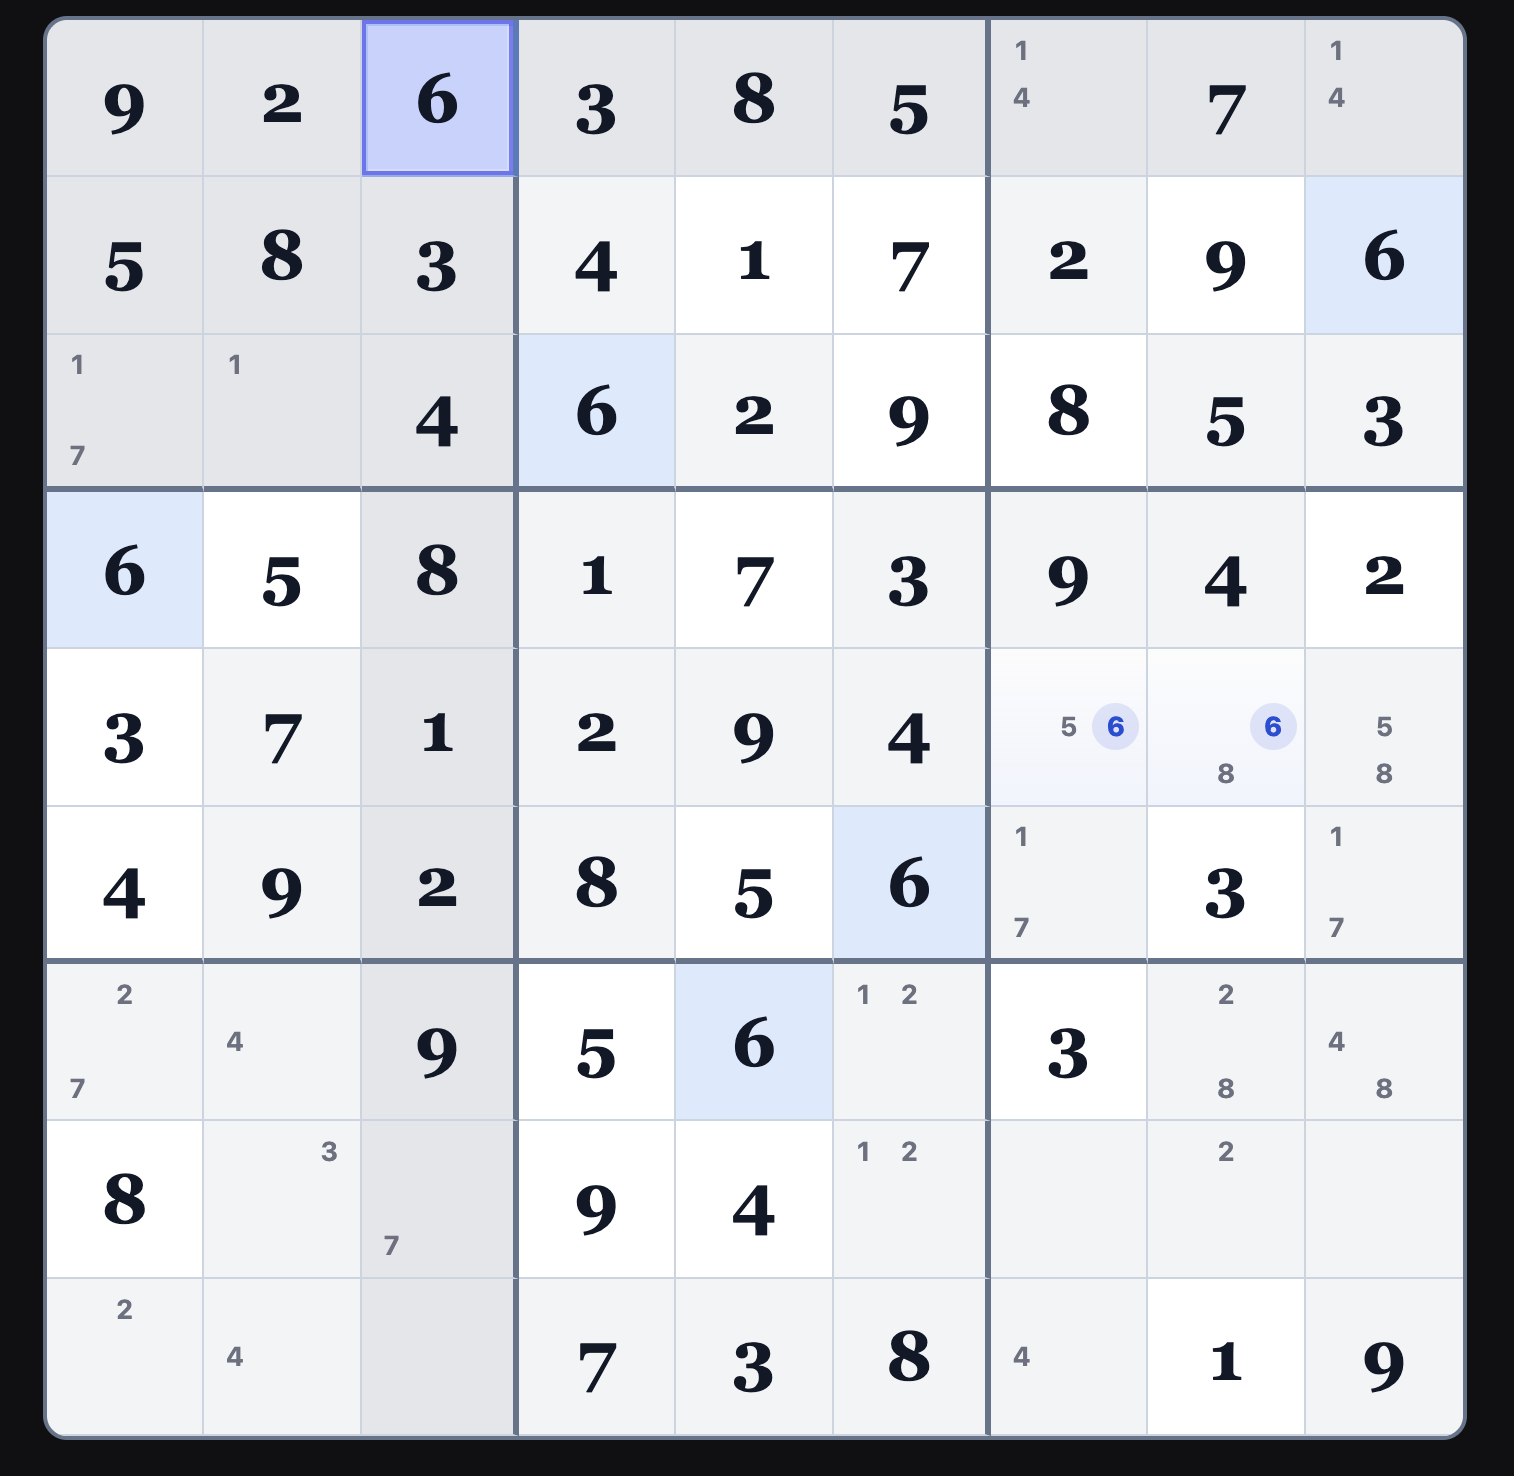
A W-wing is a technique involving two cells that share the same pair of candidates (e.g., {A, B}),
connected by a strong link on one of those digits through another unit.
This connection forces one candidate to be true in both cells simultaneously,
allowing you to eliminate the other candidate from any cell that sees both endpoints.
Scan for two cells in different units that contain the same pair of candidates (e.g., {A, B})
and cannot see each other. Then look for a strong link on one of those digits (say A)
connecting their units (row/column/box); if that link forces A to occupy one of the endpoints,
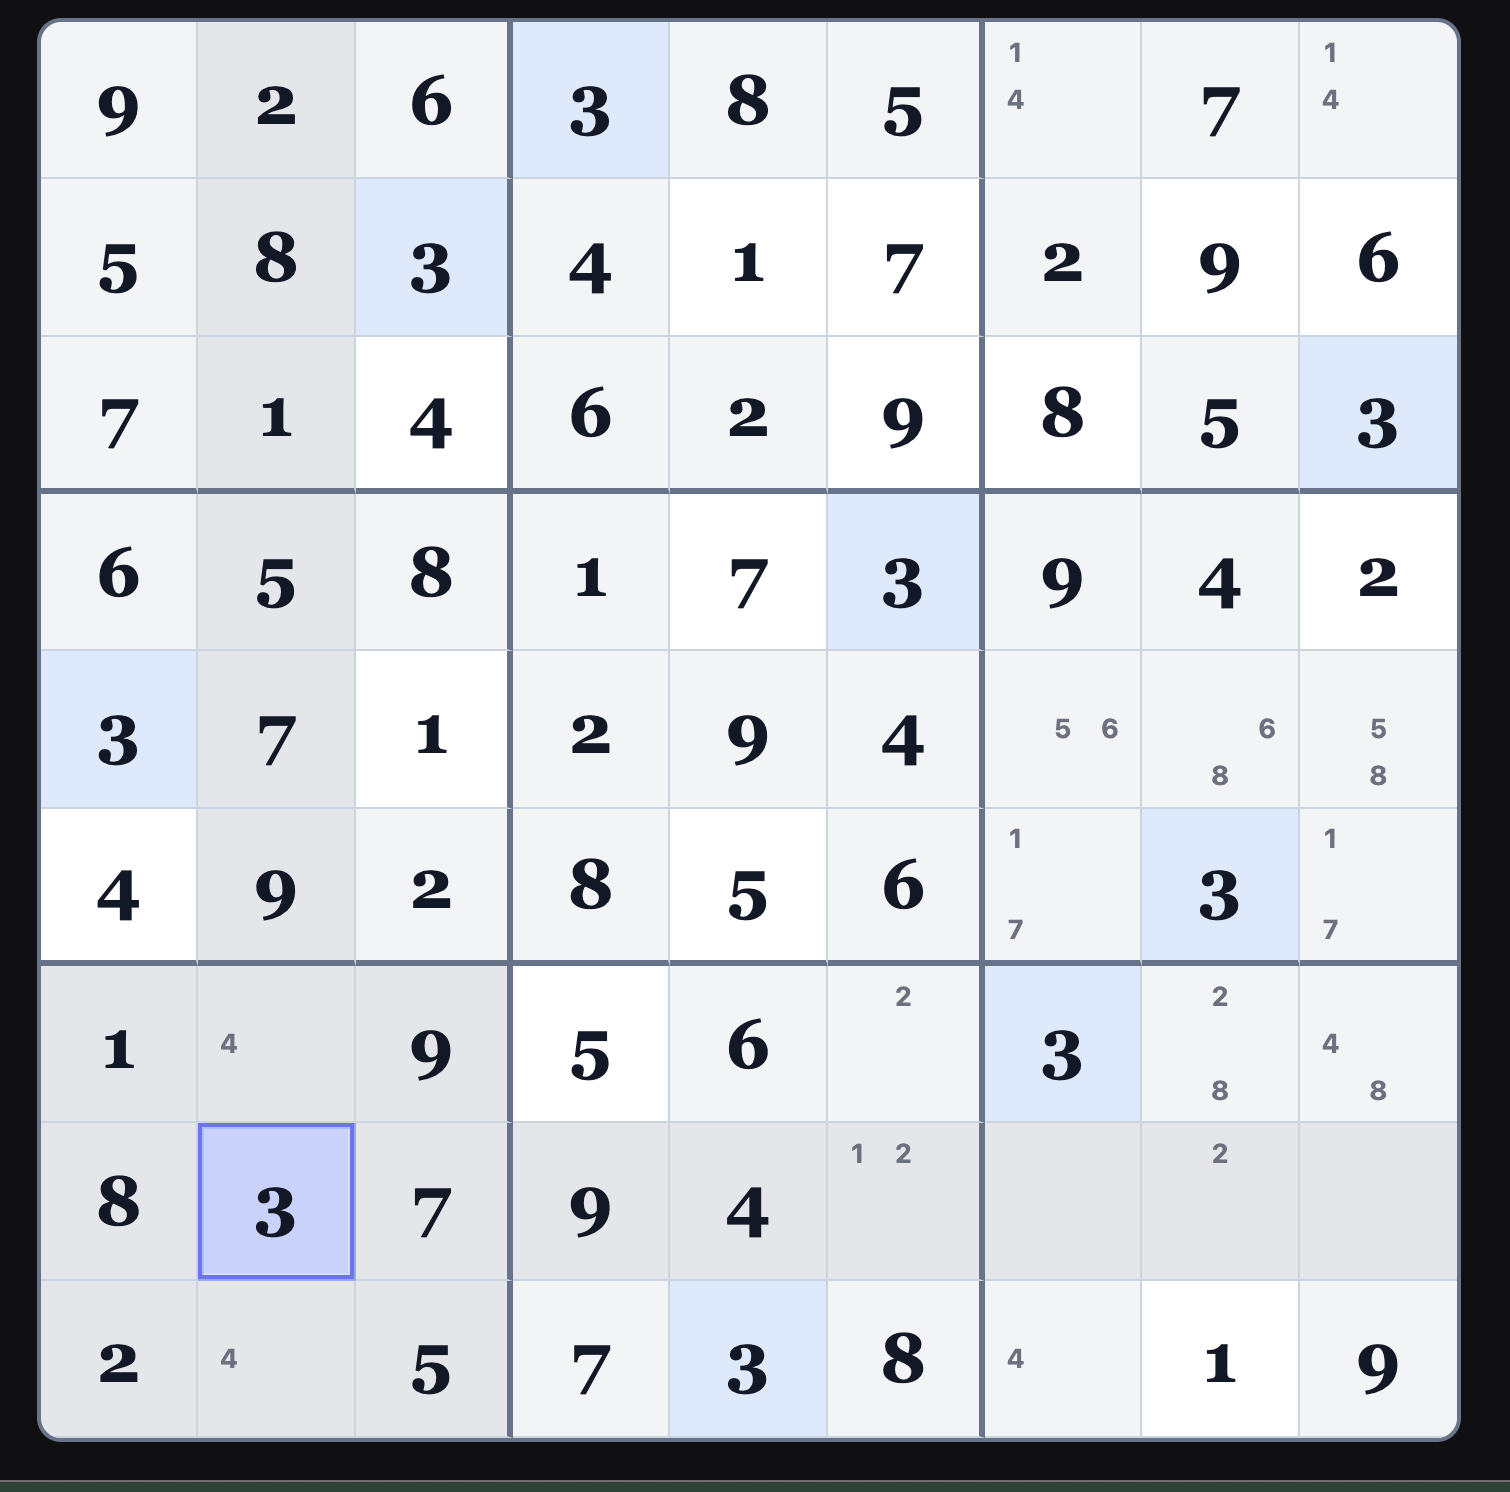
you can eliminate the other candidate (B) from any cell that sees both endpoints.
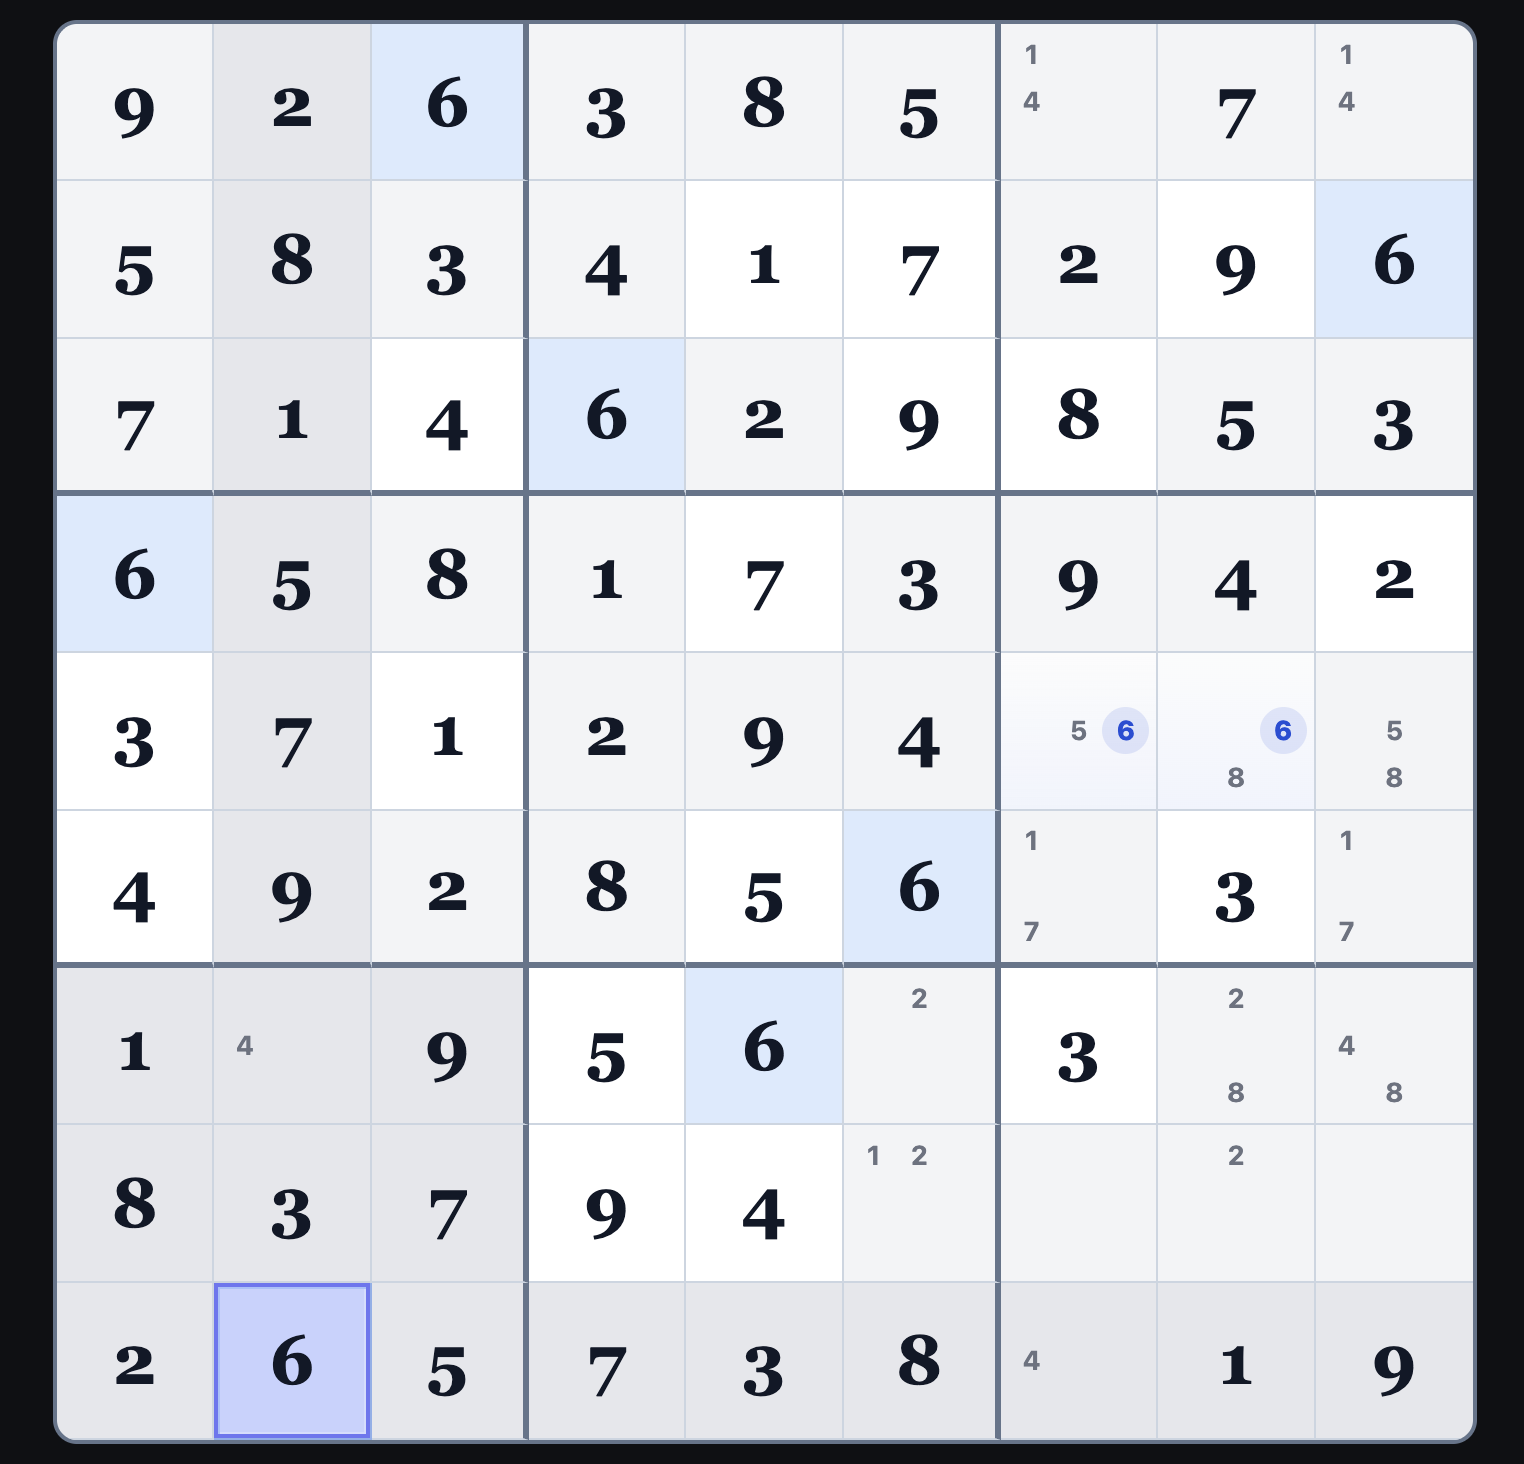
Big Picture
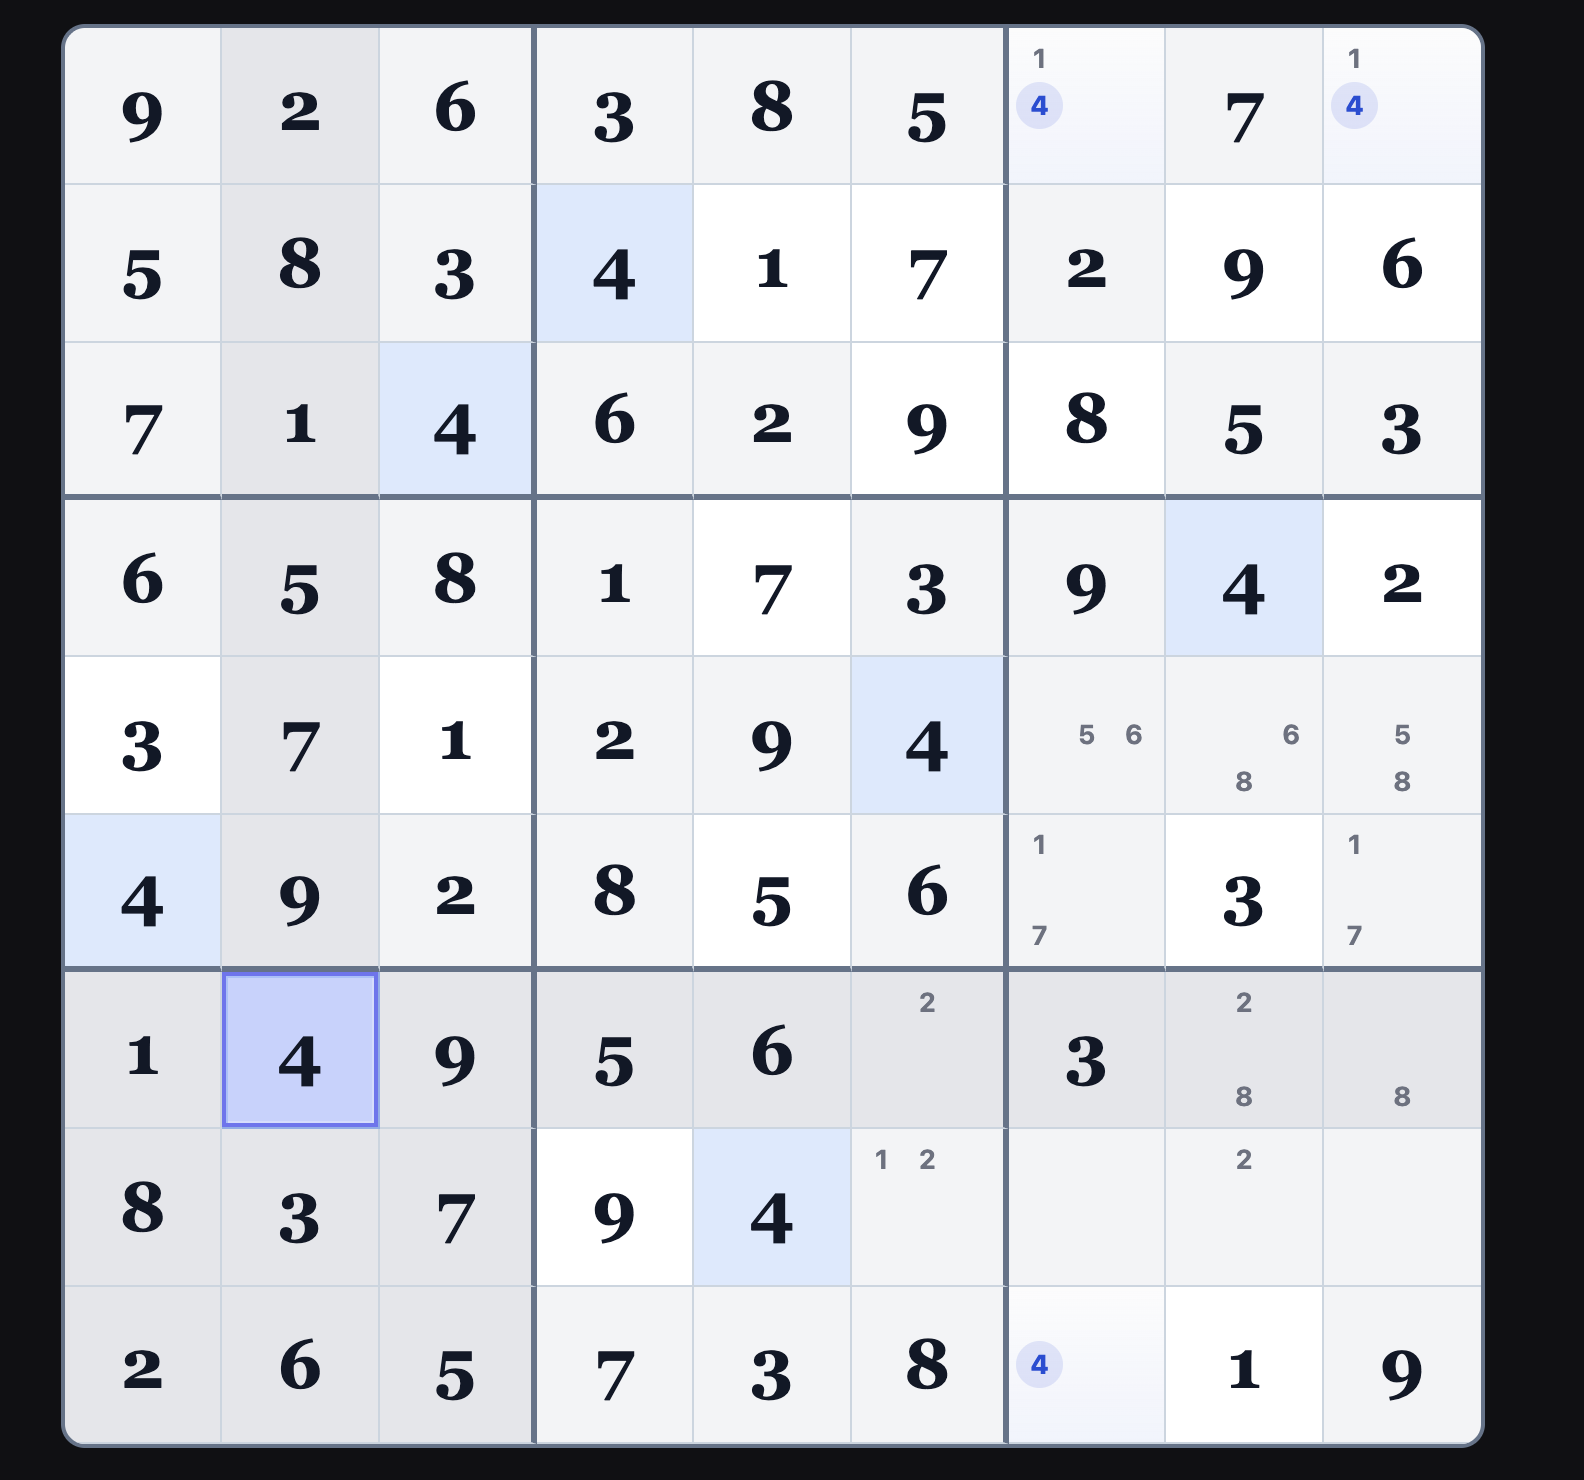
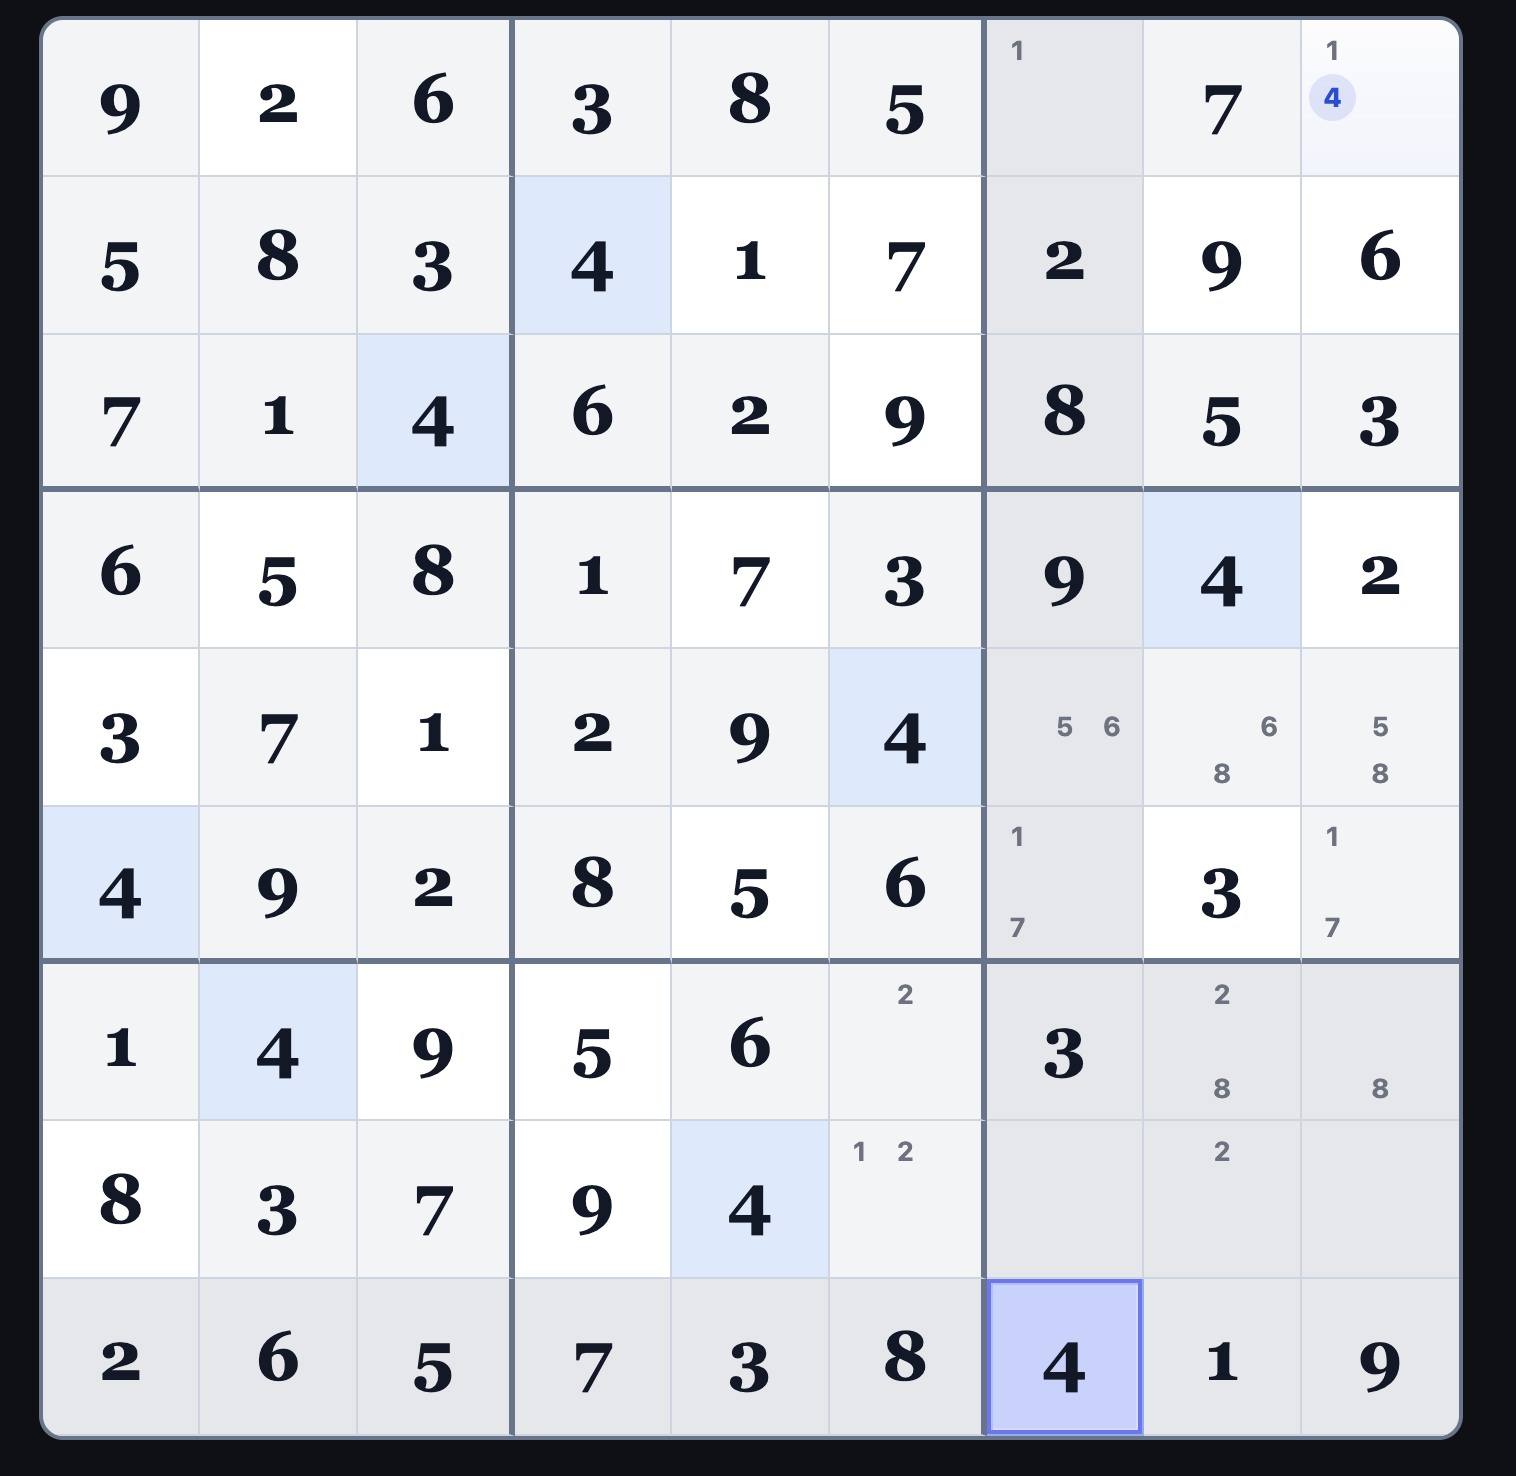
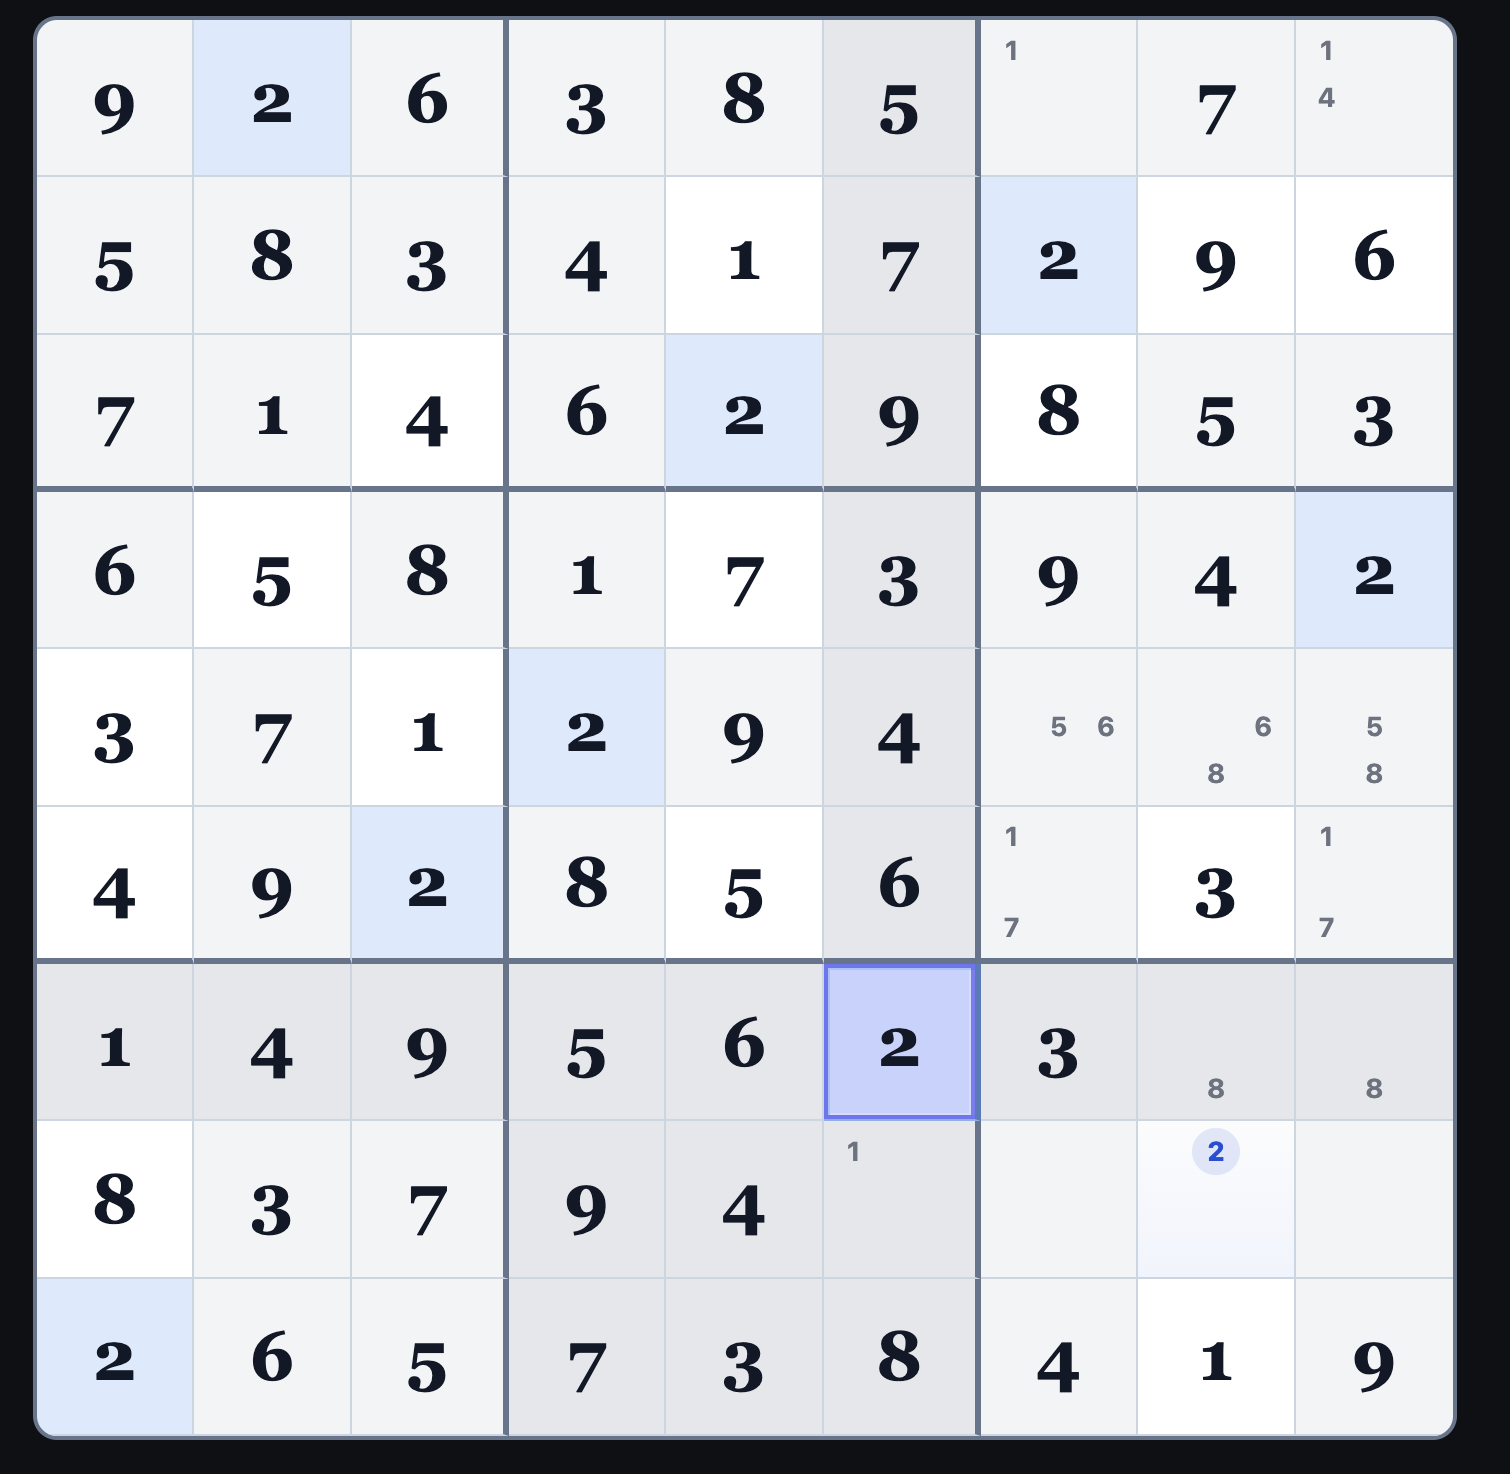
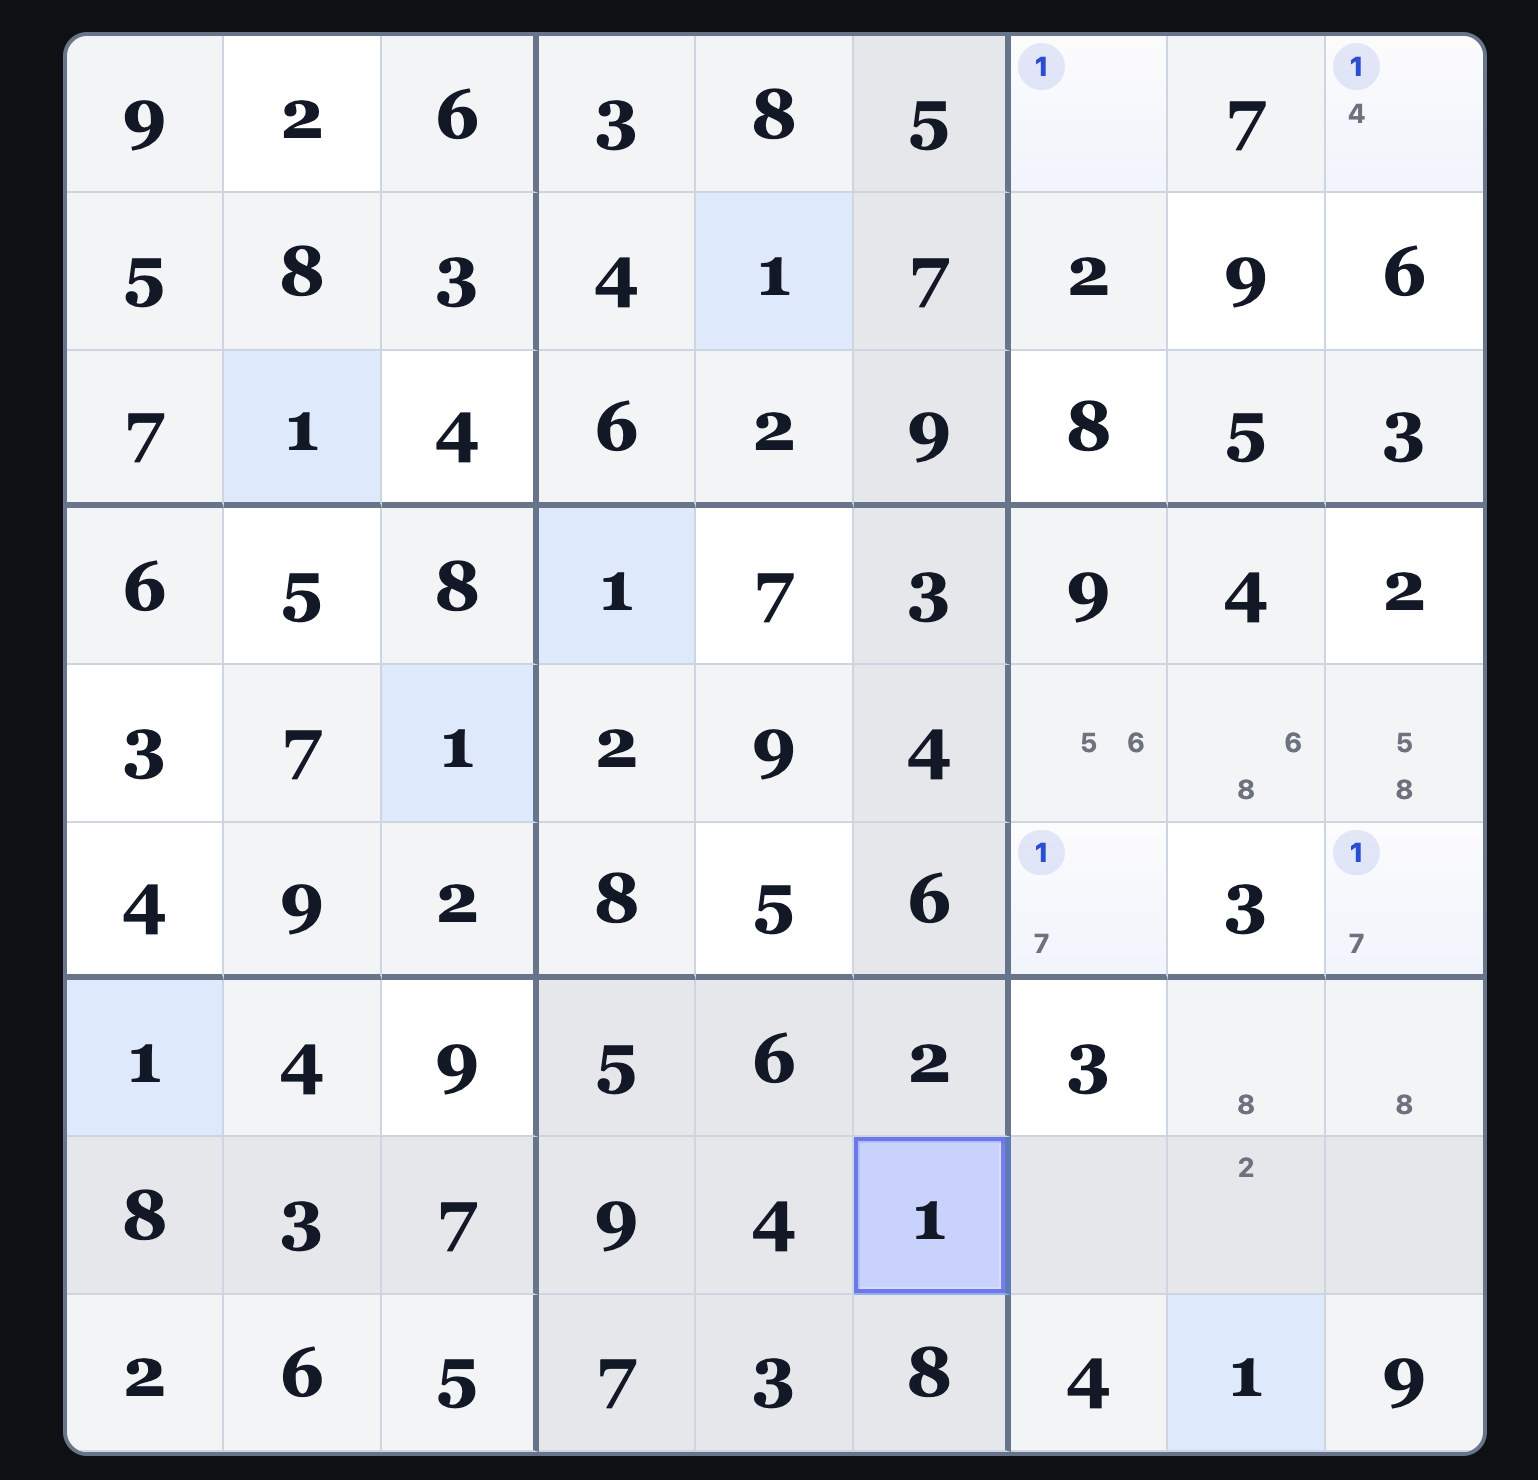
All of these patterns come from the same idea:
when possibilities are limited, they create structure—and that structure lets you eliminate other options.
Unique Rectangle
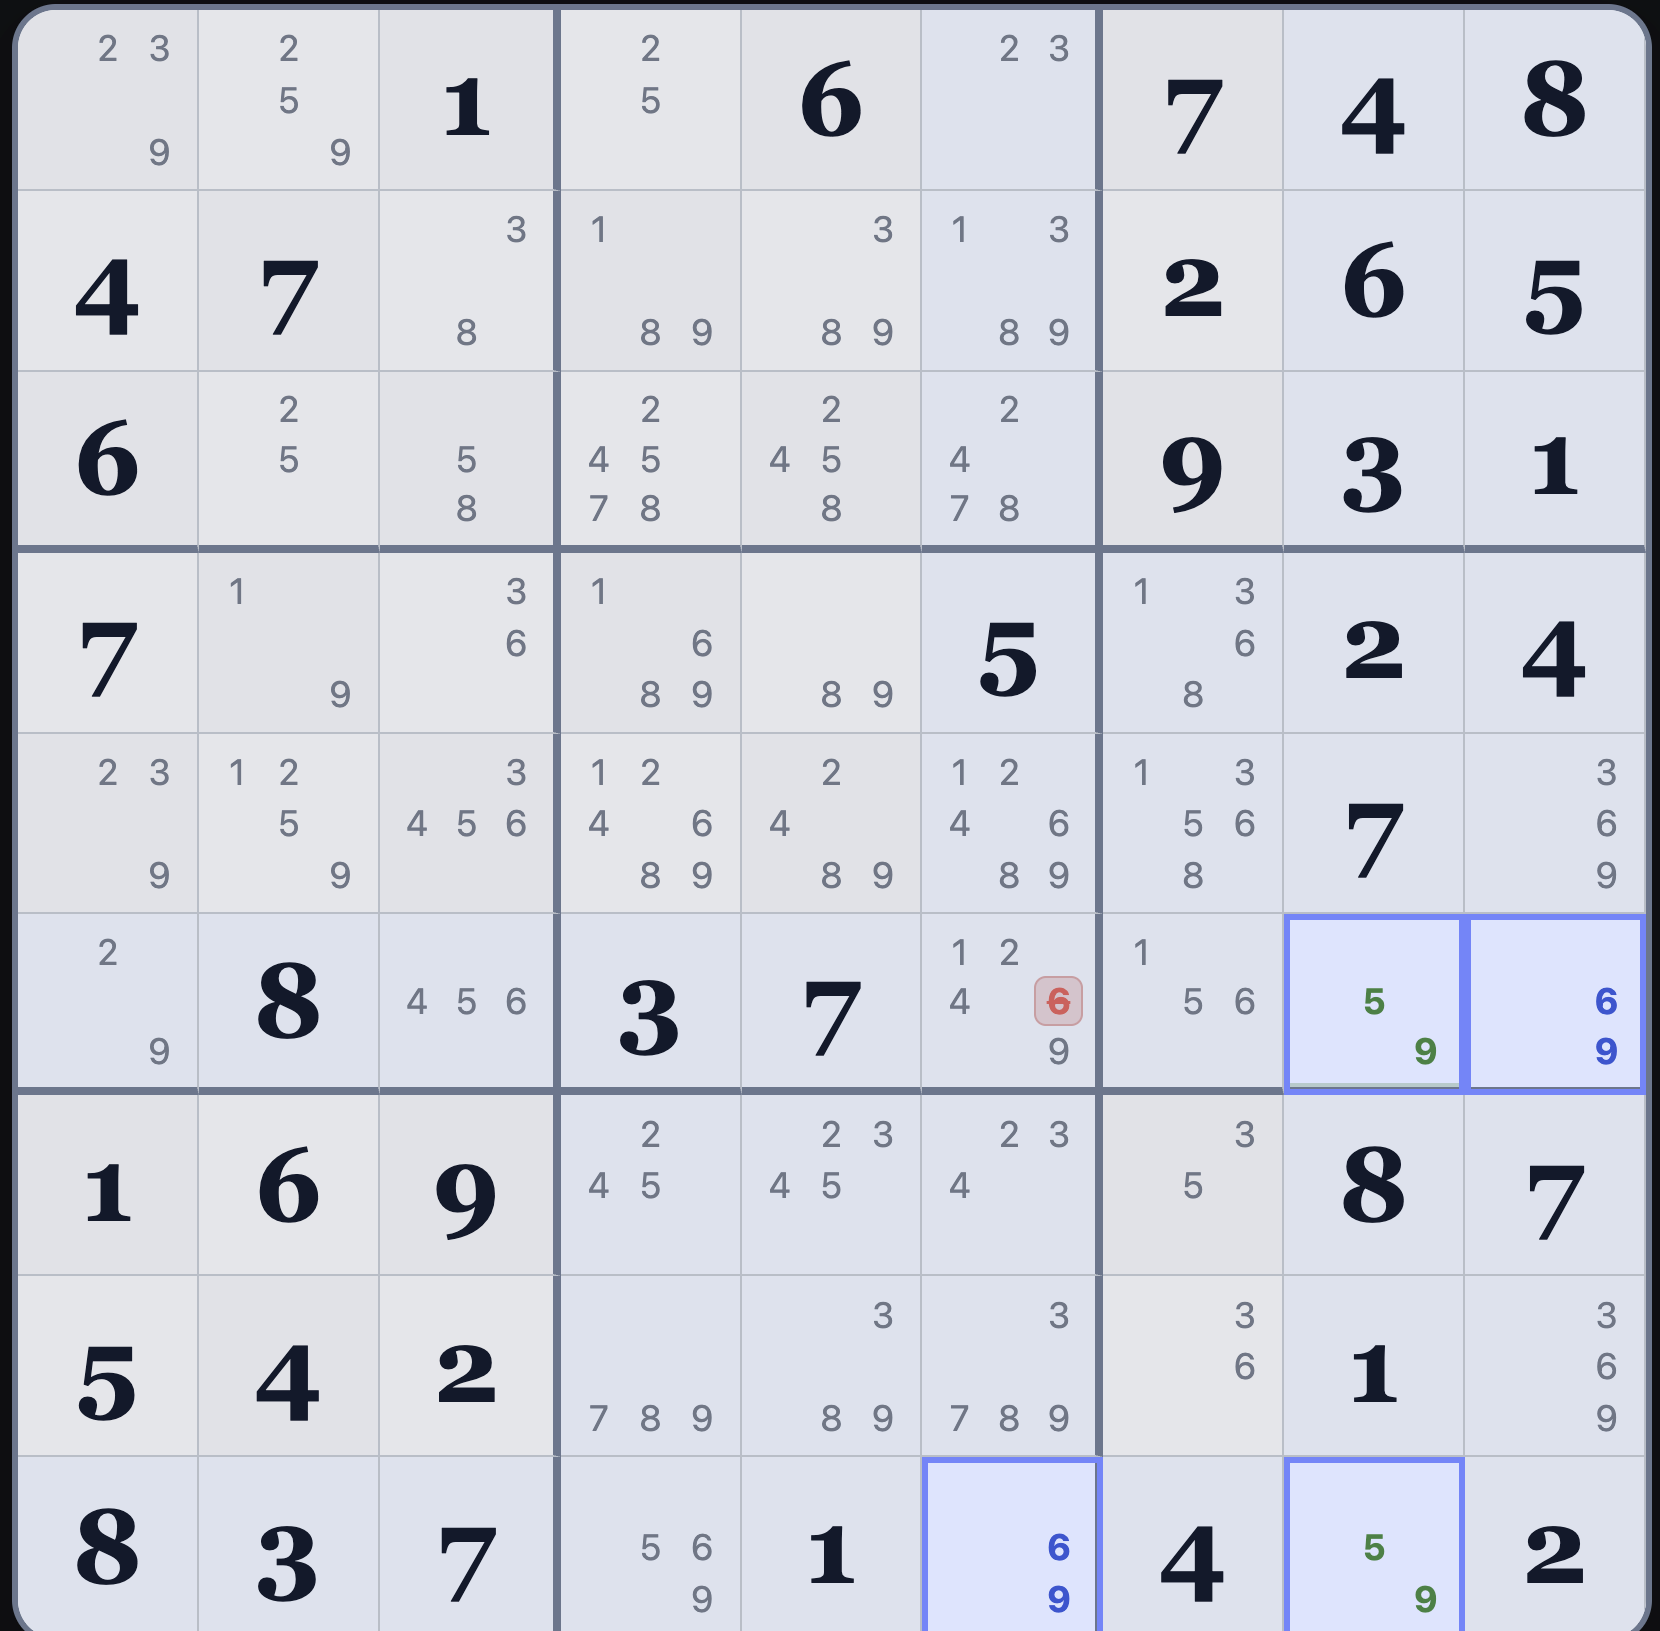
If you look at the four highlighted squares, they form a kind of “rectangle”
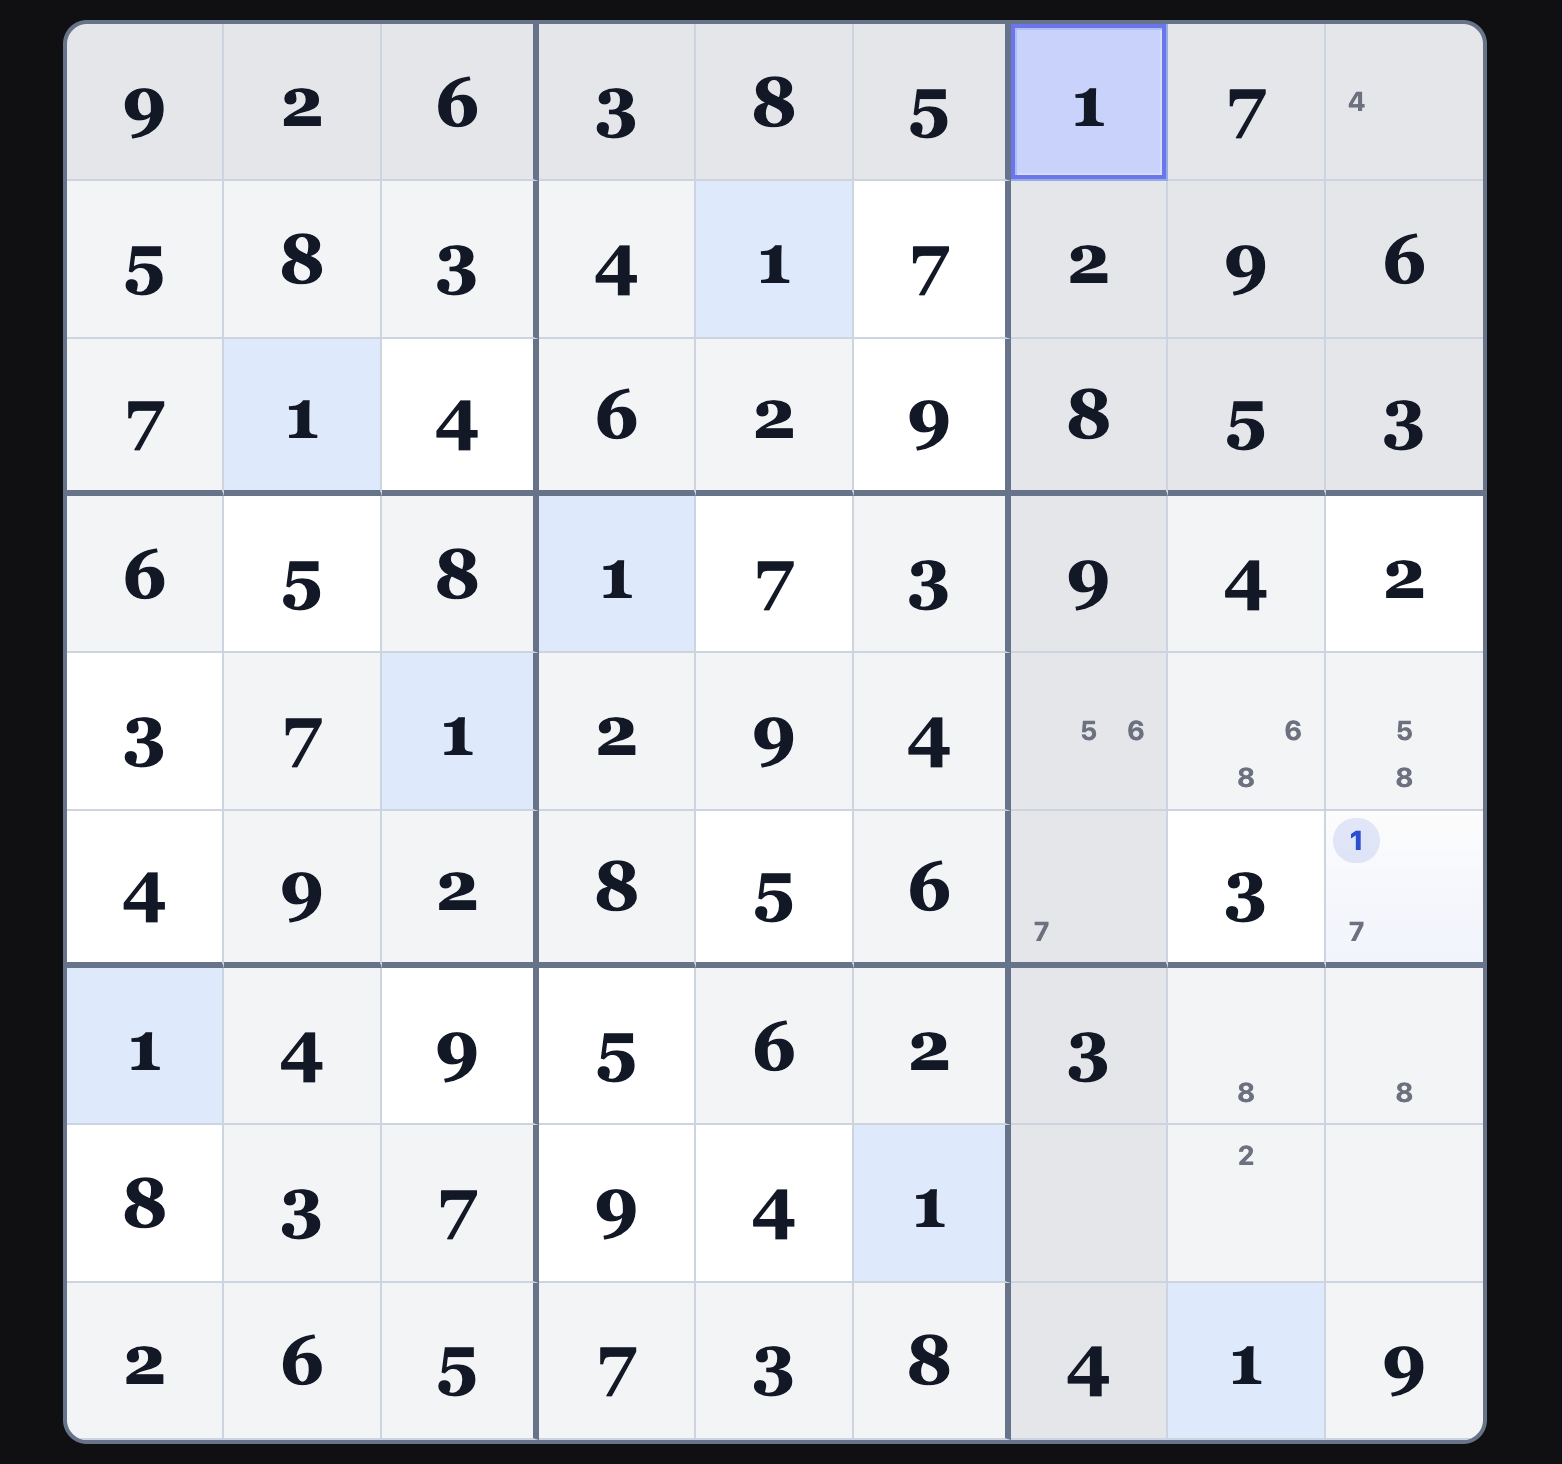
where each corner is limited to the same two numbers: 7 and 8. Now imagine what would
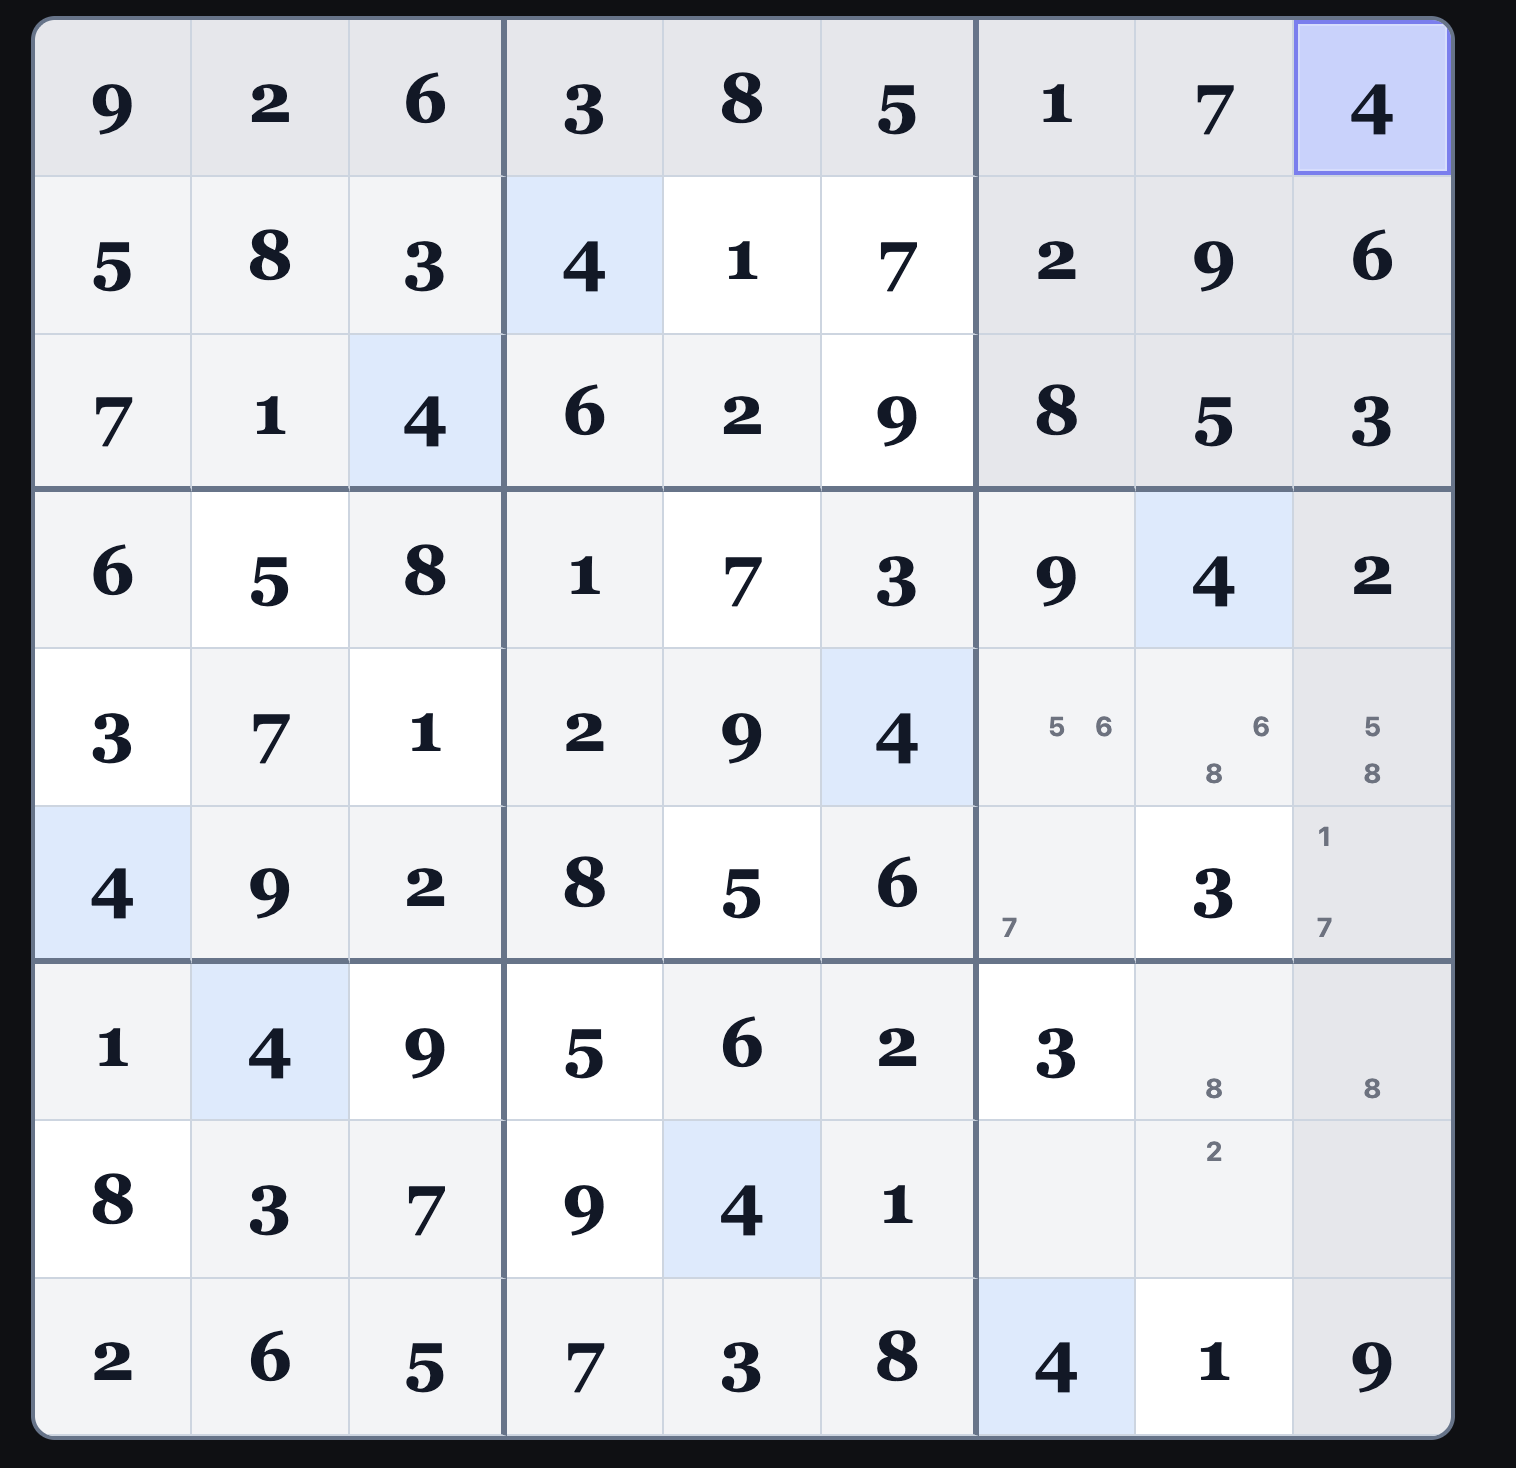
happen if the square at r4c2 were allowed to keep either 7 or 8. Then all four corners of
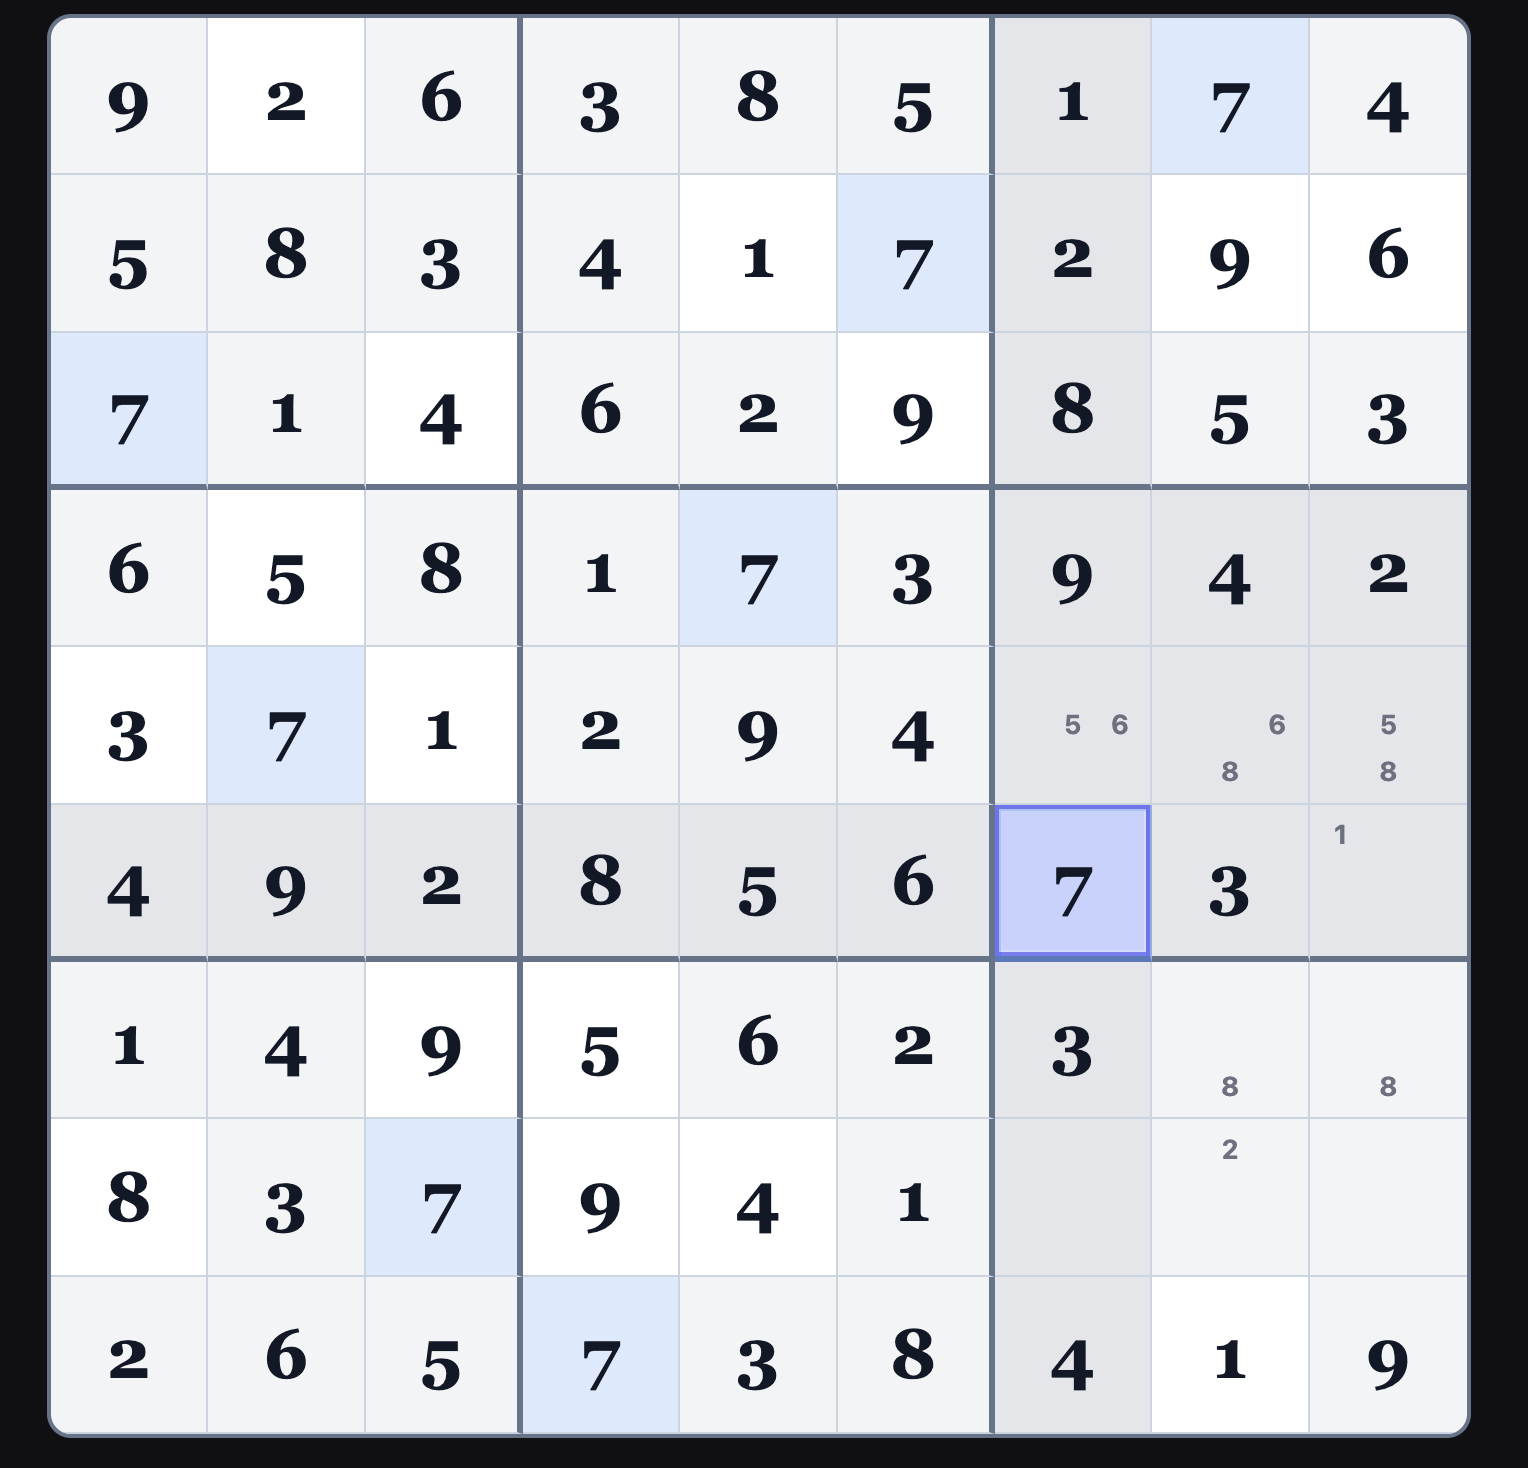
that rectangle could be filled using only those two numbers—and crucially, there would be
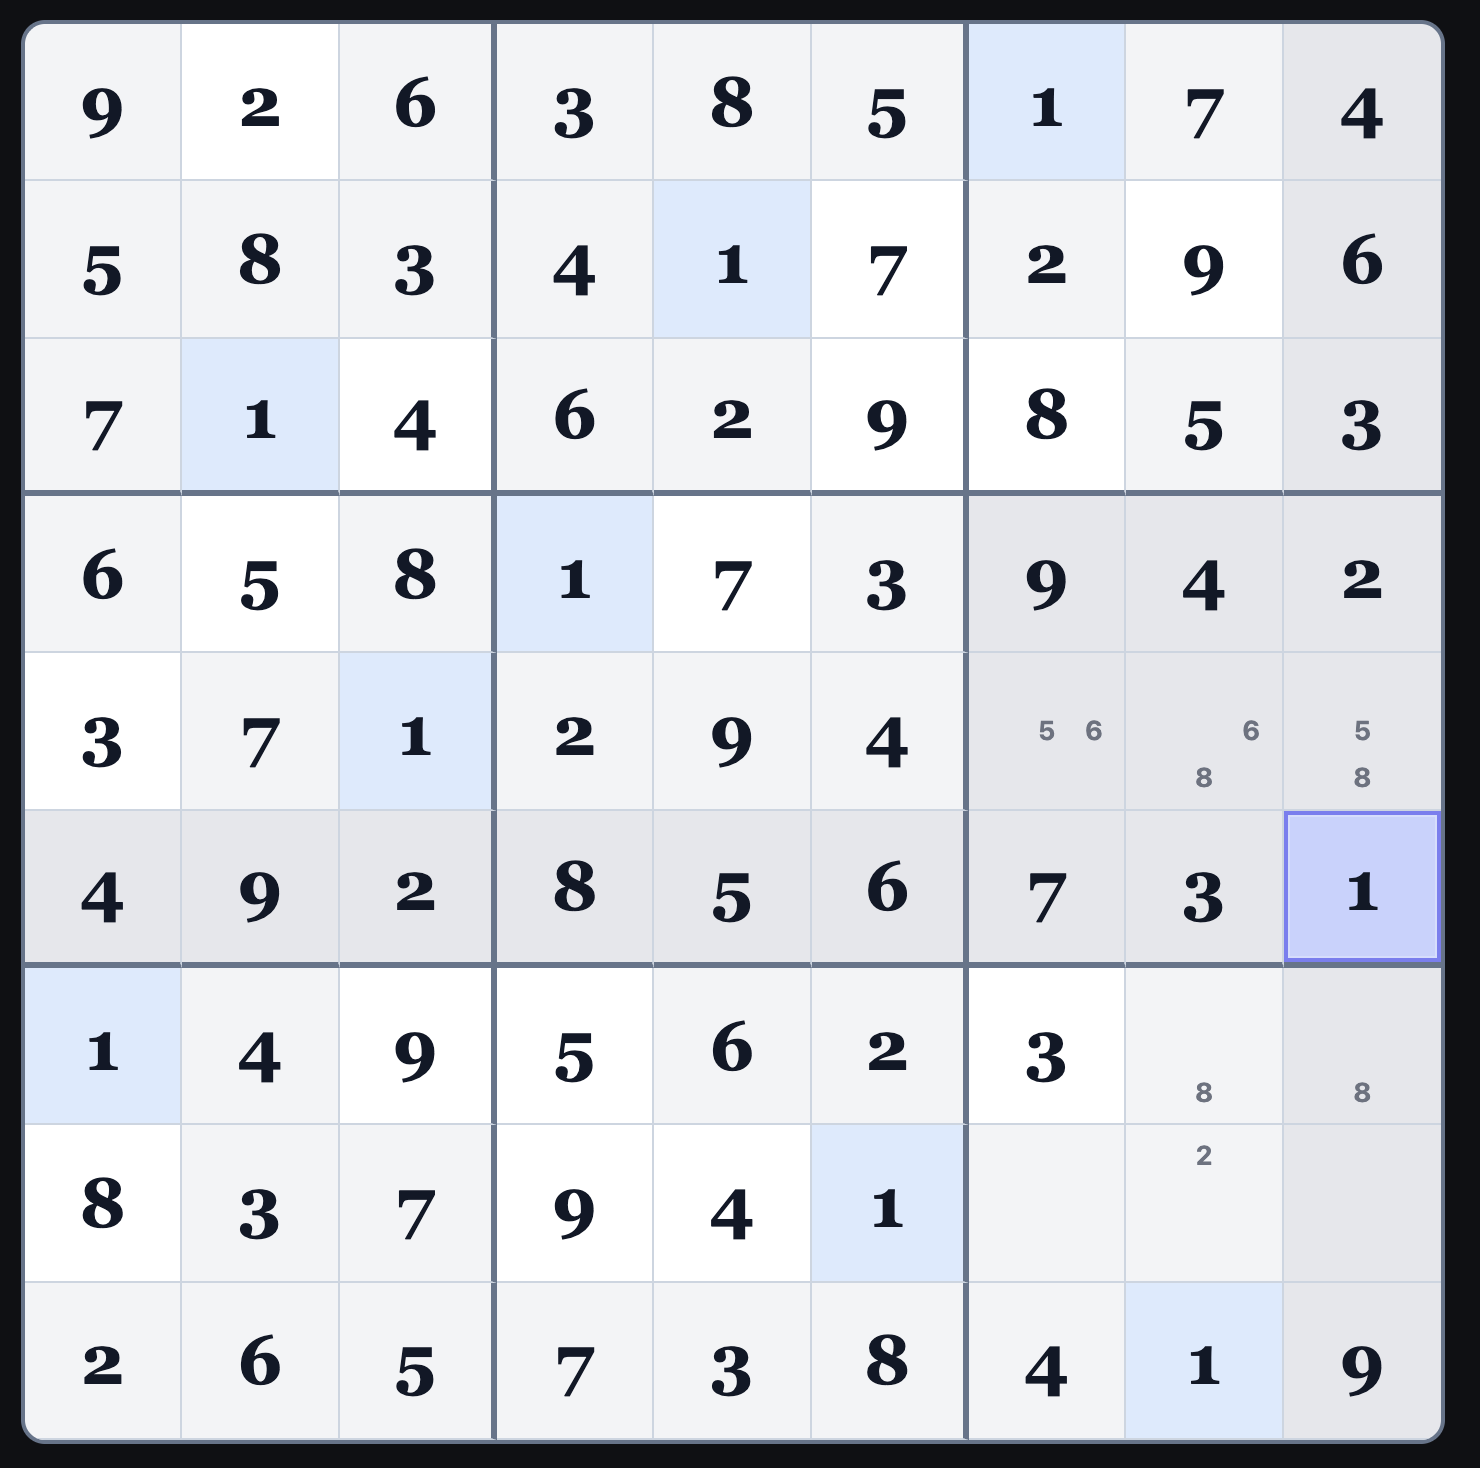
more than one way to do it. That would mean the puzzle has two valid solutions instead of one,
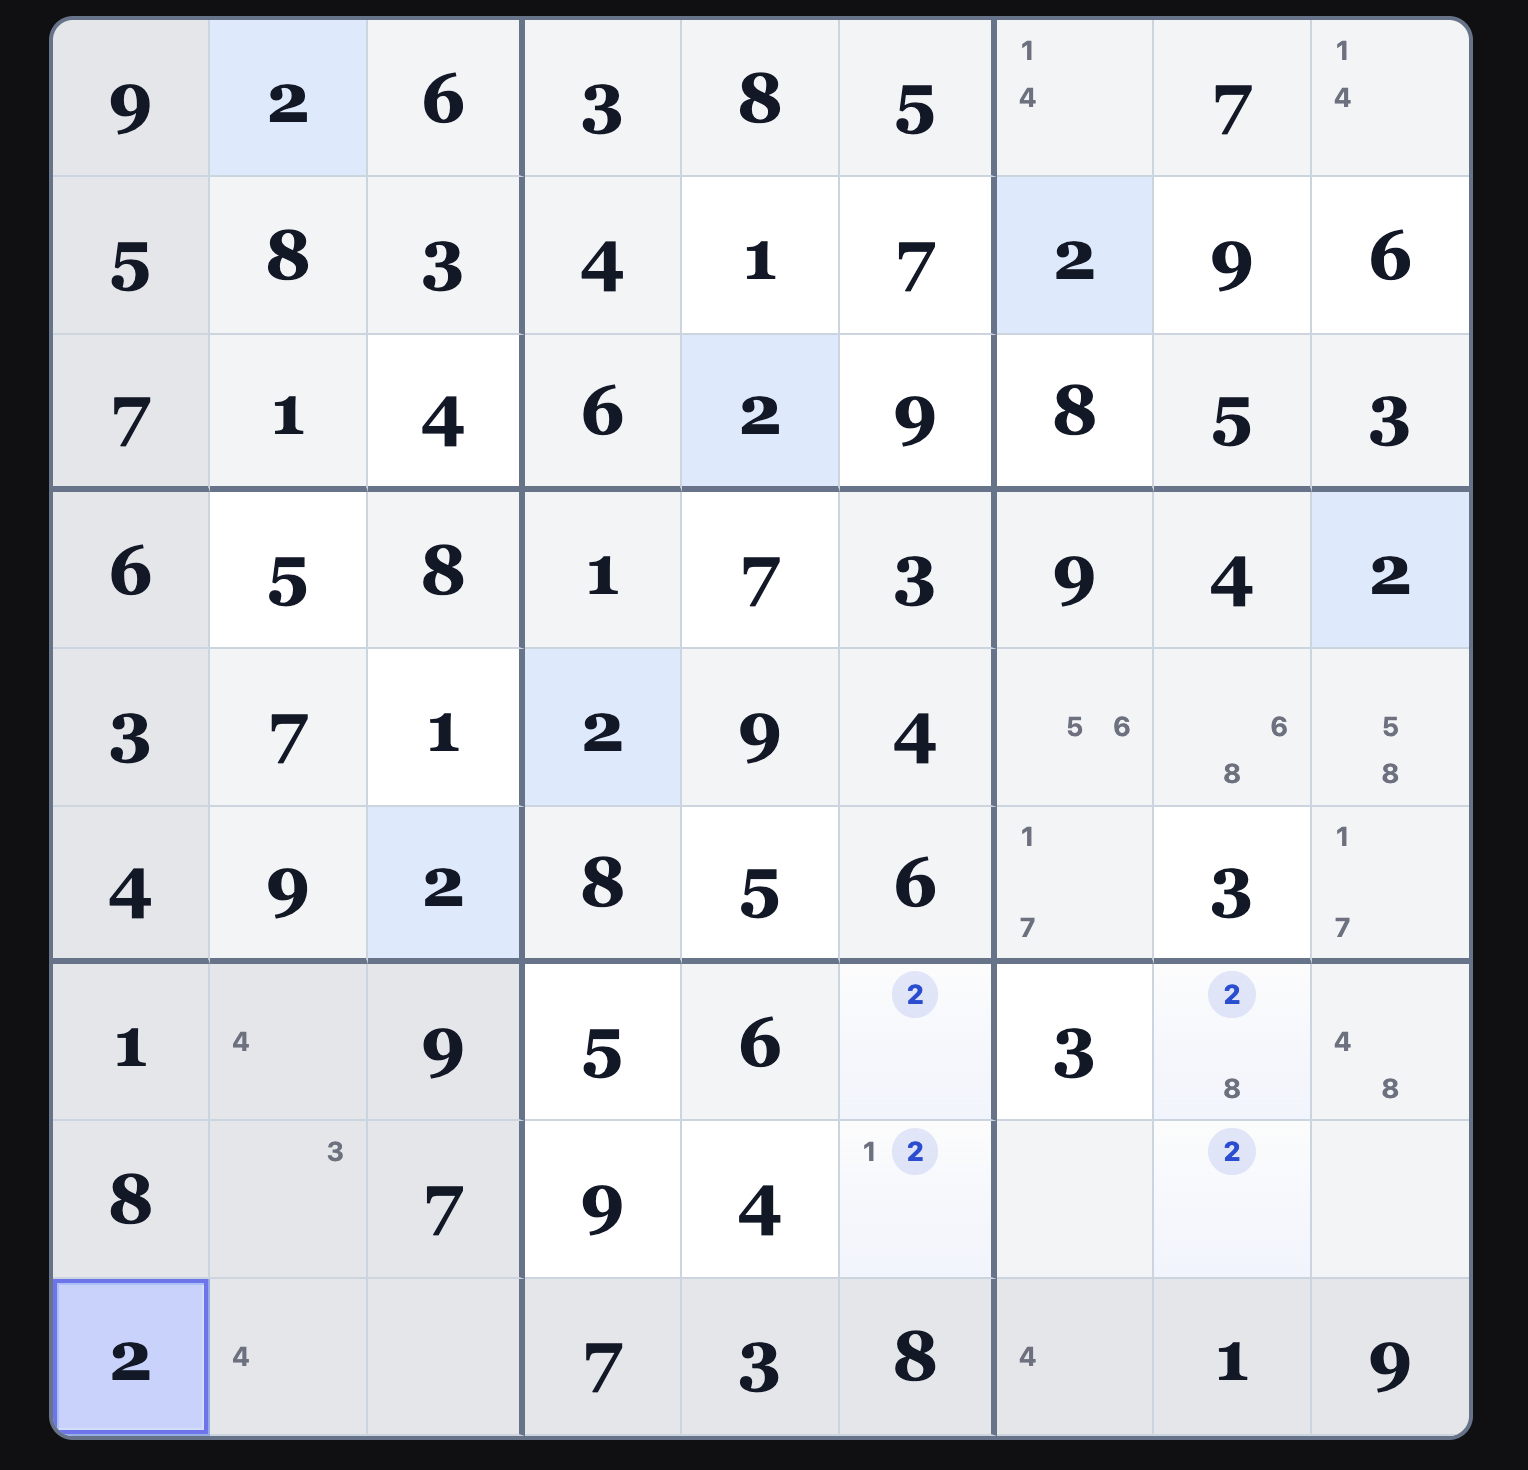
which a proper Sudoku never does. To avoid that ambiguity, r4c2 is not allowed to be 7 or 8, so those options must be removed.
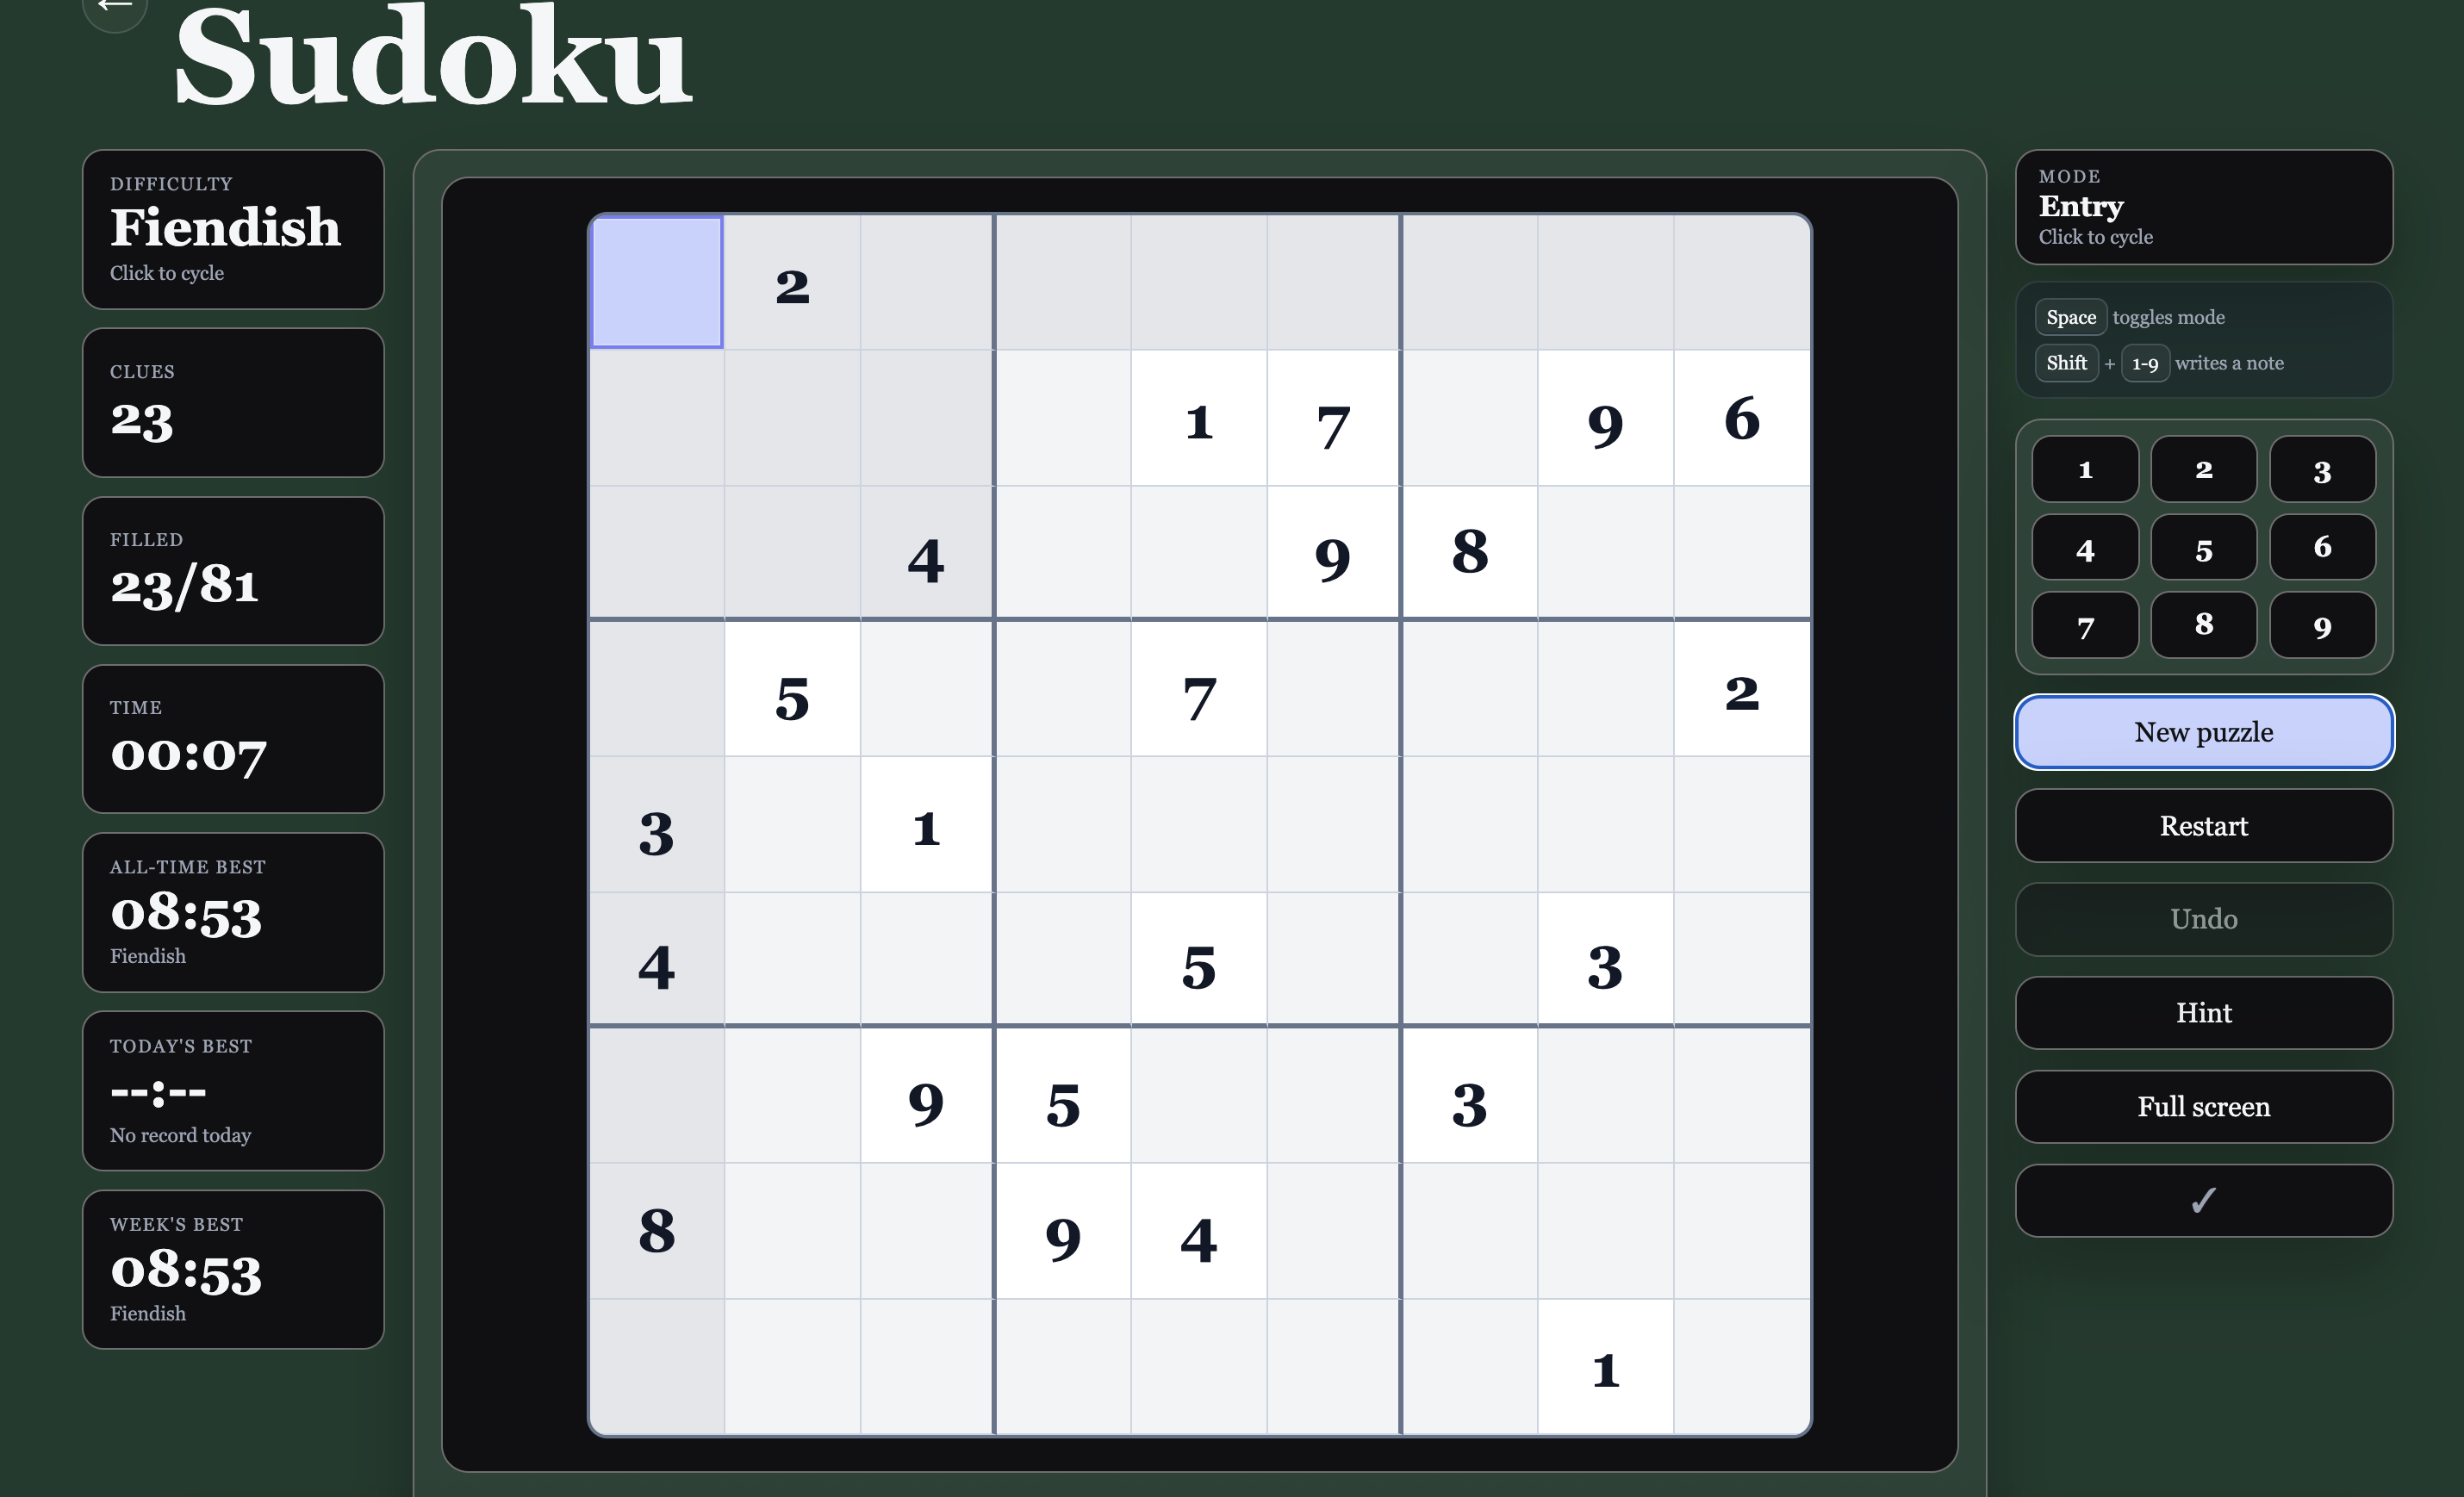
Let's play a game together!
This is the Sudoku board produced by my favorite online Sudoku app, fcc.cc/sudoku .
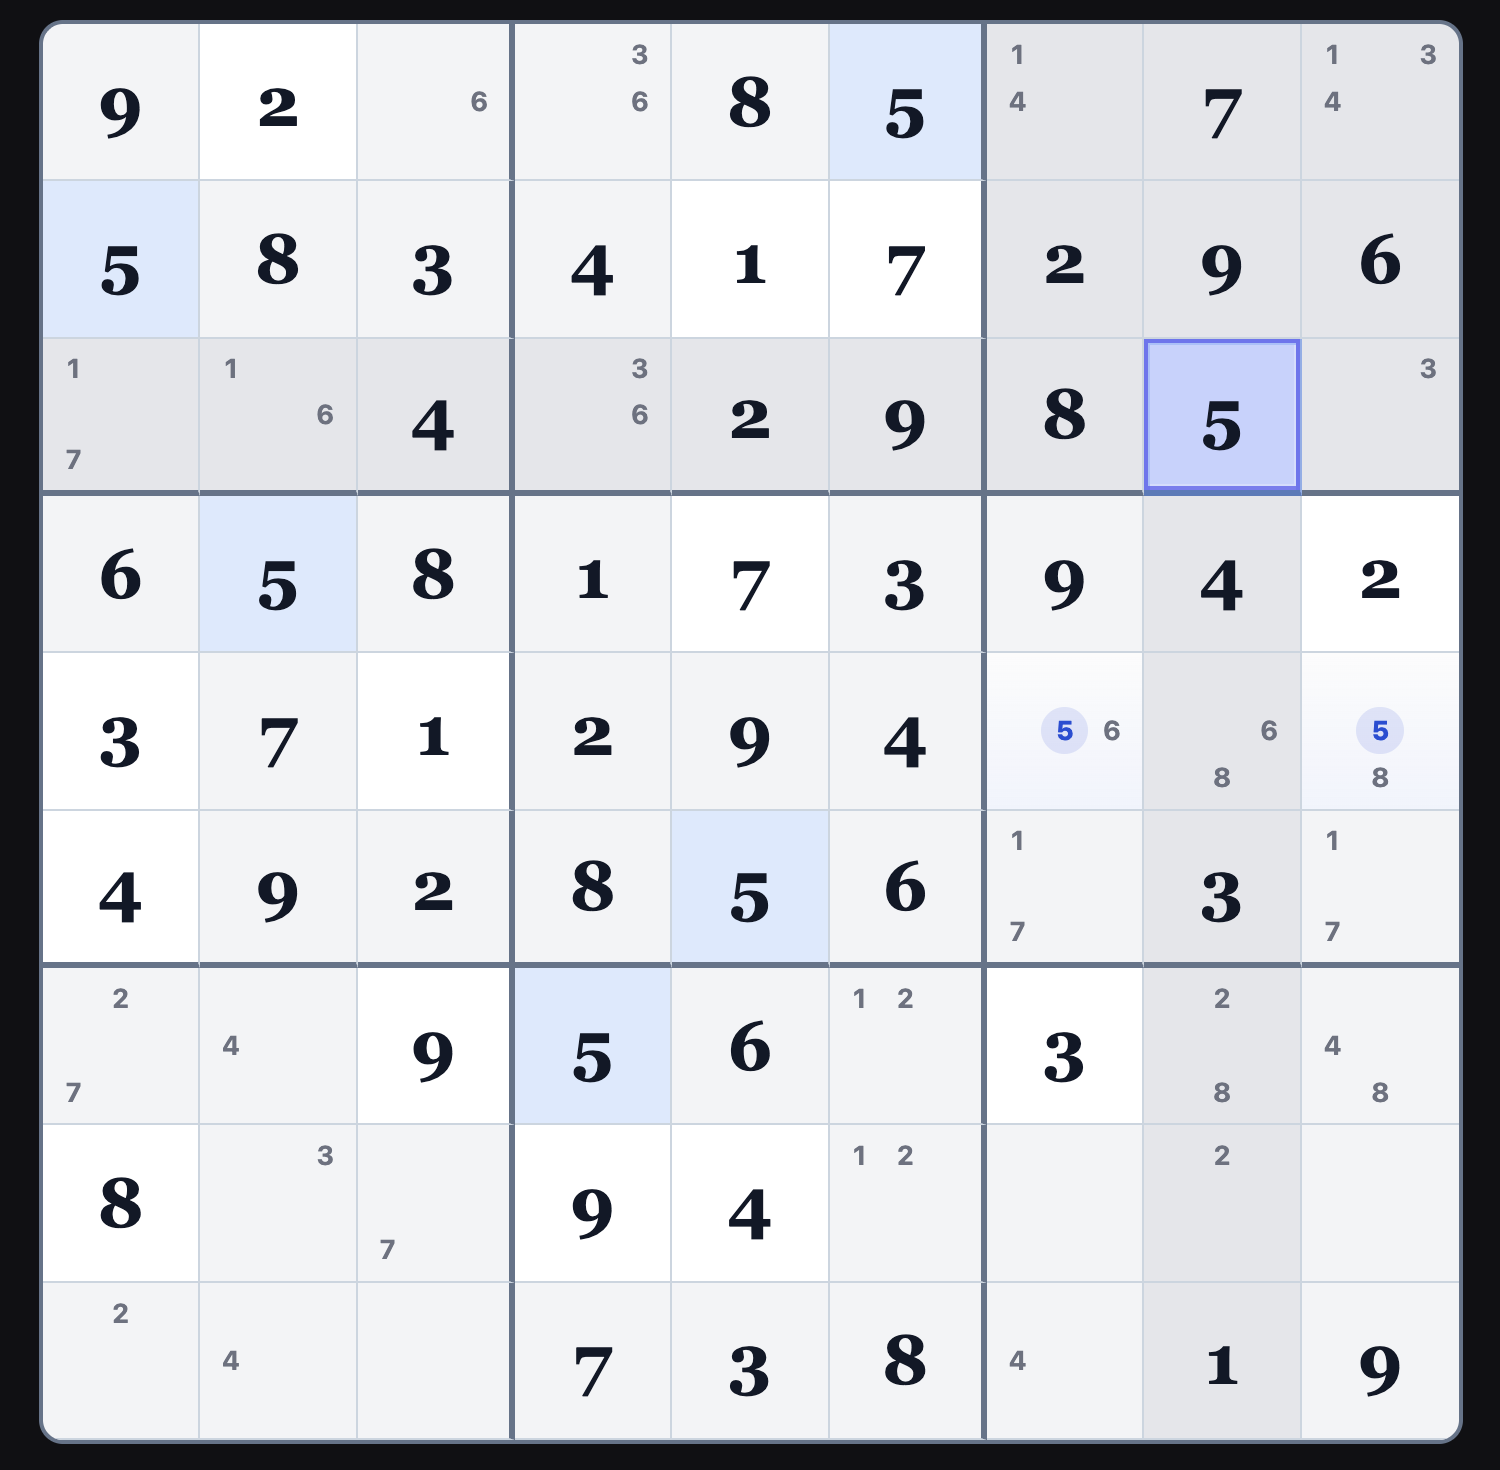
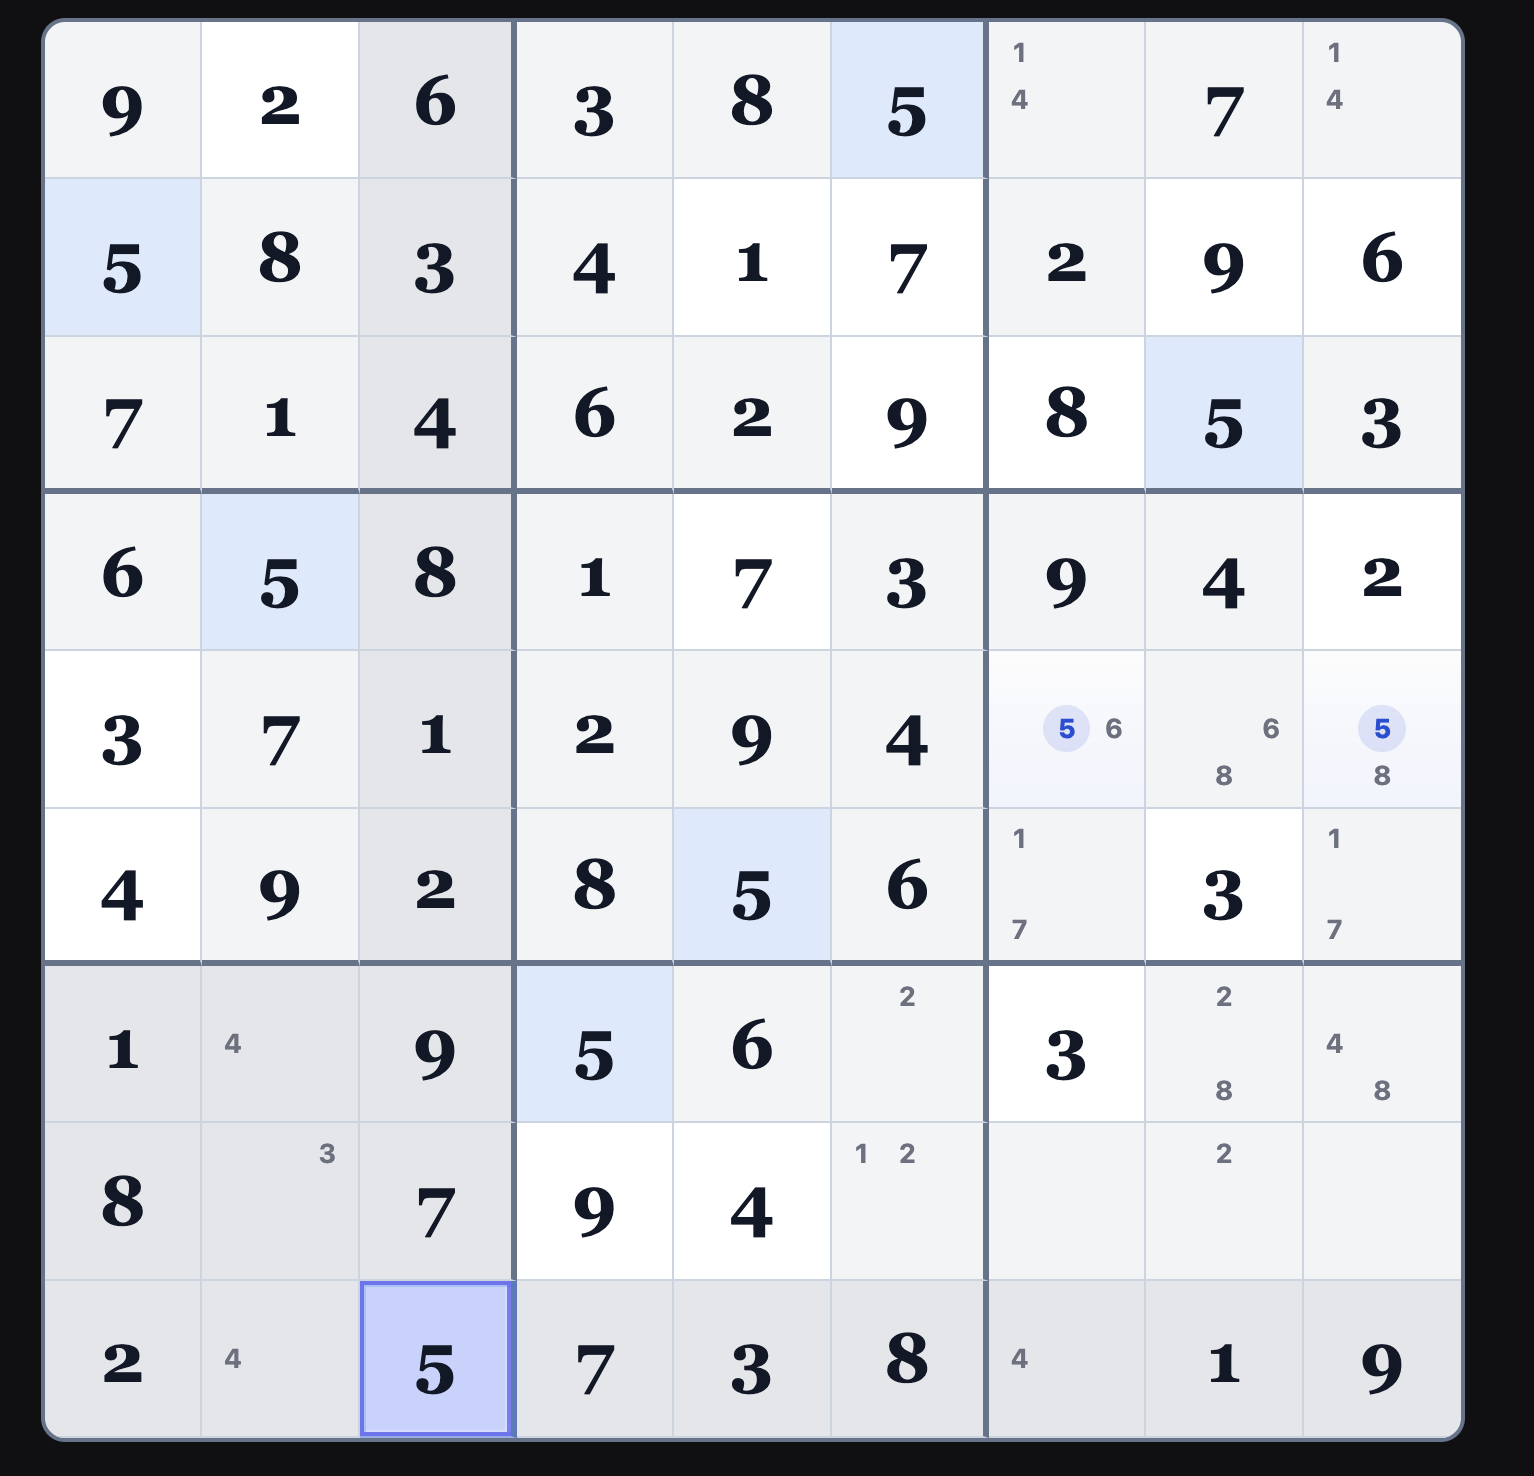
At this site, there are five levels of play from Easy to Fiendish.
Let’s start with a Fiendish puzzle 🙂, and I’ll show you how manageable this can be.
You can change the level of play at fcc.cc by clicking on the "difficulty" box
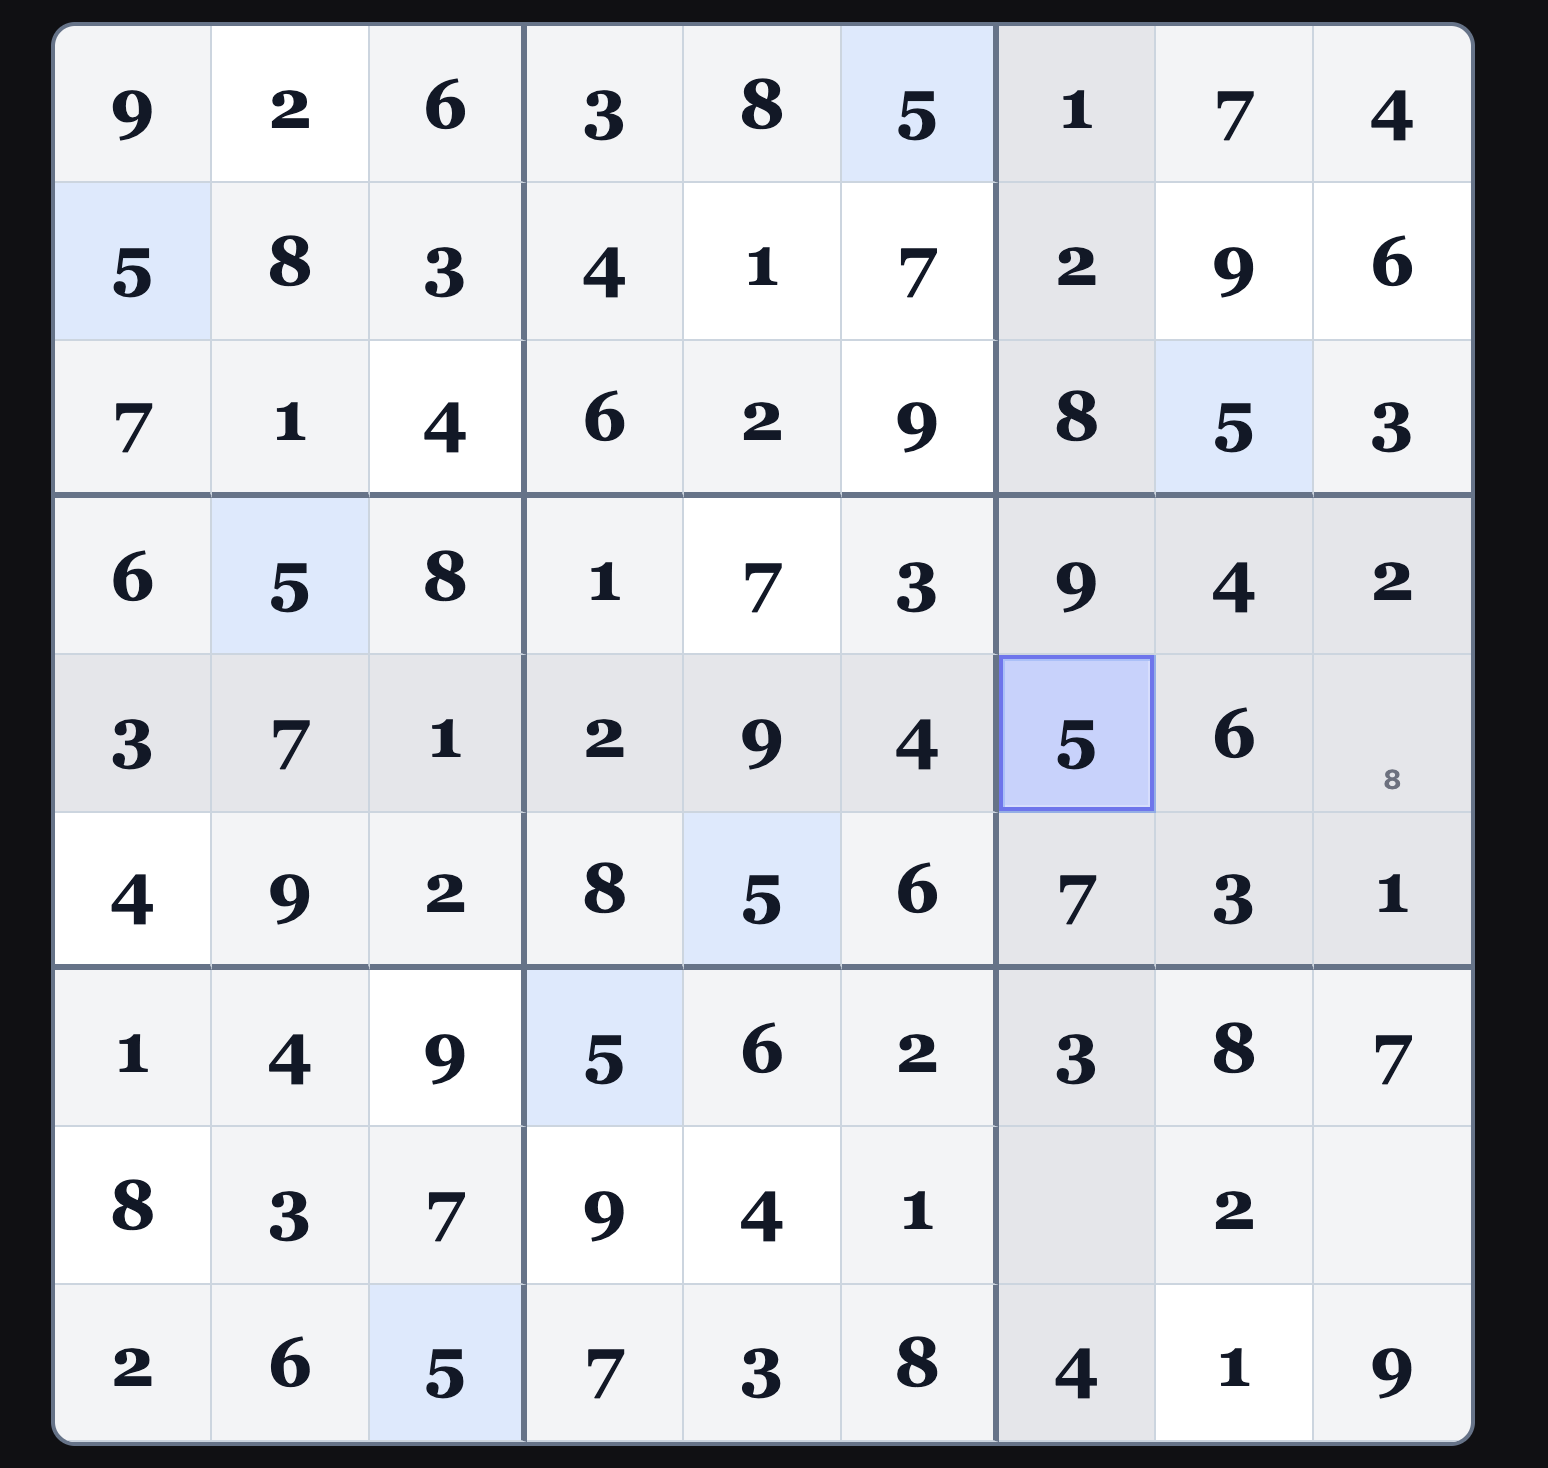
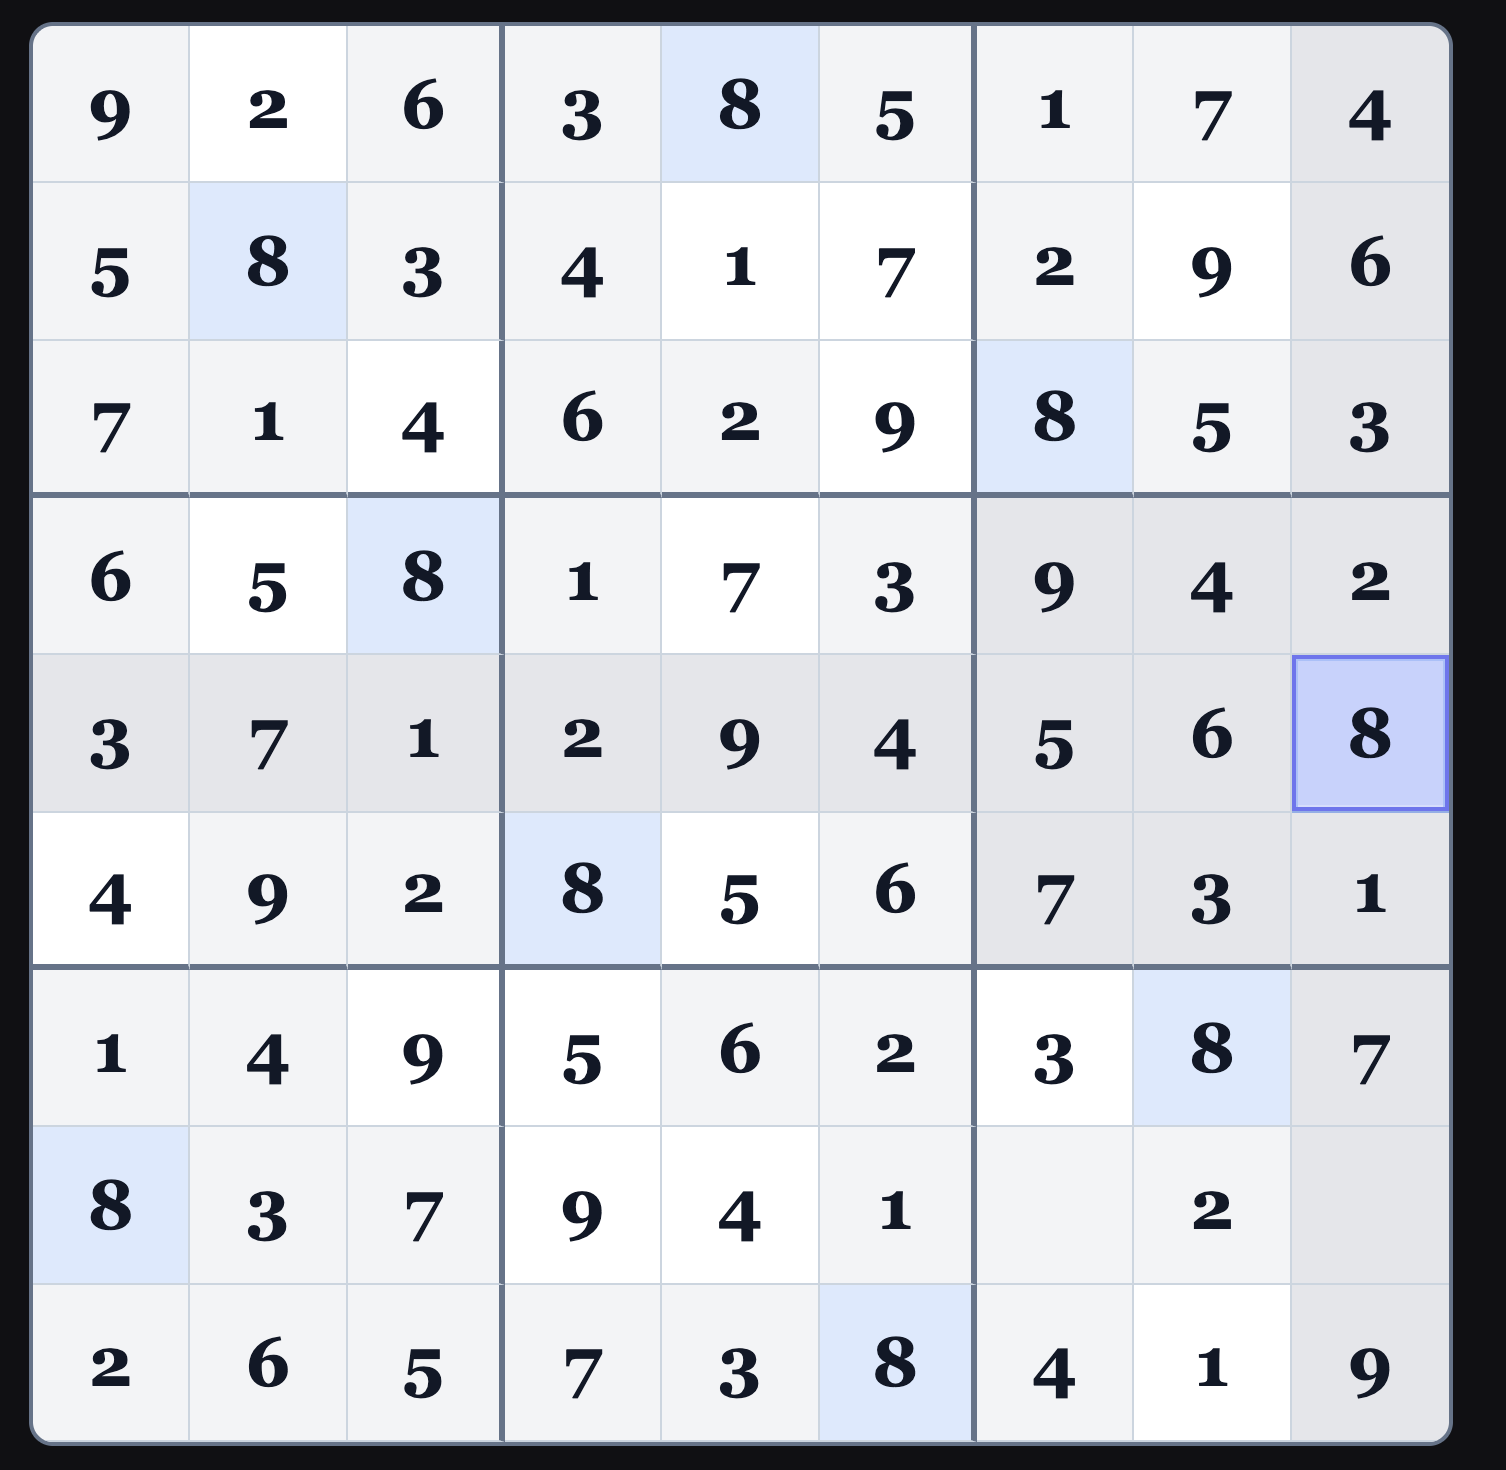
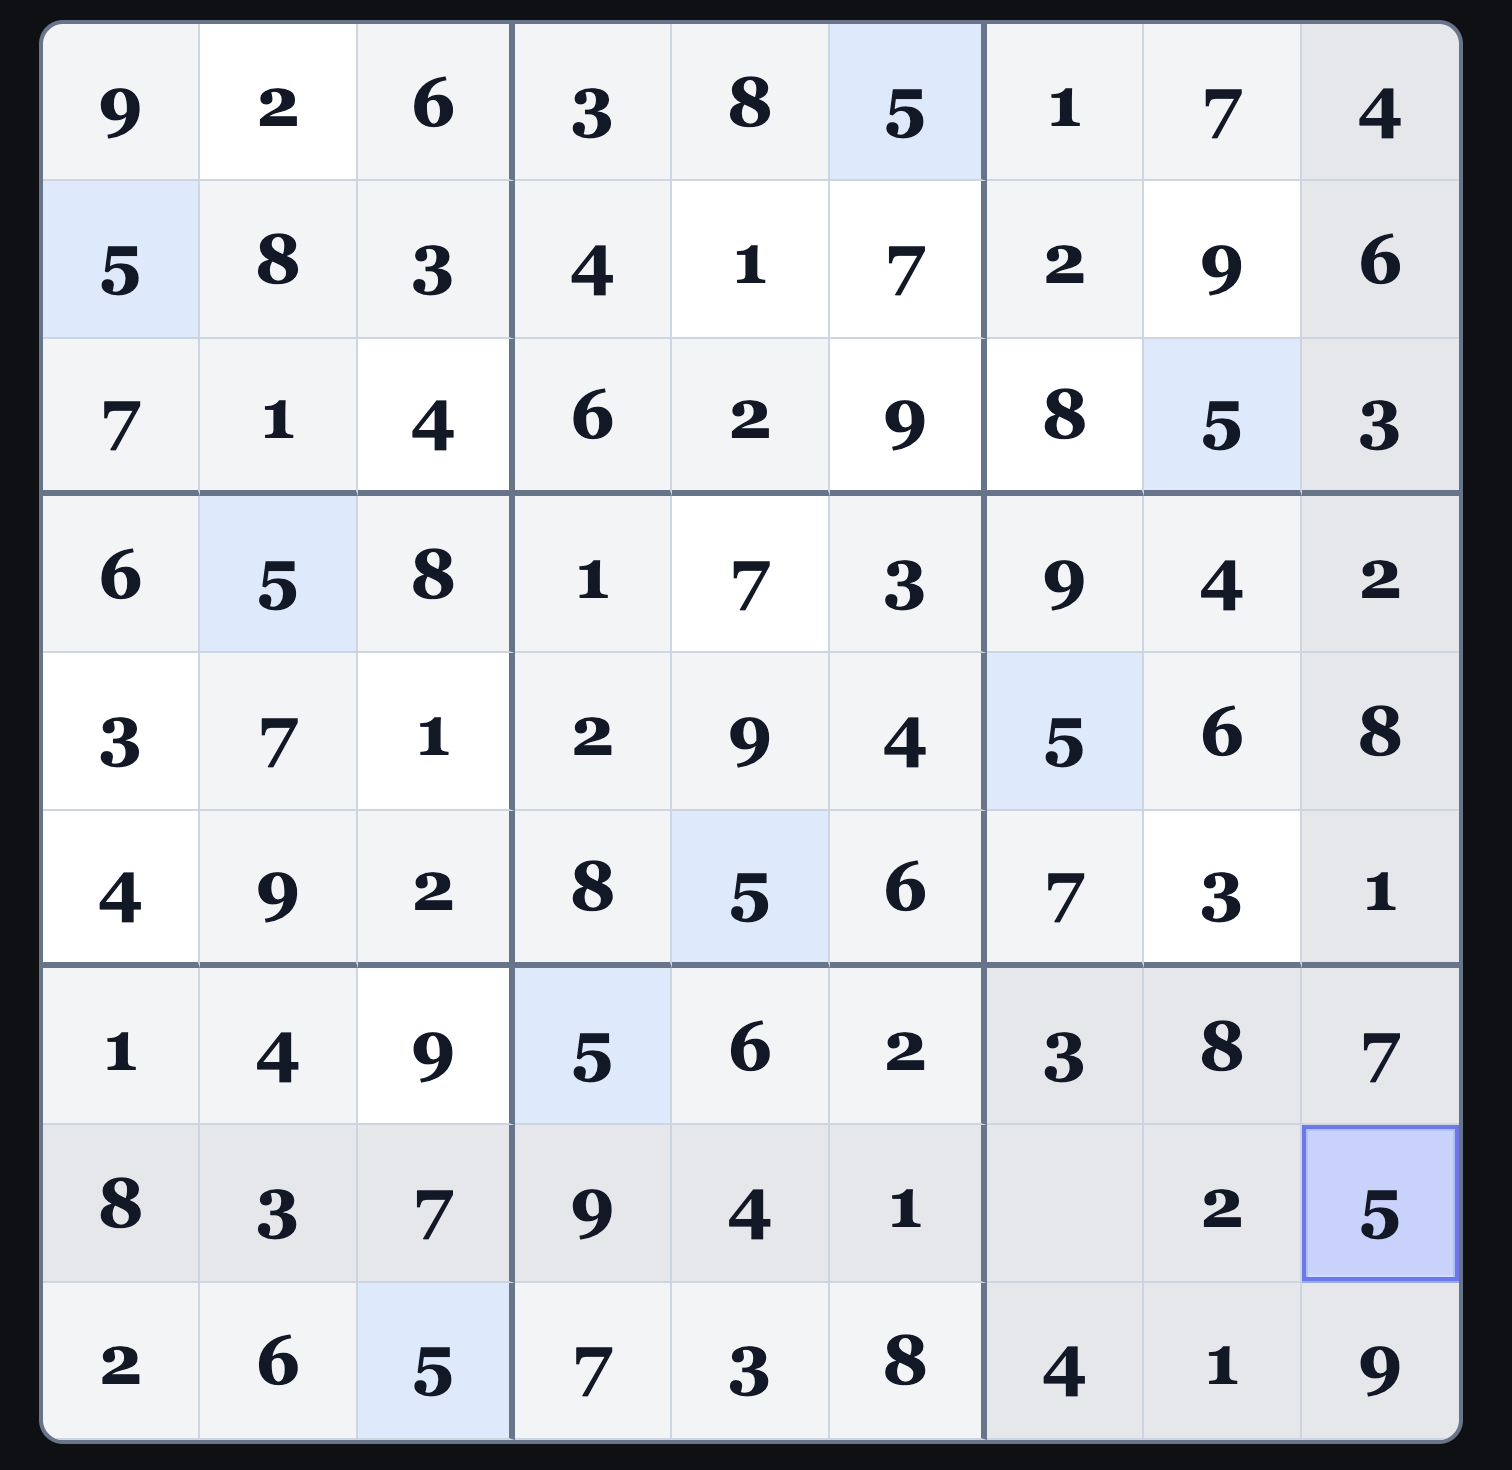
and the "mode" box to change between "Entry" and "Pencil". fcc.cc allows you to change the entry/pencil mode by clicking on the space bar,
which is super convenient.
I usually begin by scanning the grid numerically, looking for the obvious 1s, then 2s, and so on.
But if a number—say 4—already appears in several places, I might start there instead. Unlike chess,
the order of play isn’t very important. My approach isn’t especially fancy;
it relies on a handful of simple patterns that you apply repeatedly, working through the puzzle again and
again as each new number opens up more possibilities. Or perhaps better said, each
new number opens up new constraints.
Tip:
We will use the “r/c/b” notation system,
which refers to individual cells using row (1–9), column (1–9), and block (1–9) coordinates,
such as r1c1 for the top-left cell or b5 for the middle block.
In Sudoku terminology, a column of blocks
is usually called a “stack”. A row of blocks is called a "band".
Blocks b1, b4
and b7 are "stack 1".
Blocks b1, b2
and b3 are "band 1".
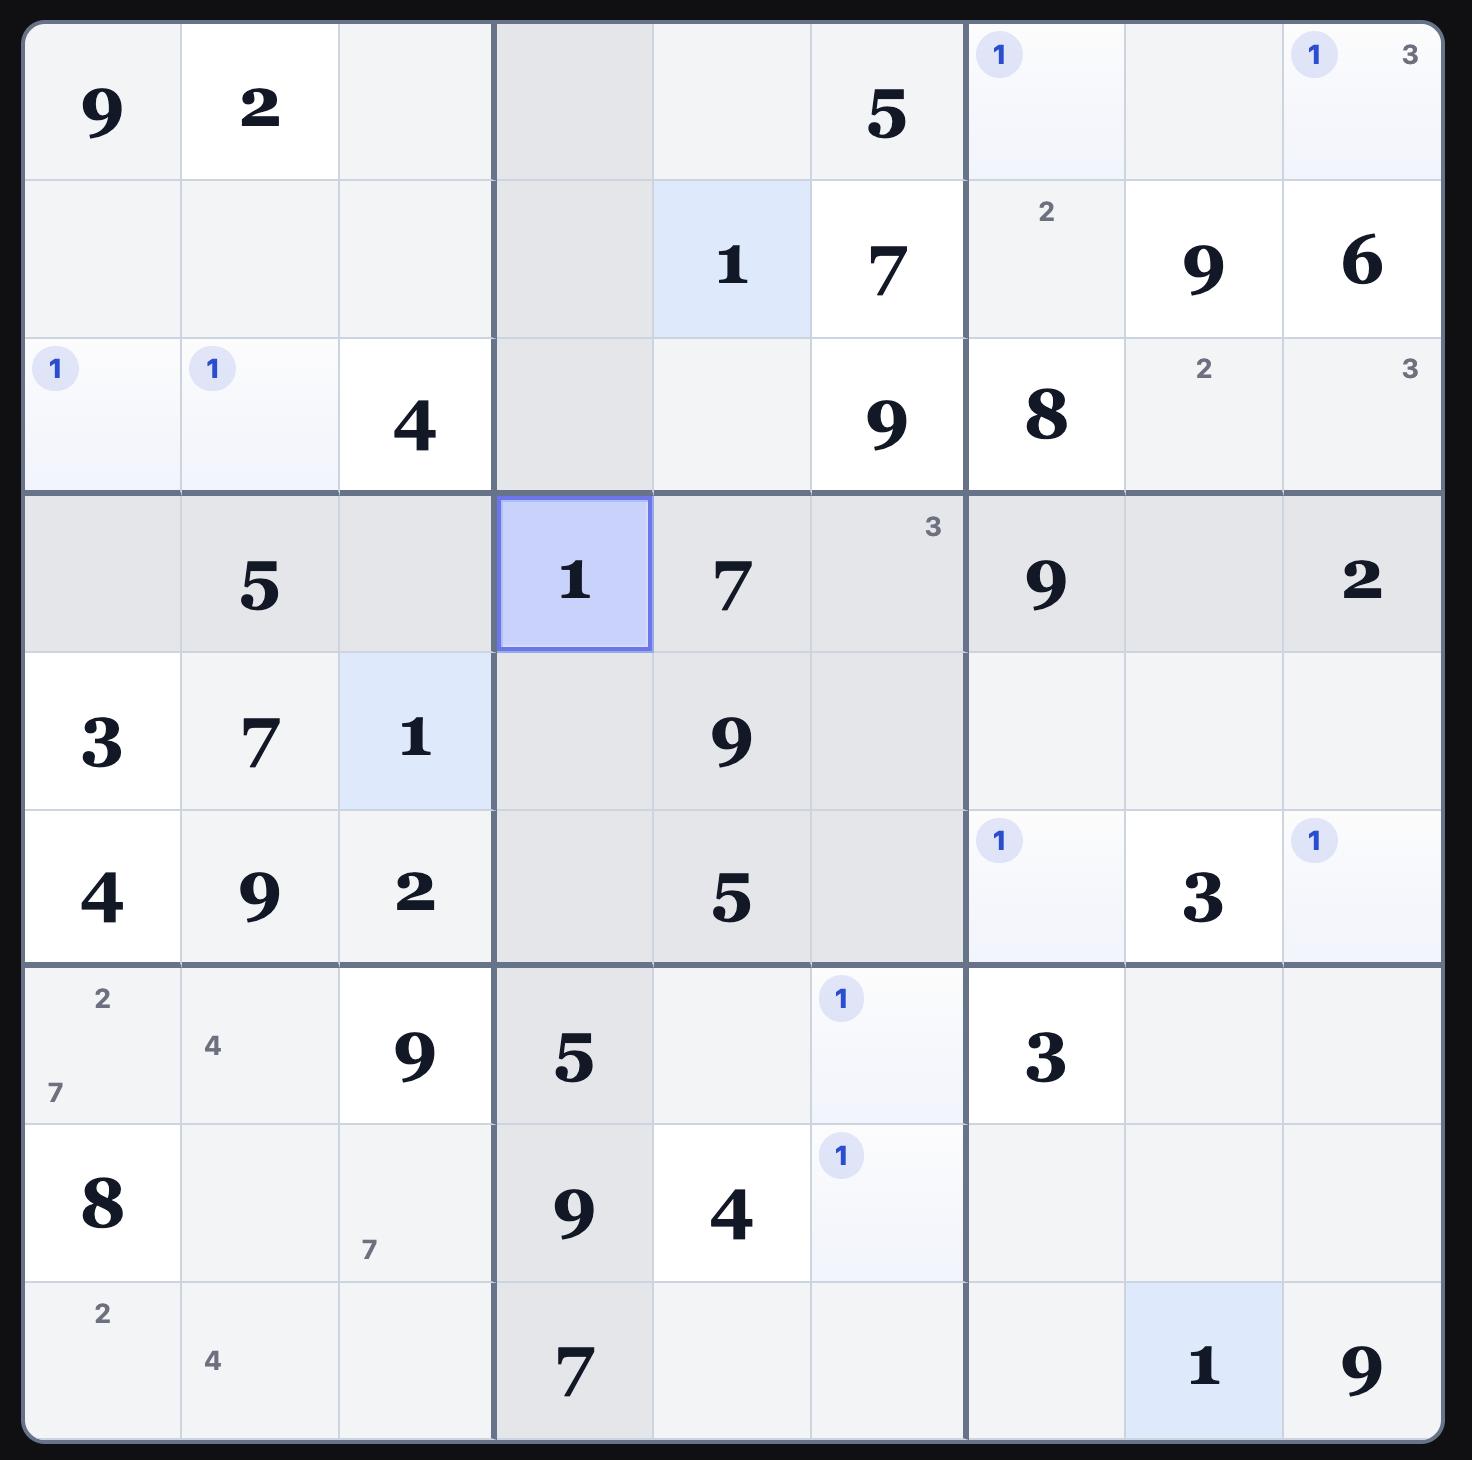
1
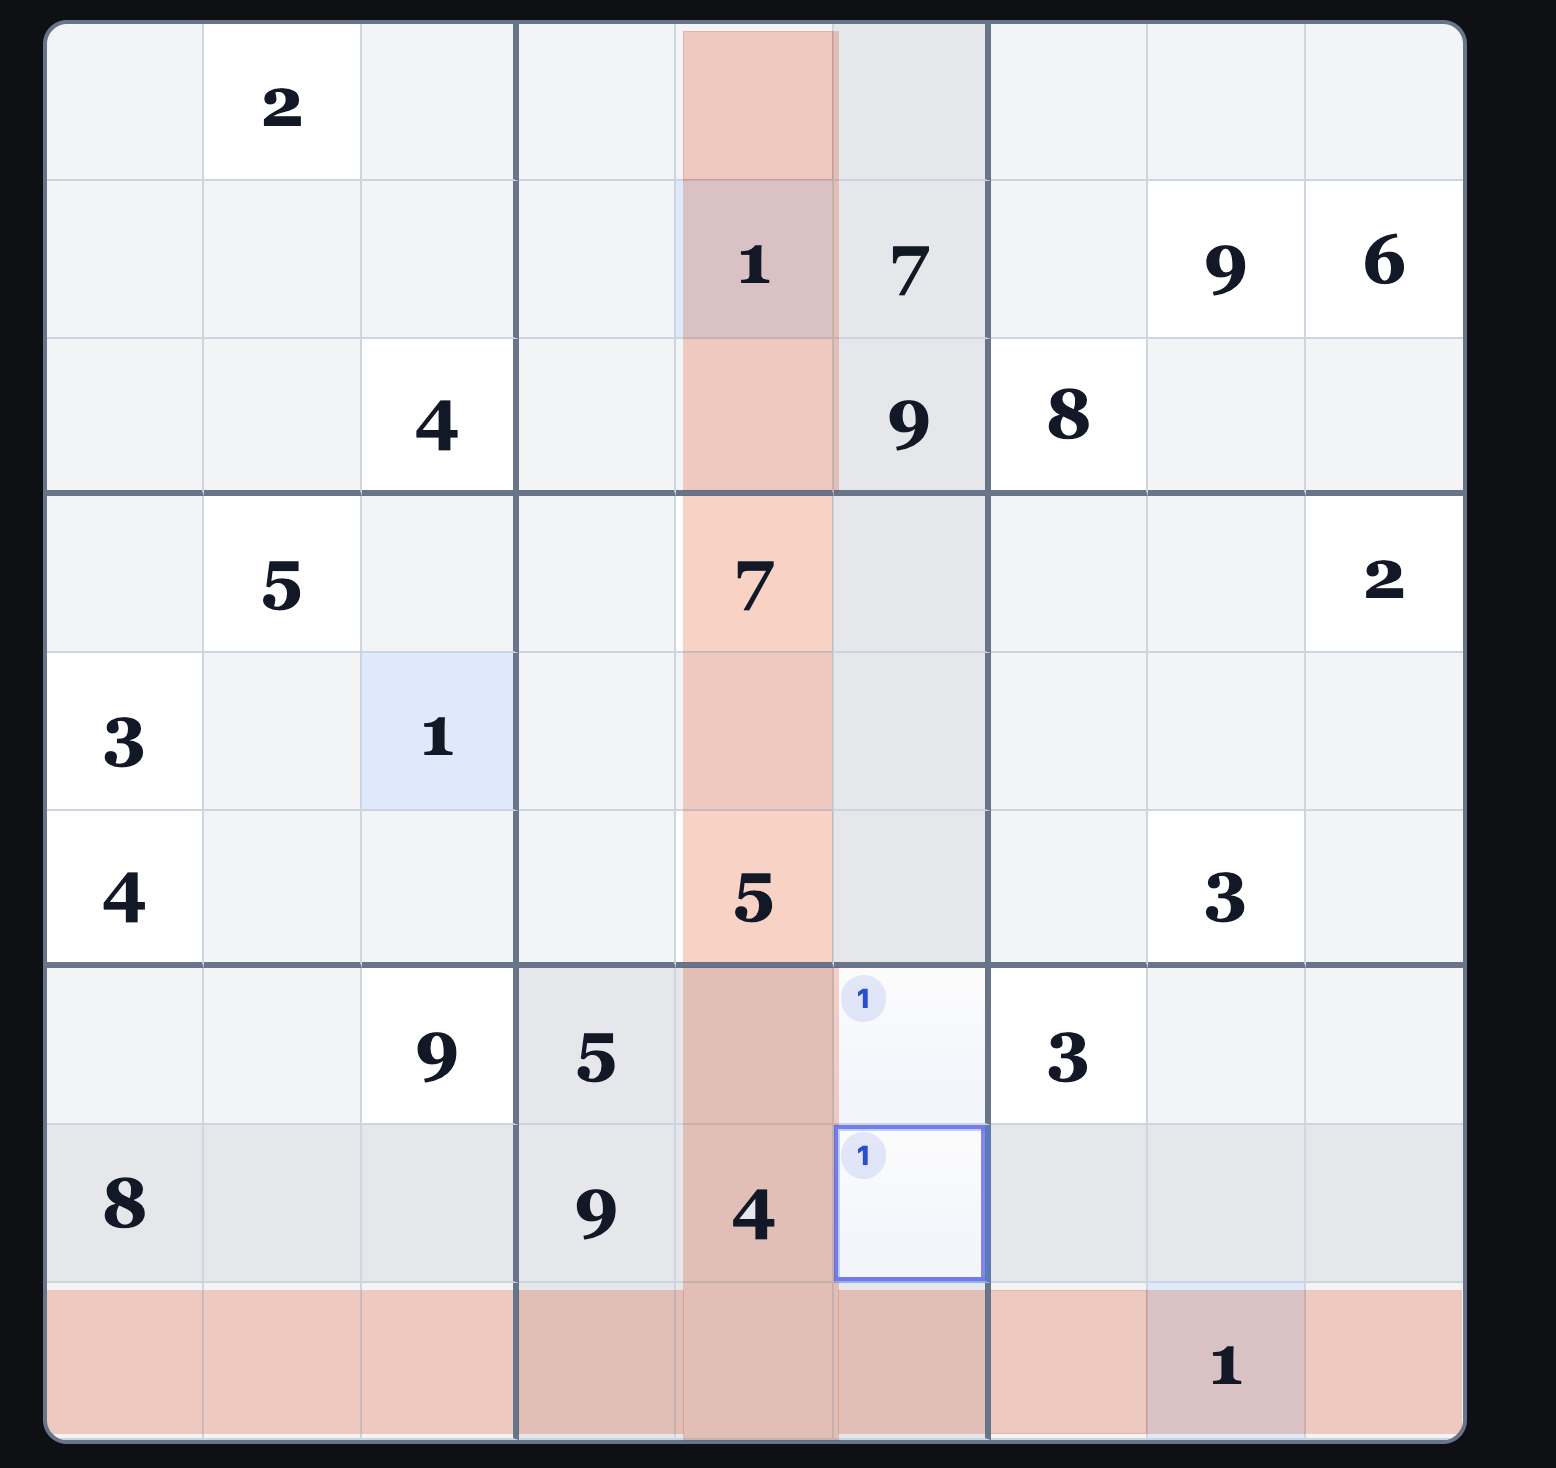
The first thing we can see from the given Sudoku board is that we can narrow
down the potential candidates for 1 in stack 2. The 1 in r2c5
means that there can be no other 1 in b2, r2
or c5.
The 1 in r9c8
means that there can be no other 1 in b9, r9
or c8.
Examining b8 shows us that the only candidate squares for 1 are
r7c6 and r8c6. By default, the "mode"
box at fcc.cc is set to "Entry". Since we aren't sure which square is correct, let's
change that to use the "Pencil" mode.
After you've changed to Pencil mode, click in each and enter a 1 in r7c6 and r8c6
to add the pencil marks.
Tip:
The system of pencil marking squares that can be narrowed down to two candidate squares in a column,
row, or block is called Snyder Notation, named for Thomas Snyder
("Dr. Sudoku"), a three-time World Sudoku Champion. Snyder notation is a selective pencil-marking method
in which you record candidates only when a digit can go in exactly two cells within a 3×3 block.
This reduces clutter and makes useful pairs easier to spot.
2
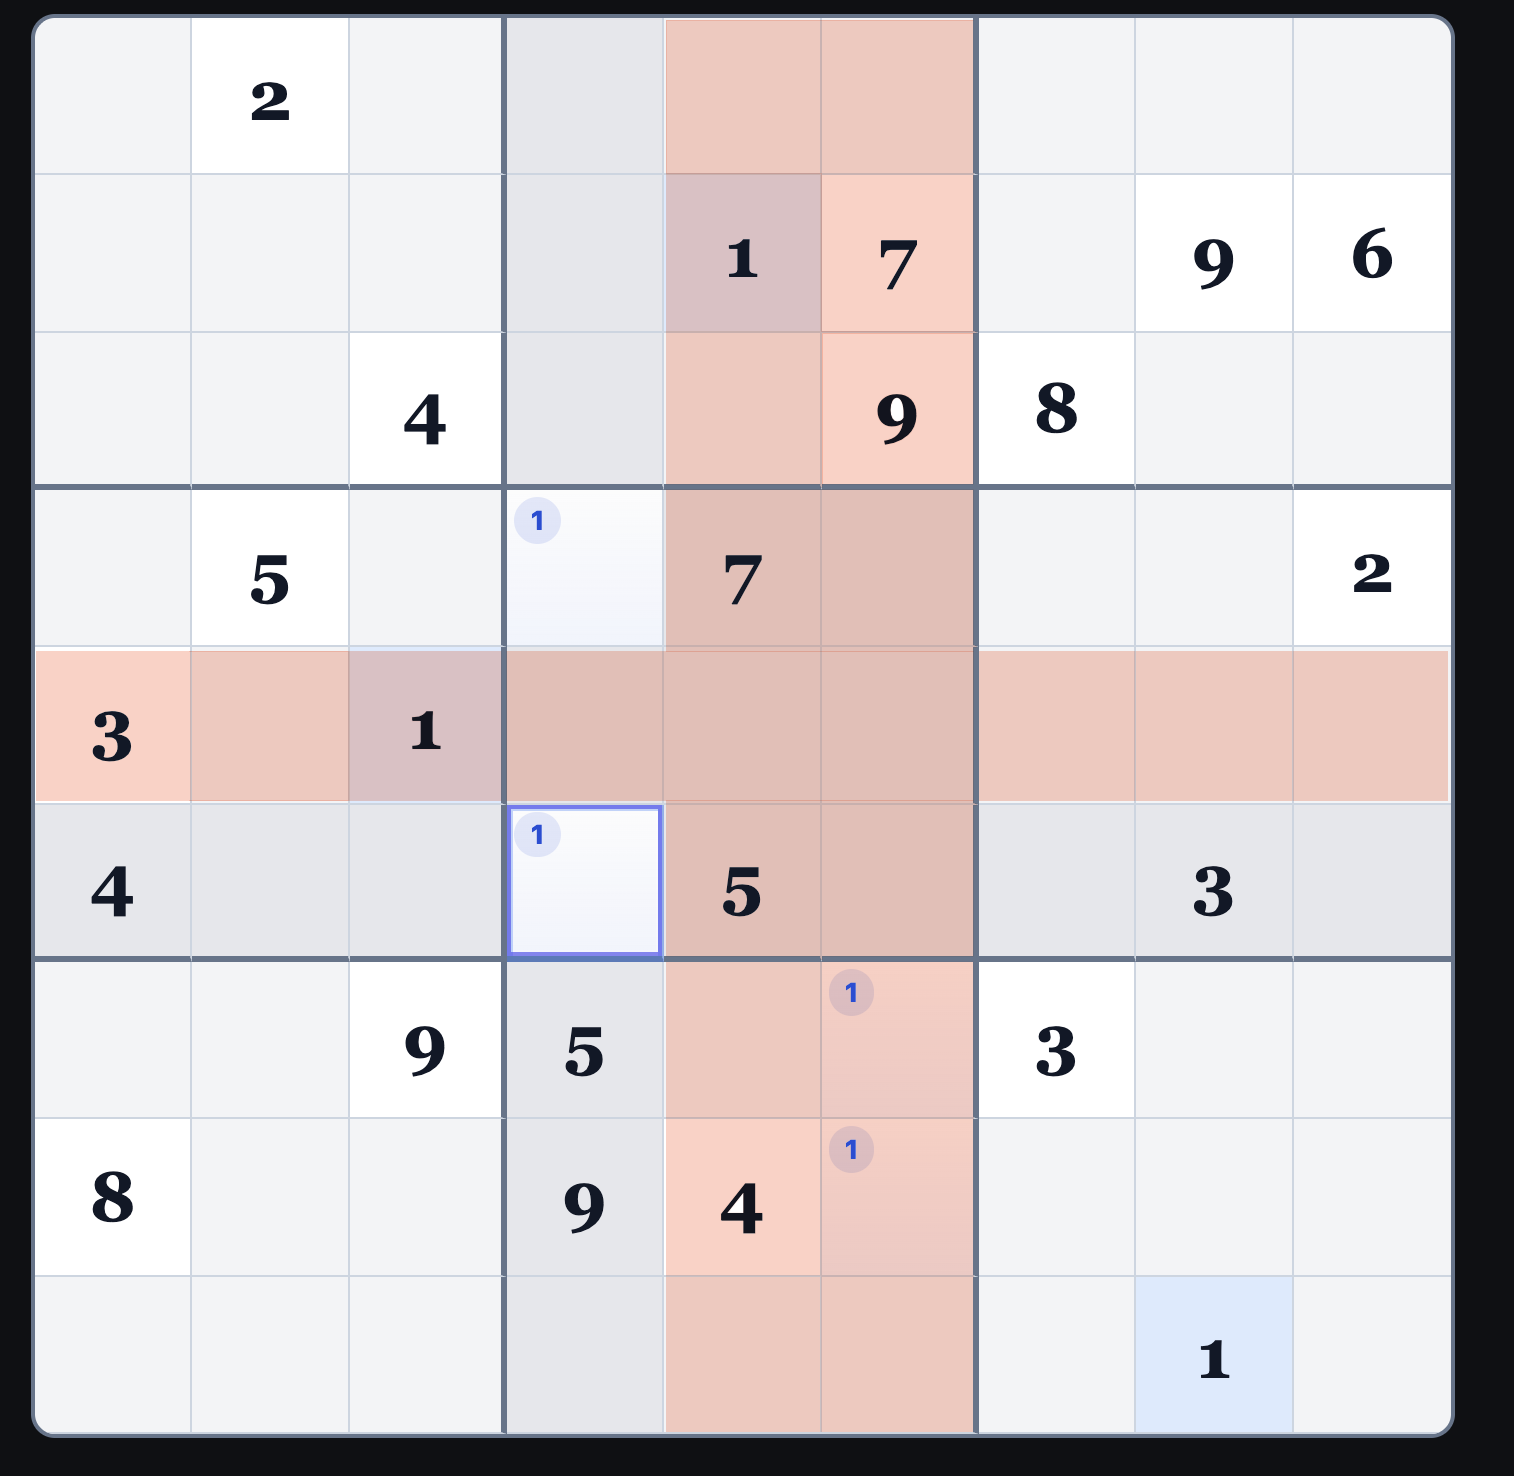
Because we've entered both pencil marks for column c6 as
the only possible places for a 1 in that block, that means that column c6
is "locked" as far as the number 1 goes. And we were given a 1 in column c5.
This means that in block b5, the 1 must be in column c4.
However, the 1 in r5c3 means that row r5 is locked
in regards to 1. Therefore, the only candidate squares in b5
are r4c4 and r6c4.
Since we have only two candidate squares, add Snyder pencil marks there.
3
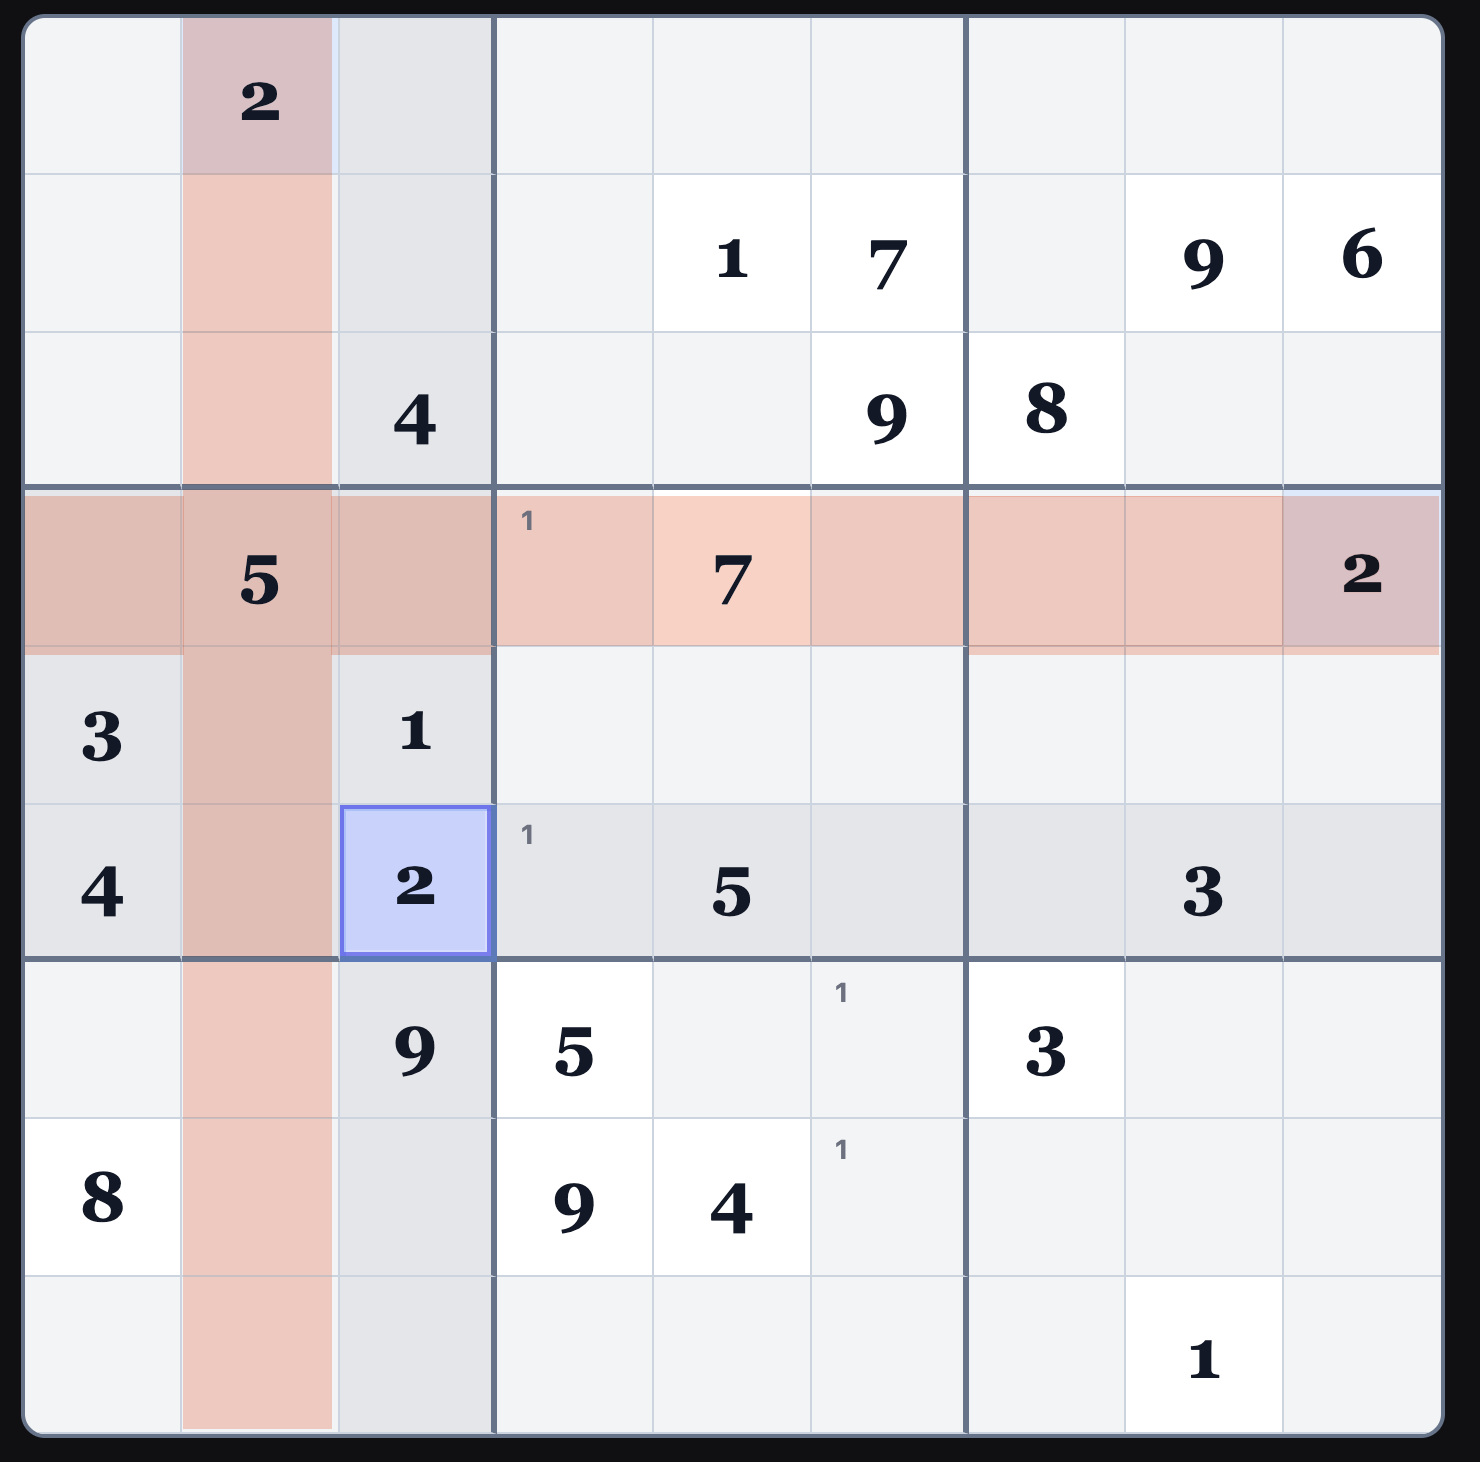
Because there is a given 2 in r1c2, no other square in
column c2 can be a 2. Because there is a given 2 in r4c9,
no other square in row r4 can be a 2. In block b4,
that leaves only one possible location for 2: r6c3.
Change the pencil tool to entry mode and enter a 2 in r6c3.
4
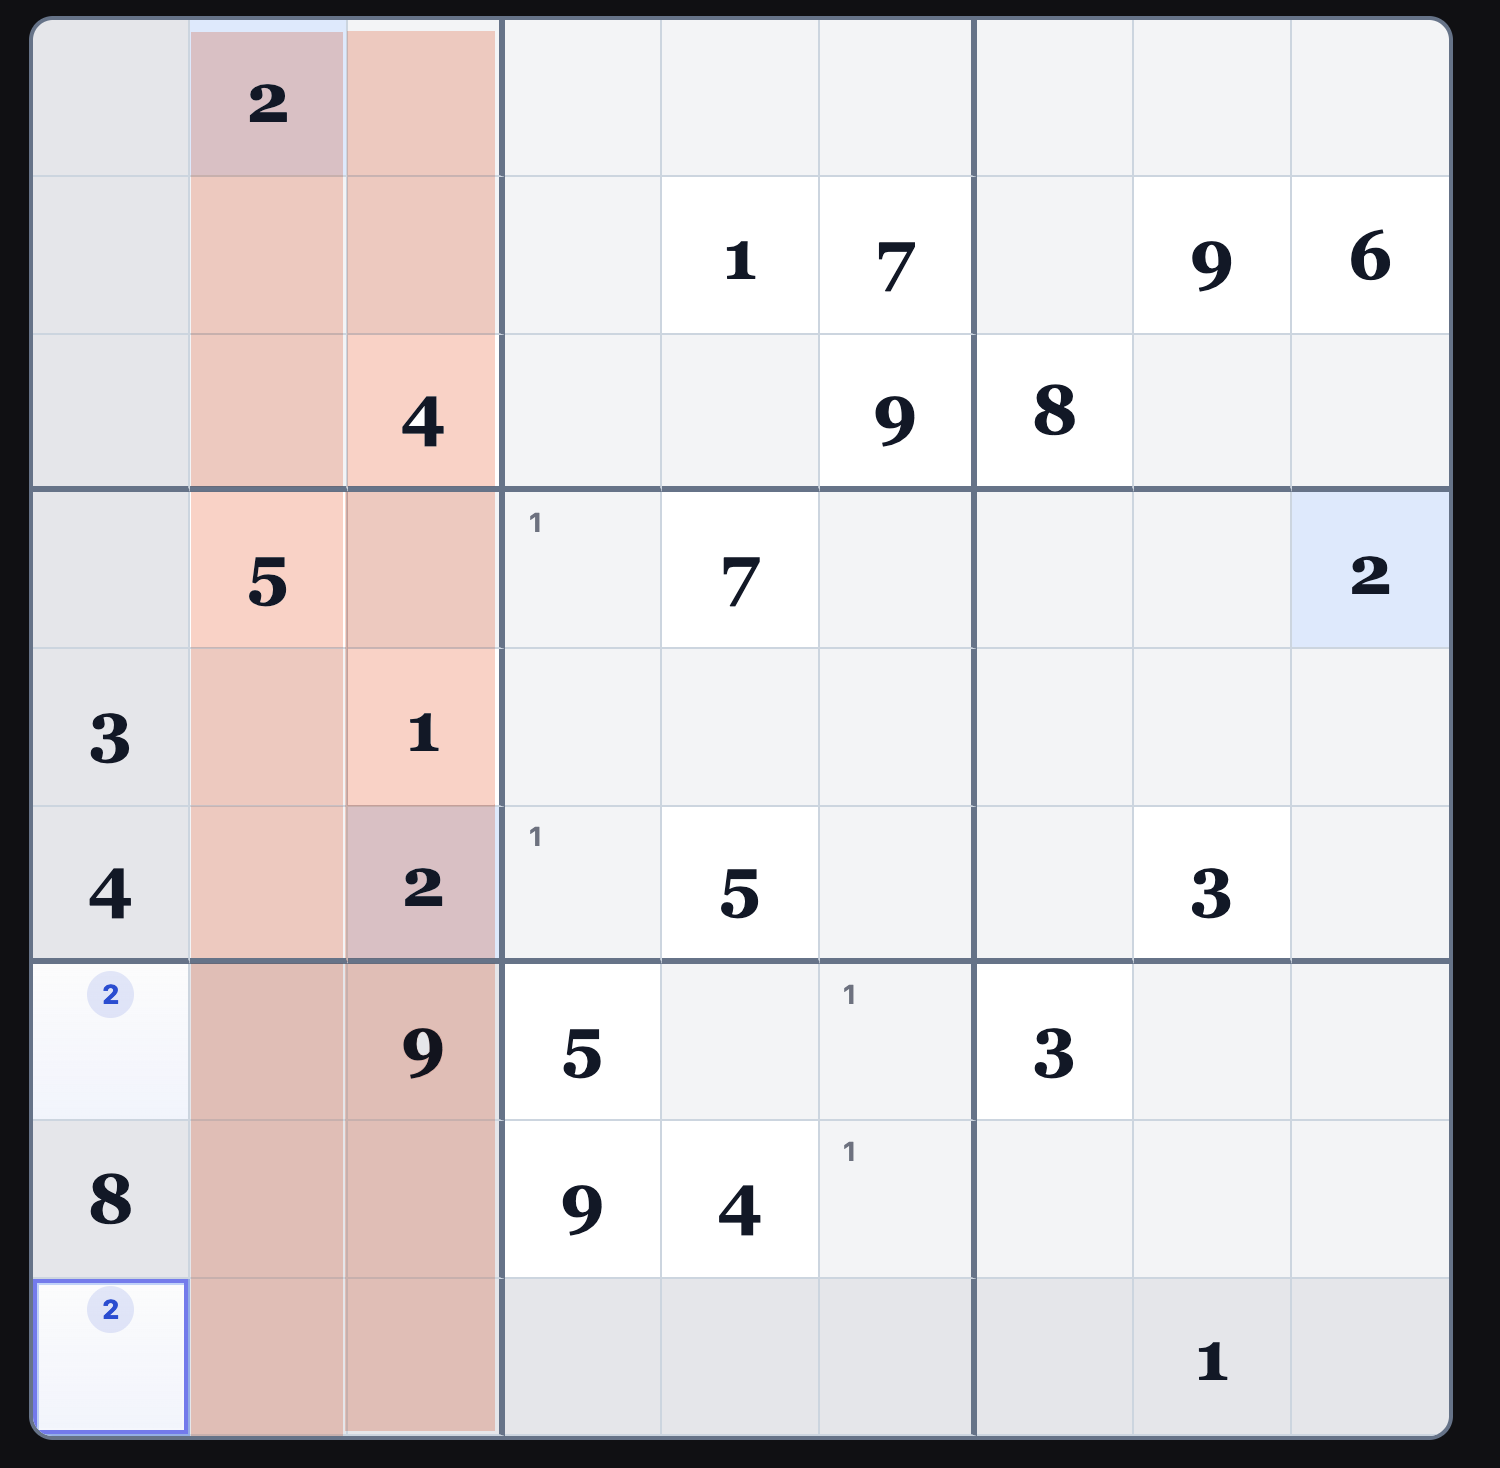
Using the same logic as in stack 2, the fact that columns c2 and c3
already have a 2, the 2 in b7 must be in c1.
There are only two candidate squares available, so pencil in 2 Snyder numbers to r7c1 and r9c1
5
We can enter Snyder numbers for 2 in block b3. The 2 in r1c2
and r4c9 mean that there are only two candidate squares, r2c7
and r3c8. Mark them with your pencil.
The Snyder numbers that are in the same row or column are much more helpful, because they help you constrain the row
or column. However, these Snyder numbers are sometimes still helpful for narrowing down candidates within the block.
6
Let's move on to looking for candidates for 3. We've got a 3 in r5c1 and
r6c8. This means we can once again narrow down the candidate squares to
only two choices, r4c4 and r4c6. Mark them with your pencil.
This means we can once again narrow the candidates for 3 in b5 to just two squares: r4c4 and r4c6.
7
We can also enter some Snyder numbers in block b3. We've got a 3 in r7c7
and r6c8. This leaves only r1c9 and r3c9
as candidate squares. Let's pencil those in.
8
Let's add some 4s!
We've got a 4 in r3c3 and
r6c1 and r8c5.
This configuration gives us only 2 candidate squares in b7, r7c2 and
r9c2. Let's pencil in those Snyder numbers.
9
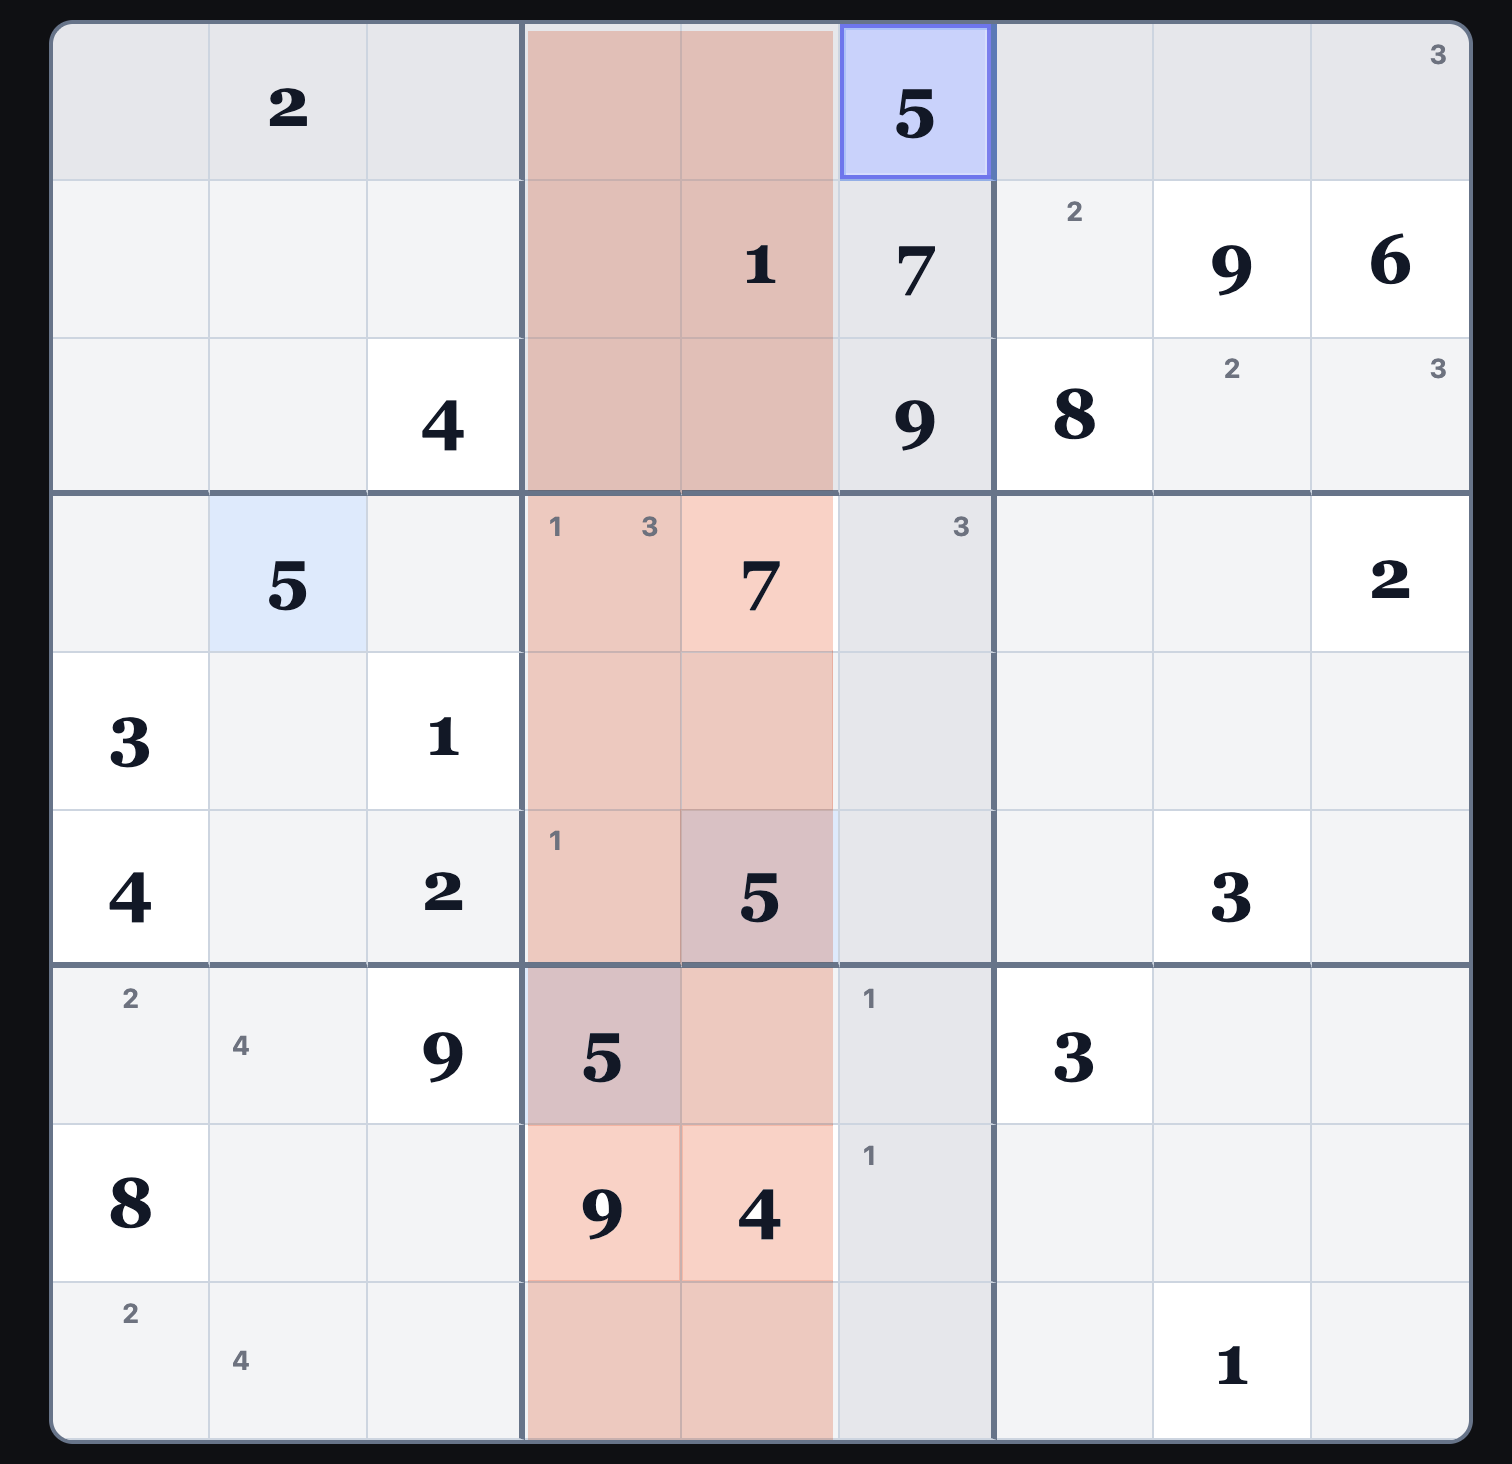
We can add a 5! Because we've got a 5 in r7c4 and r6c5, there is only
one space open for 5 in b2: r1c6.
Change your entry mode and enter a 5.
10
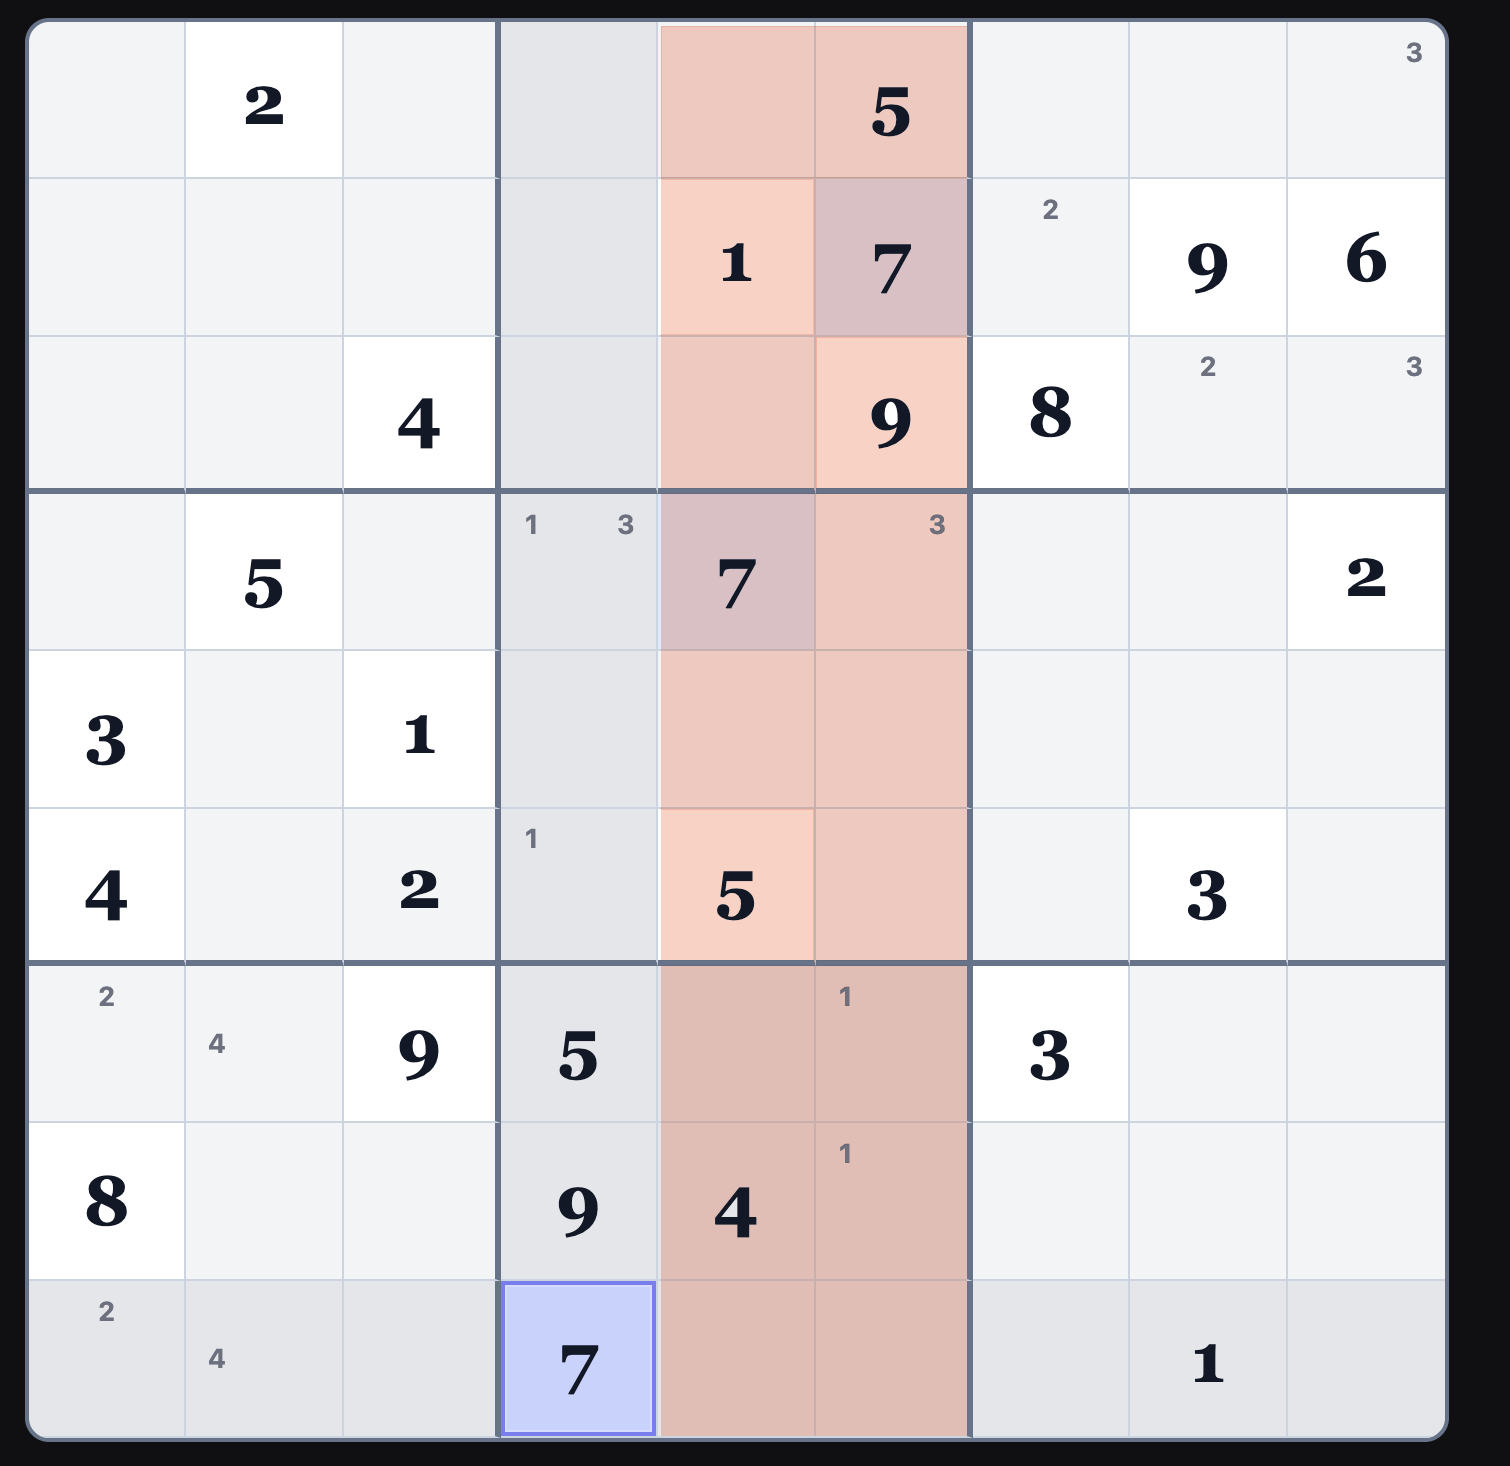
There's a 7 in r2c6 and r4c5.
This means that for b8, there is only
1 candidate square for 7: r9c4.
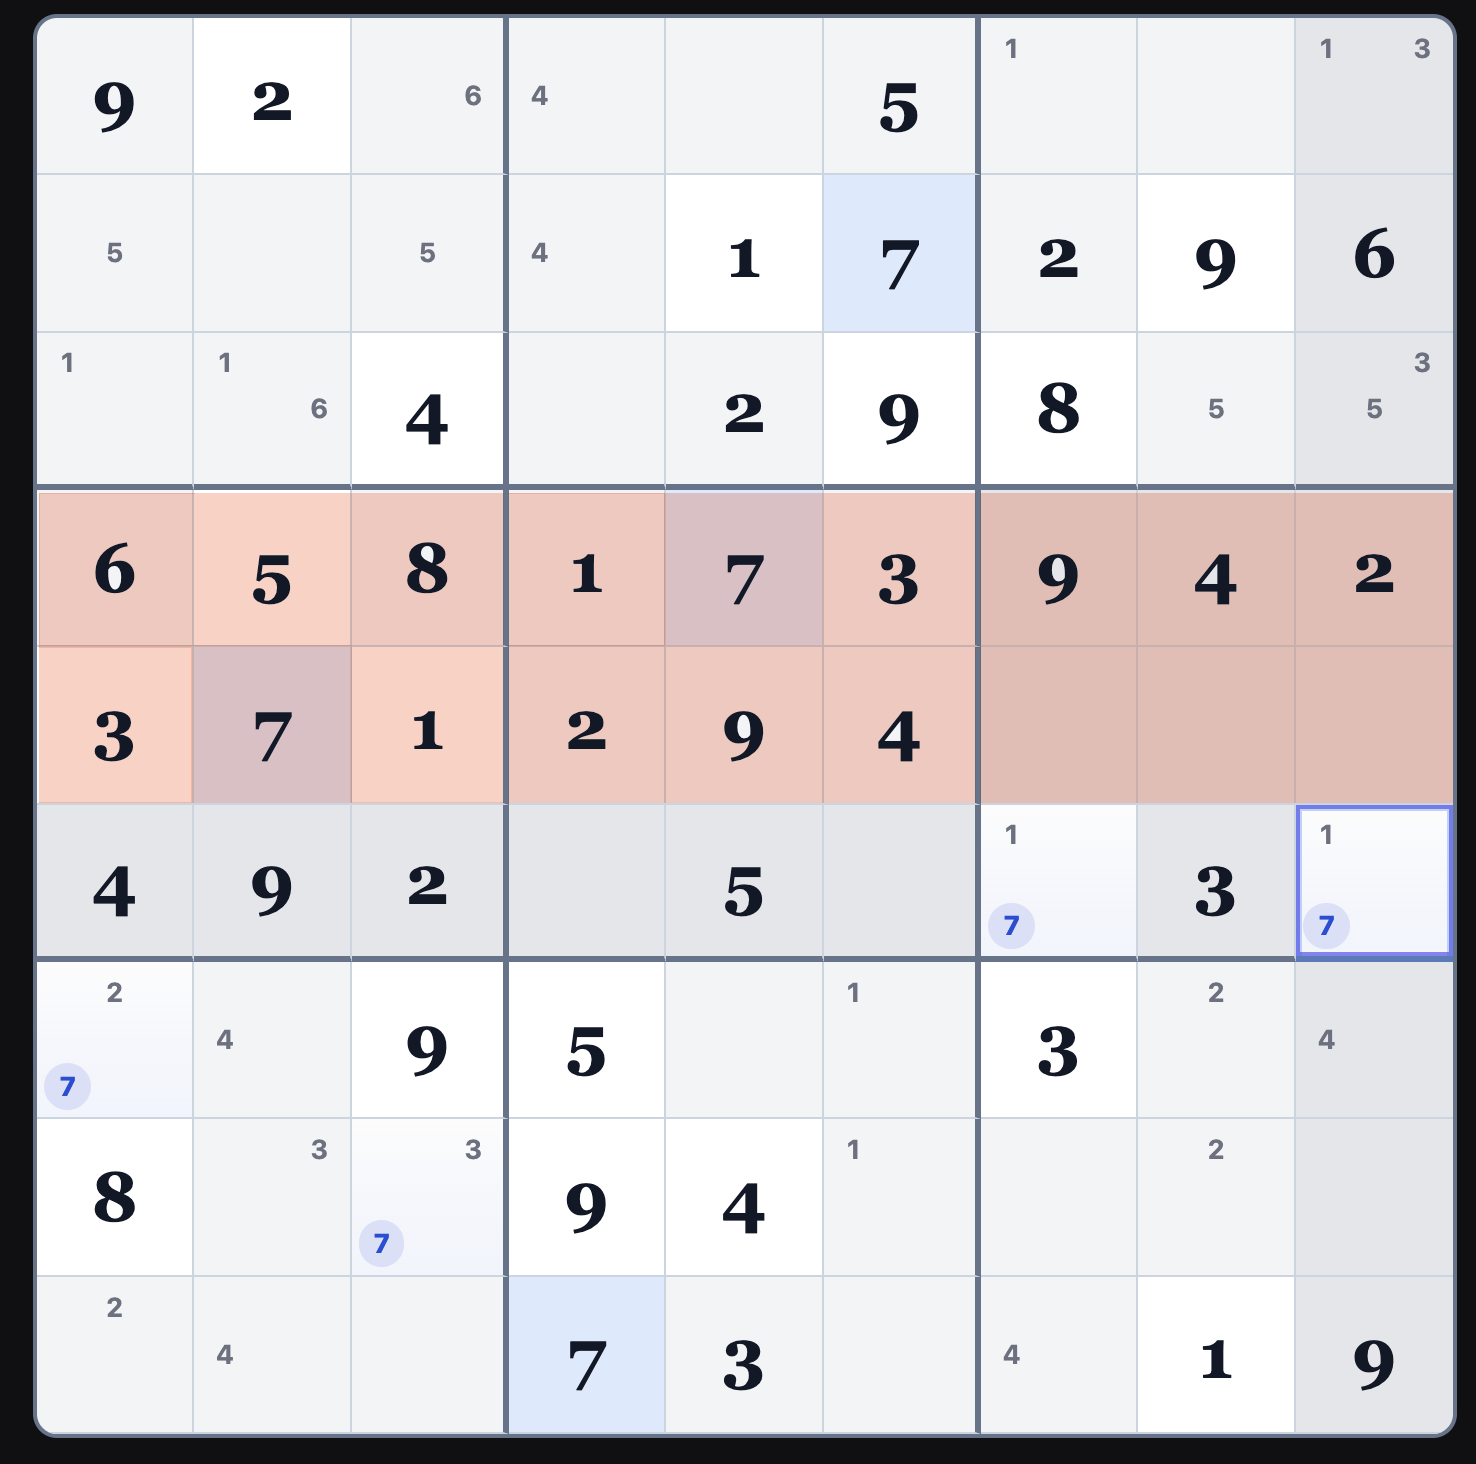
11
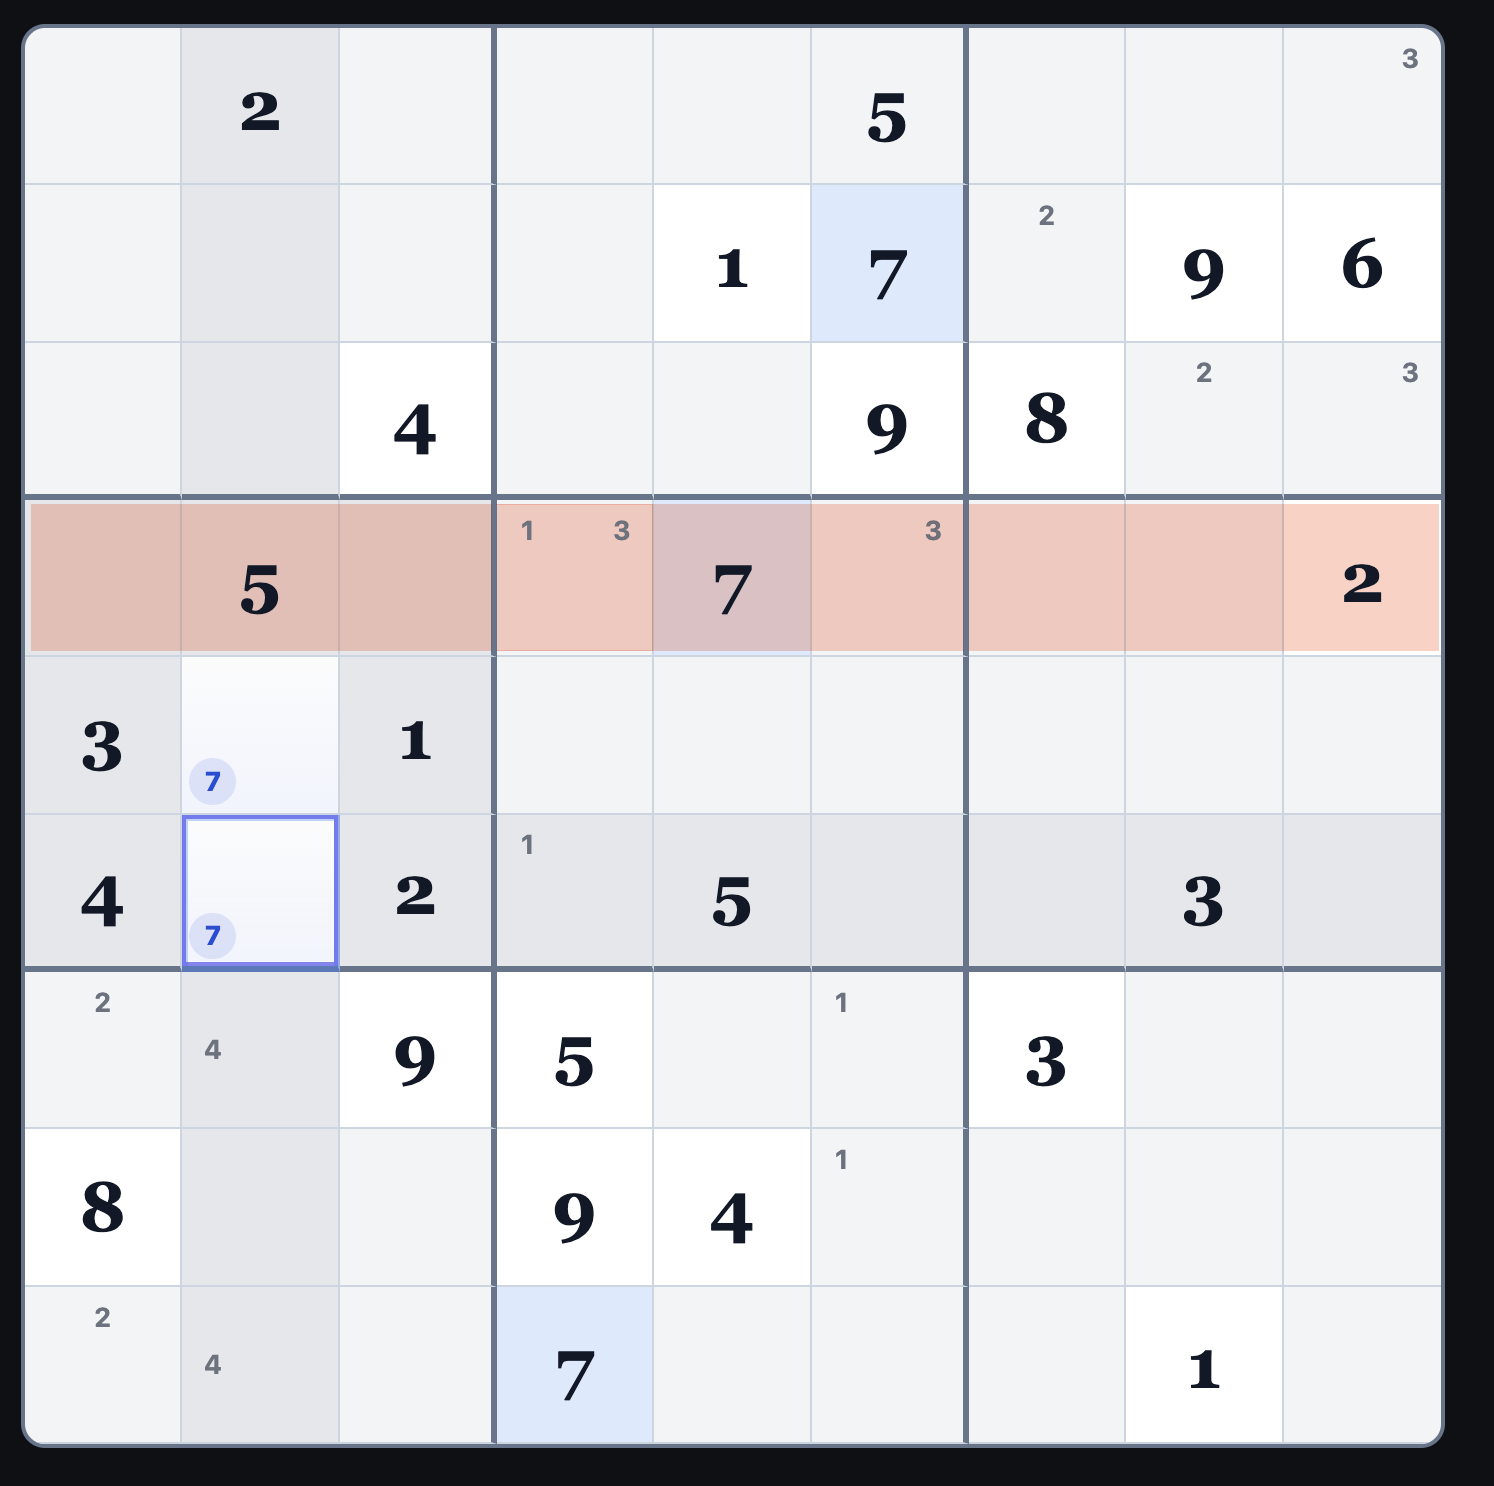
Because of the 7 at r4c5, block b4 has only
two candidate squares for 7, r5c2, and r6c2.
Change the mode back to Pencil and add a 7 pencil mark in both squares.
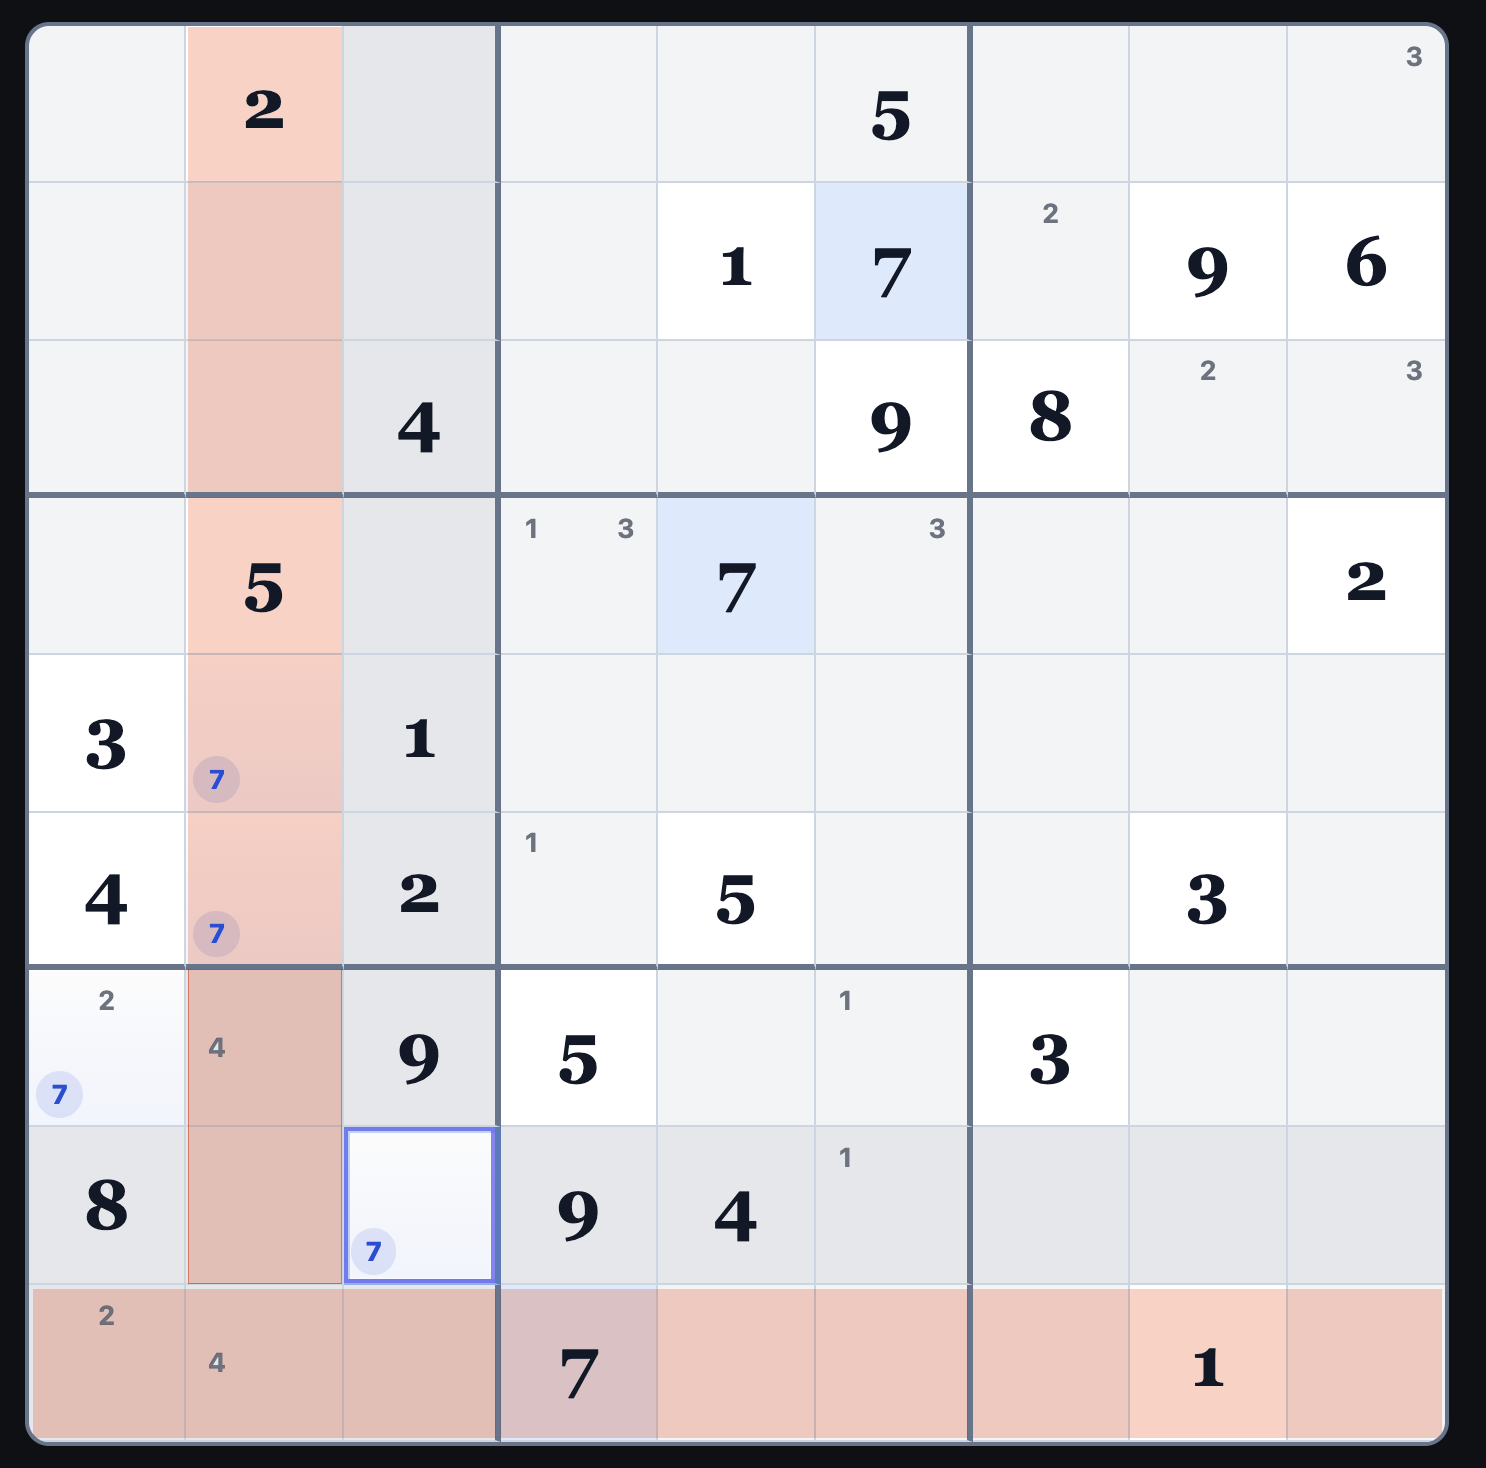
Tip:
Take a good look at b7. Because b4 has those
pointing 7s, we know that in b7, we can't have a candidate for 7 in column
c2.
12
The only candidate squares for 7 in b7 are r7c1 and r8c3.
13
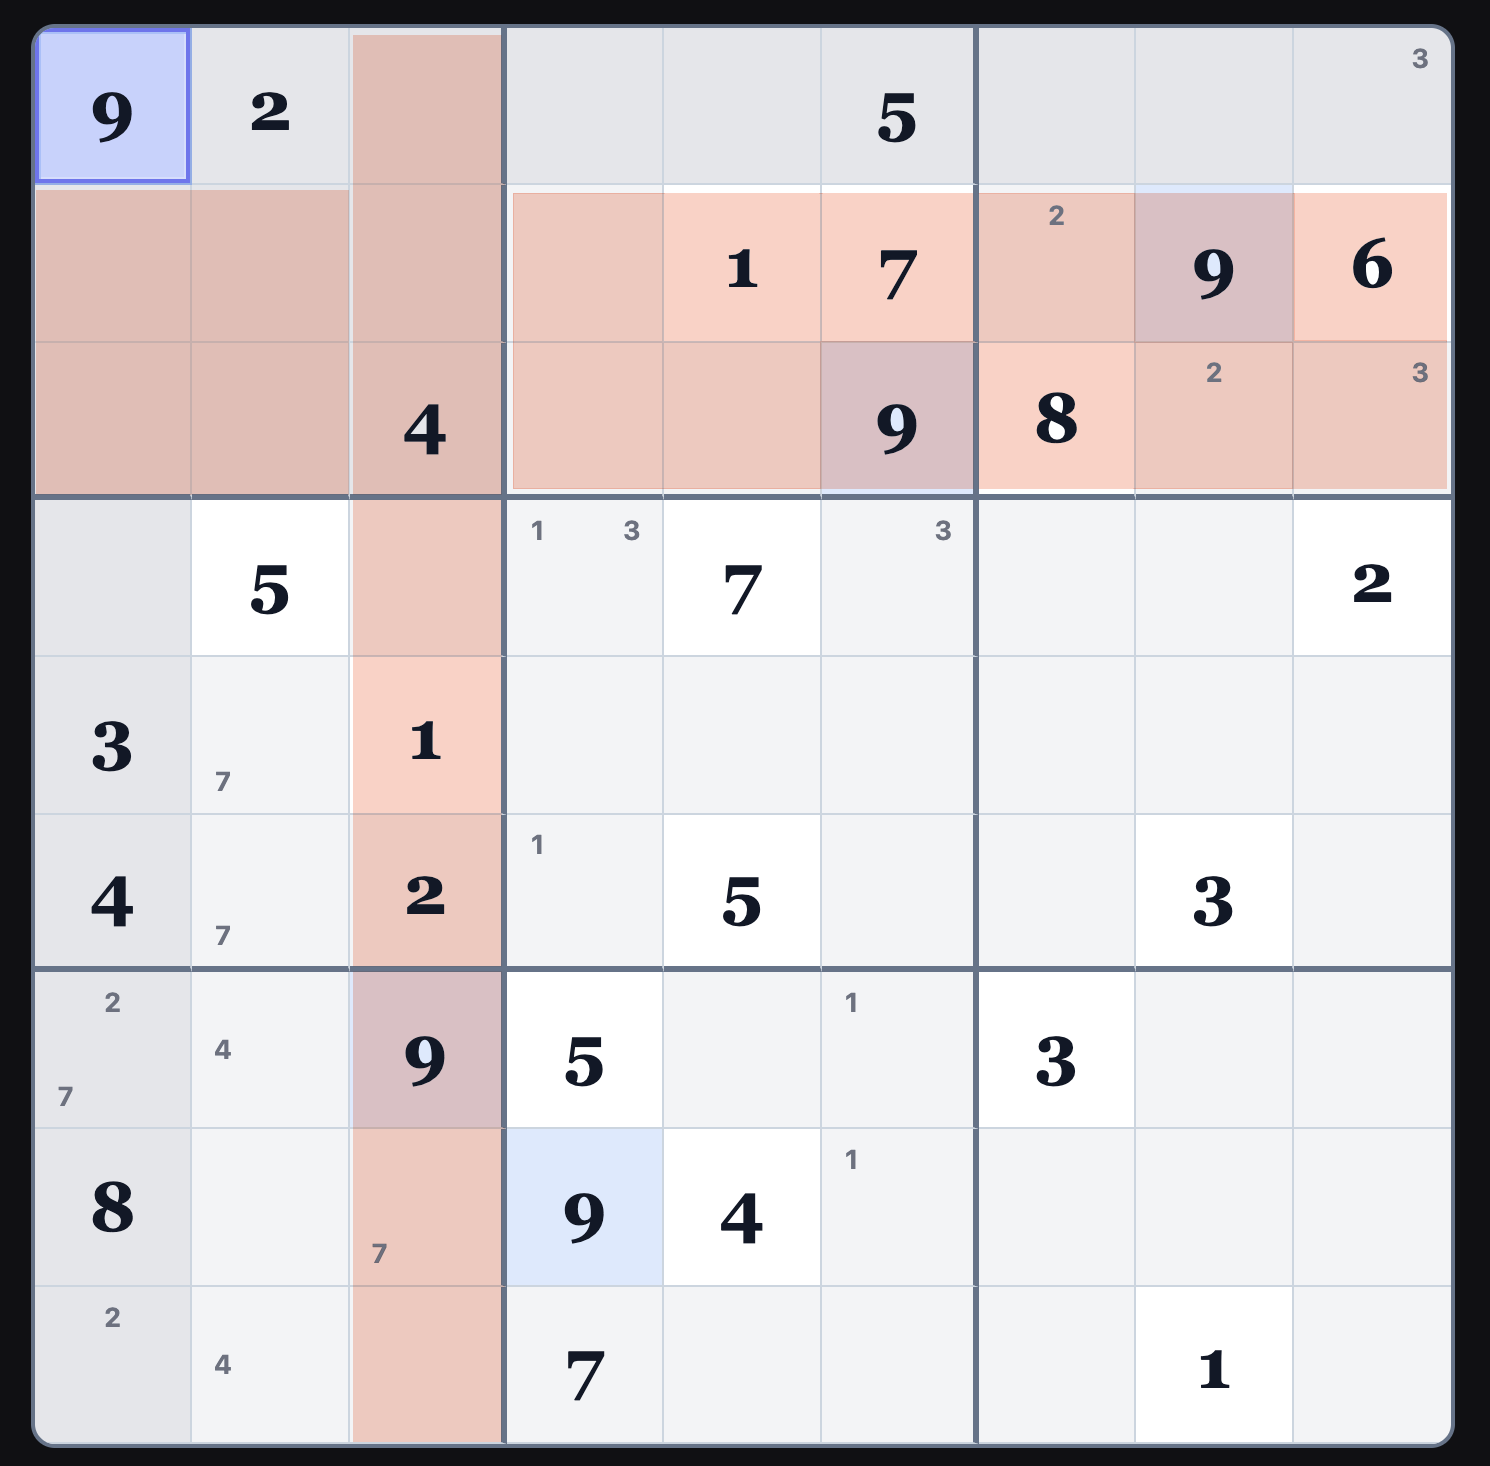
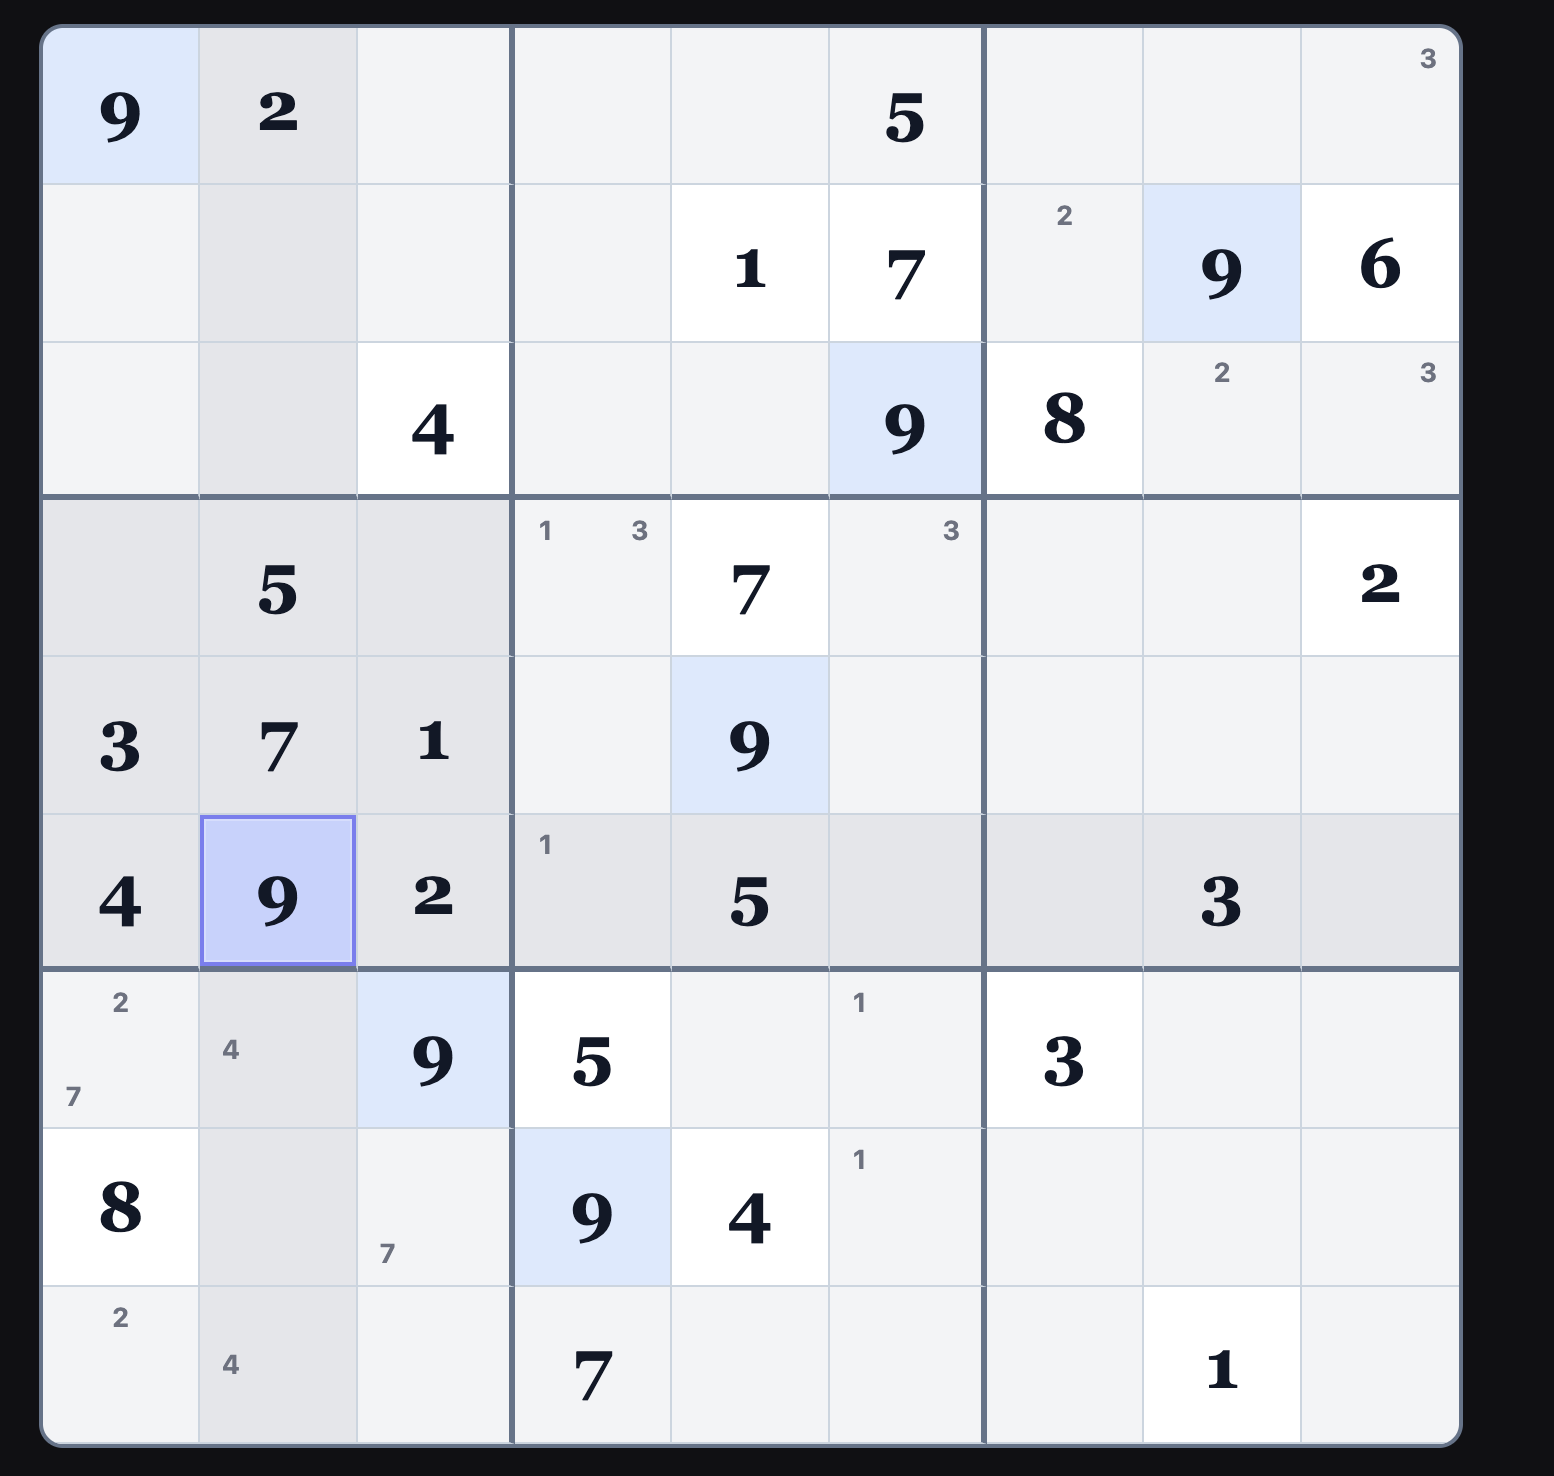
Looking for 9, we see some at r2c8, r3c6,
and r7c3.
This means the only possible square for 9 in b1 is r1c1.
As Holmes put it, when you have eliminated the impossible, whatever is left
must be the truth.
Change your mode to entry and confidently enter a 9 in r1c1. Elementary, Watson.
14
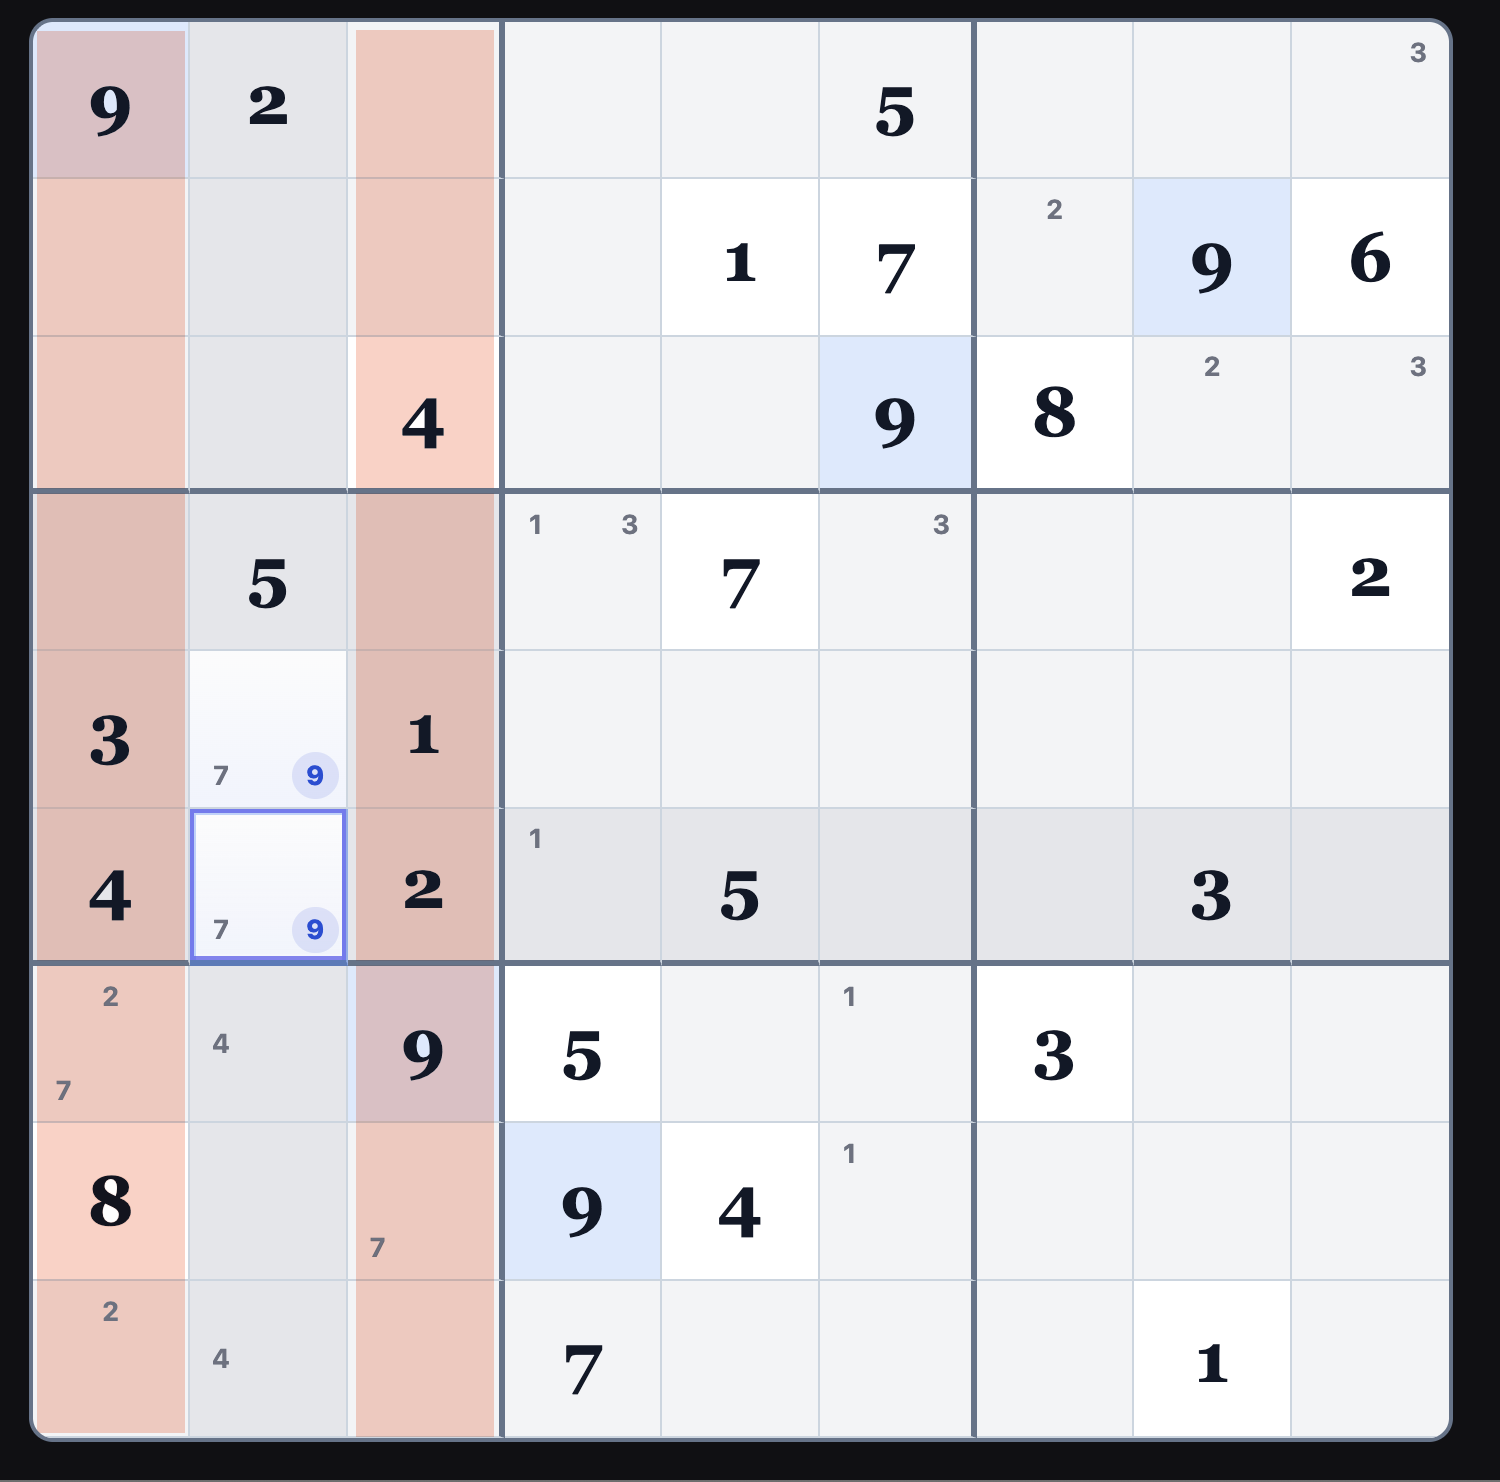
Because there is a 9 in r7c3 and now a
9 in r1c1,
the 9s in b4 must be in column 2.
So we can pencil 9s into r5c2 and r6c2.
Tip:
One of the most useful ideas in Sudoku is the pair. The power
of the pair is that these numbers can act like entered numbers in the block, row and column.
Since we've determined that the only two candidate squares exist in b4 for
both 7 and 9, we cannot mark another number as a candidate inside those squares.
For example, if I asked you, "Is r5c2 a candidate for 8?"
you might be tempted to say yes because there seems to be no logical
impediment. There is no 8 in b4, nor any 8s in
row r5 or column c2. But because it is part of a pair, it is logically
impossible for any value besides 7 or 9 to be considered as a candidate.
15
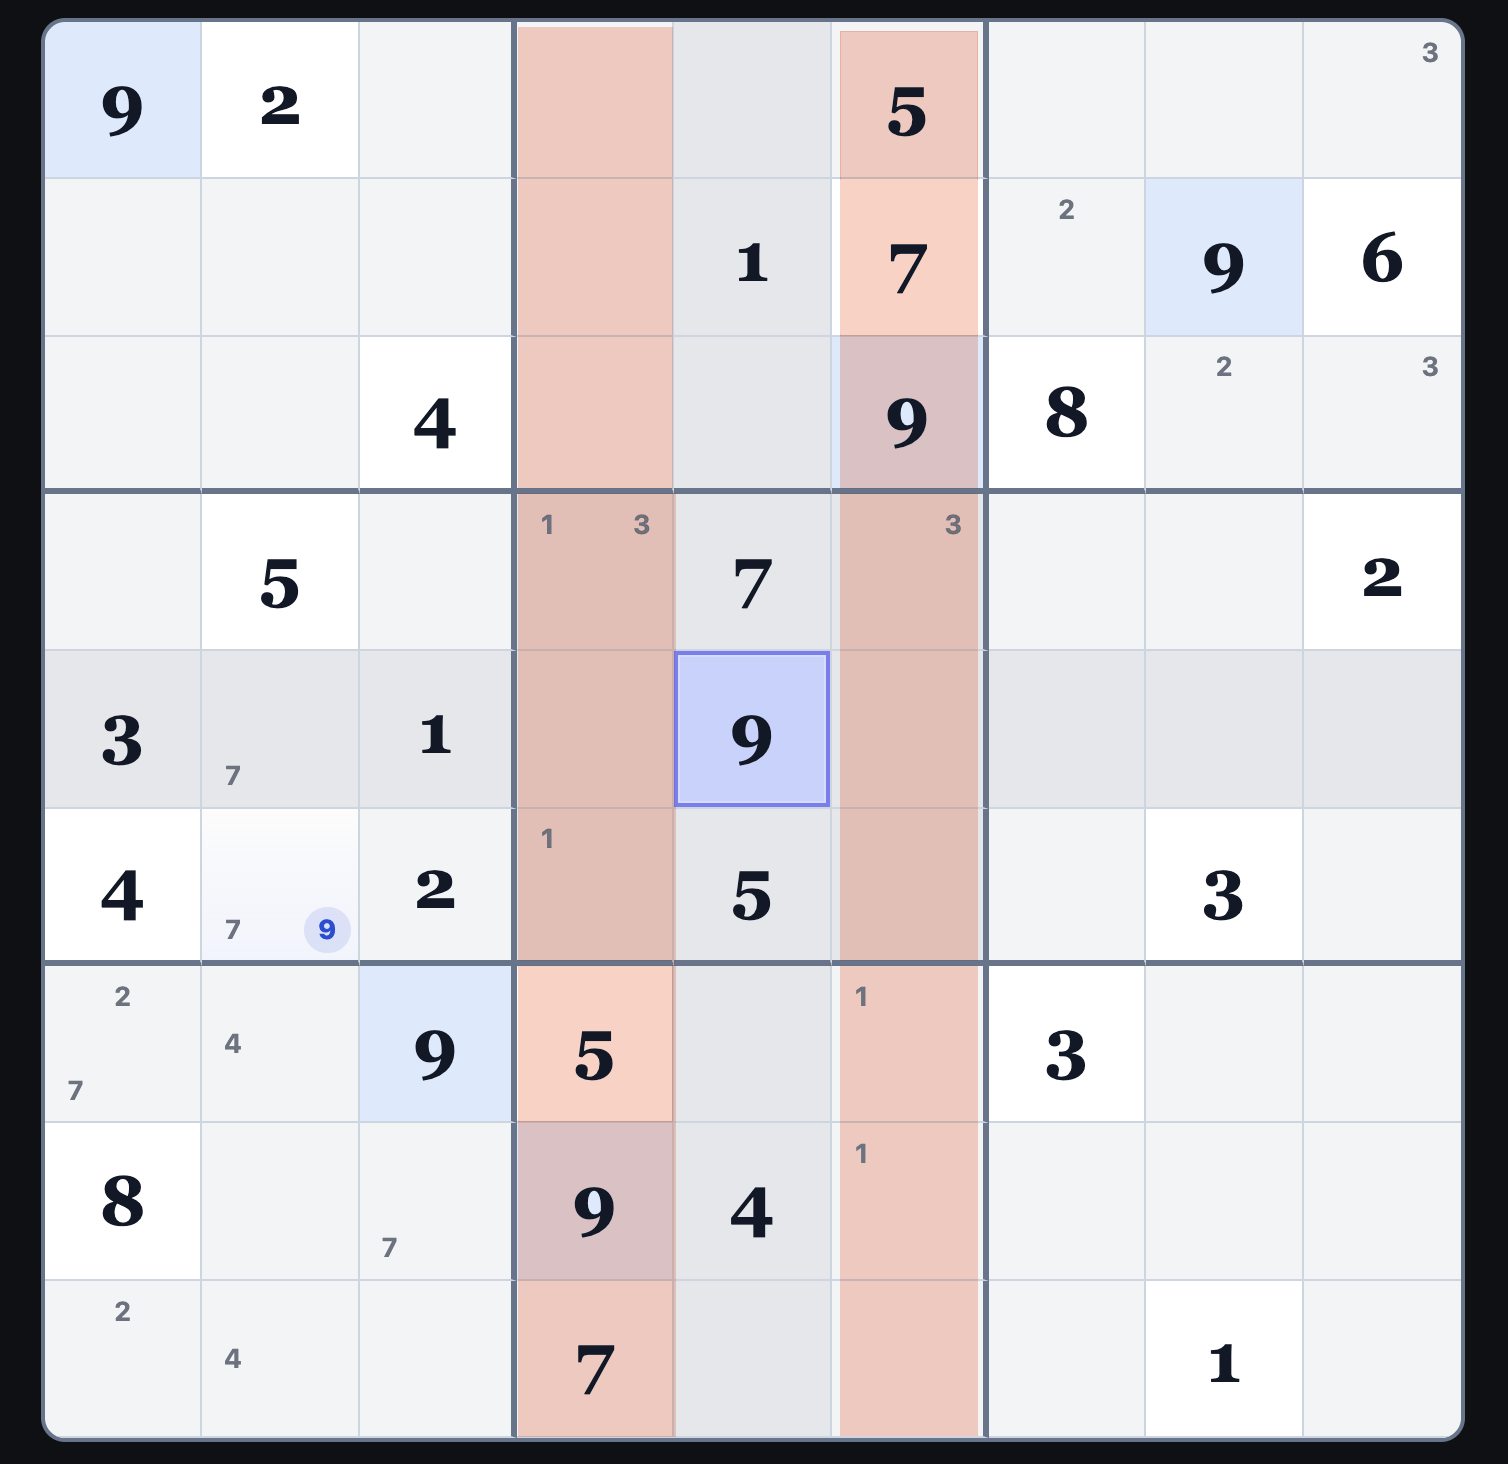
If we look at block b5, we see that there is an obvious value for r5c5. It
can only be a 9. Notice what happens in r5c2 when we fill the nine in
r5c5. The Sudoku app has erased a pencil mark 9 for you, because that
square can no longer be considered a candidate for 9.
By the way, the app won't prevent you from re-entering a pencil mark of 9 back in r5c2. Pencil
marks are not checked for logic when added, so you can enter incorrect values.
16
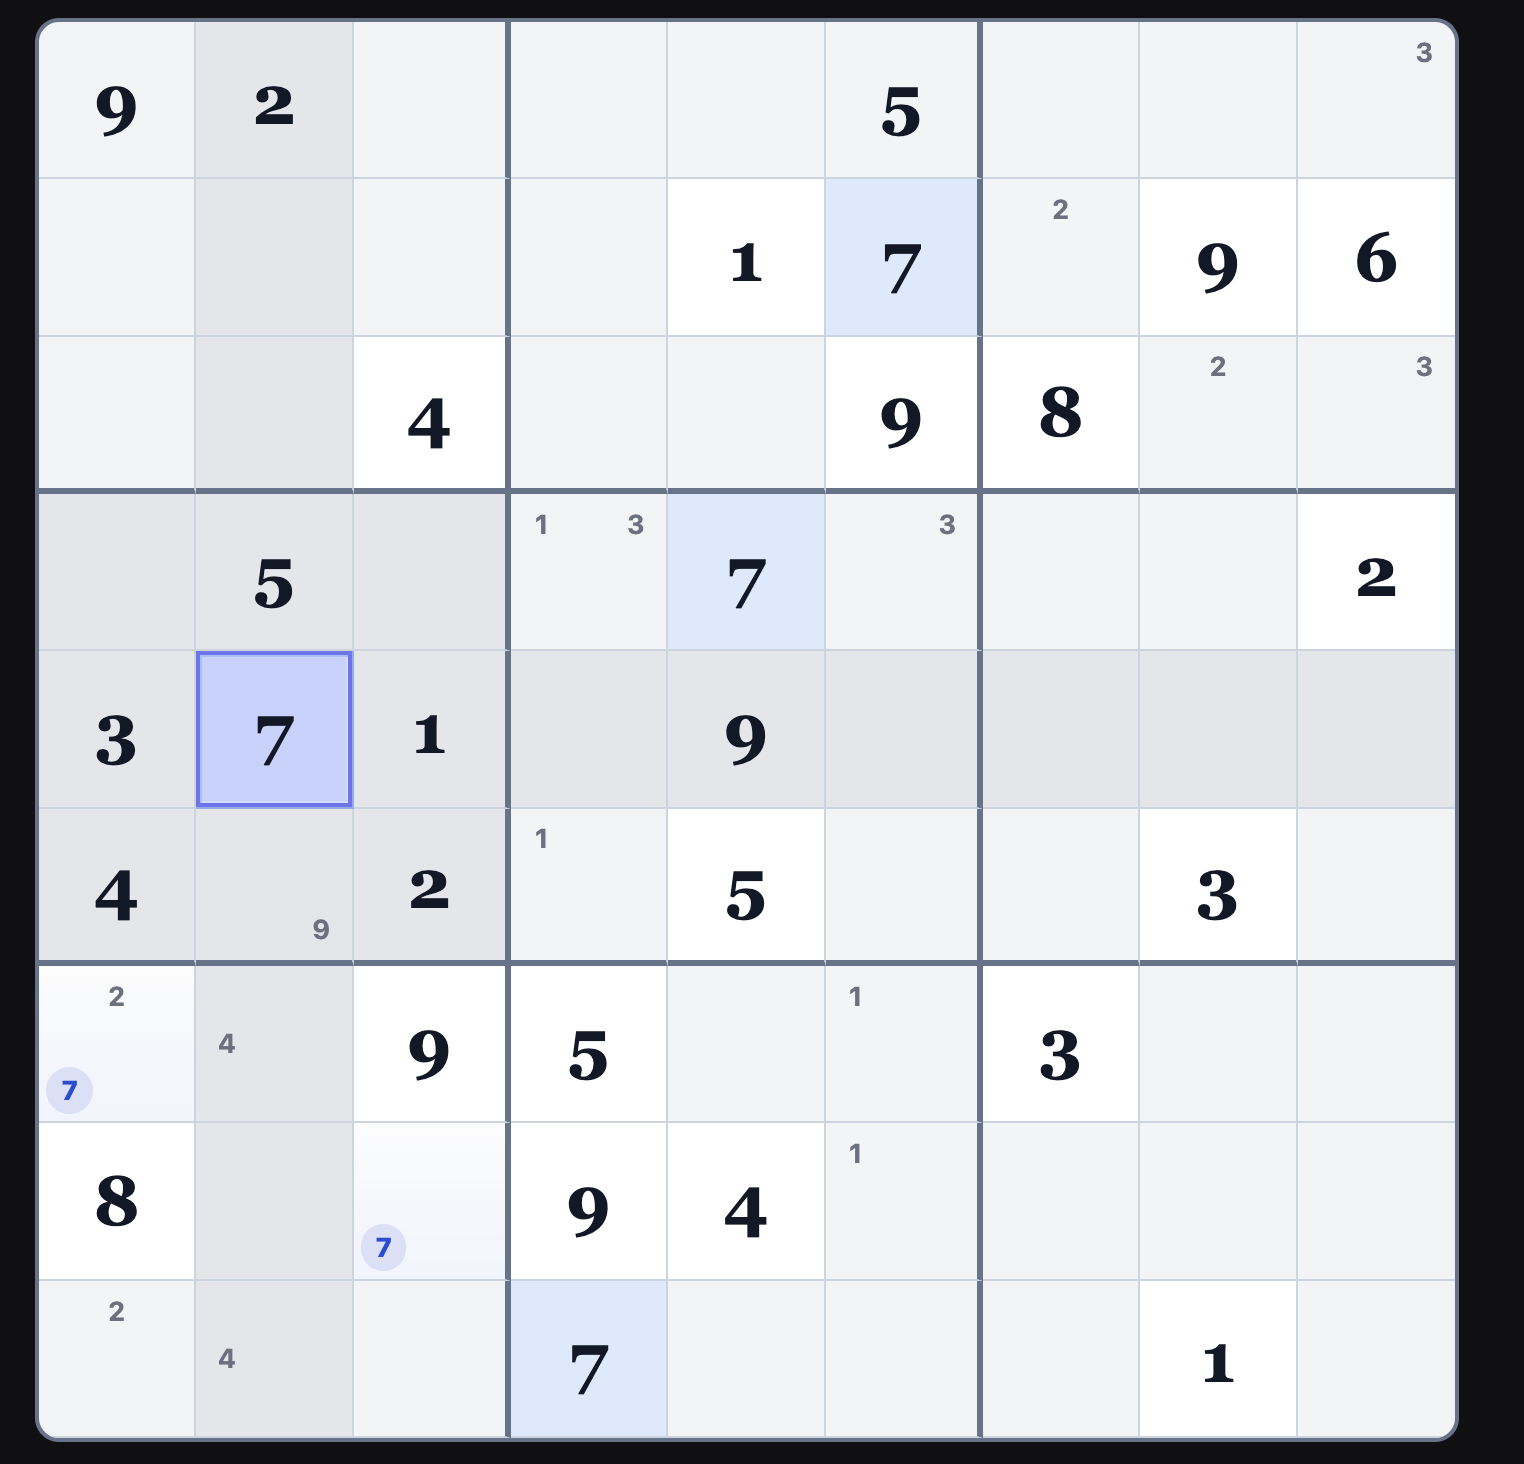
Here's an example of why pairs are very cool. Because the app removed the 9 pencil mark in r5c2 when we entered
9 in r5c5, we now have the answer: Logic says
that r5c2 must be a 7. After we enter it, we notice that the app has removed the
pencil mark in r6c2, and the number there must logically be a 9.
17
Unlike real life, in Sudoku, logic always prevails. r6c2 is 9.
18
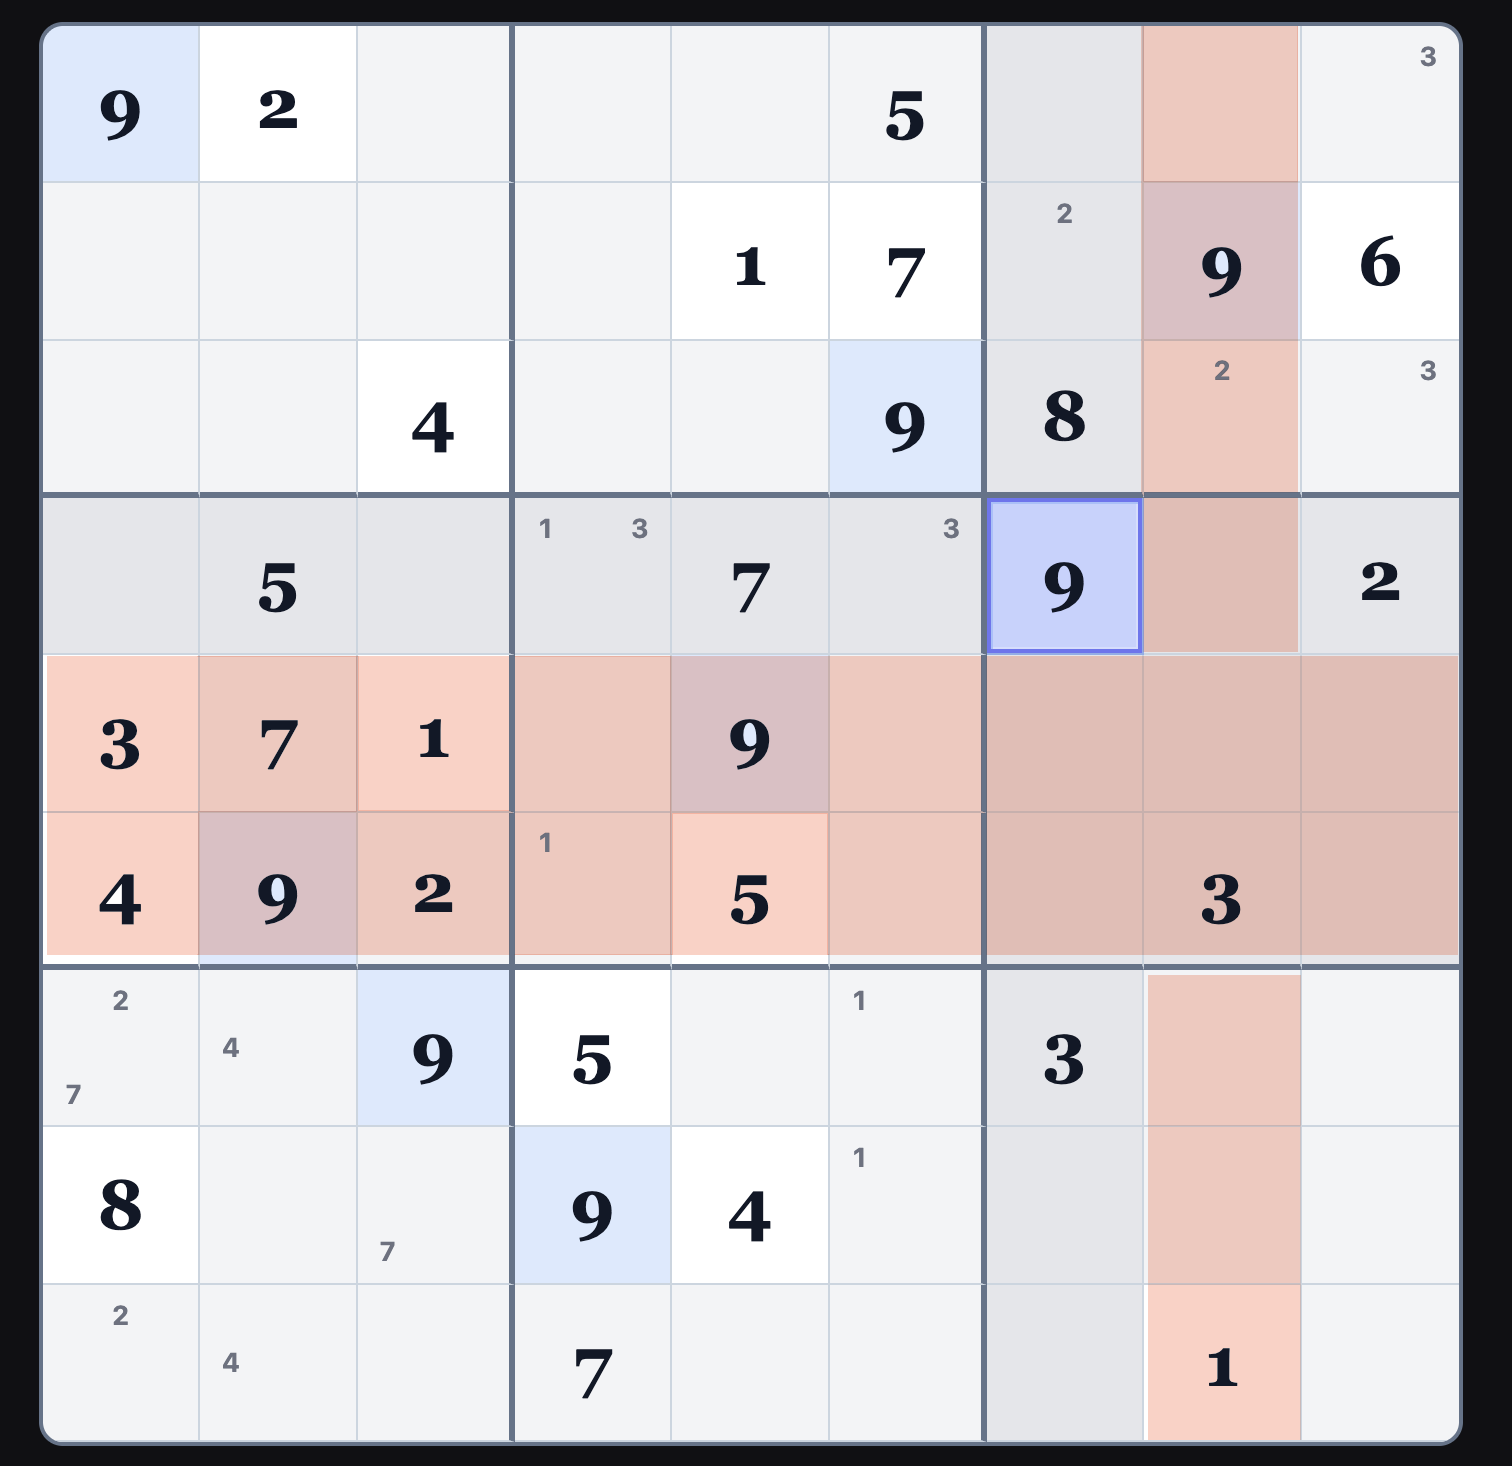
Because we now know that r6c2 is 9, we can deduce that
r4c7 must be a 9.
19
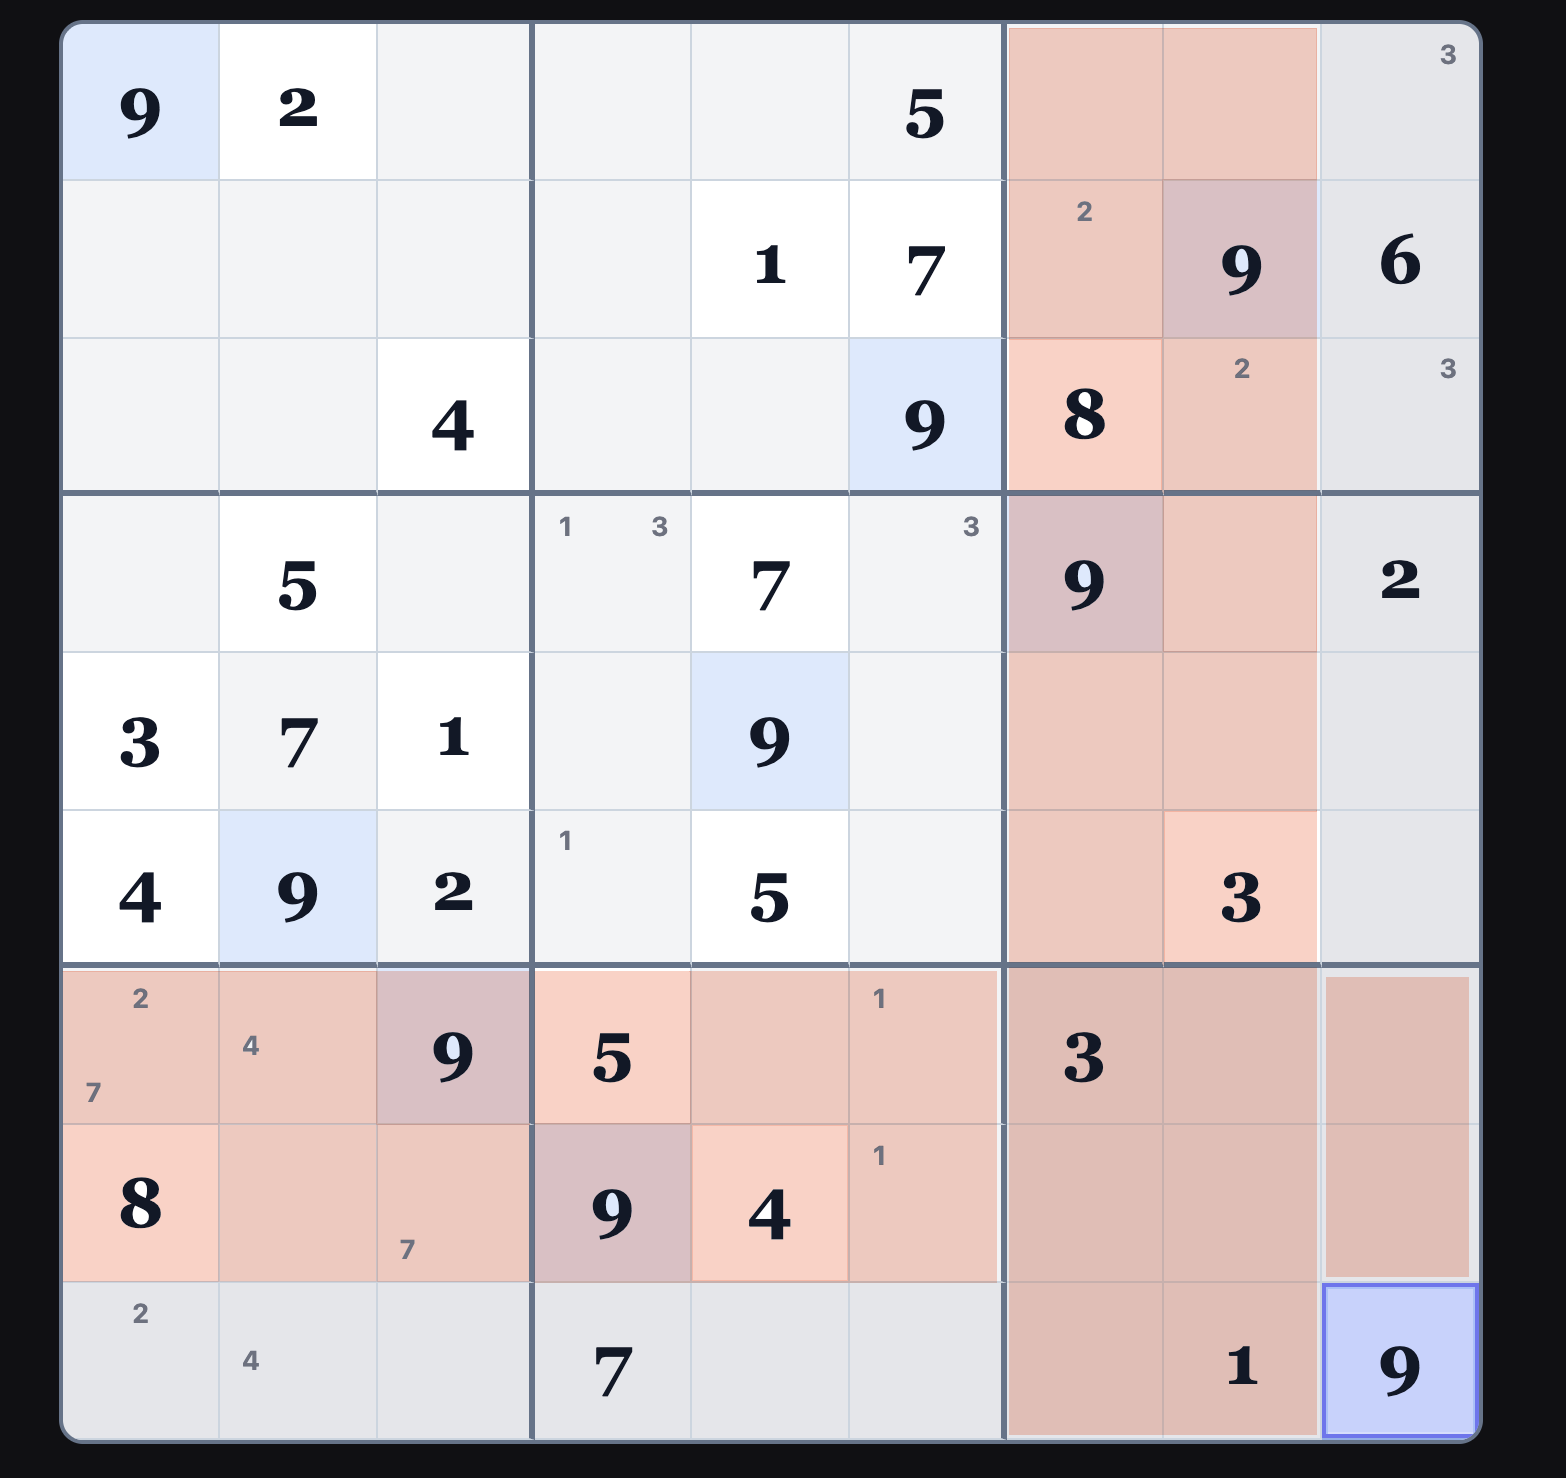
And with that knowledge, we can deduce that
r9c9 must be a 9.
Tip:
The app is aware that we have found all the 9s in the Sudoku grid. So the
optional number entry tool at fcc.cc shows you this by disabling the 9 in
the display.
20
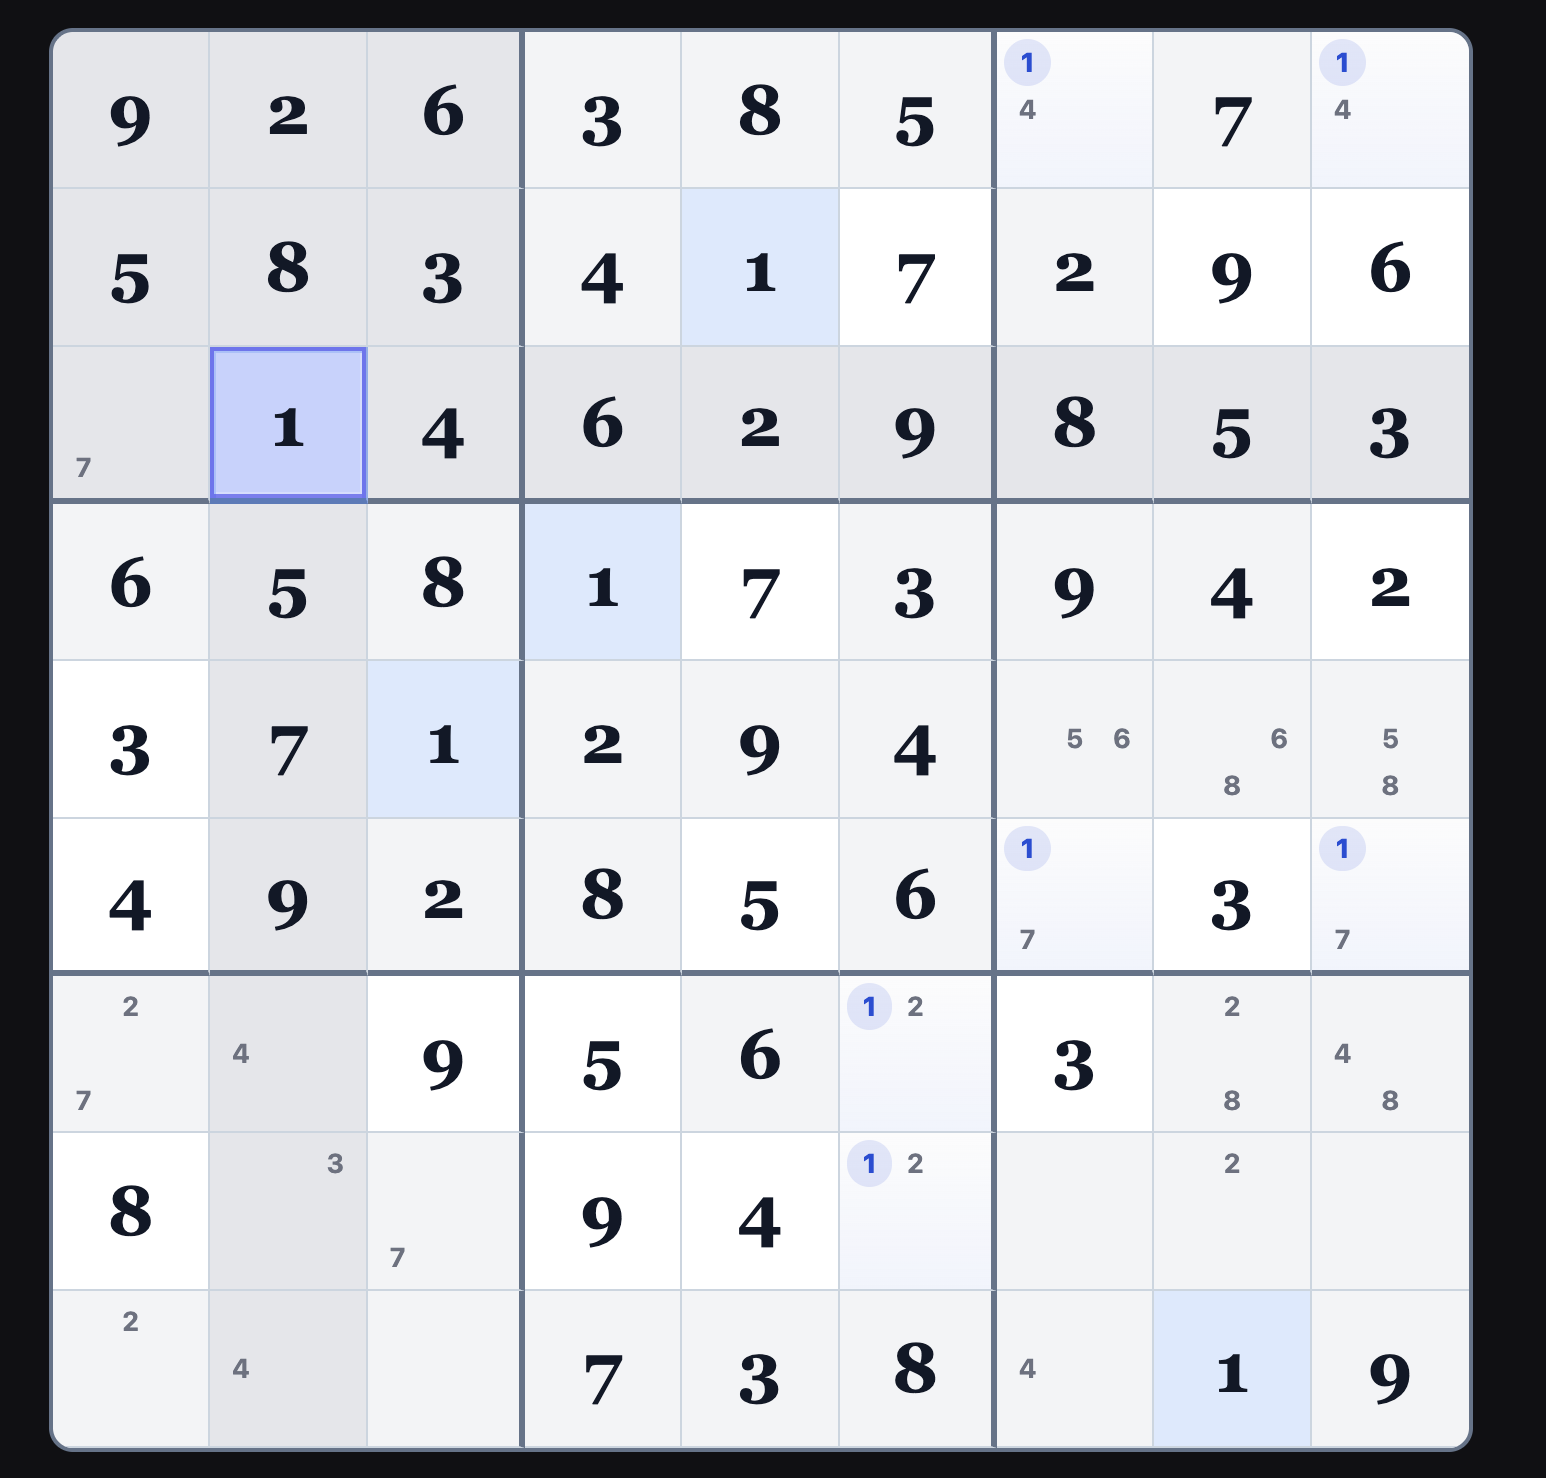
We can deduce that there are two candidate squares for 1 in b1:
r3c1 and r3c2.
21
The pencil marks in r3c1 and r3c2 act like
an entered 1, because we know that one of them must be a 1, and so the entire row r3
is locked-in for a 1. Therefore, we can deduce that the 1 for b3 must
be r1c7 or r1c9.
22
The 1 in r5c3 and r9c8 allow us
to deduce that r6c7 and r6c9
must be candidates for 1 in b6
Tip:
Since adding pencil marks causes no validation, the app
won't tell you that the pencil marks we just entered into r6c7 and r6c9
have changed the status of candidates in b6.
When you enter Snyder numbers, as I said before, they can act like
entered numbers.
23
Those pencil marks in r6c7 and r6c9
make it impossible for r6c4 to
still be a candidate for 1, so I've removed the pencil mark for 1 in r6c4. The only
candidate for 1 in b5 is r4c4.
24
I've entered a 1 in r4c4. Did you happen to notice that before
I entered the 1, there was also a pencil mark for 3? That is now gone, which means that the other
Snyder number 3 in r4c6 is now the only candidate for 3 in b5
25
Let's enter the 3 in r4c6.
26
That 3 that we just entered in r4c6 along with the 3 in
r7c7 allow only 1 candidate square for 3 in b7: r9c5.
27
Because of the 8 in r8c1, there is only one candidate
square for 8 in b4 : r4c3.
28
Perhaps you noticed that b4 only has
one open square, r4c1. That must
be a 6.
29
Perhaps you noticed that r4 only has
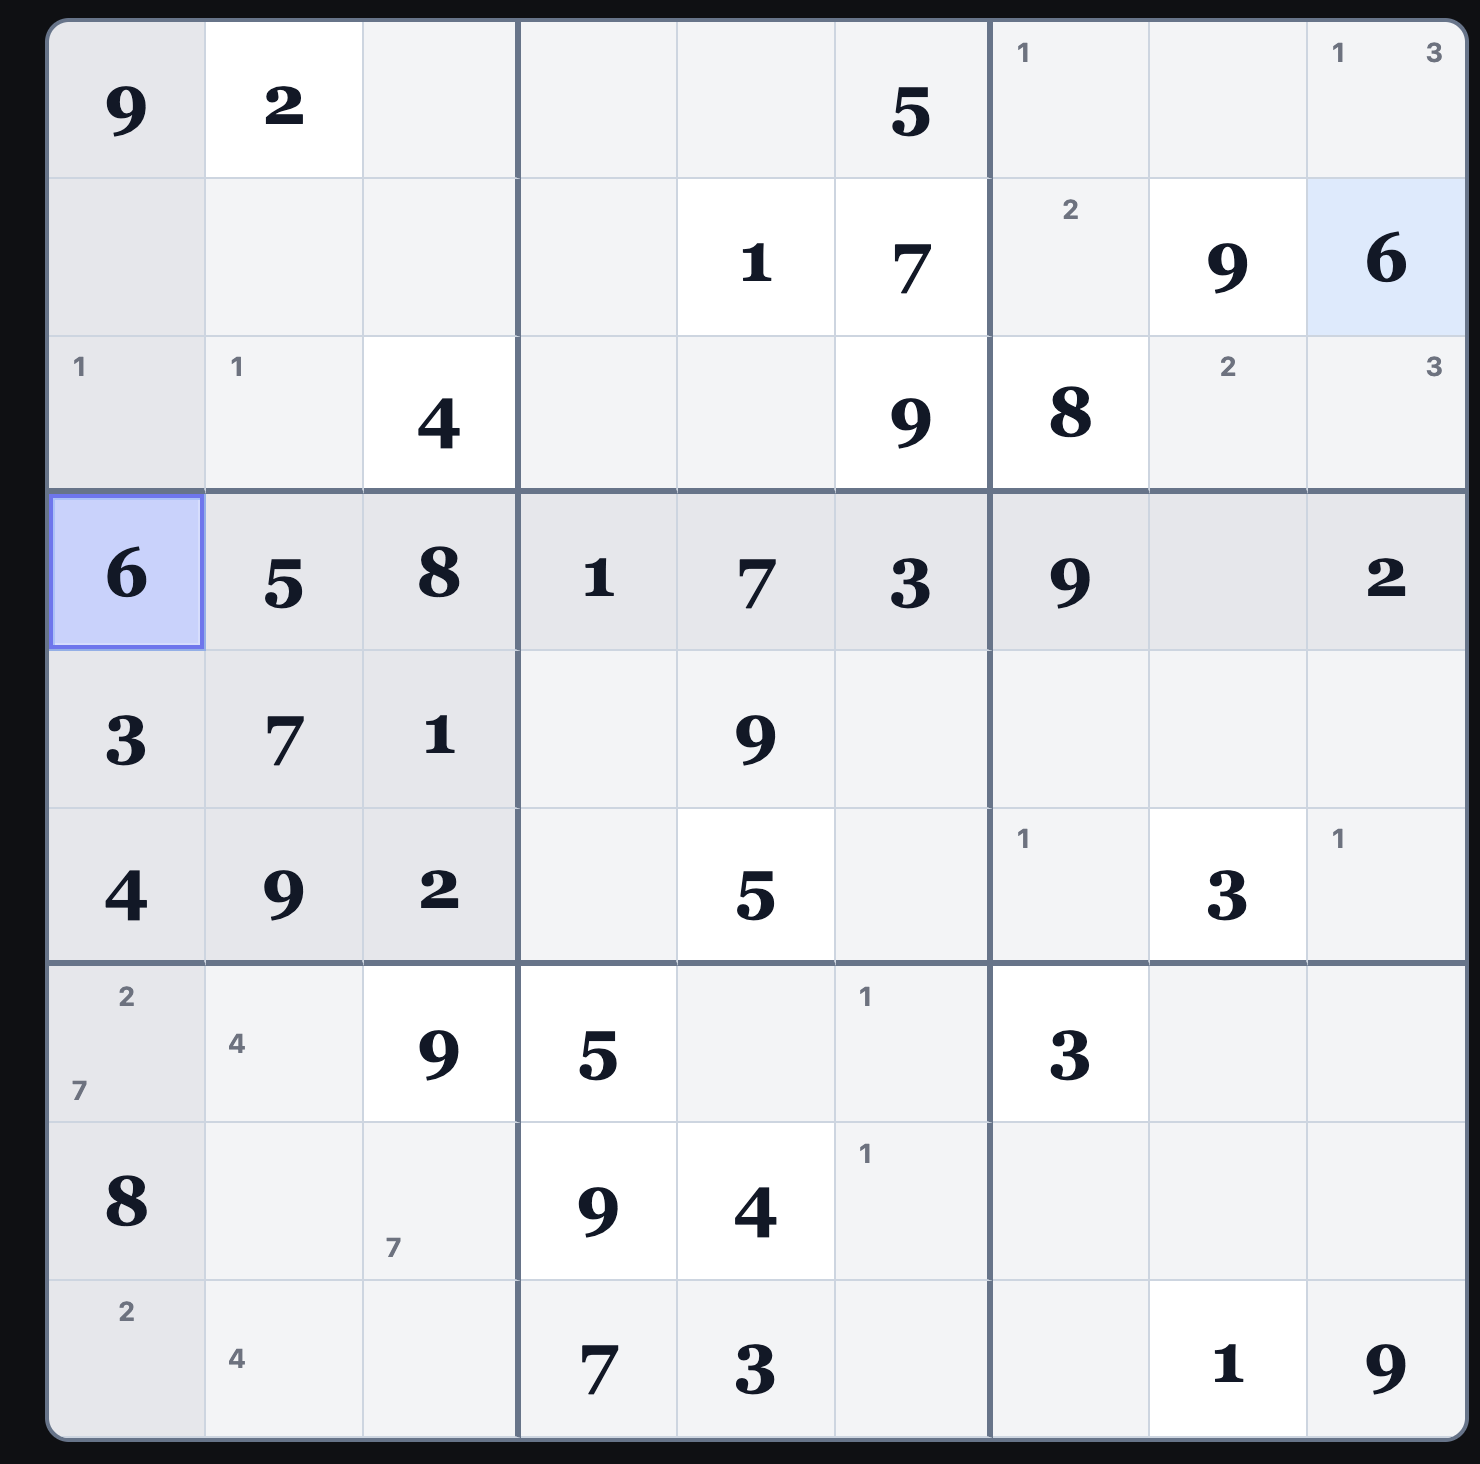
one open square, r4c8. That must
be a 4.
30
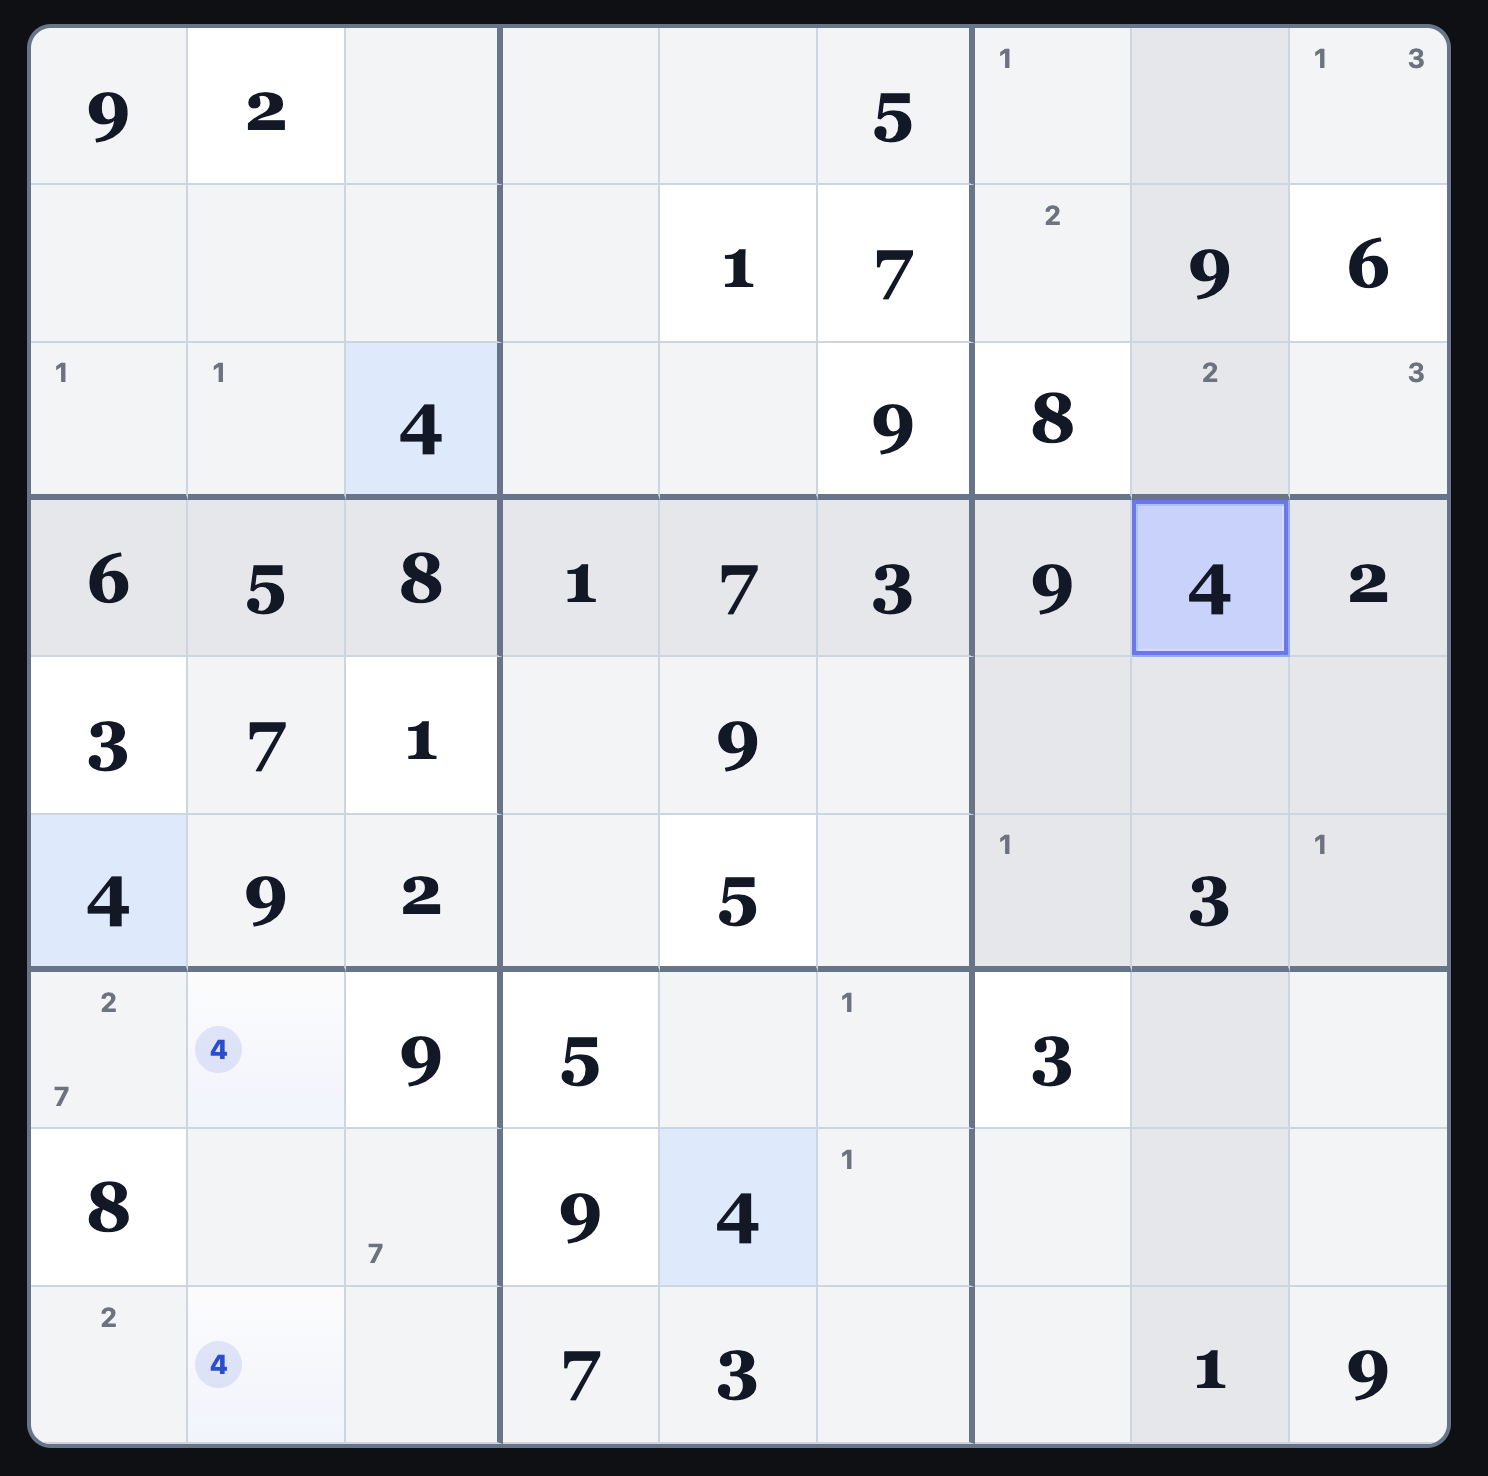
Because b4 has a 4 in r6c1 and
b6 now has a four at r4c8, we can deduce
that there are only two candidate spots for 4 in b5 :
r5c4 and r5c6.
31
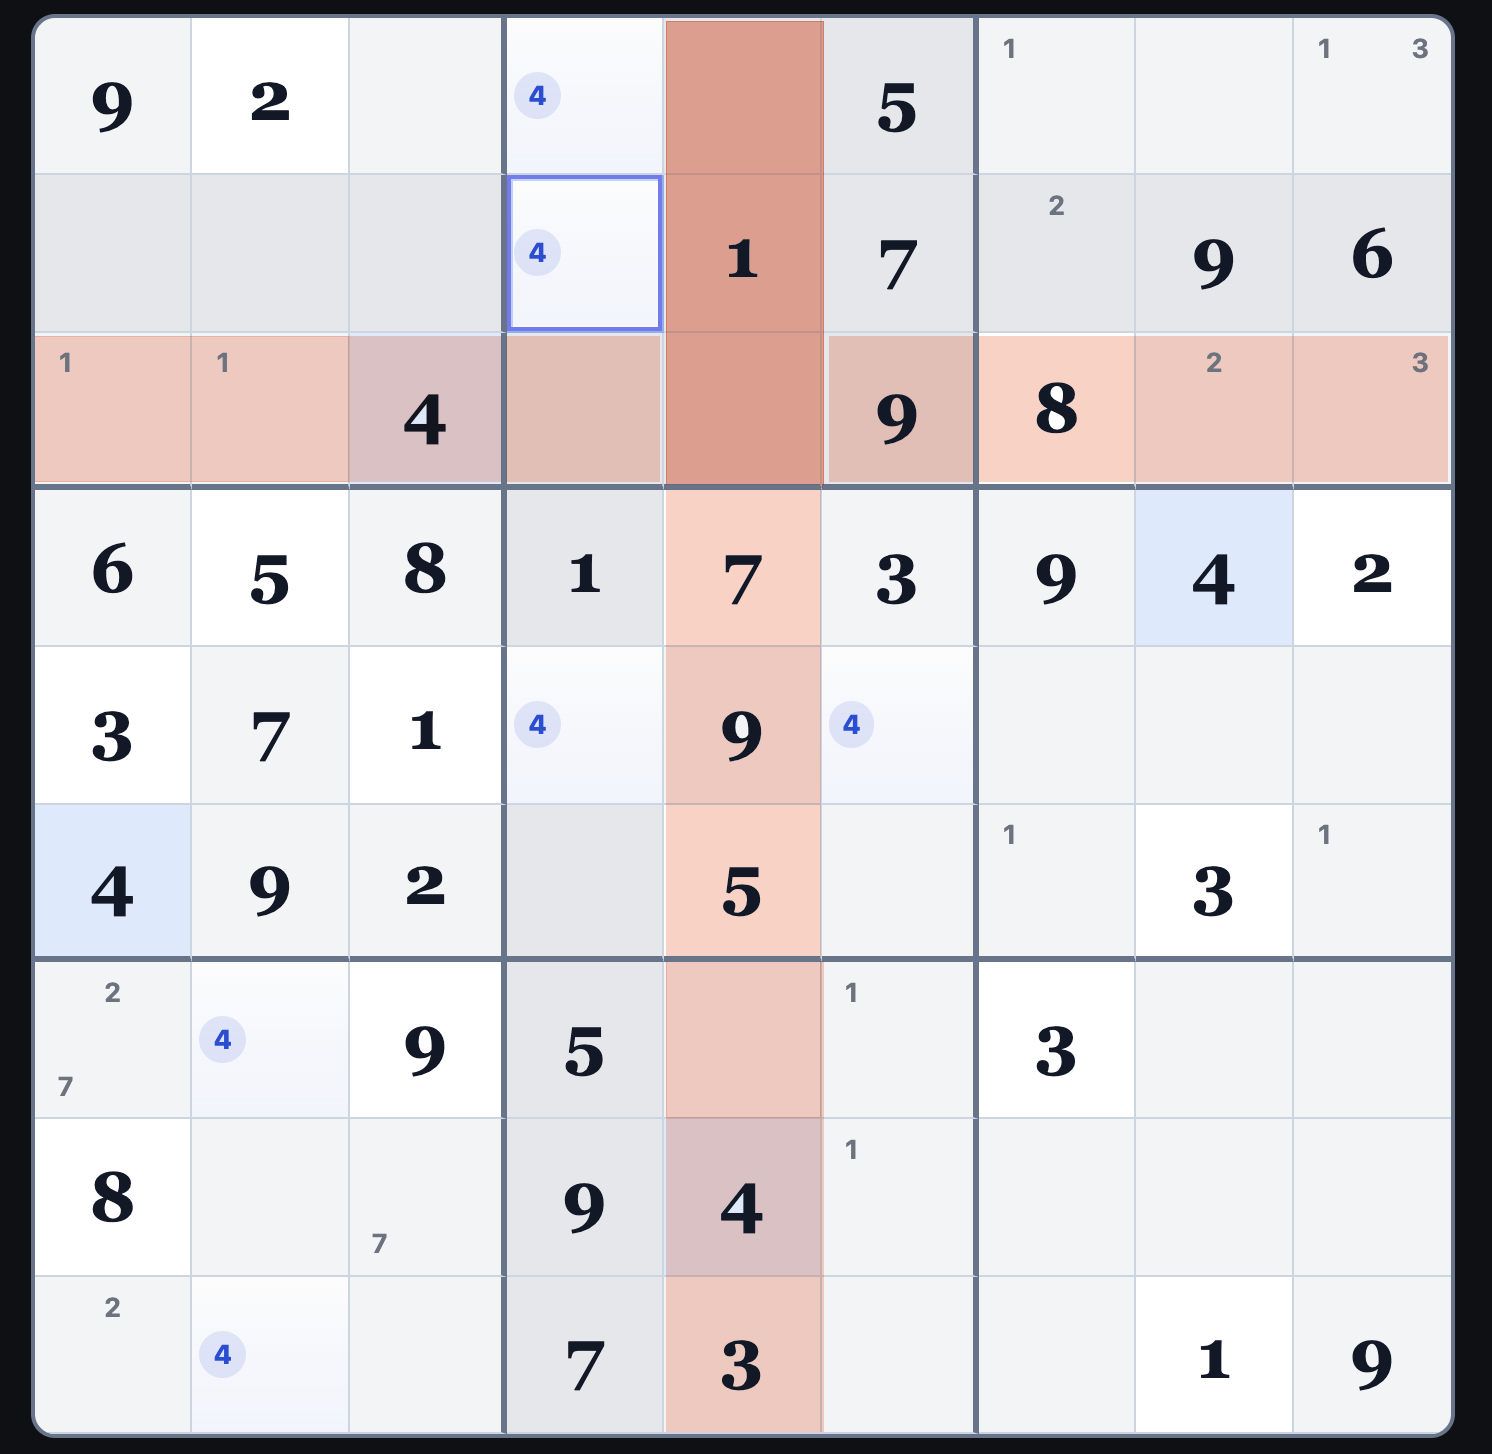
Notice that the 4 in r7c5 eliminates that column
from having a 4 in column c5 in b2.
Therefore there are only two candidates for 4 in b2:
r1c4 and r2c4.
32
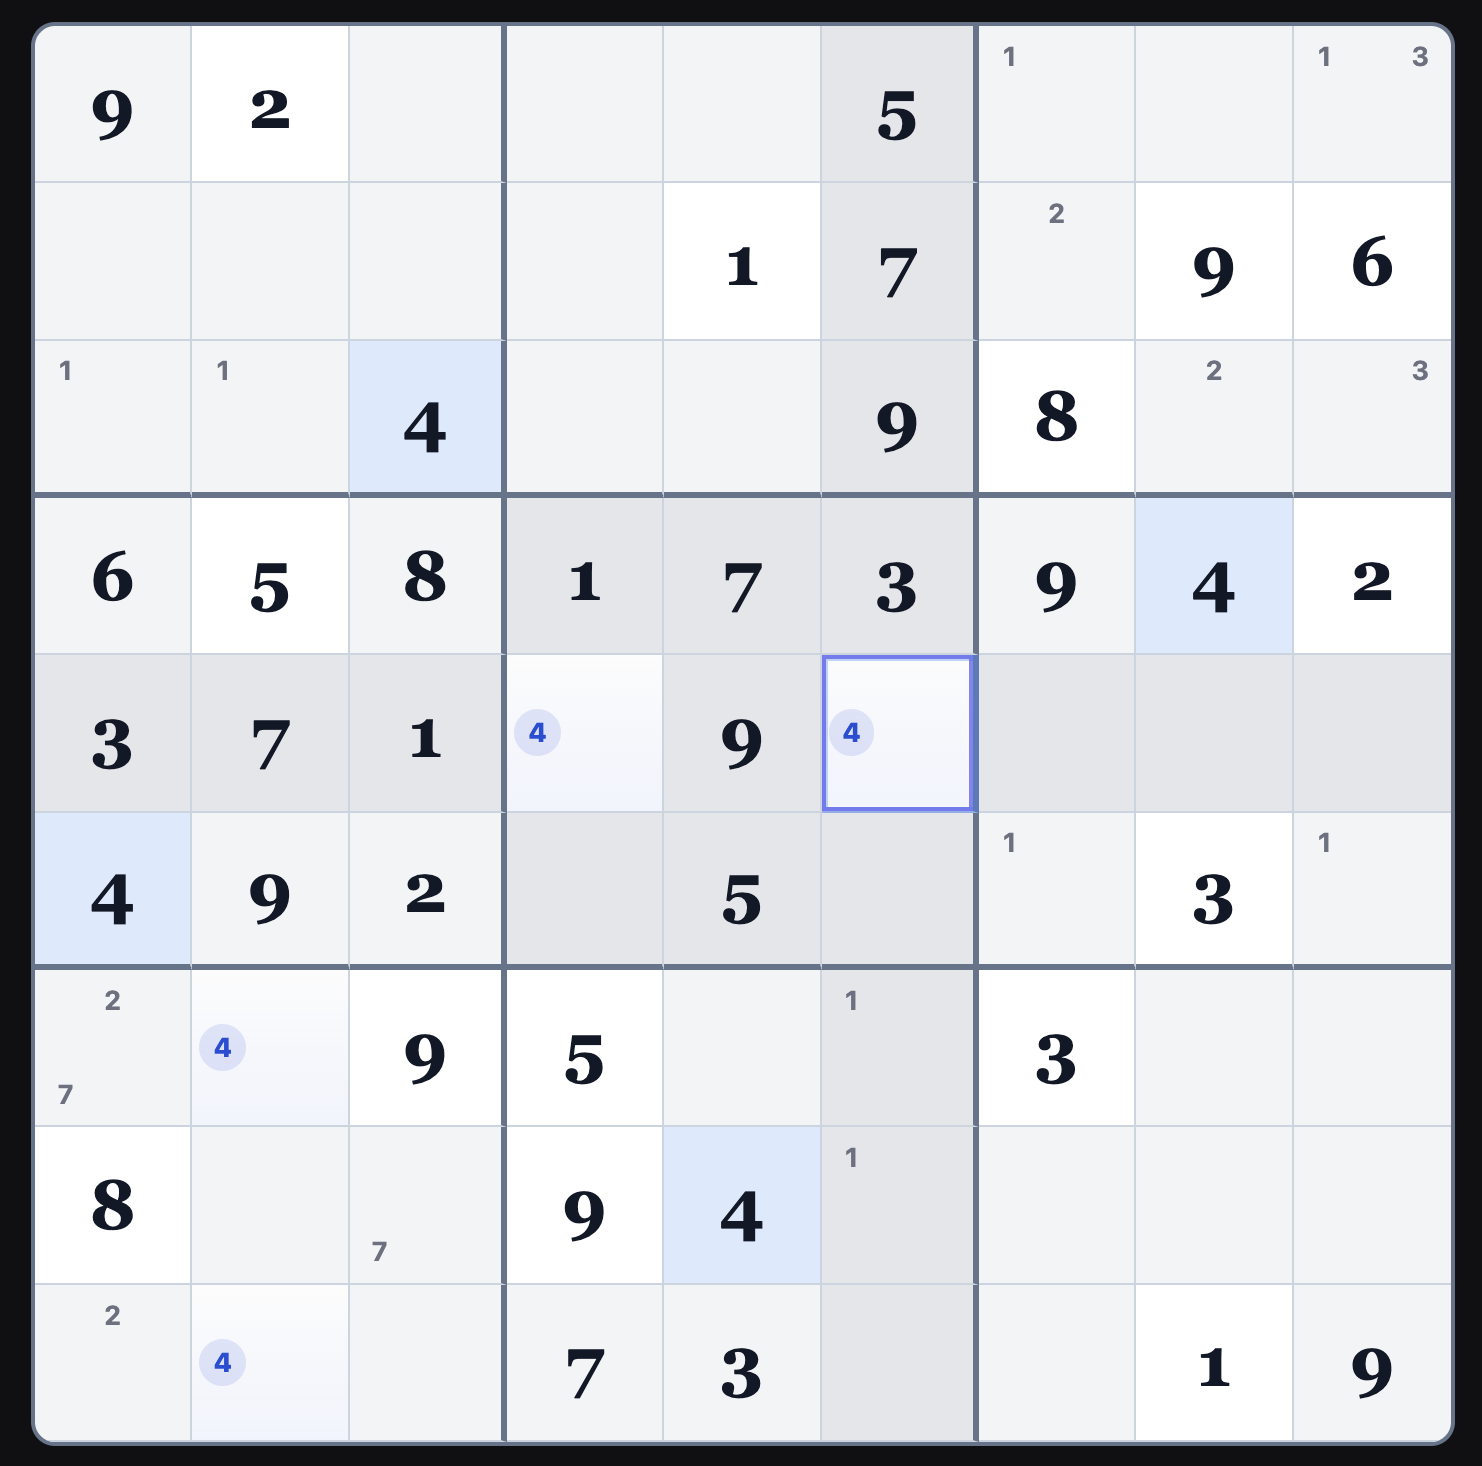
Notice what those 4s in b2 are doing. They are pointing and causing
r5c4 to no longer be a viable candidate for 4, so I've
removed the pencil mark. Now there is only one candidate square for 4 in b5,
r5c6.
33
I entered 4 in r5c6.
34
Because of the 2 in r6c3,
the only candidate square for 2 in b5
is r5c4.
35
Having added the 2 in r5c4, there is only
one candidate square in b2 for 2:
r3c5. Notice that adding the 2 there has
removed the 2 pencil mark in r3c9
to be erased, leaving only one candidate for 2 in b3.
36
When you have eliminated the impossible...
I entered the 2 in r2c7.
37
The 2 in r2c7 and r9c4
show us that there are two candidate squares for 2 in b9,
r7c8 and r8c8.
38
Ring, ring. "Hello, Bruce? This is your Sudoku board. Check
for 3s in b8 and b9. Maybe you'll find something good."
The 3s in r7c7 and r9c5 show us
two candidates for 3 in b7 :
r7c2 and r7c3.
39
The 4s in r8c5 and r4c8 show us
two candidates for 4 in b9 :
r9c7 and r7c9.
40
The 5 in r1c6 shows us
two candidates for 5 in b3 :
r3c8 and r3c9.
41
We can now determine the two candidates for 5 in b1:
r2c1 and r2c3.
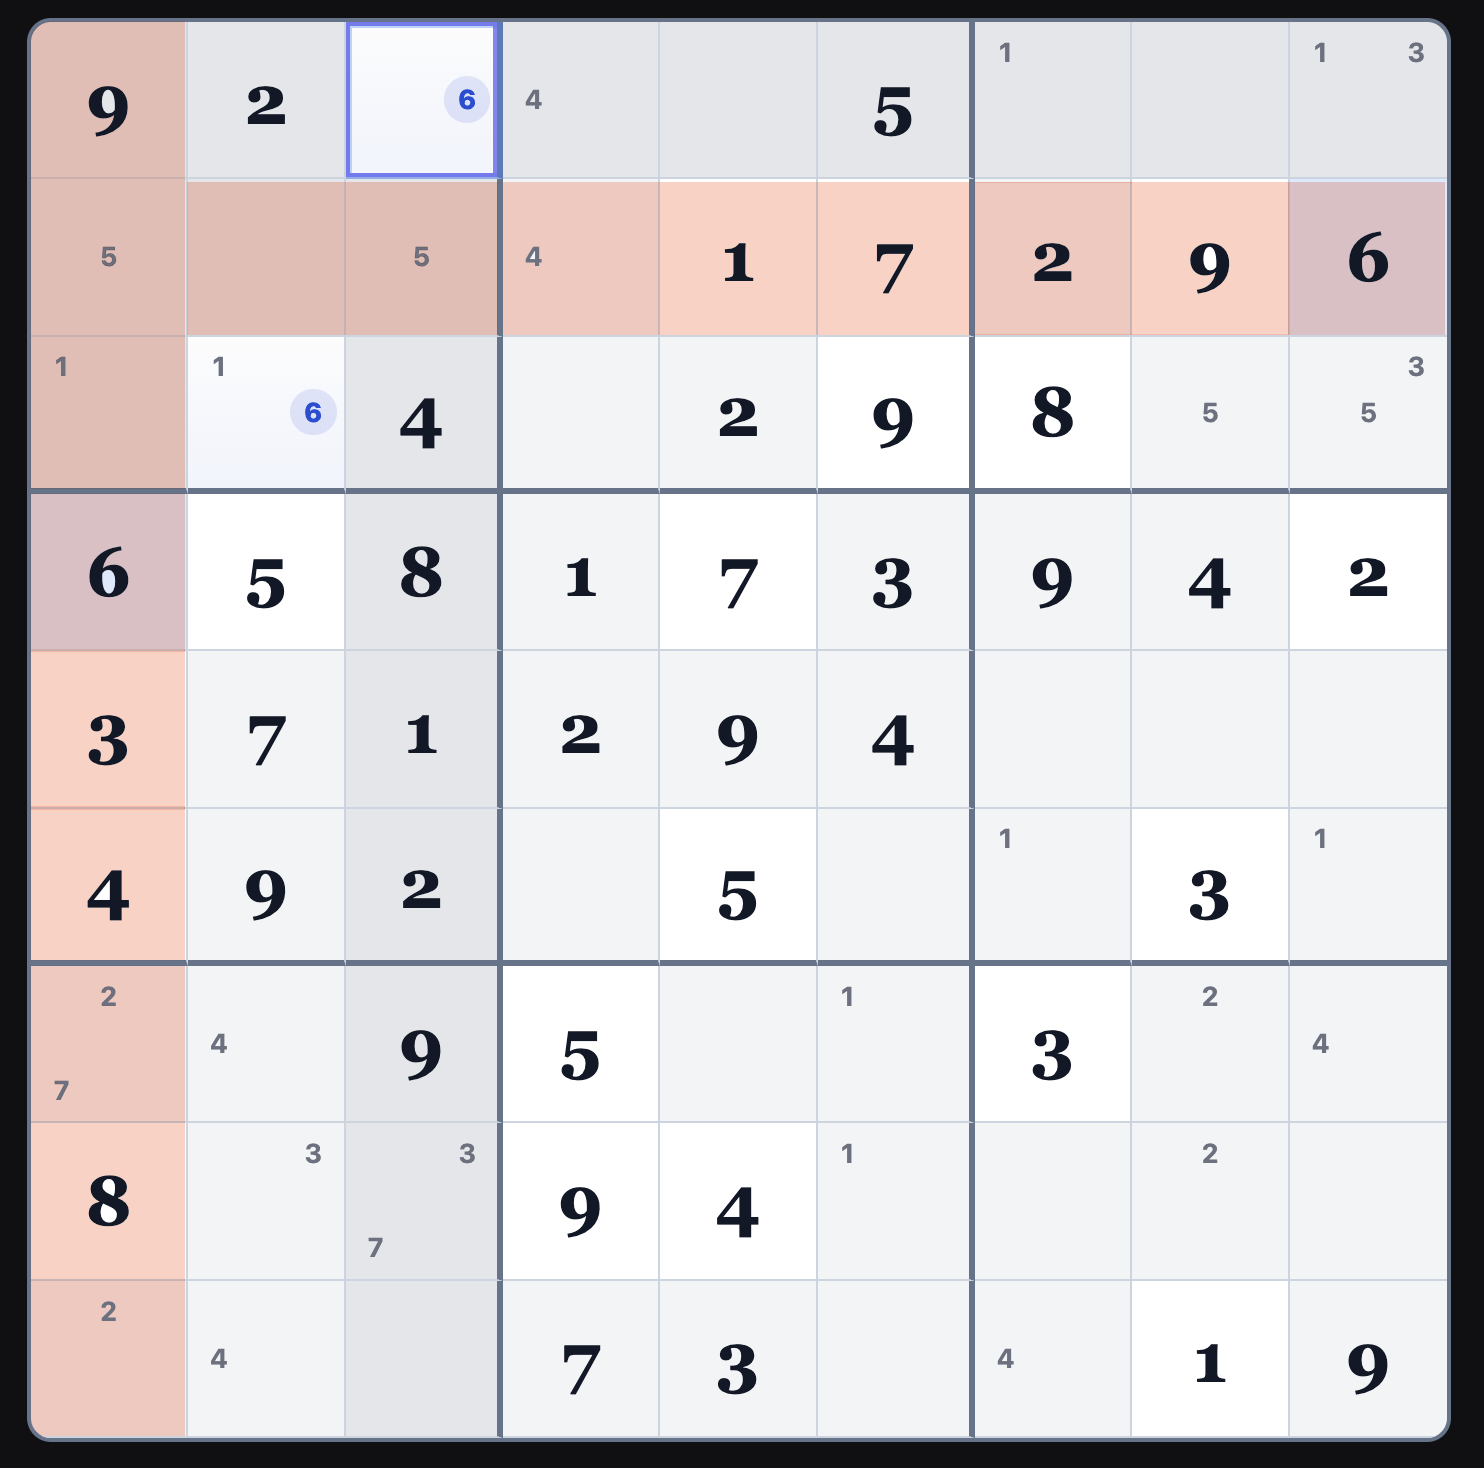
42
Looking at b1, we can identify
two candidates for 6:
r1c3 and r3c2.
43
I've been looking forward to talking about this! This is another amazing thing
about pairs in Sudoku. Notice that we've determined that we can add
candidates for 7 in b6 at
r6c7 and r6c9.
This has created a pair of 1 and 7, making those squares off limits
to any other number, and it reserves their use for the block. If
the pair are in the same row or column, they reserve those two numbers
for themselves in that row or column.
44
I'm finally getting around to filling in pairs
in b5. We can add a pair of 8s and 6s in squares
r6c4 and r6c6.
Tip:
A triplet in Sudoku usually means three cells that together
contain exactly the same three candidate numbers. This is a triplet of 5, 6 and 8 in b6.
45
Because of the 1 and 7 pair in r6c7 and r6c9,
we know that these two squares cannot have any more candidates. So the rest of
the missing numbers must be contained within r5c7, r5c8, and r5c9.
46
There are 8s in r8c1, r4c3, and r3c7
so we know that the 8 in b1 is in r2c2.
47
There are 8s in r8c1 and r3c7
so we can identify two candidates for 8 in b9: r7c8 and r7c9.
48
Because we identified the candidates for 8 in r7c8 and r7c9,
we can narrow down the 8 in b7 as r9c6. But look what
happened to the pencil mark for 8 in r6c6. We've erased the 8 pencil mark,
so the only candidate for that square is 6.
49
Got it! And now the 6 pencil mark in r6c4 has been erased, leaving only the 8
as a candidate in r6c4.
50
Let's enter that 8 in r6c4.
51
With that 8 in r6c4 and r9c6,
we can identify the 8 in b2 as r1c5.
52
Is there a good reason why I added the two candidates for 2 in r7c6 and r8c6
before adding the obvious 6 in r7c5? No. That's just the way I played it.
53
So let's enter the 6 now in r7c5.
54
We can put it pencil marks for 6 in r1c4 and r3c4.
55
Easier levels of Sudoku puzzles can often be solved just using the Snyder numbers. But
more challenging Sudoku will inevitably require pencil marking all potential
candidates, not just ones with only two numbers. b2 is
nearly complete, so let's add the missing number 3 in all potential squares in that block:
r1c4, r2c4, and r3c4.
56
Now let's enter all the potential candidates for 3 in b1 :
r1c3, r2c3, and r3c2.
57
Here's an important concept: when looking for candidates, if you can only find one number
that will work in the square, it must be the answer. So while we have valid pencil marks for 5
in r2c1 and r2c3, 5 in r2c1
is the only valid value. It must be a 5.
58
When we entered the 5 in r2c1, the app erased the pencil mark in r2c3,
leaving 3 as the only possible value for r2c3. Notice the remaining unentered squares in b1 are
triplets.
59
Row r2 is almost complete.
The square r2c4 must be 4.
60
This example is perfect to show the power of pairs. We can identify two and only two potential
squares for 4 in b3: r1c7 and
r1c9. There were already pencil marks in those same squares for 1.
Remember I said that if you have a pair in two squares in the same block, they cannot
logically have any other potential numbers. So that pencil mark of 3 in r1c9
is a problem.
Unfortunately, when I was doing this puzzle, instead of erasing the 3 in r1c9
and entering a 3 into r3c9, I did other things. So put a pin in this,
and I'll remind you about it later.
61
It appears that I decided to identify all of the potential squares for 7 in b3,
which is fine. In doing this, I realized that the only number that works in r1c8
is 7.
62
Entering the 7 erases the 7 pencil marks in the block and row.
63
The removal of the pencil marked 7 in r3c8
leaves 5 as the only potential candidate for that square.
64
And now finally, as promised, we can reveal that r3c9 is,
in fact, 3 and the {1,4} pair stand alone at the top of the block.
Note that adding the 3 to r3c9 erased the 3 in r3c4.
65
And the only remaining value for r3c4 is 6, which
erases the pencil marked 6 in r1c4.
66
And the only remaining value for r1c4 is 3.
67
Let's enter that 6 into r1c3. This leaves only two numbers
left to enter in b1, and the pencil marks tell all.
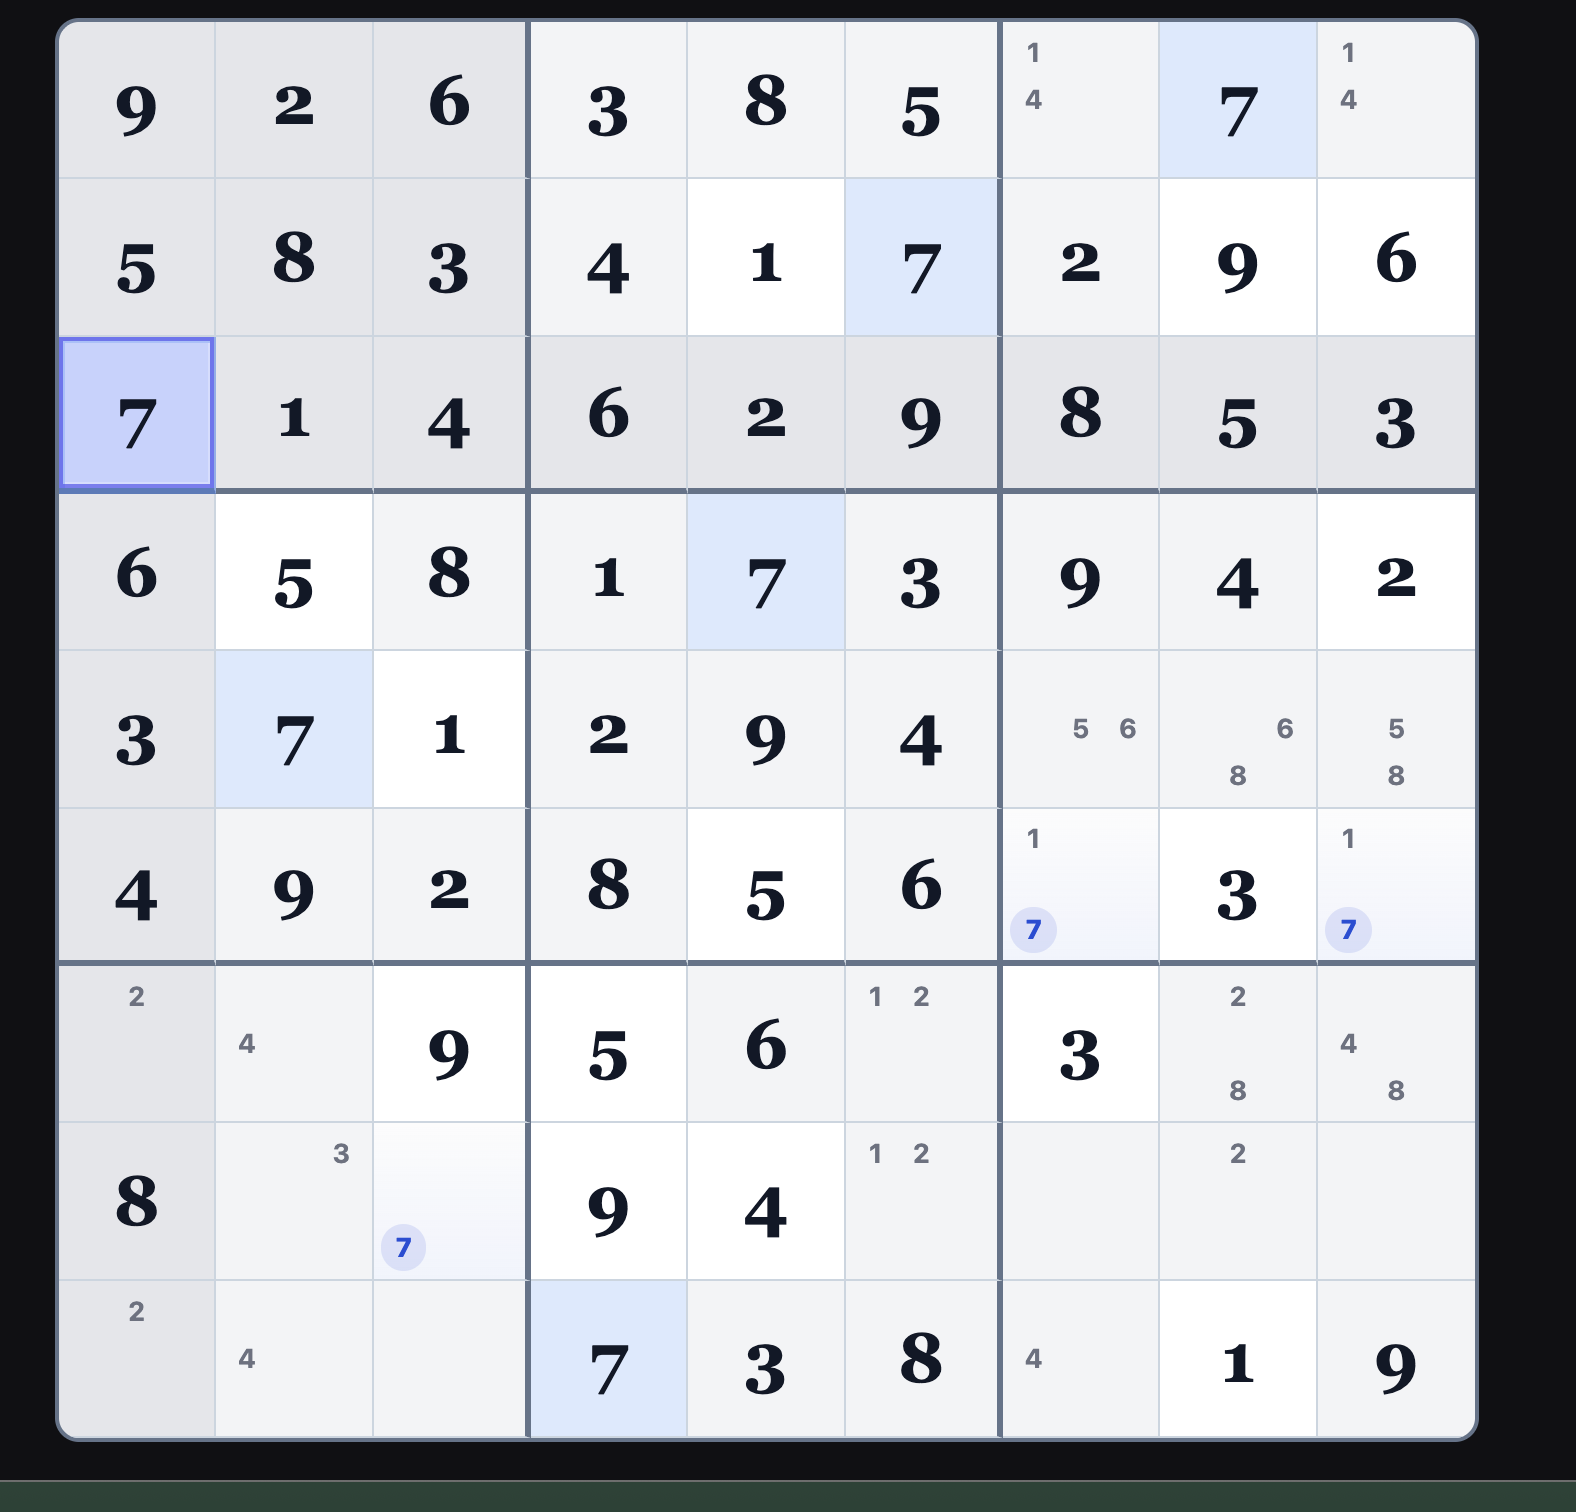
68
Enter a 1 into r3c2. There's no reason why
you couldn't enter 7 into r3c1 first, because it has to be the value.
69
And now here's the 7 for r3c1. Entering the 7
erases the pencil mark 7 in r7c1
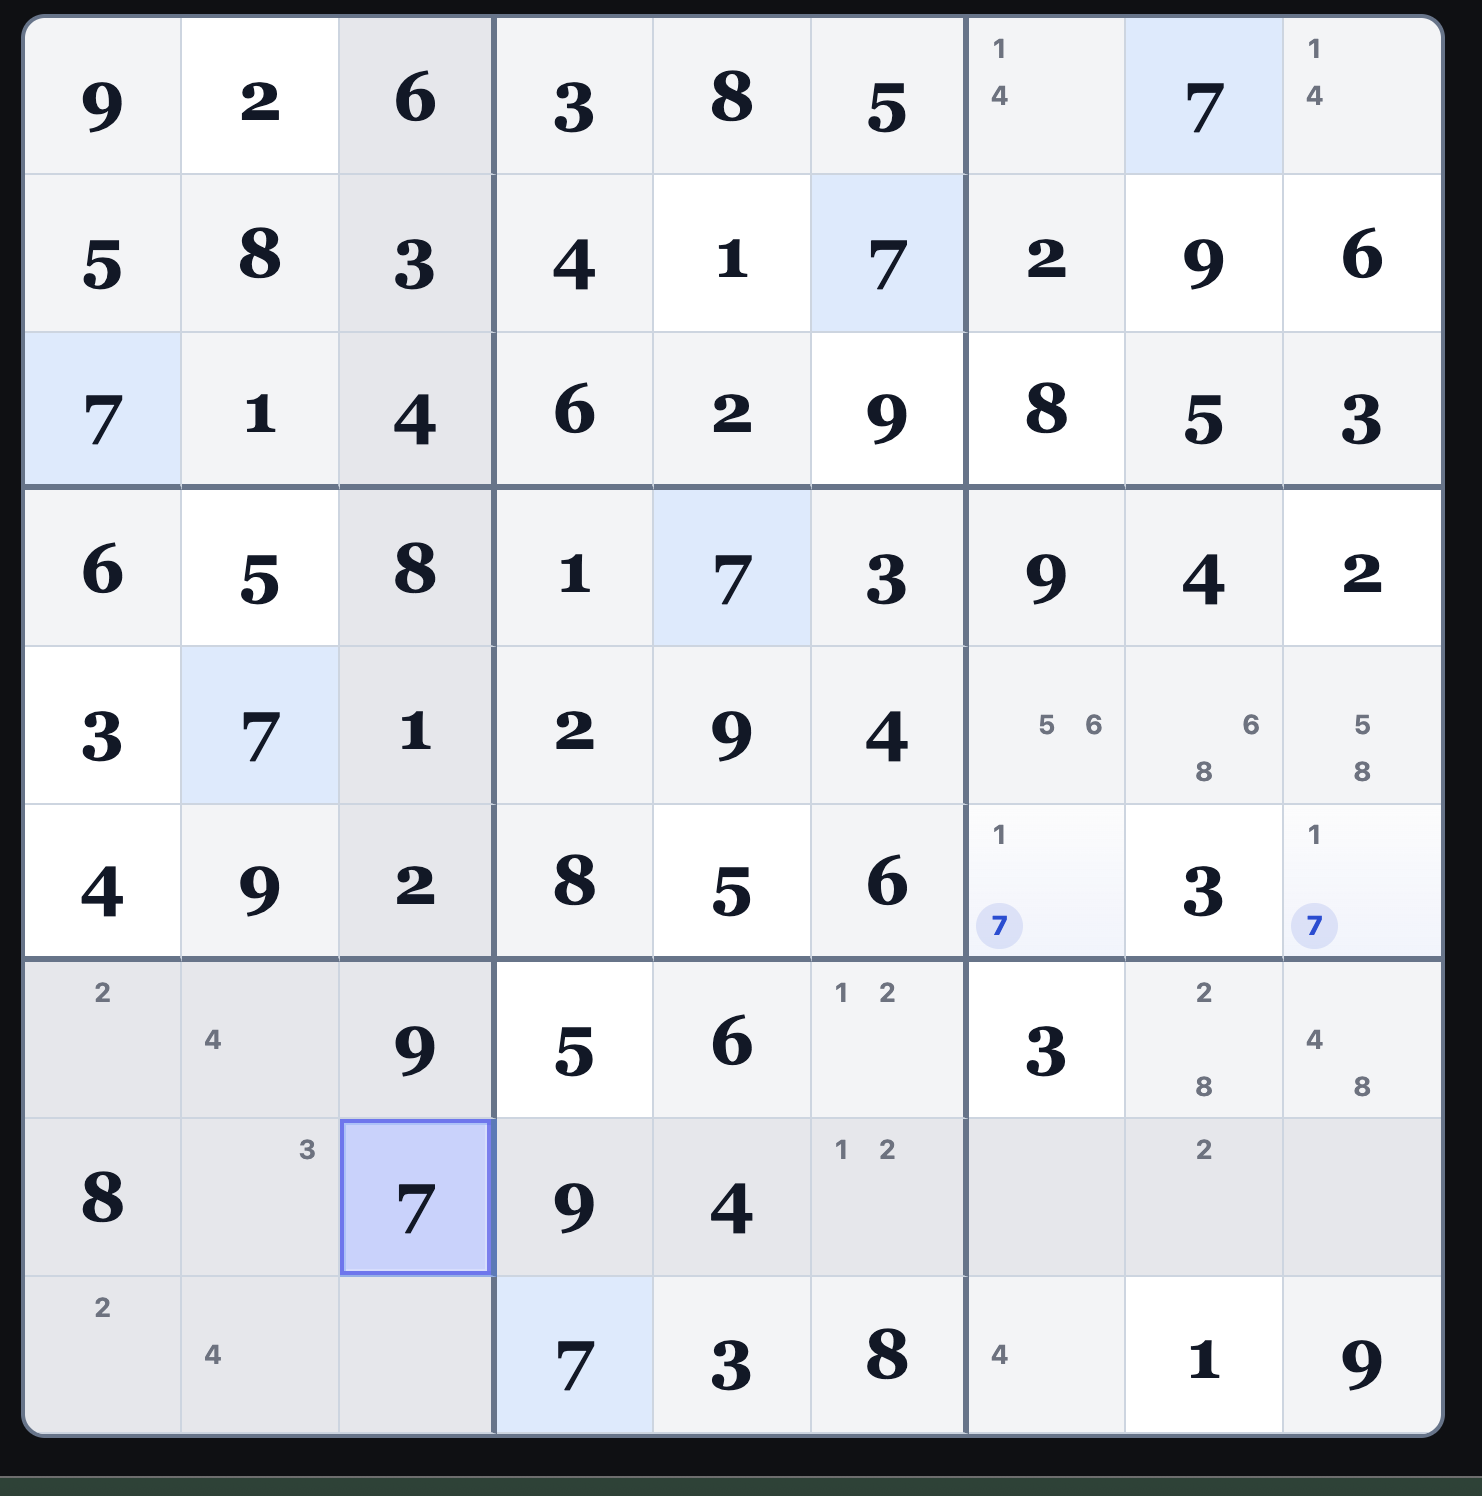
70
Leaving the only possible 7 for b7 in r8c3.
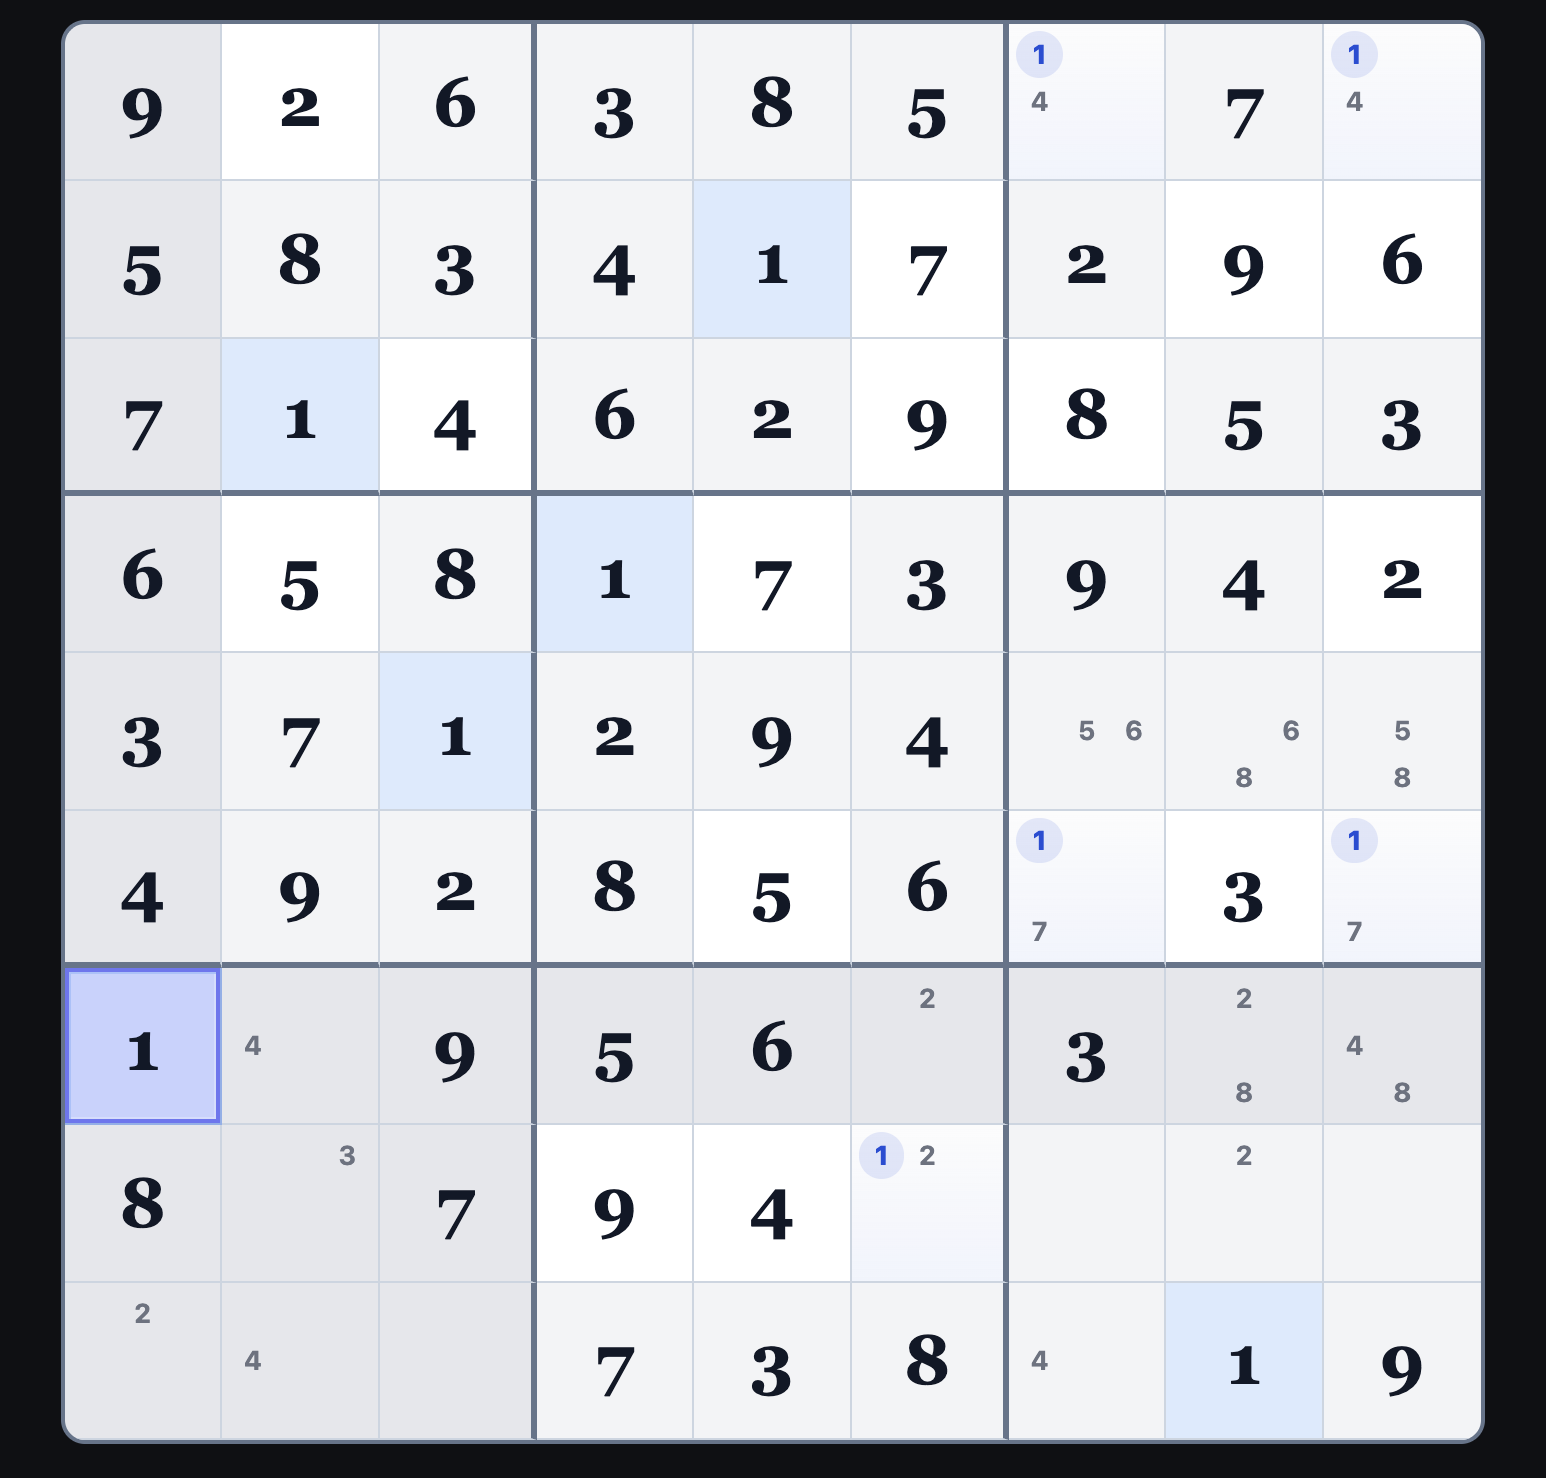
71
I never got around to pencil marking 1s in b7, but
there is only one possible square: r7c1
72
r9c1 must be 2 in order for
column c1 to be a valid Sudoku grid.
73
Likewise, to complete c3, the
value for r9c3 must be 5.
74
r8c2 is the only possible location for 3 in b7.
75
Because of the 6 in r7c5,
r9c2 must be 6.
76
And of course r7c2,
must be 4, which completes b7 and c2.
77
r9c7, must be 4, which completes r9.
78
r7c6, must be 2.
79
And of course
r8c6, must be 1.
80
r1c7, must be 1, which erases the pencil mark 1 in r6c7,
leaving r6c9 as the only candidate for 1 in that block and 7 as the only candidate for
r6c7, which we will enter momentarily.
81
While we're up here in b3, we can enter the 4 that must go in r1c9,
completing the b3 block.
82
Let's enter the 7 for r6c7, which logically erases the
pencil marked 7 in r6c9.
83
And now let's enter the 1 in r6c9.
84
r8c8 is the only possible location for 2 in b9.
85
r7c9 is the only possible location for 7 in b9.
86
And to complete r7,
r7c8 must be 8.
87
6 is the only valid entry for r5c8,
which removes the 6 pencil mark in r5c7.
88
5 is the only valid entry for r5c7.
89
Leaving 8 as the only valid entry for r5c9.
90
r8c9 obviously must be 5, leaving only one square left.

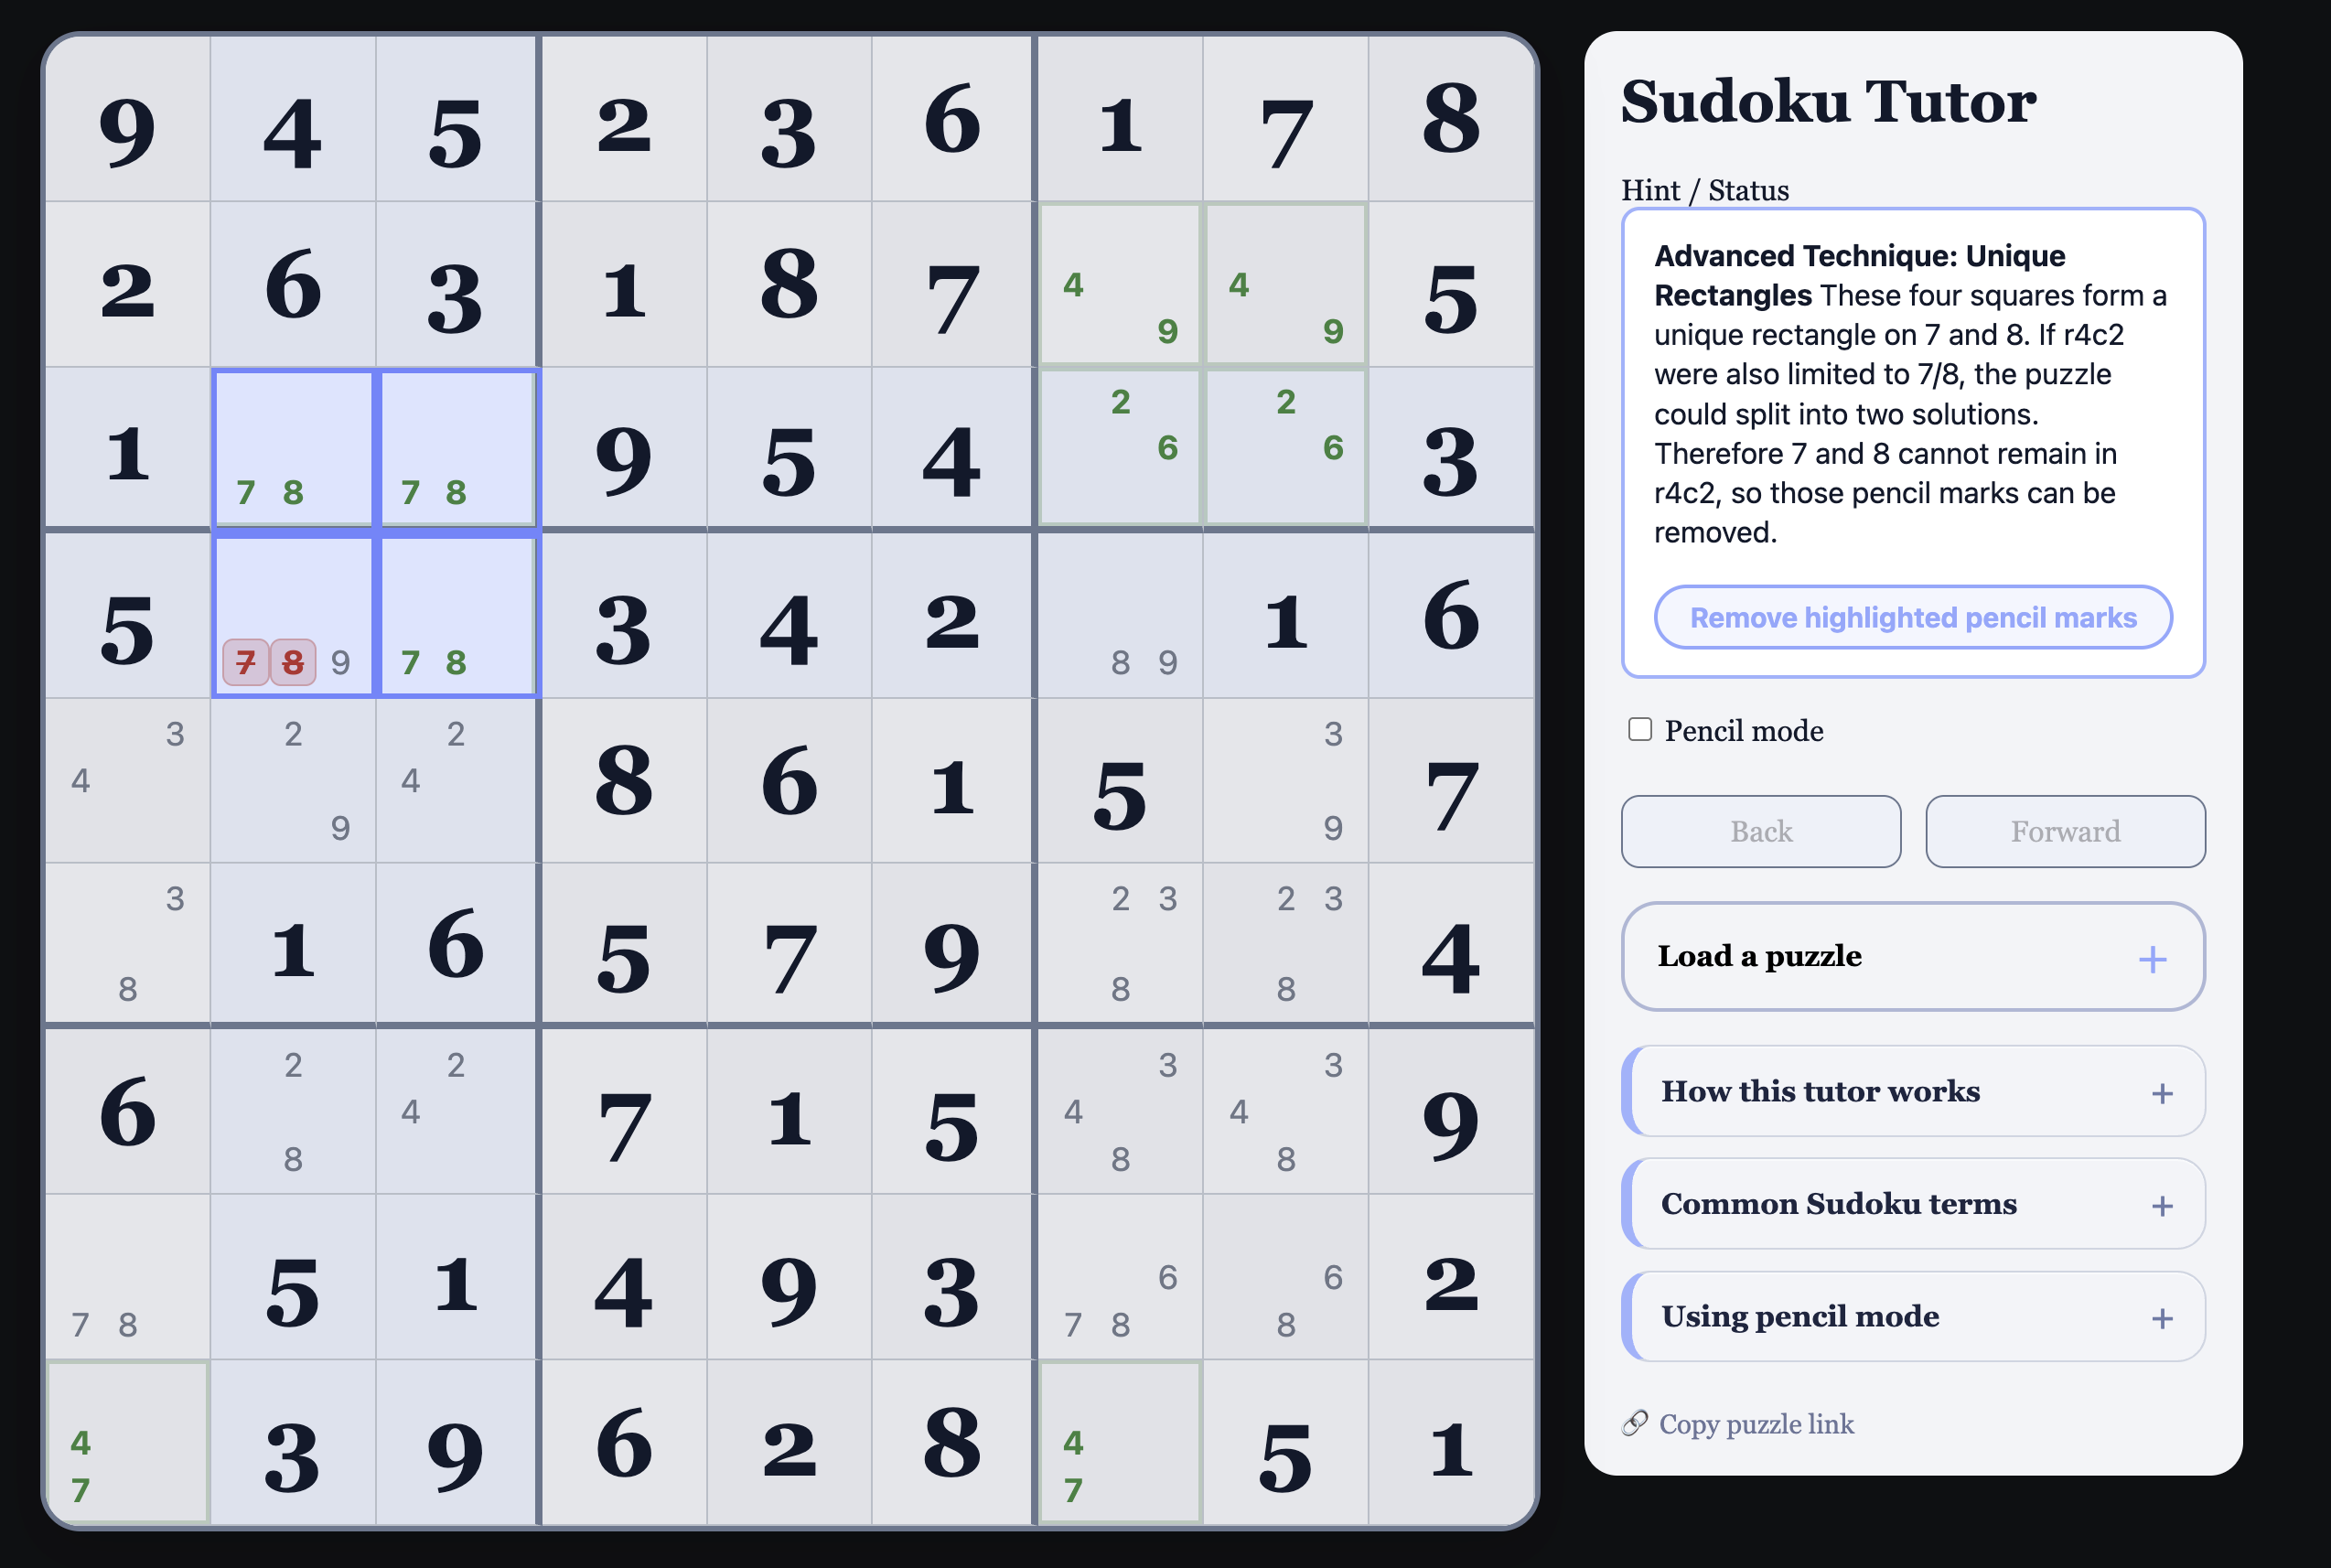 If you look at the four highlighted squares, they form a kind of “rectangle”
where each corner is limited to the same two numbers: 7 and 8. Now imagine what would
happen if the square at r4c2 were allowed to keep either 7 or 8. Then all four corners of
that rectangle could be filled using only those two numbers—and crucially, there would be
more than one way to do it. That would mean the puzzle has two valid solutions instead of one,
which a proper Sudoku never does. To avoid that ambiguity, r4c2 is not allowed to be 7 or 8, so those options must be removed.
If you look at the four highlighted squares, they form a kind of “rectangle”
where each corner is limited to the same two numbers: 7 and 8. Now imagine what would
happen if the square at r4c2 were allowed to keep either 7 or 8. Then all four corners of
that rectangle could be filled using only those two numbers—and crucially, there would be
more than one way to do it. That would mean the puzzle has two valid solutions instead of one,
which a proper Sudoku never does. To avoid that ambiguity, r4c2 is not allowed to be 7 or 8, so those options must be removed.
 This is the Sudoku board produced by my favorite online Sudoku app,